Explore Data Market Features With FlyPix AI
This demo shows how to request custom geospatial data using the FlyPix AI Data Market and track your request status.
Go to app.flypix.ai
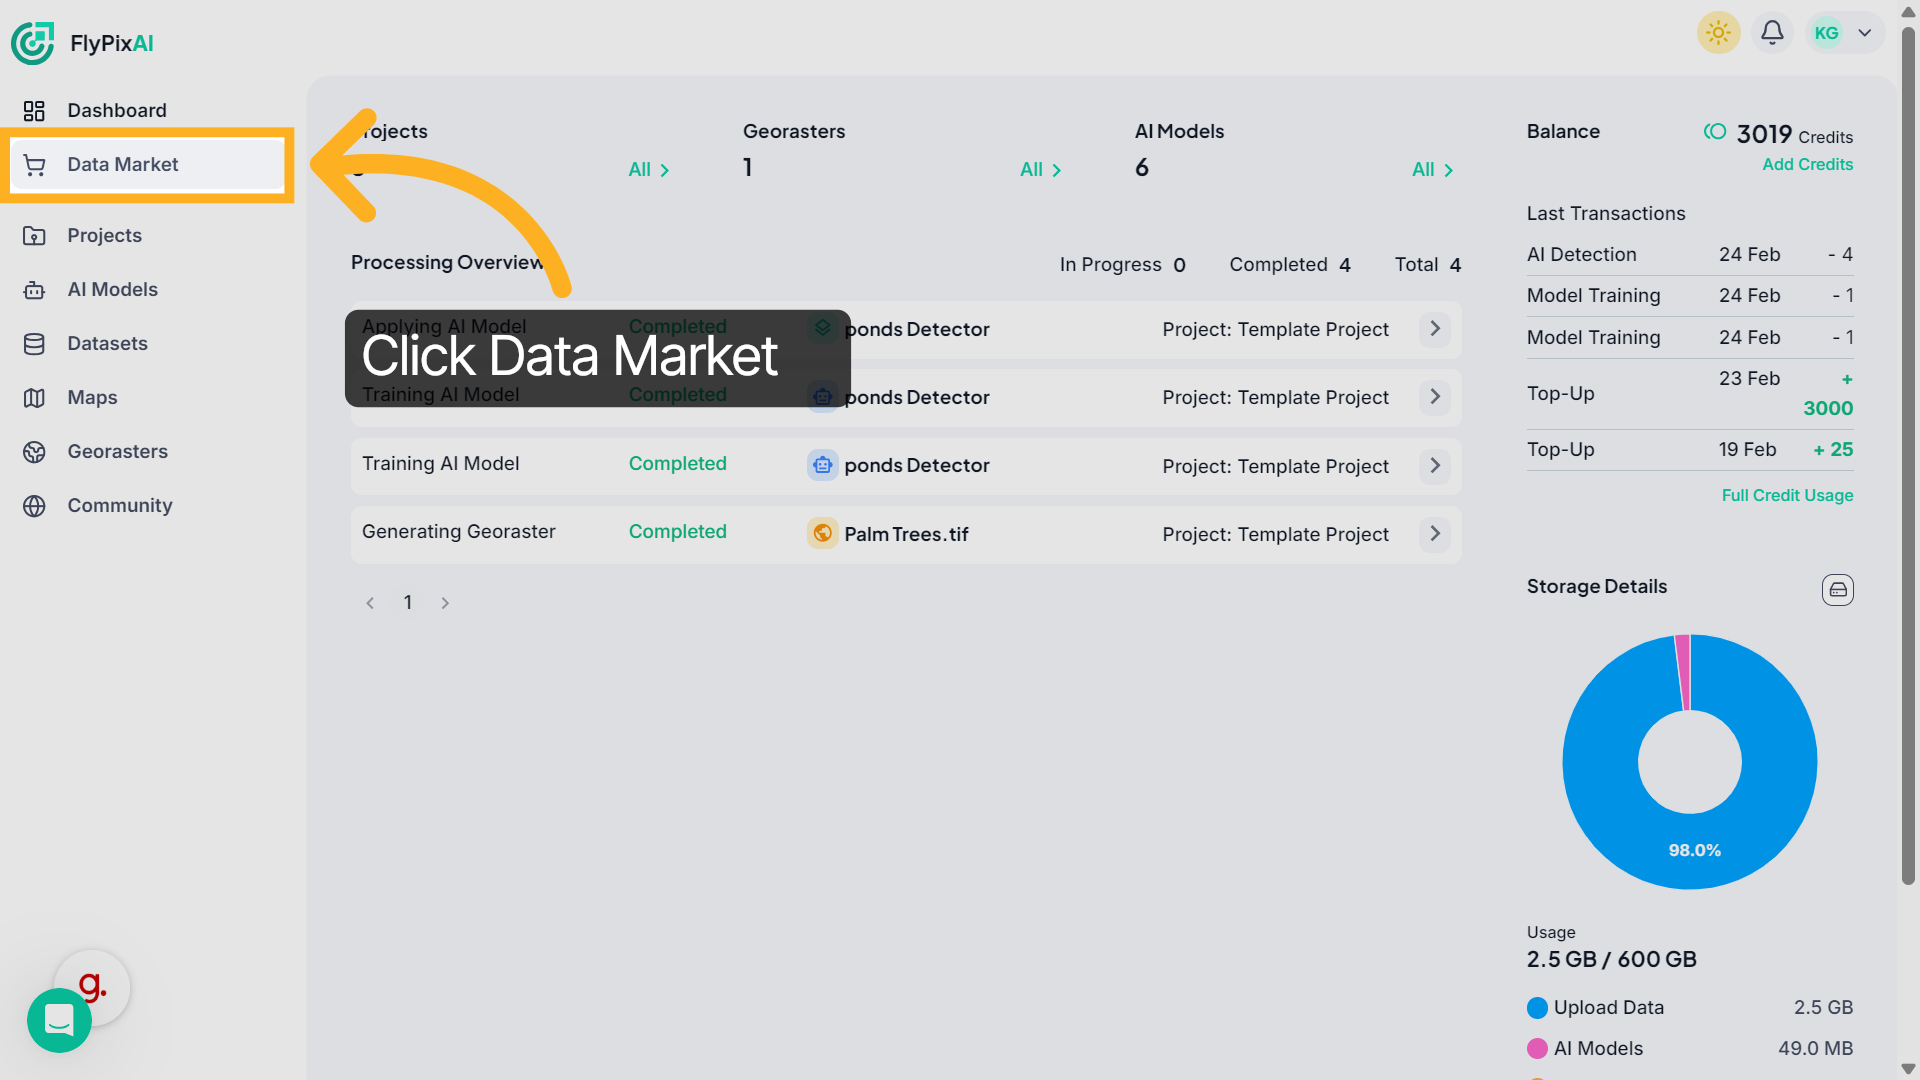
1. Access Data Market
From the left sidebar, click Data Market to open the geospatial data request page.
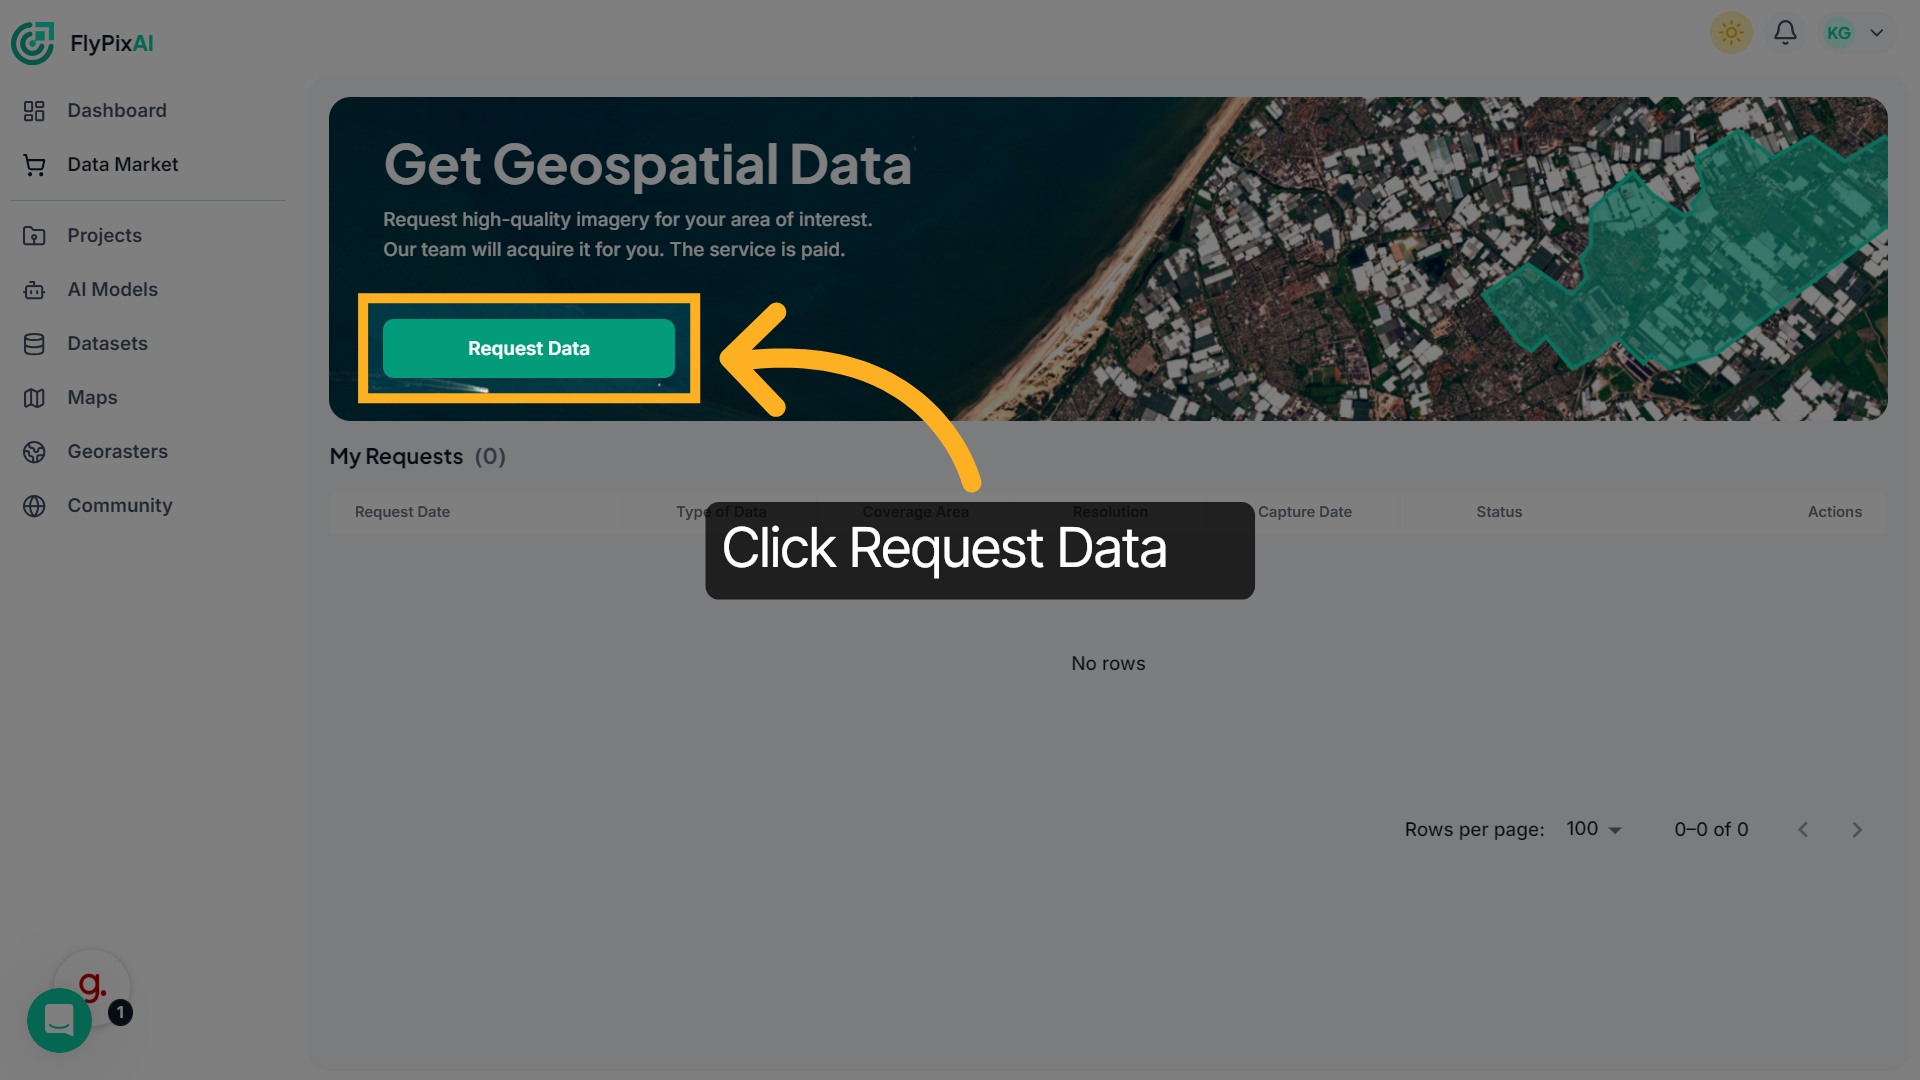
2. Start a New Request
Click Request Data to begin creating a new geospatial data request according to your needs
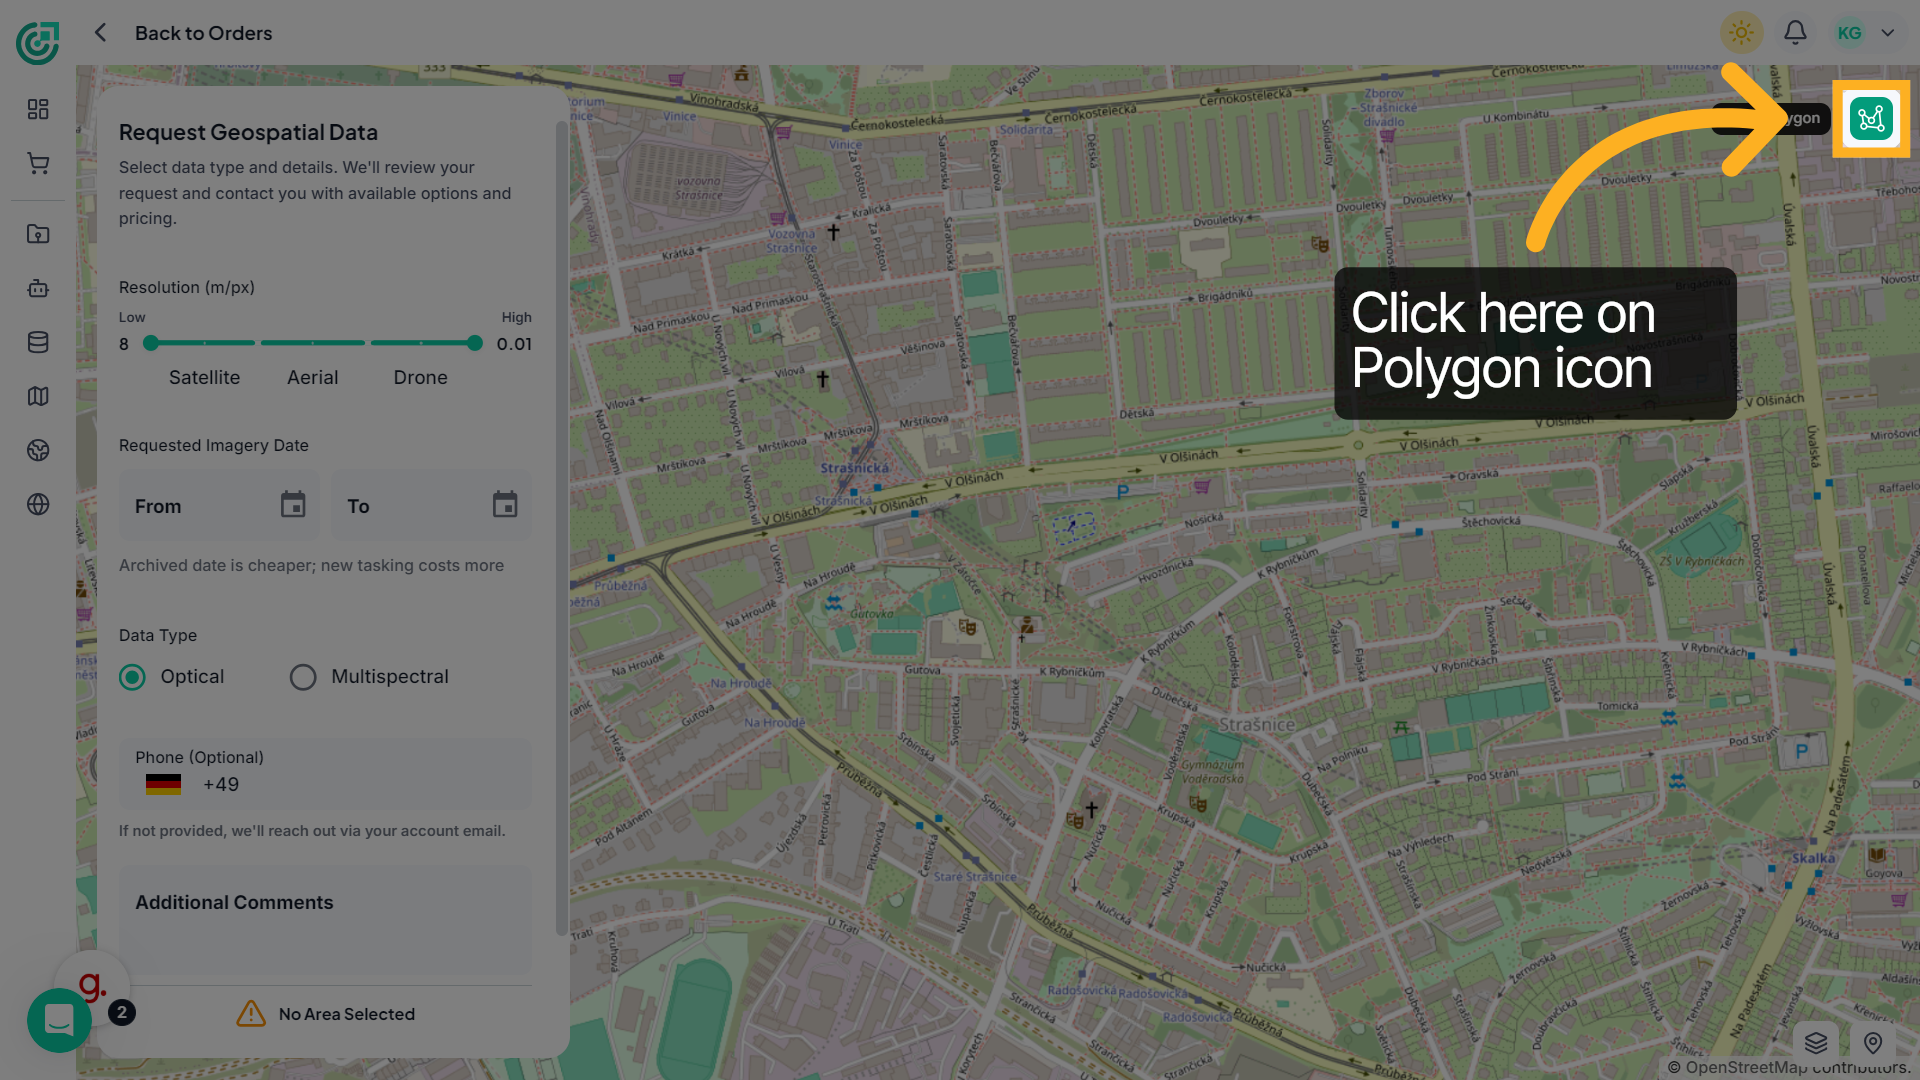
3. Activate Area Selection Tool
Click the Draw Polygon icon on the map to start defining your area of interest.
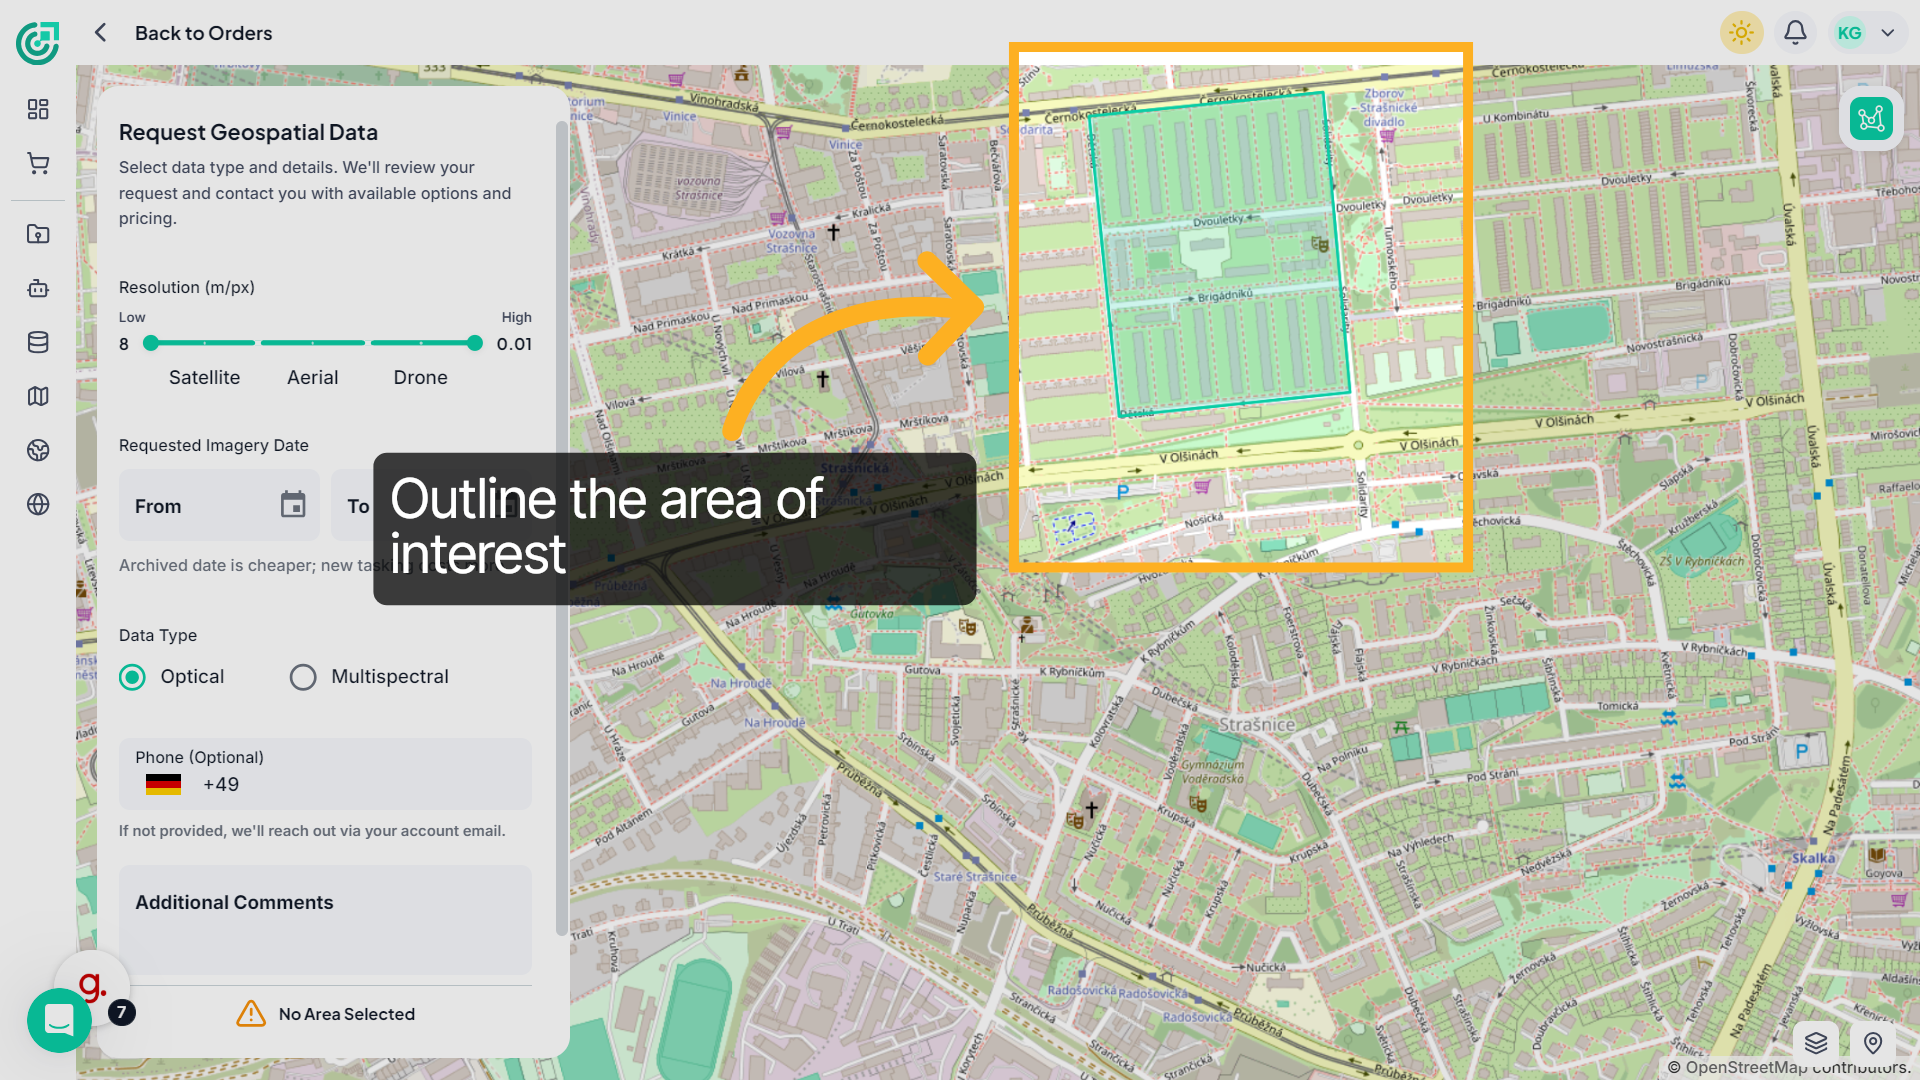
4. Draw Your Area of Interest
Click on the map to place points and outline the boundary of the area for which you want to request data. Double-click to complete the polygon.
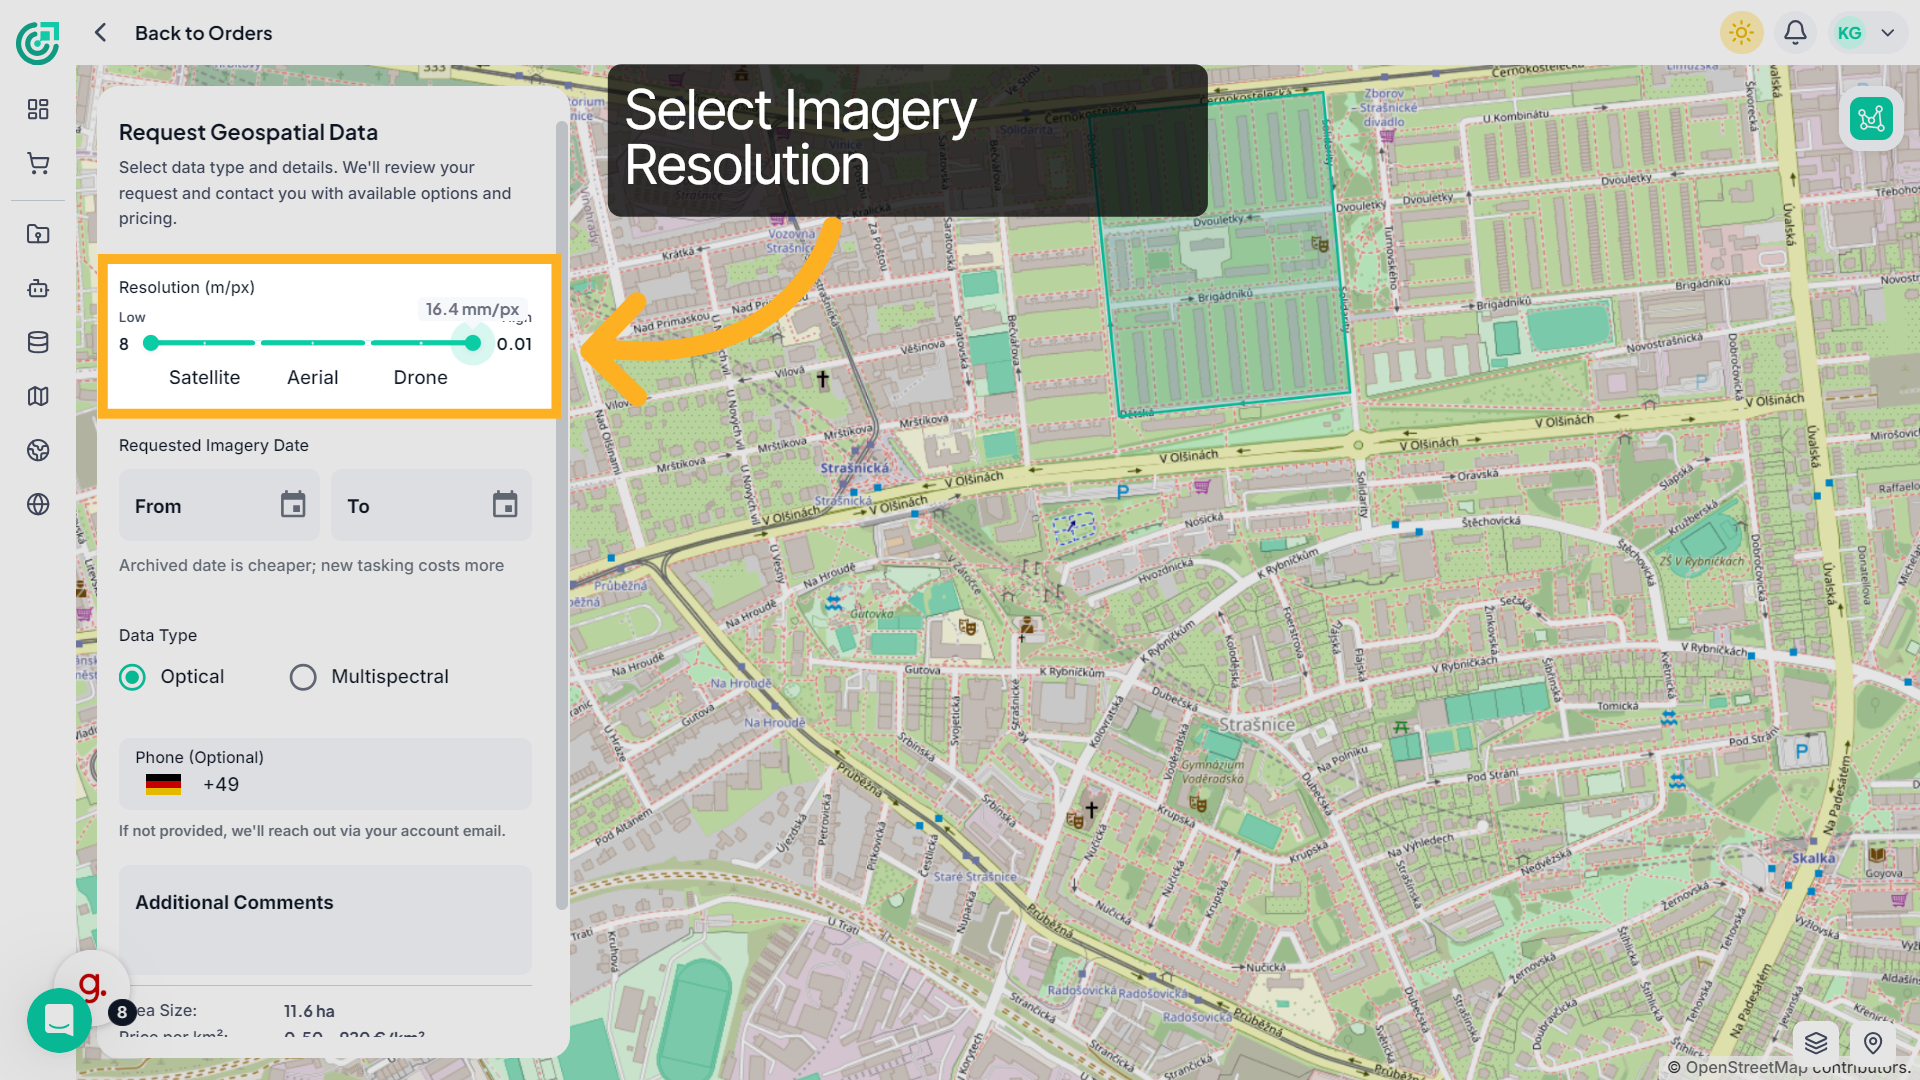
5. Set Data Resolution
Use the Resolution slider to define the desired ground resolution in meters per pixel. As you move the slider from low to high resolution, the imagery source adjusts accordingly — Satellite, Aerial, or Drone — depending on the level of detail required for your project.
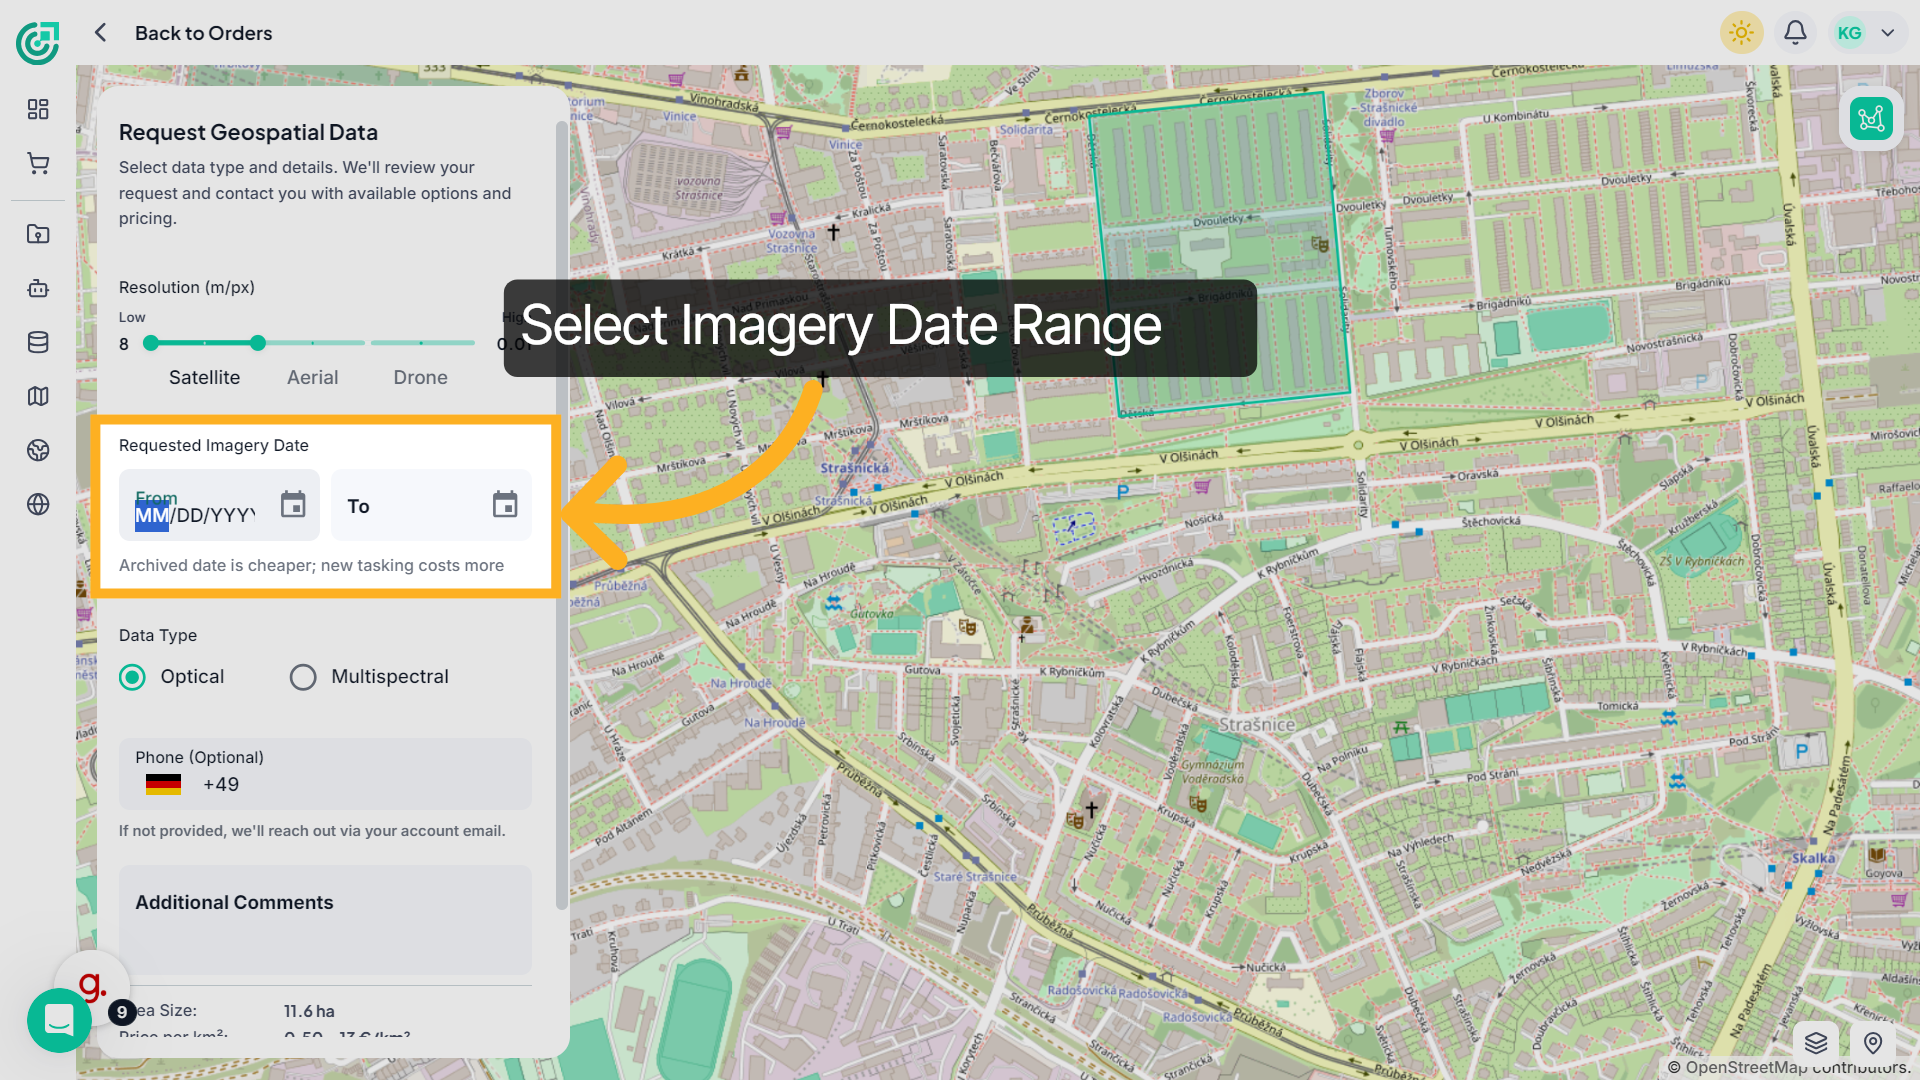
6. Select Date
Under Requested Imagery Date, select the From and To dates to define your preferred acquisition period.
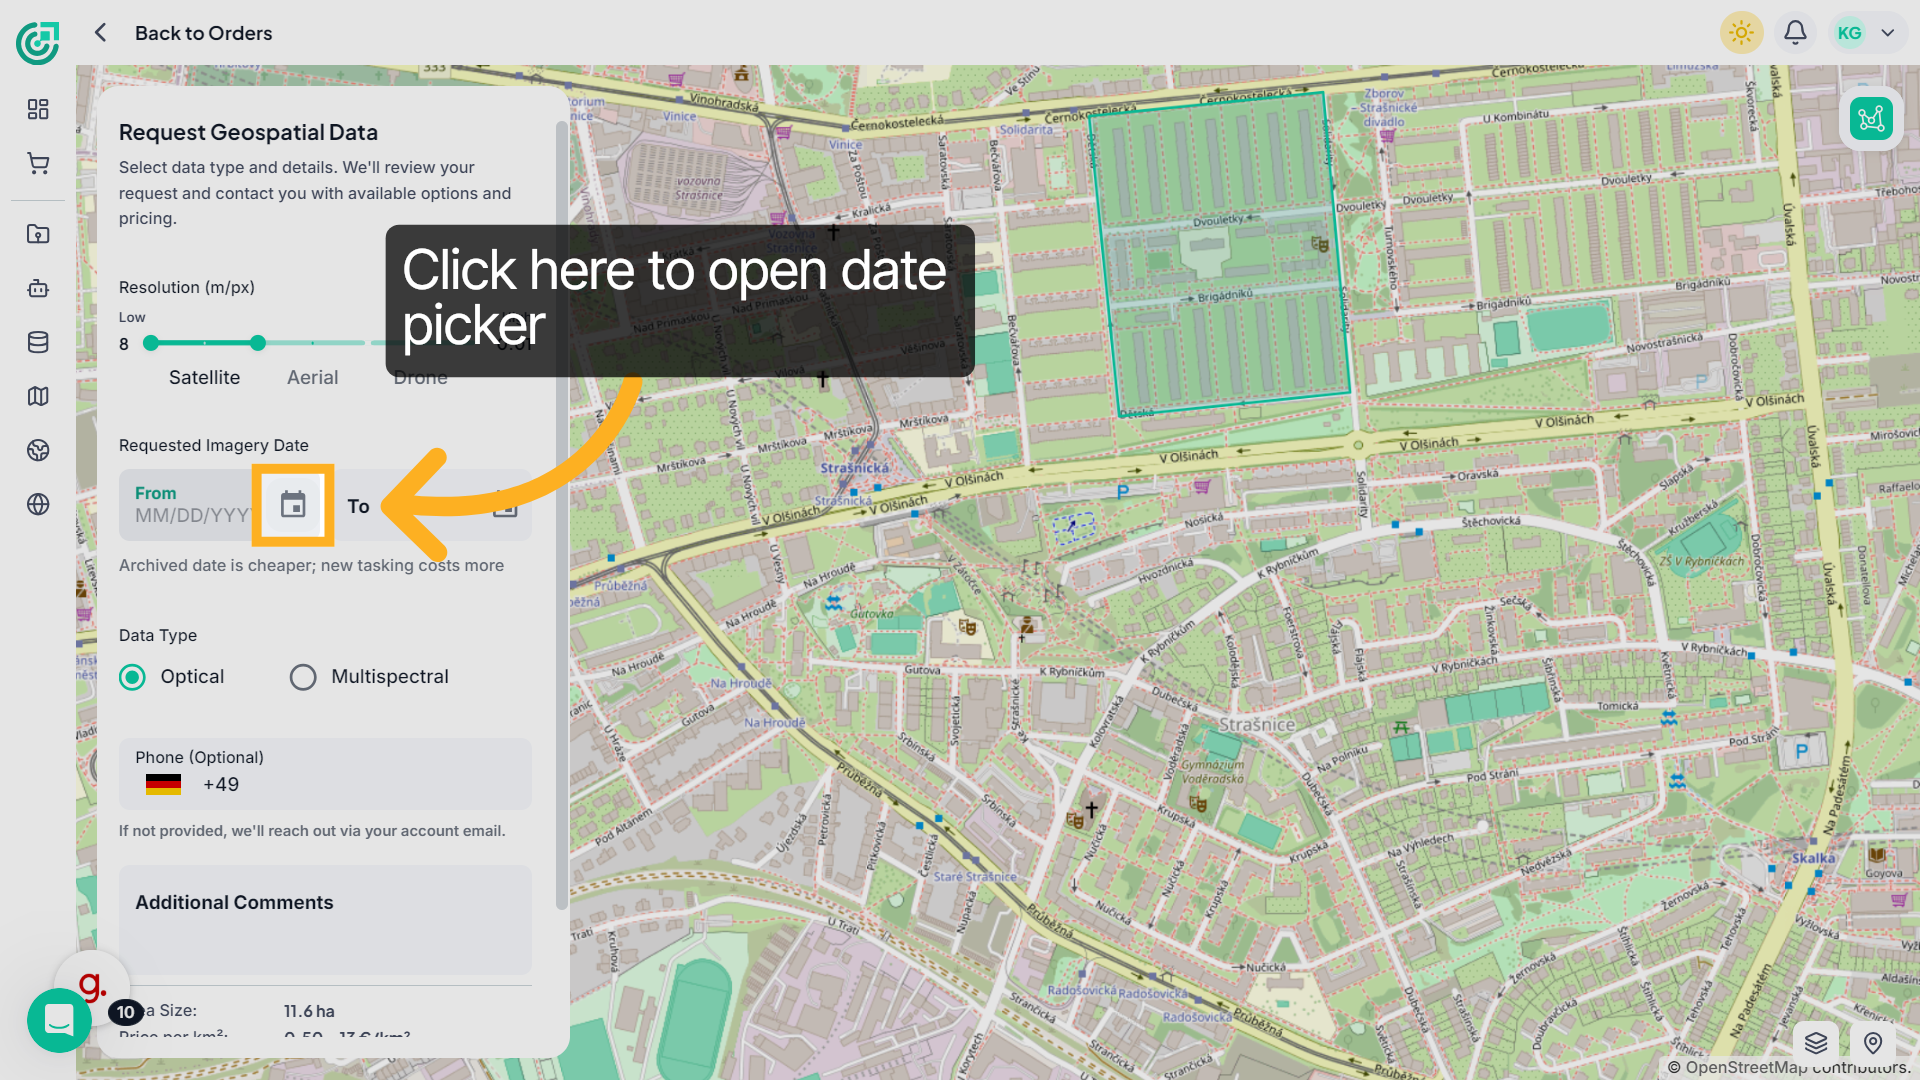
7. Open Date Picker
Click here to open the calendar.
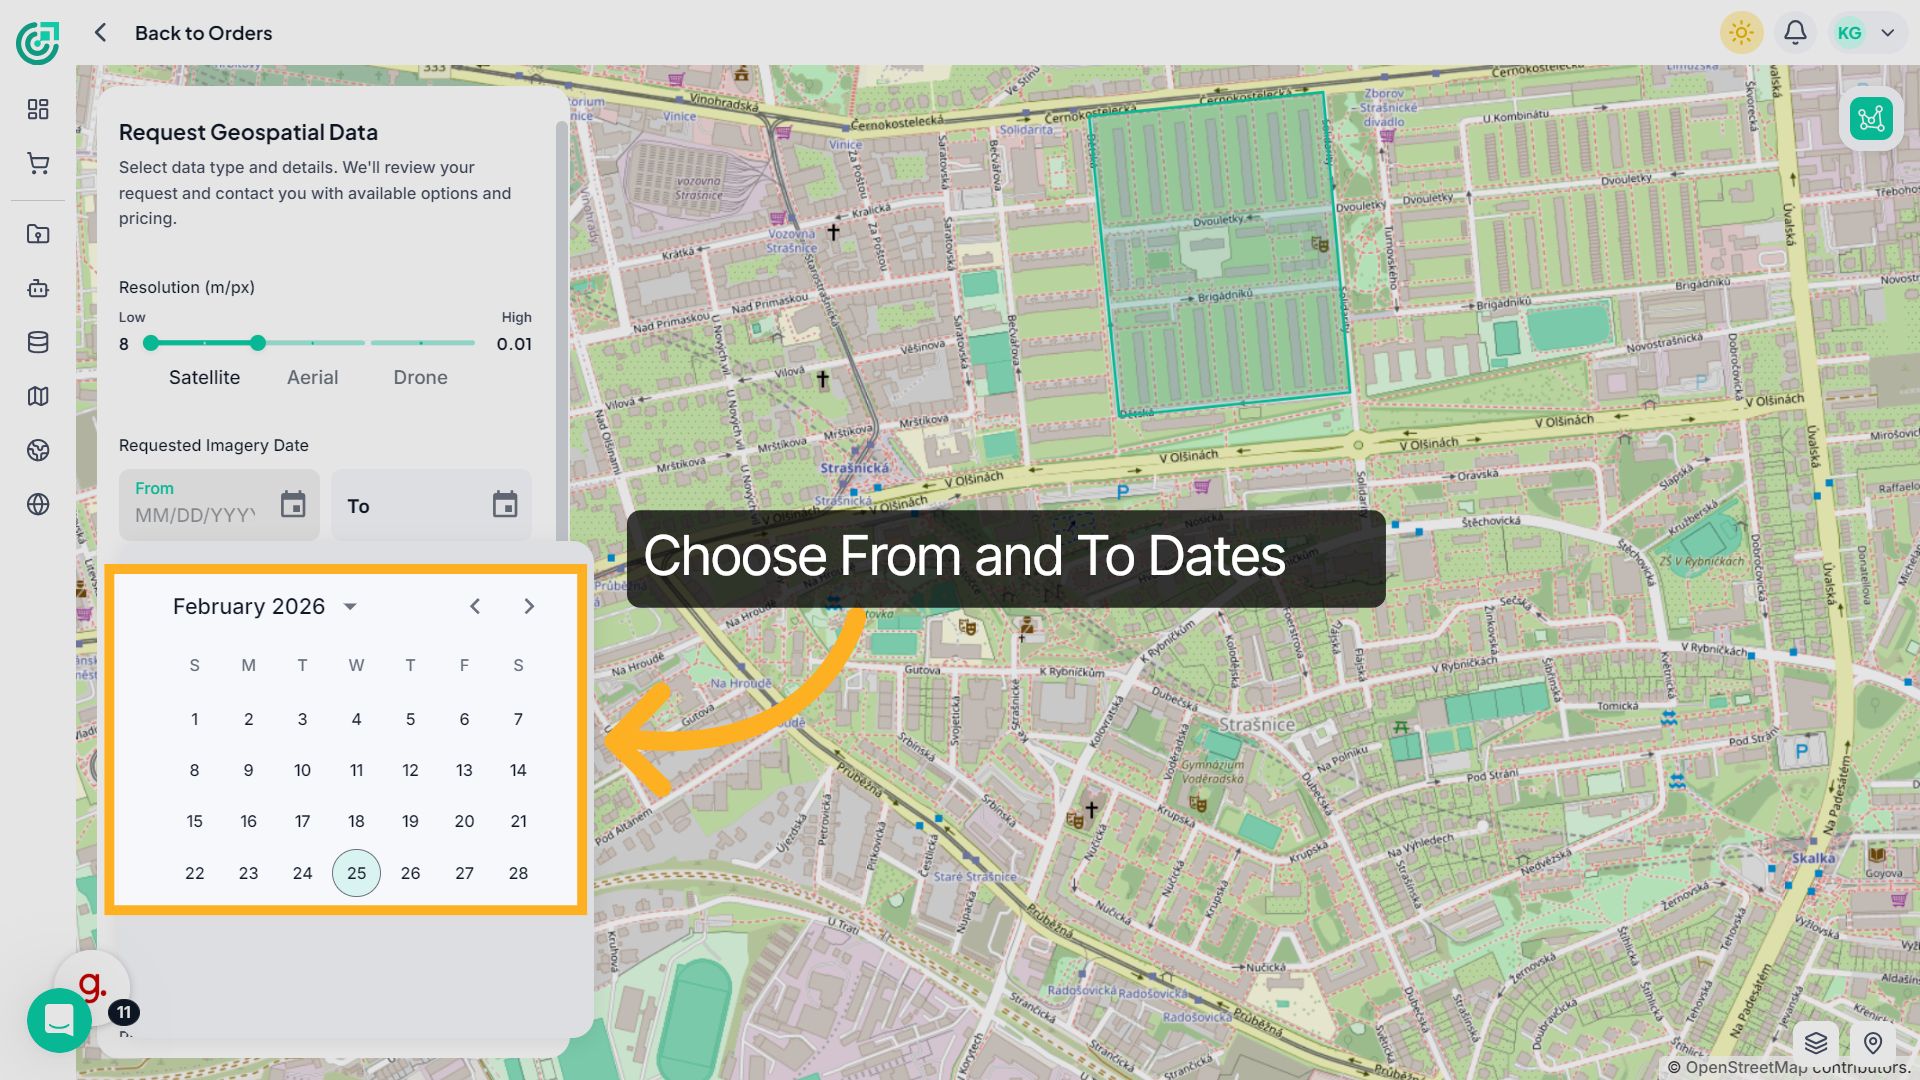
8. Choose Date
Select the specific From and To dates for your data request.
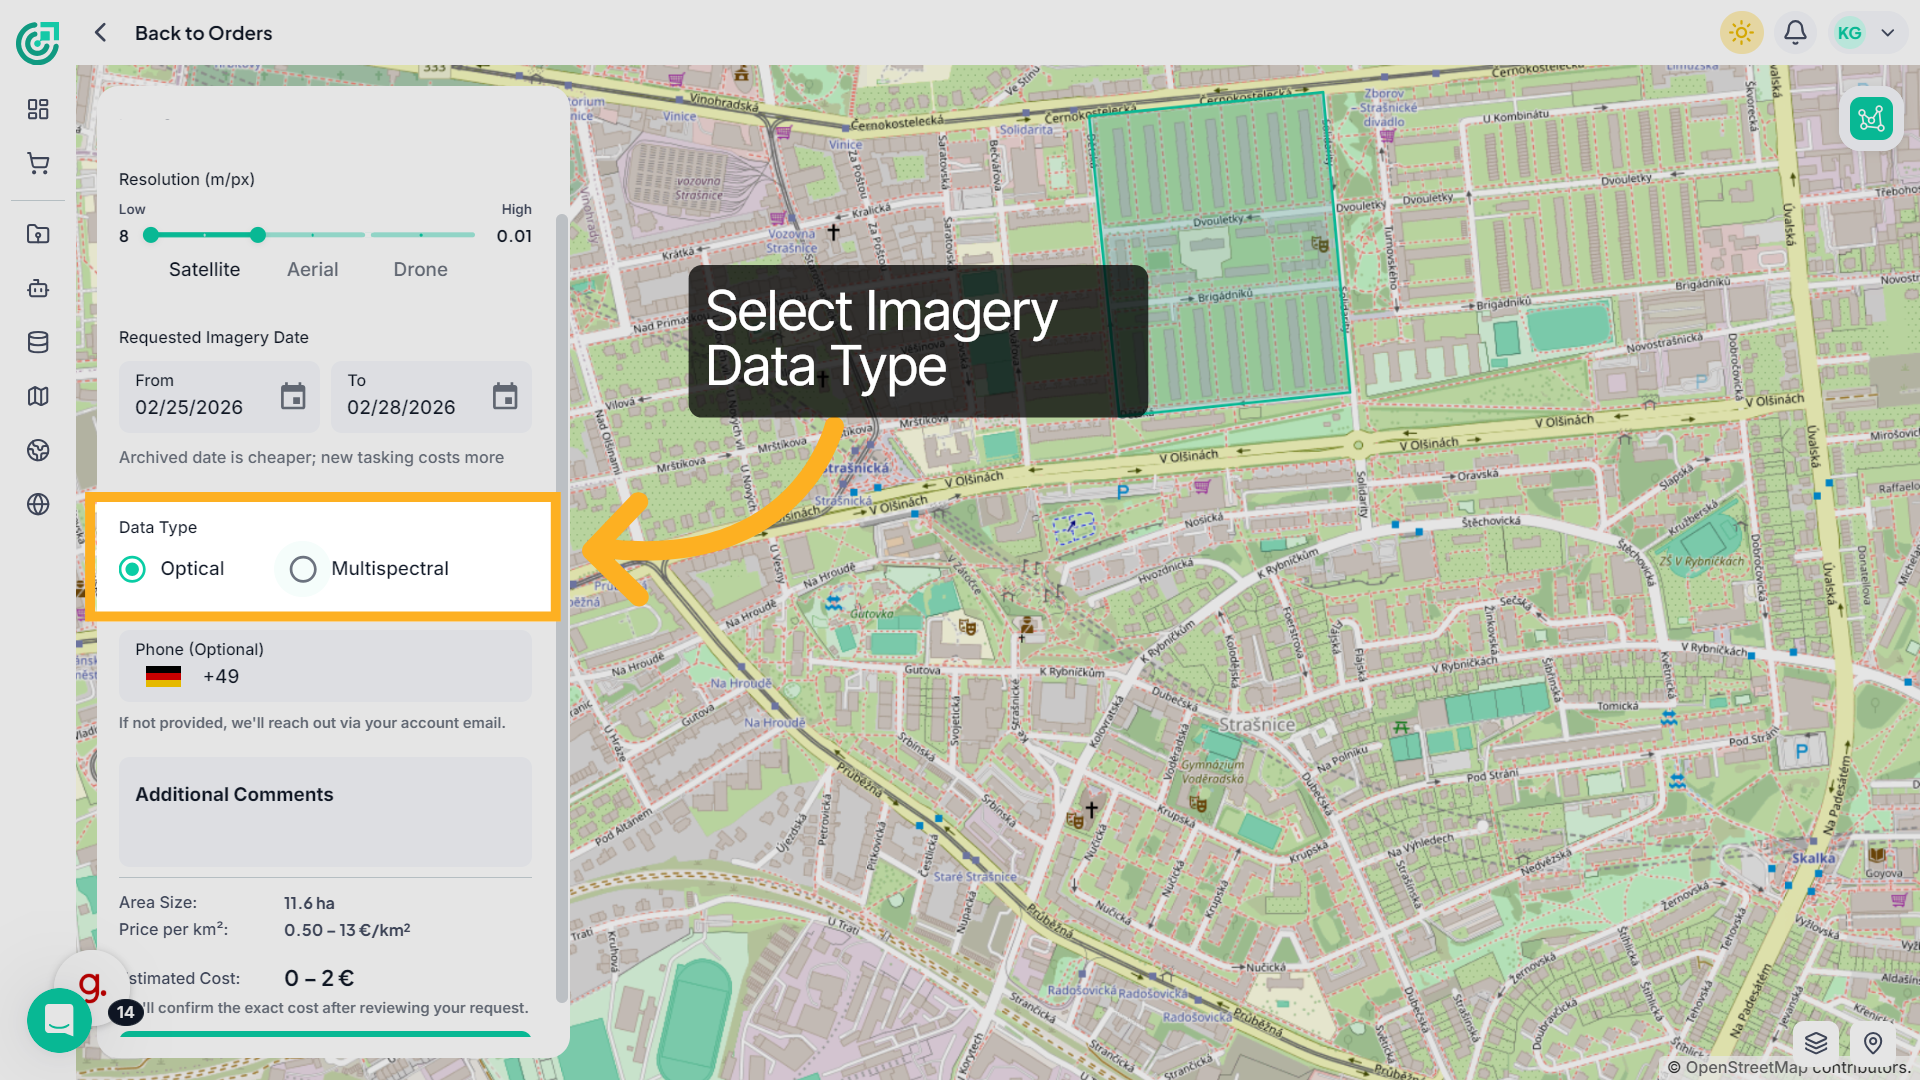
9. Choose Data Type
Select the required data type:Choose between Optical or Multispectral imagery.
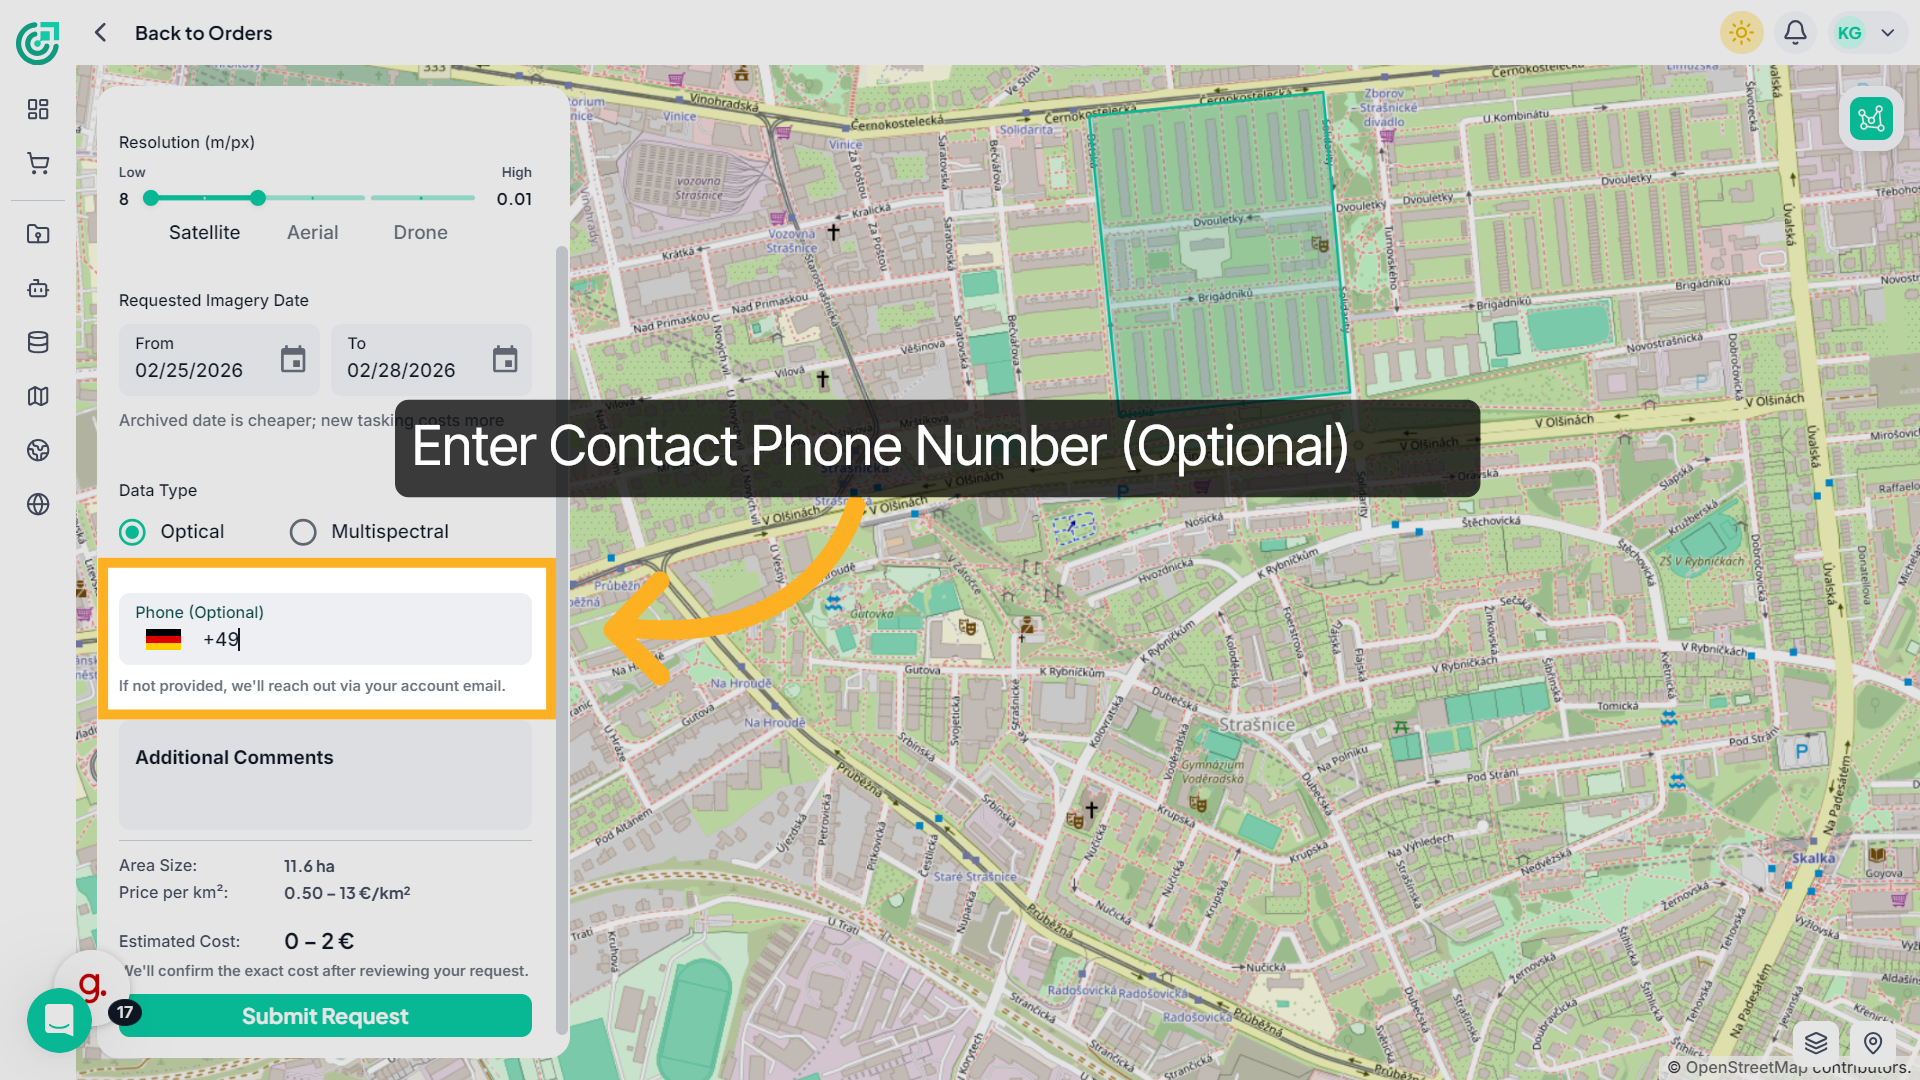
10. Open Phone Field
Enter your phone number including the country code.If no phone number is provided, FlyPix AI will contact you via your registered email.
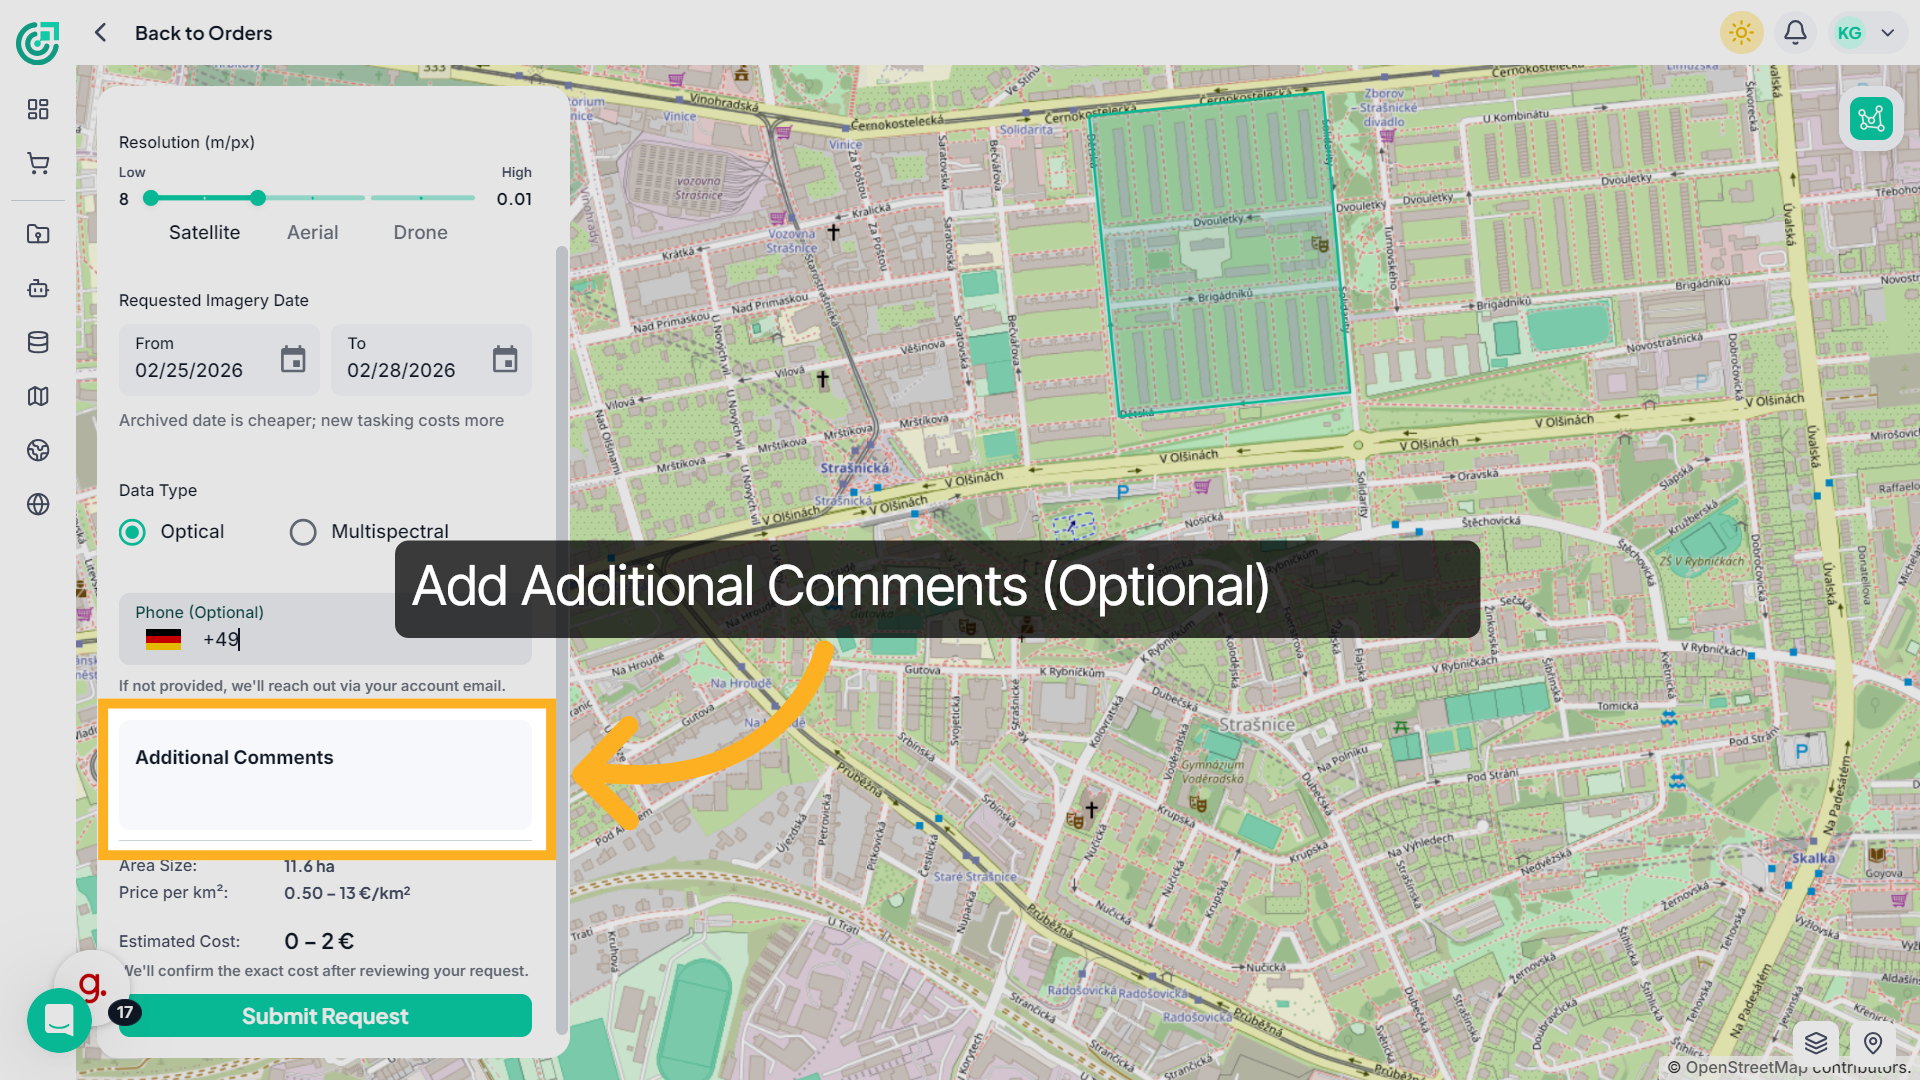
11. Add Additional Comments
Use the Additional Comments field to provide any extra details about your data request. You can specify special requirements, project context, or any important instructions that may help the FlyPix AI team better understand your needs.
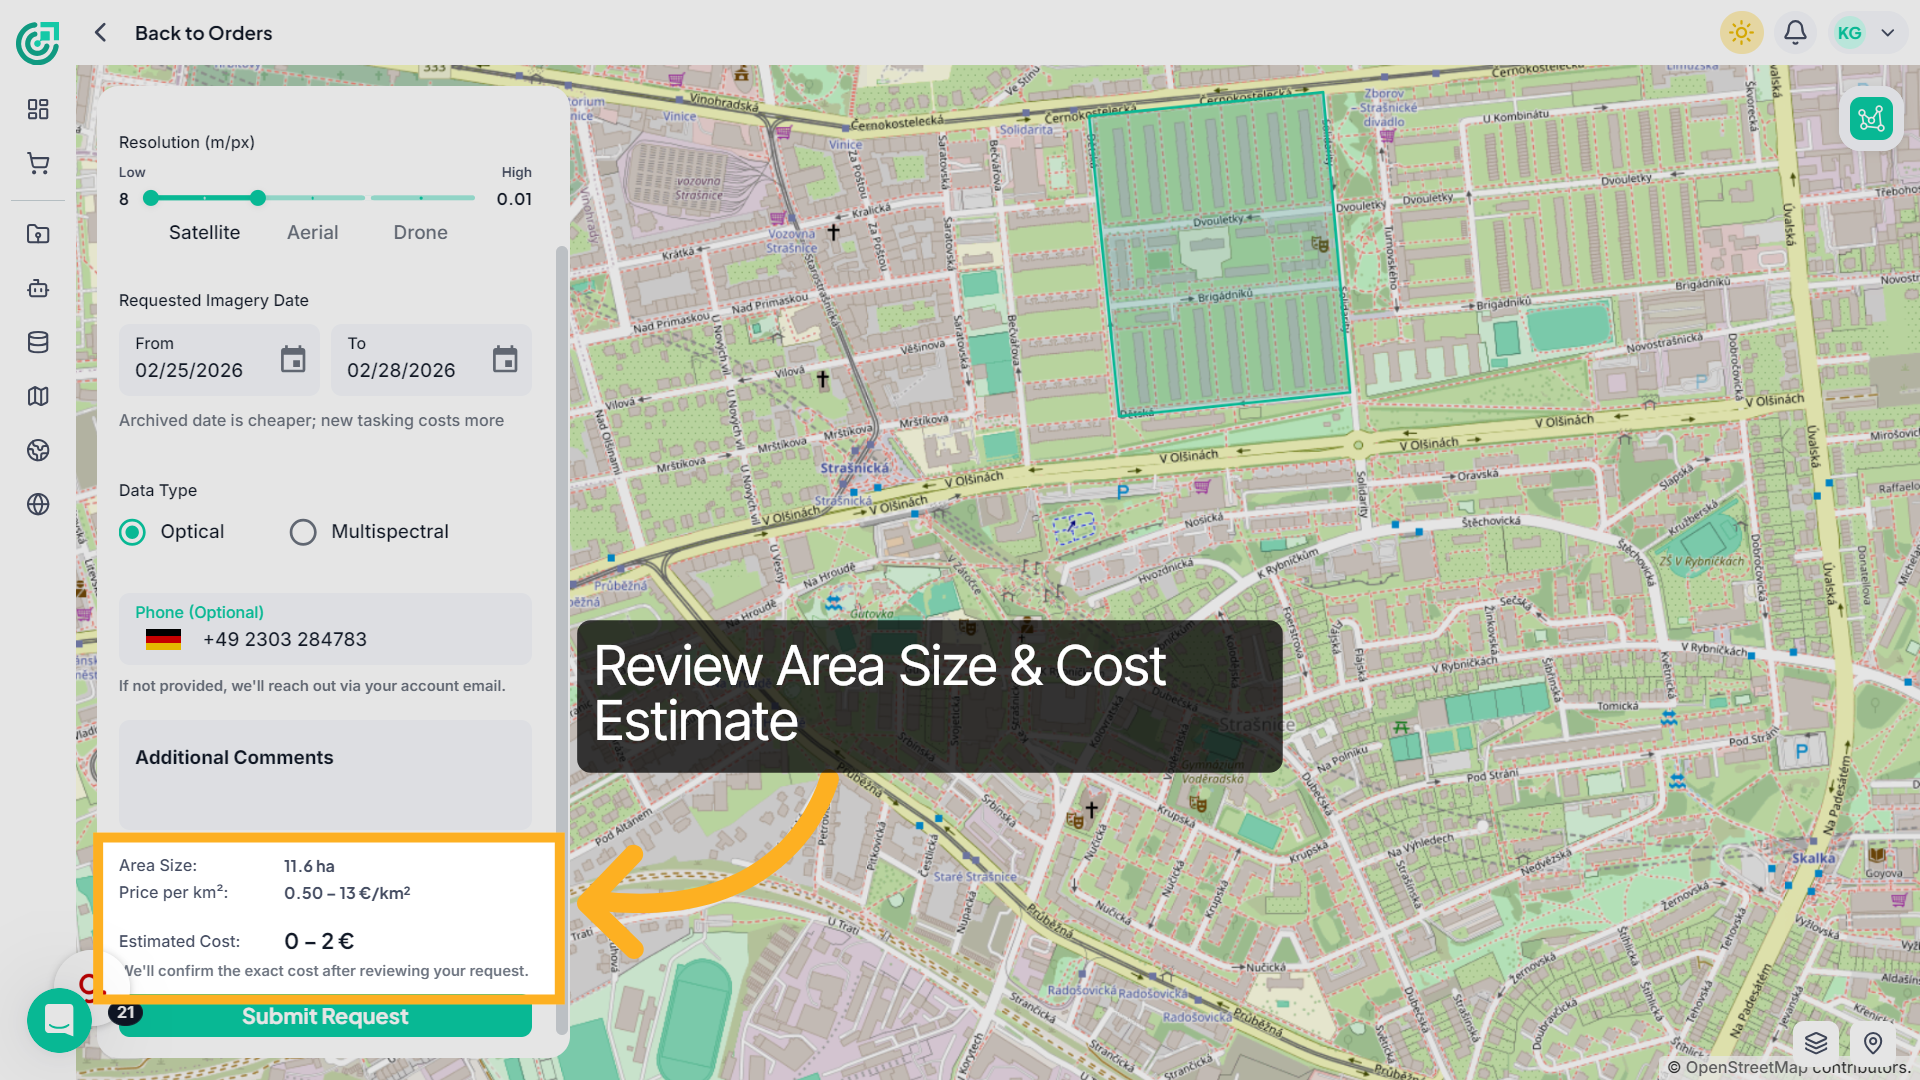
12. Review Area and Estimated Cost
Once you define your area, you’ll see the system automatically calculate the total area size and display an estimated cost range. Review these details carefully before submitting your request, as the final price will be confirmed after evaluation.
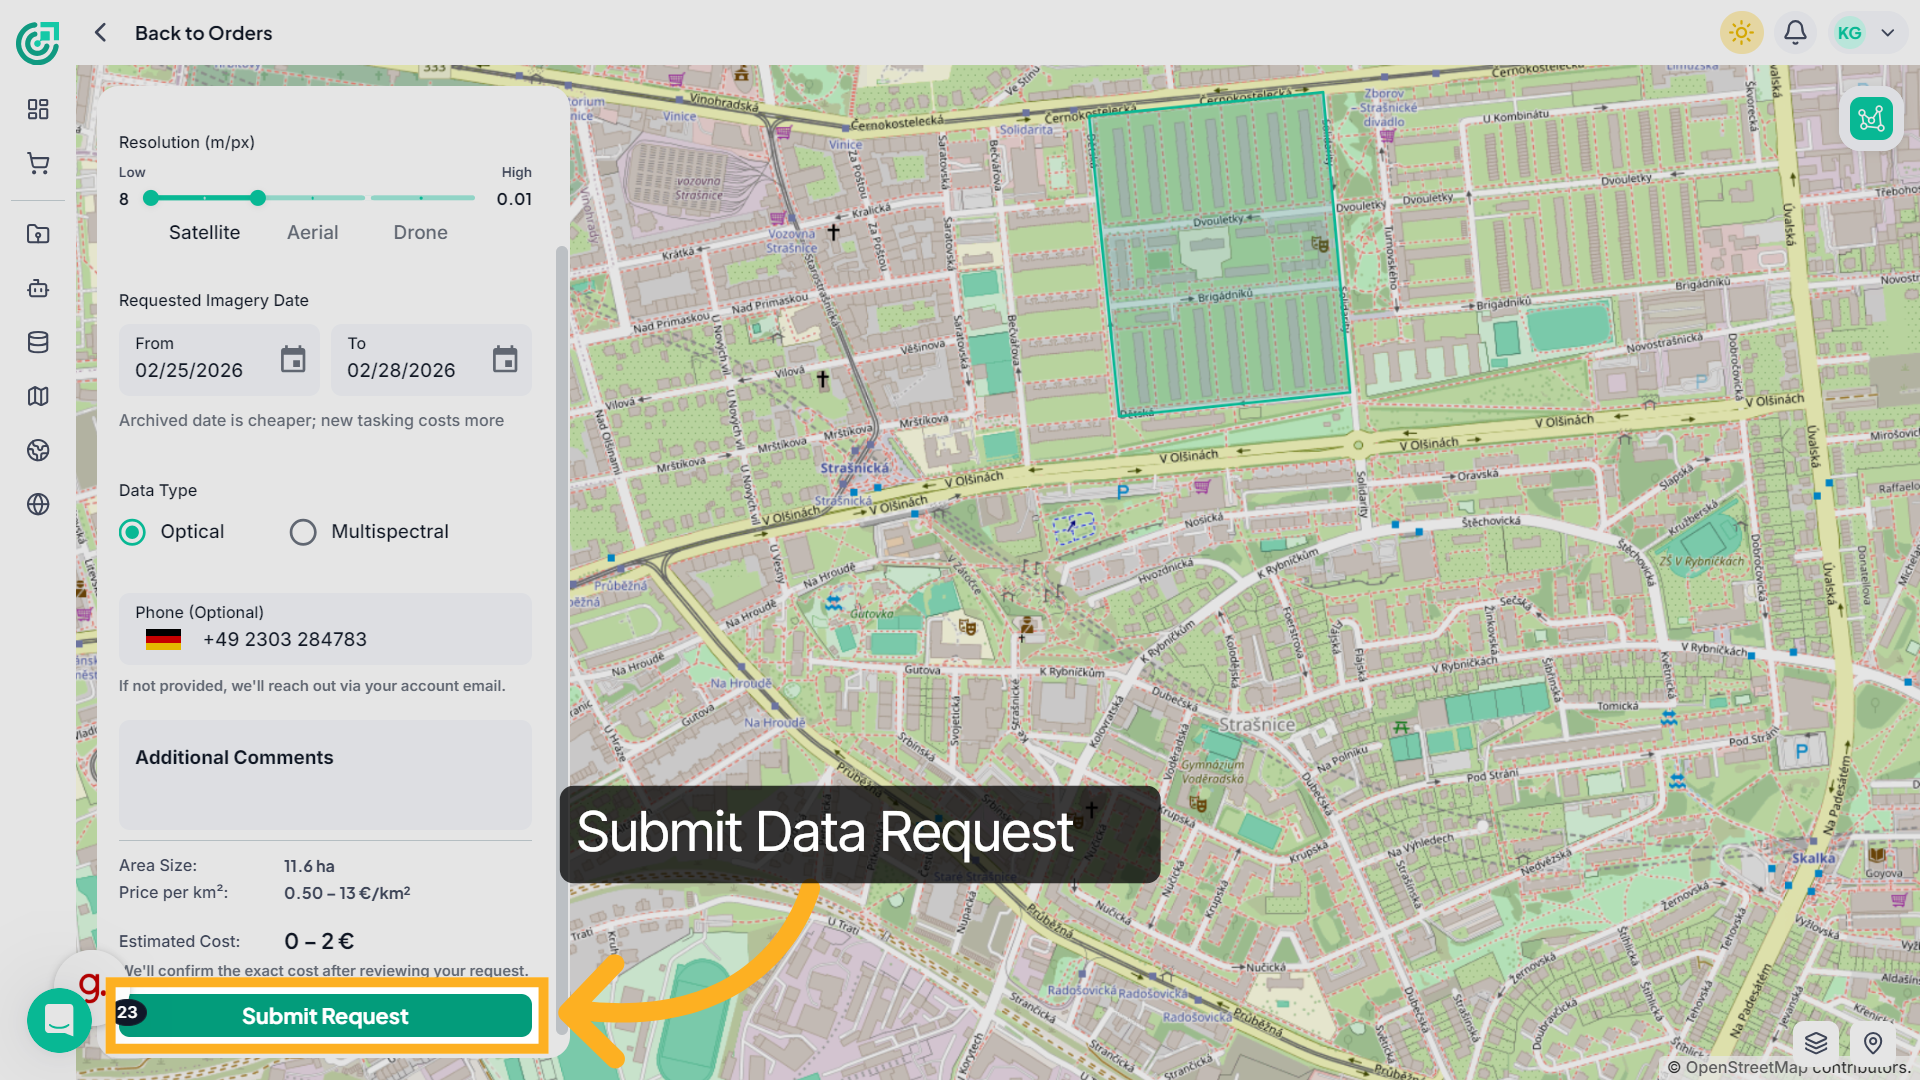
13. Submit Data Request
Click Submit Request to send your data request for review.The FlyPix AI team will evaluate your request and contact you with pricing and availability details.
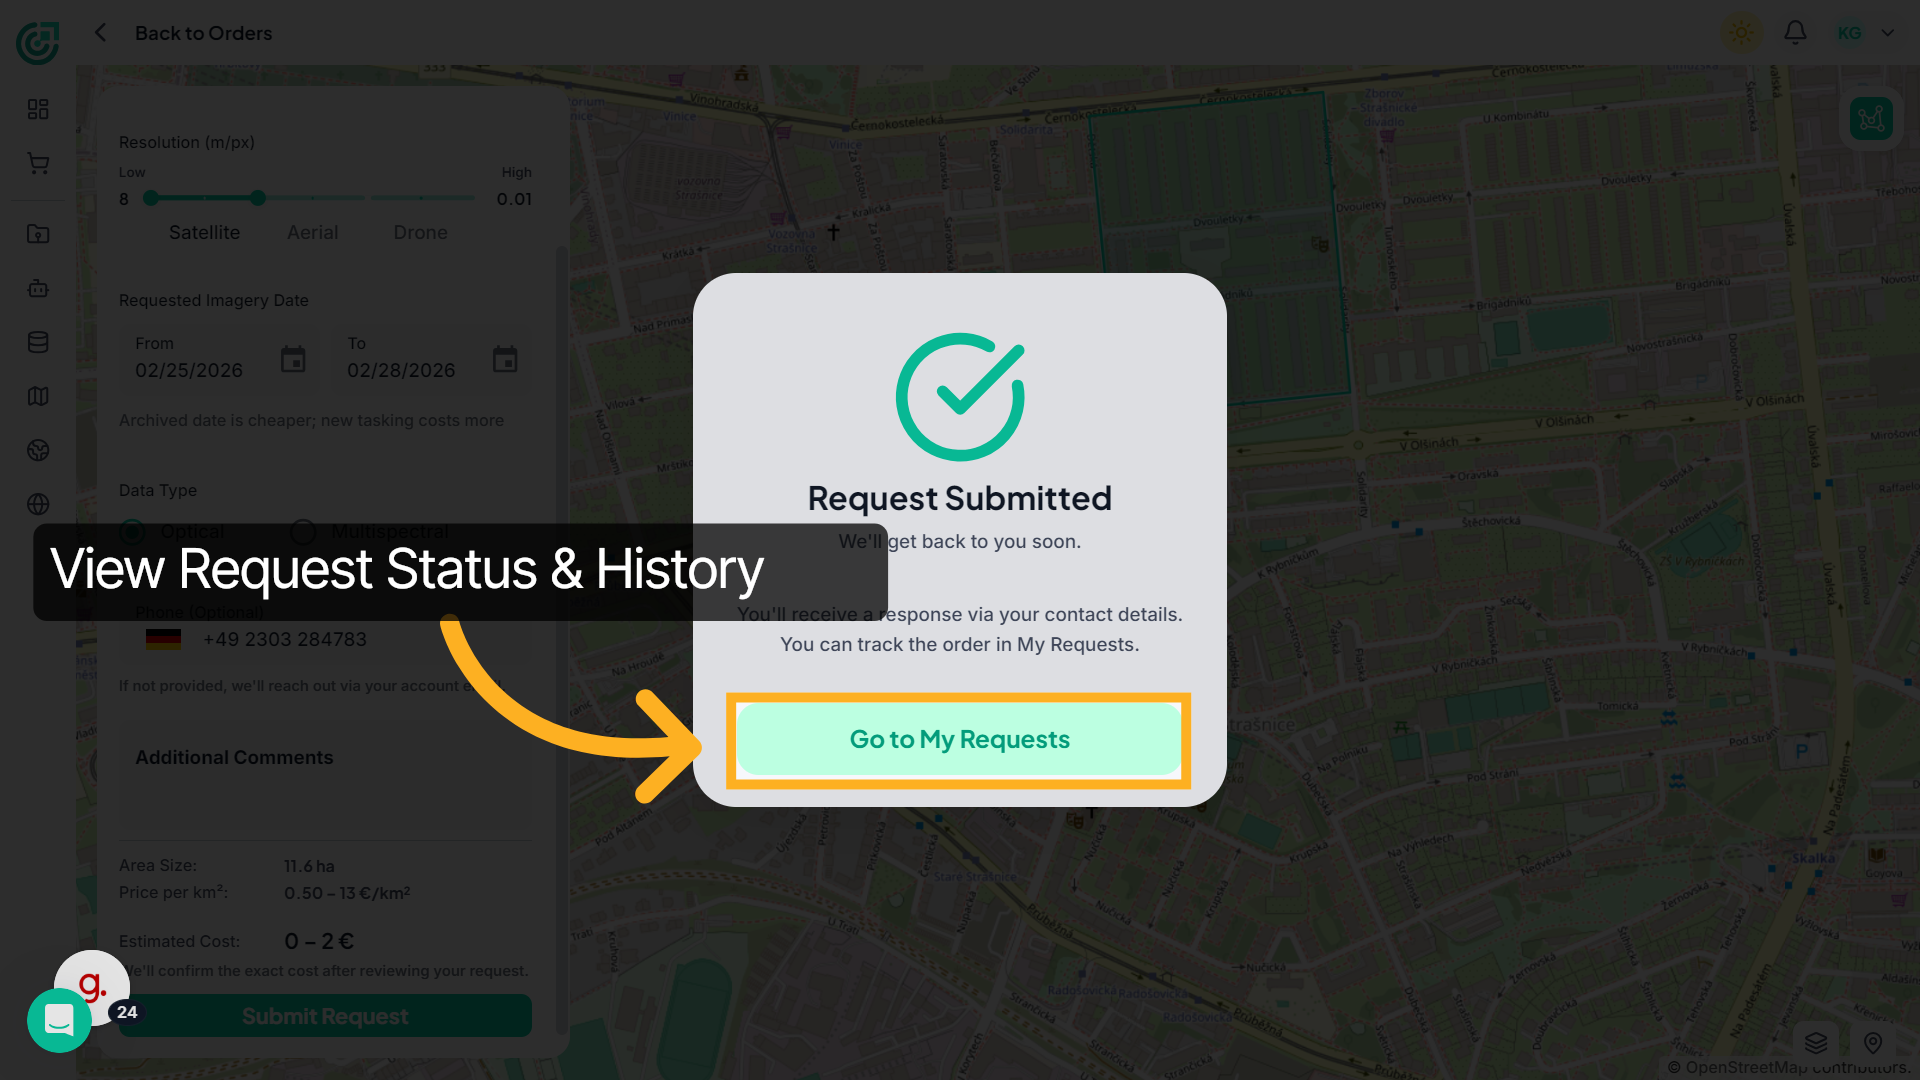
14. View My Requests
Click Go to My Requests to view the status and history of your data requests.
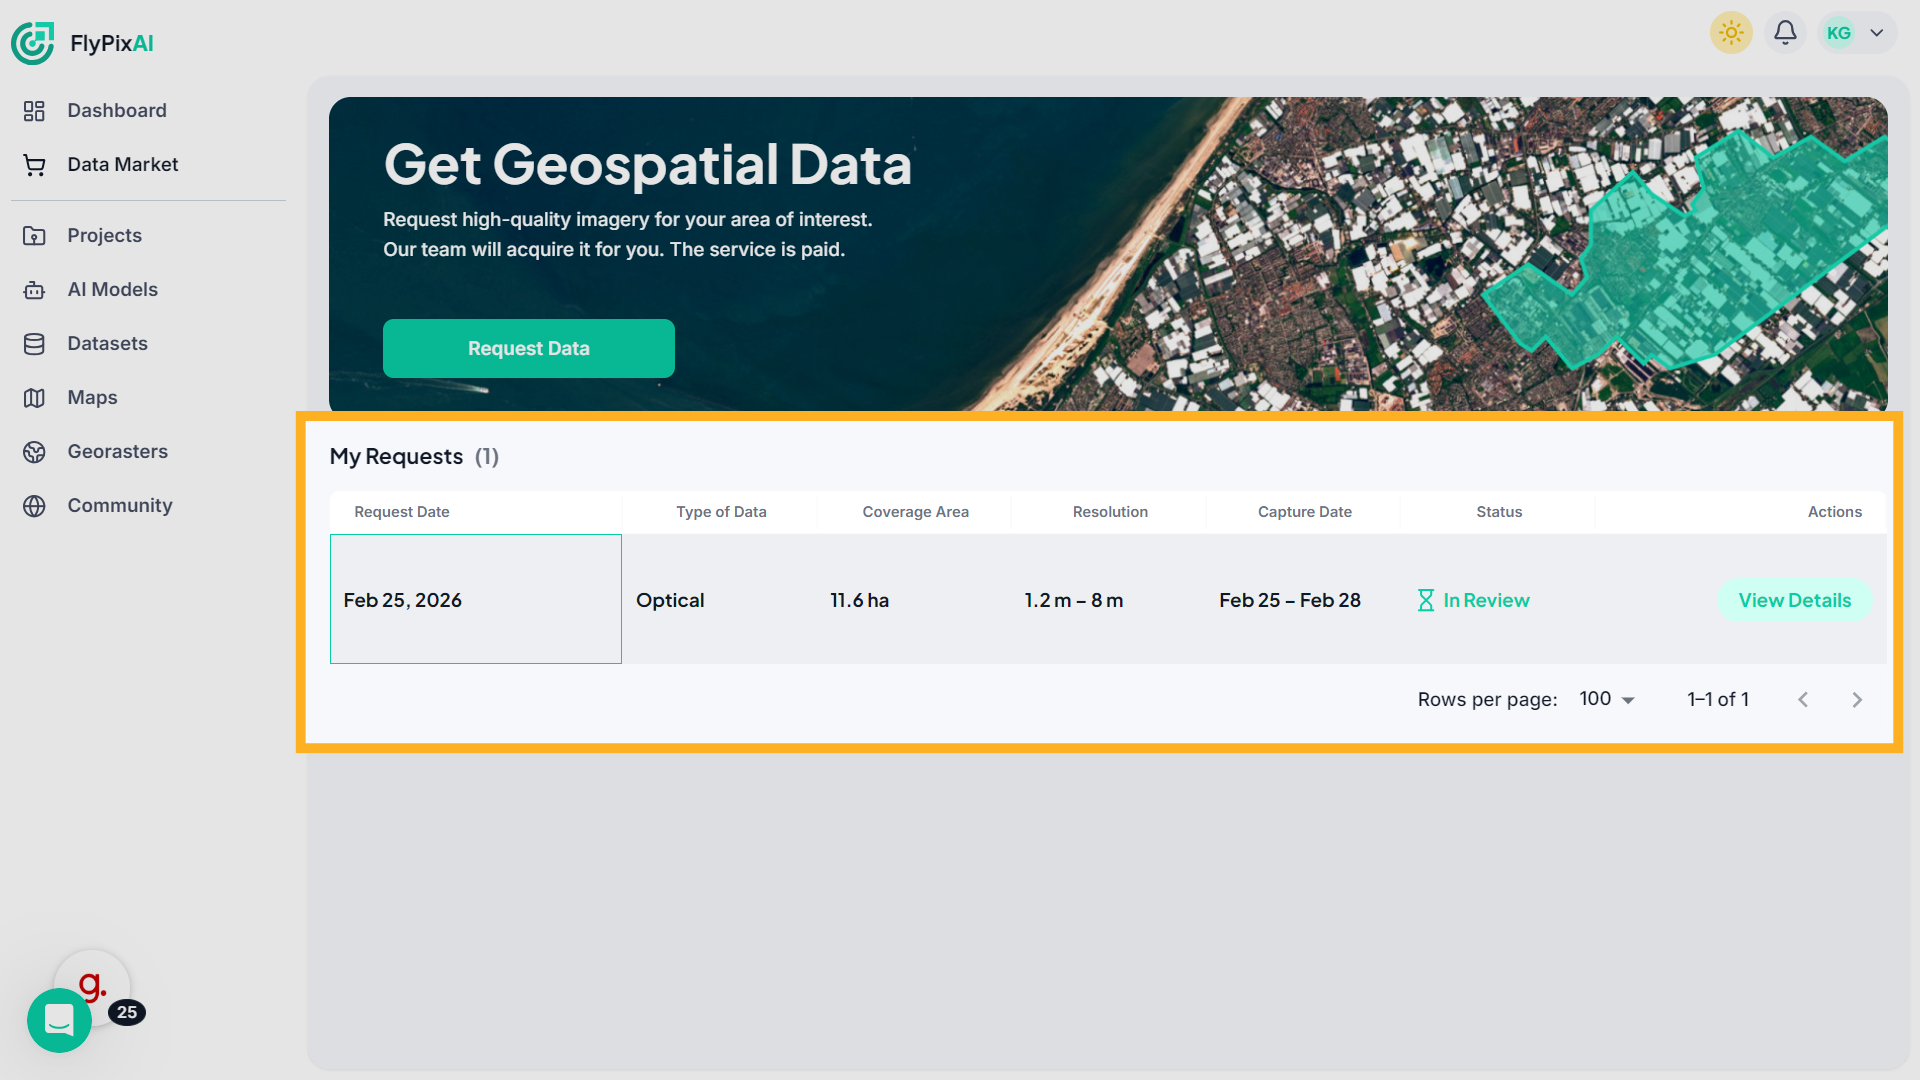
15. View Requests
Here, you can see your request date, data type, coverage area, resolution, capture date, and current status.
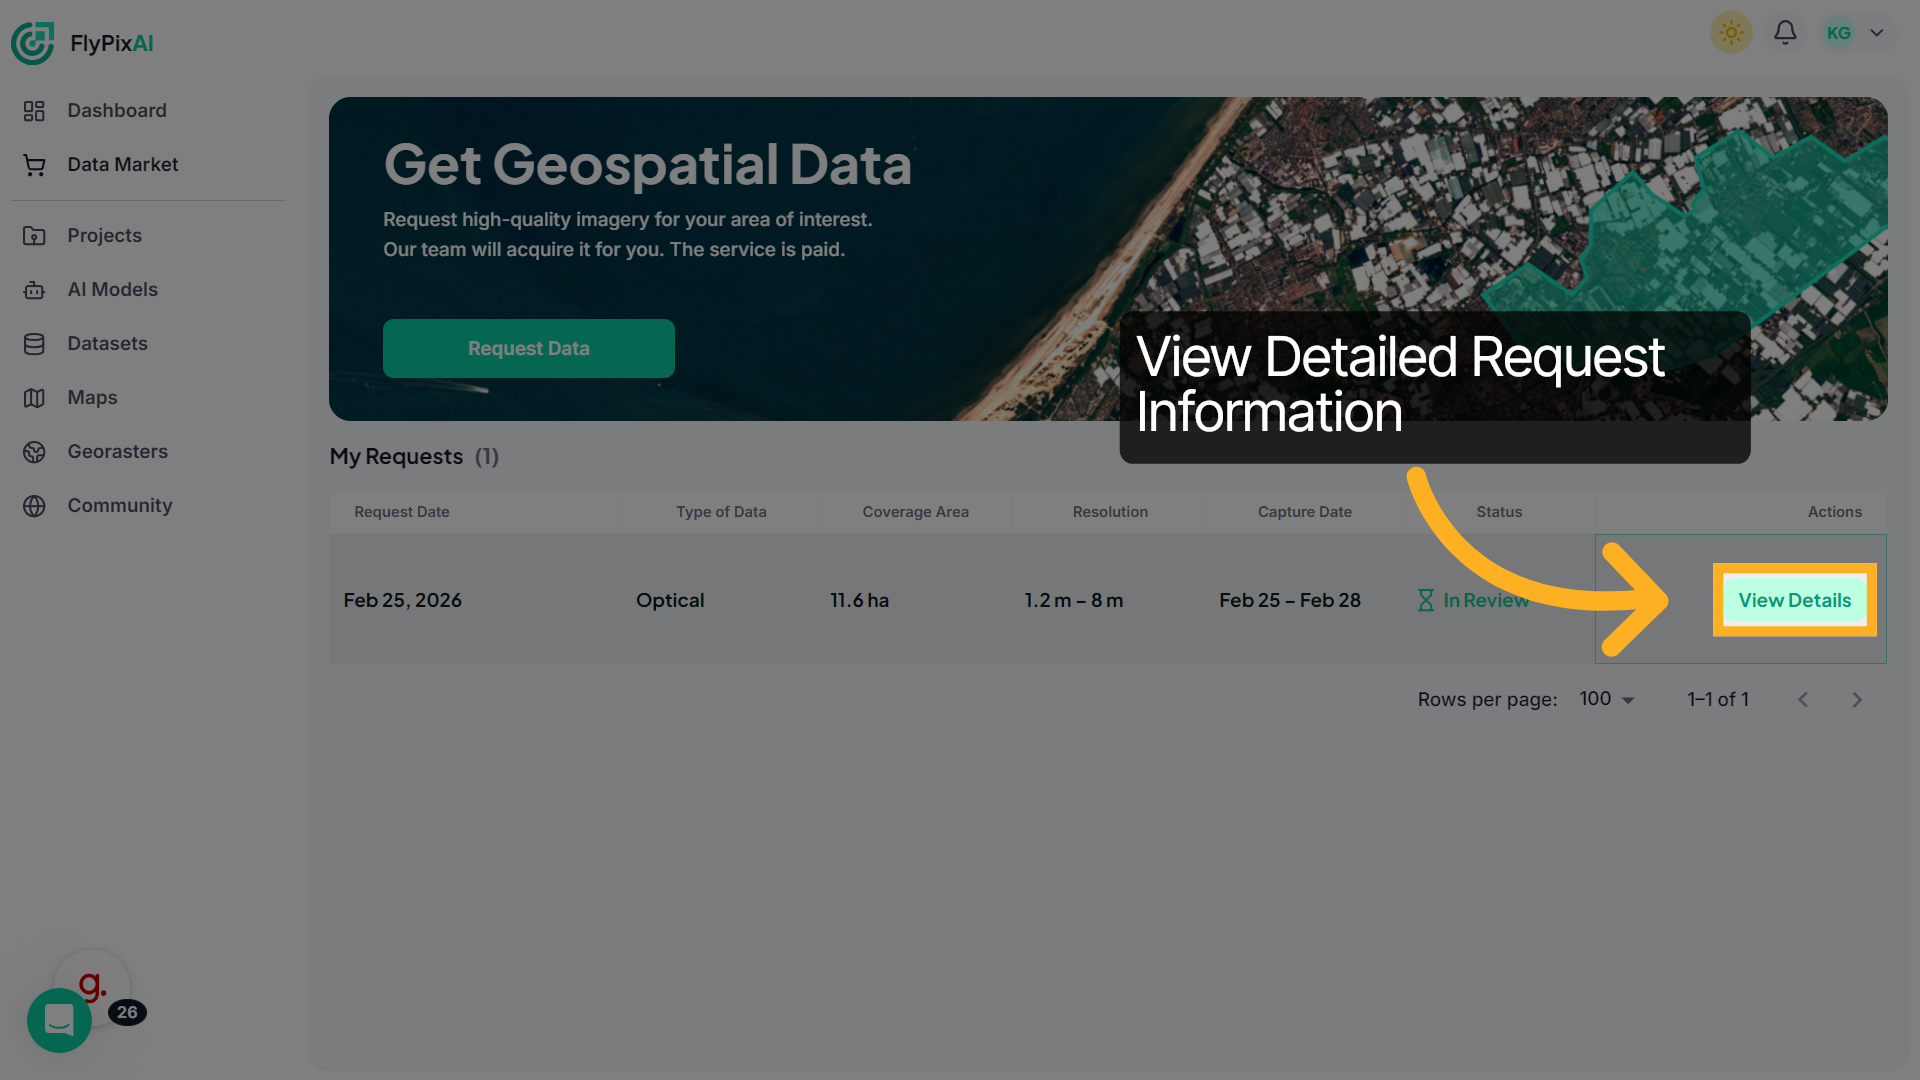
16. Click View Details
Click View Details to examine the specifics and progress of your selected data request.
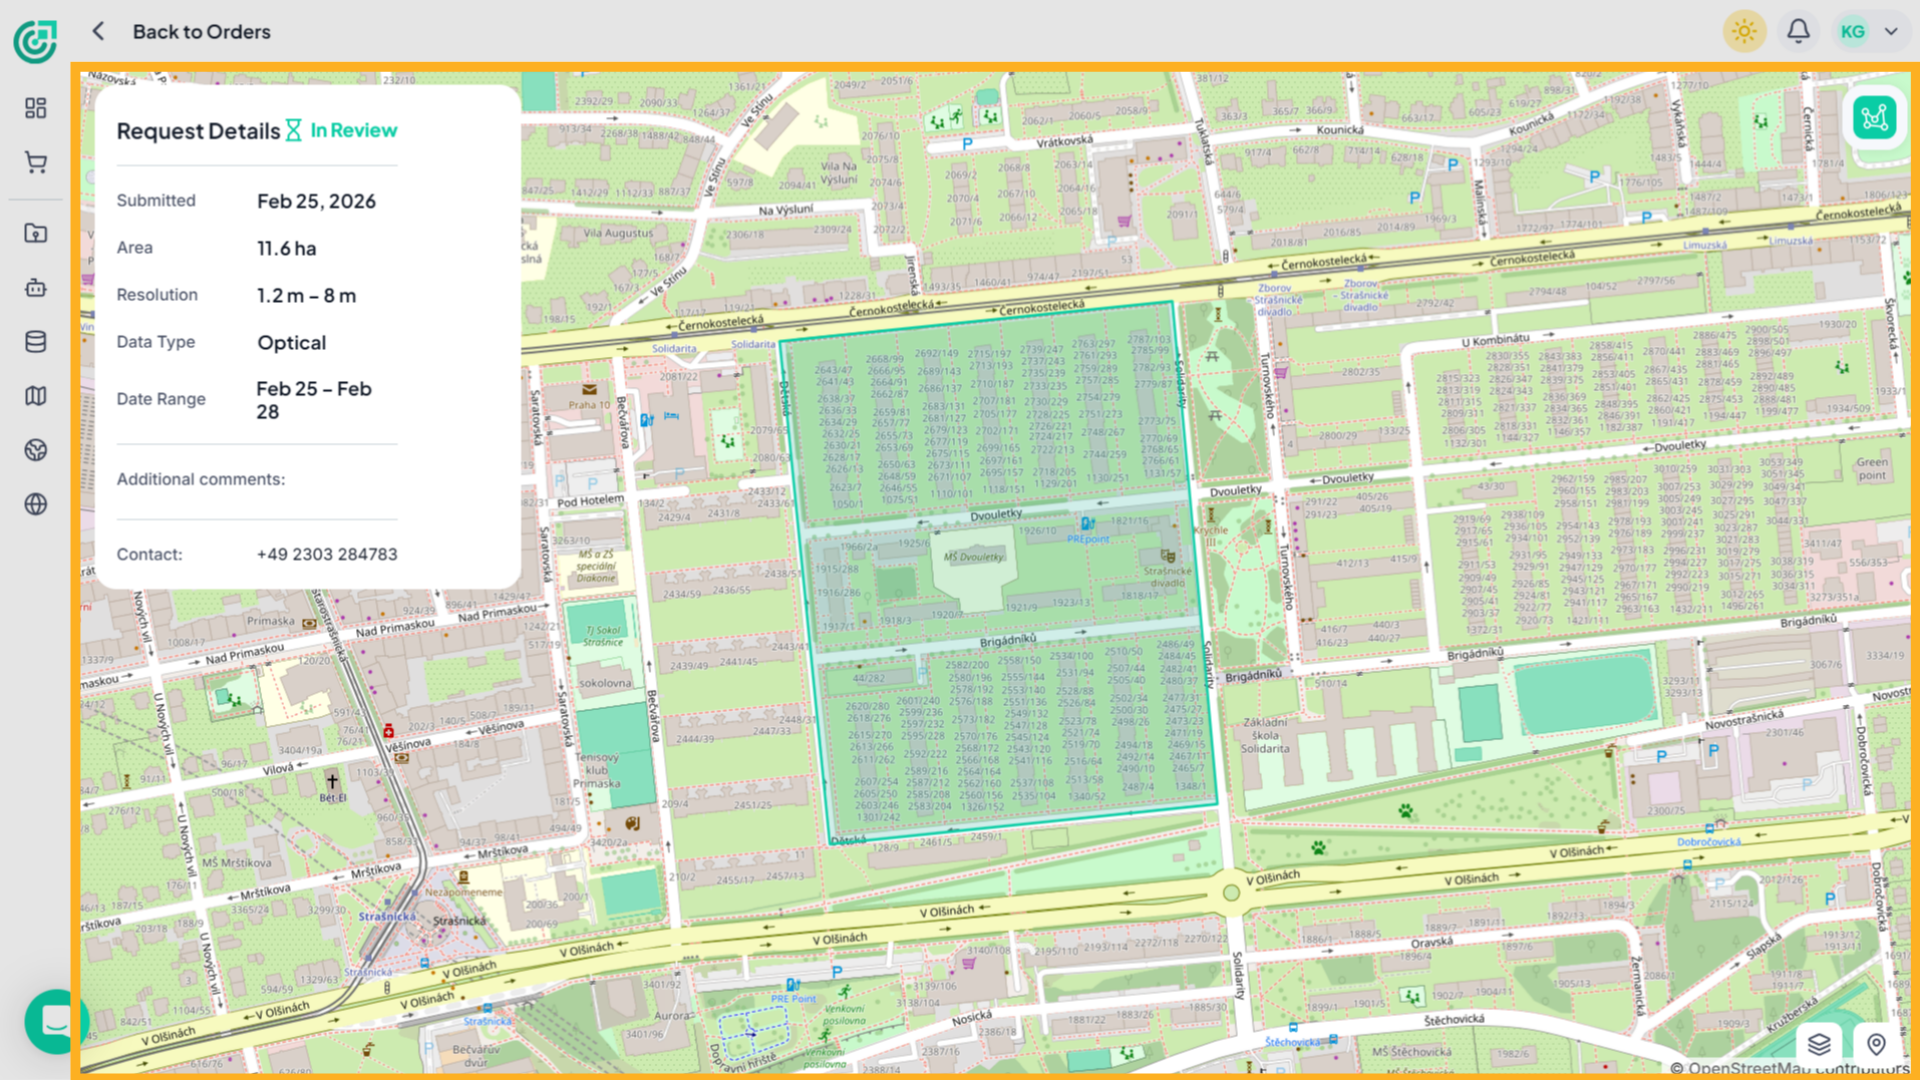
17. View Request Details
Here, you can review the submission date, selected area, resolution range, data type, date range, additional comments, and contact information, along with the current status of your request.
This demo shows how FlyPix AI’s Data Market allows you to define your area of interest, customize imagery parameters, and track your request status with ease. Start requesting geospatial data today to power your projects with precise and reliable insights.