ORION Find Similar Annotation
This demo showcases how to use ORION inside your workspace to detect and confirm objects efficiently.
Go to app.flypix.ai
1. Introduction
In this walkthrough, you’ll explore how to use ORION Find Similar within the current view, apply text-based prompts, and execute ORION across the entire file.
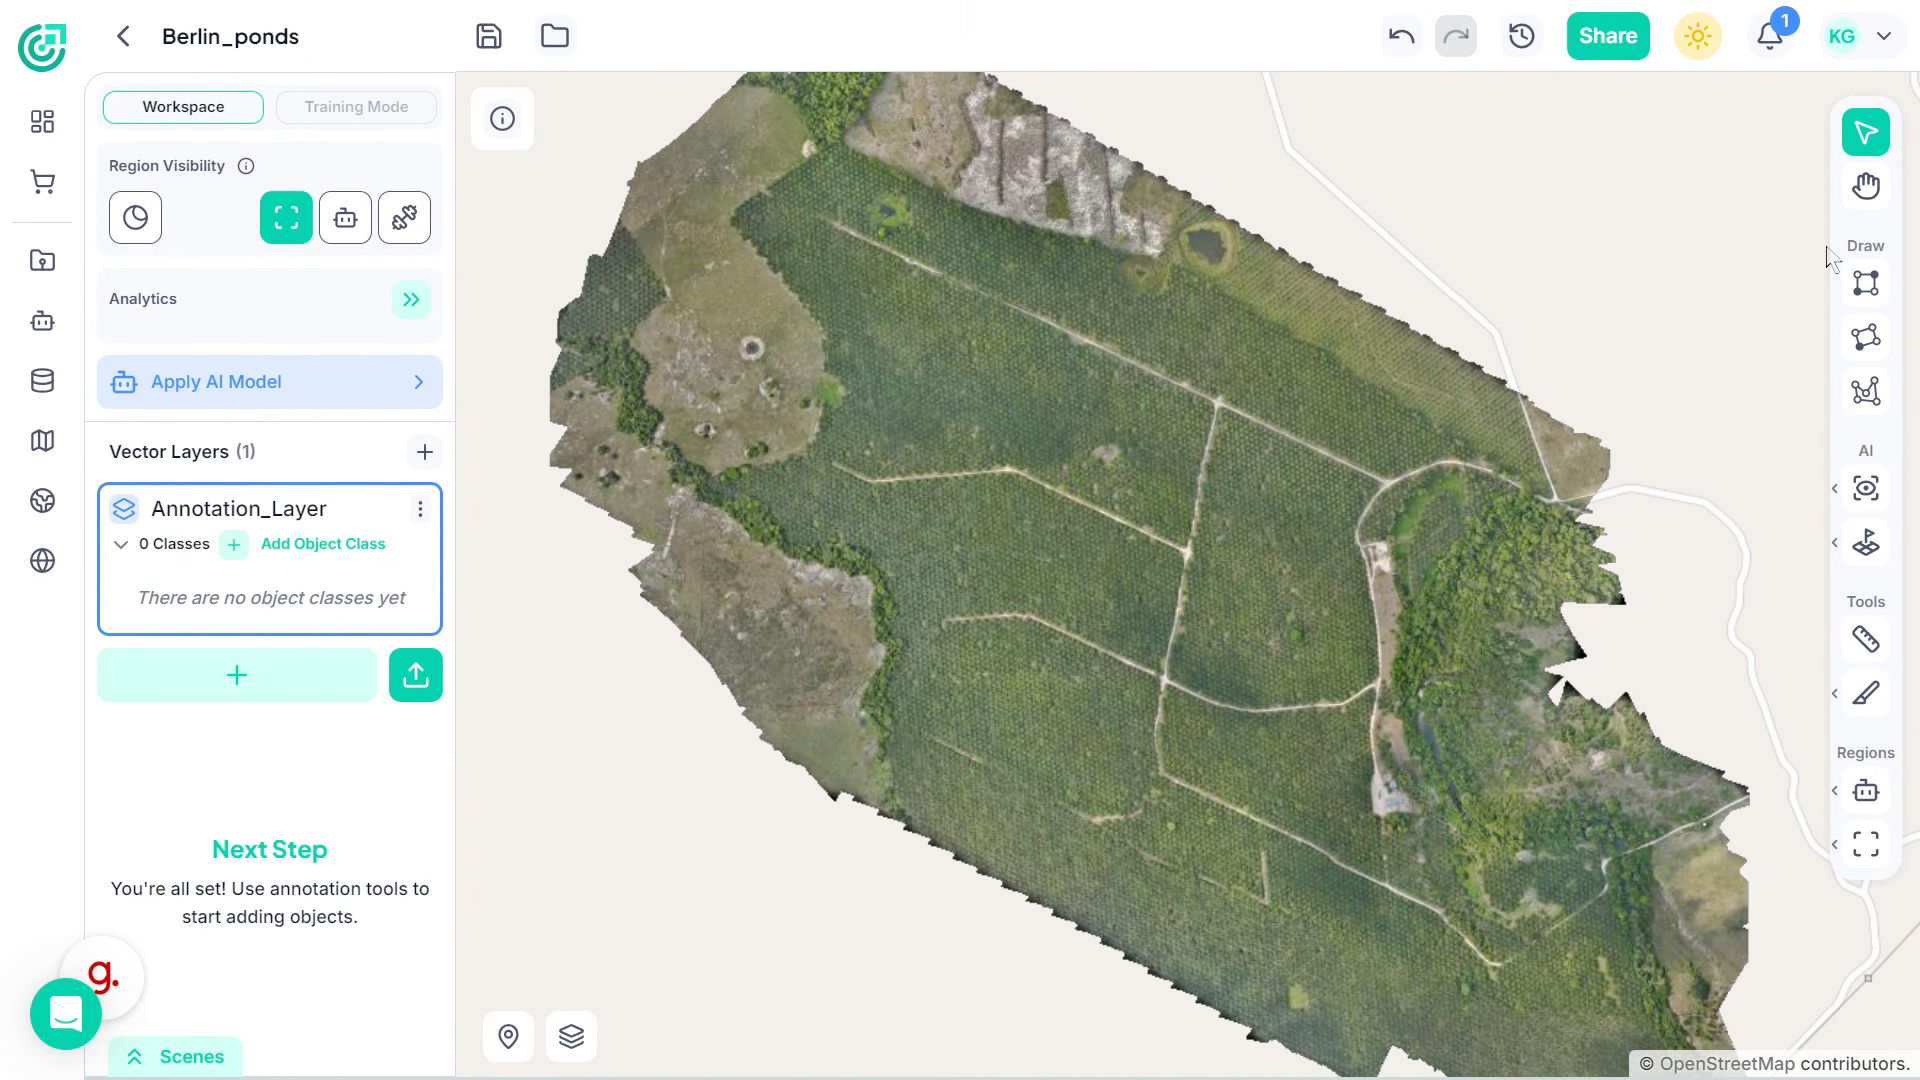
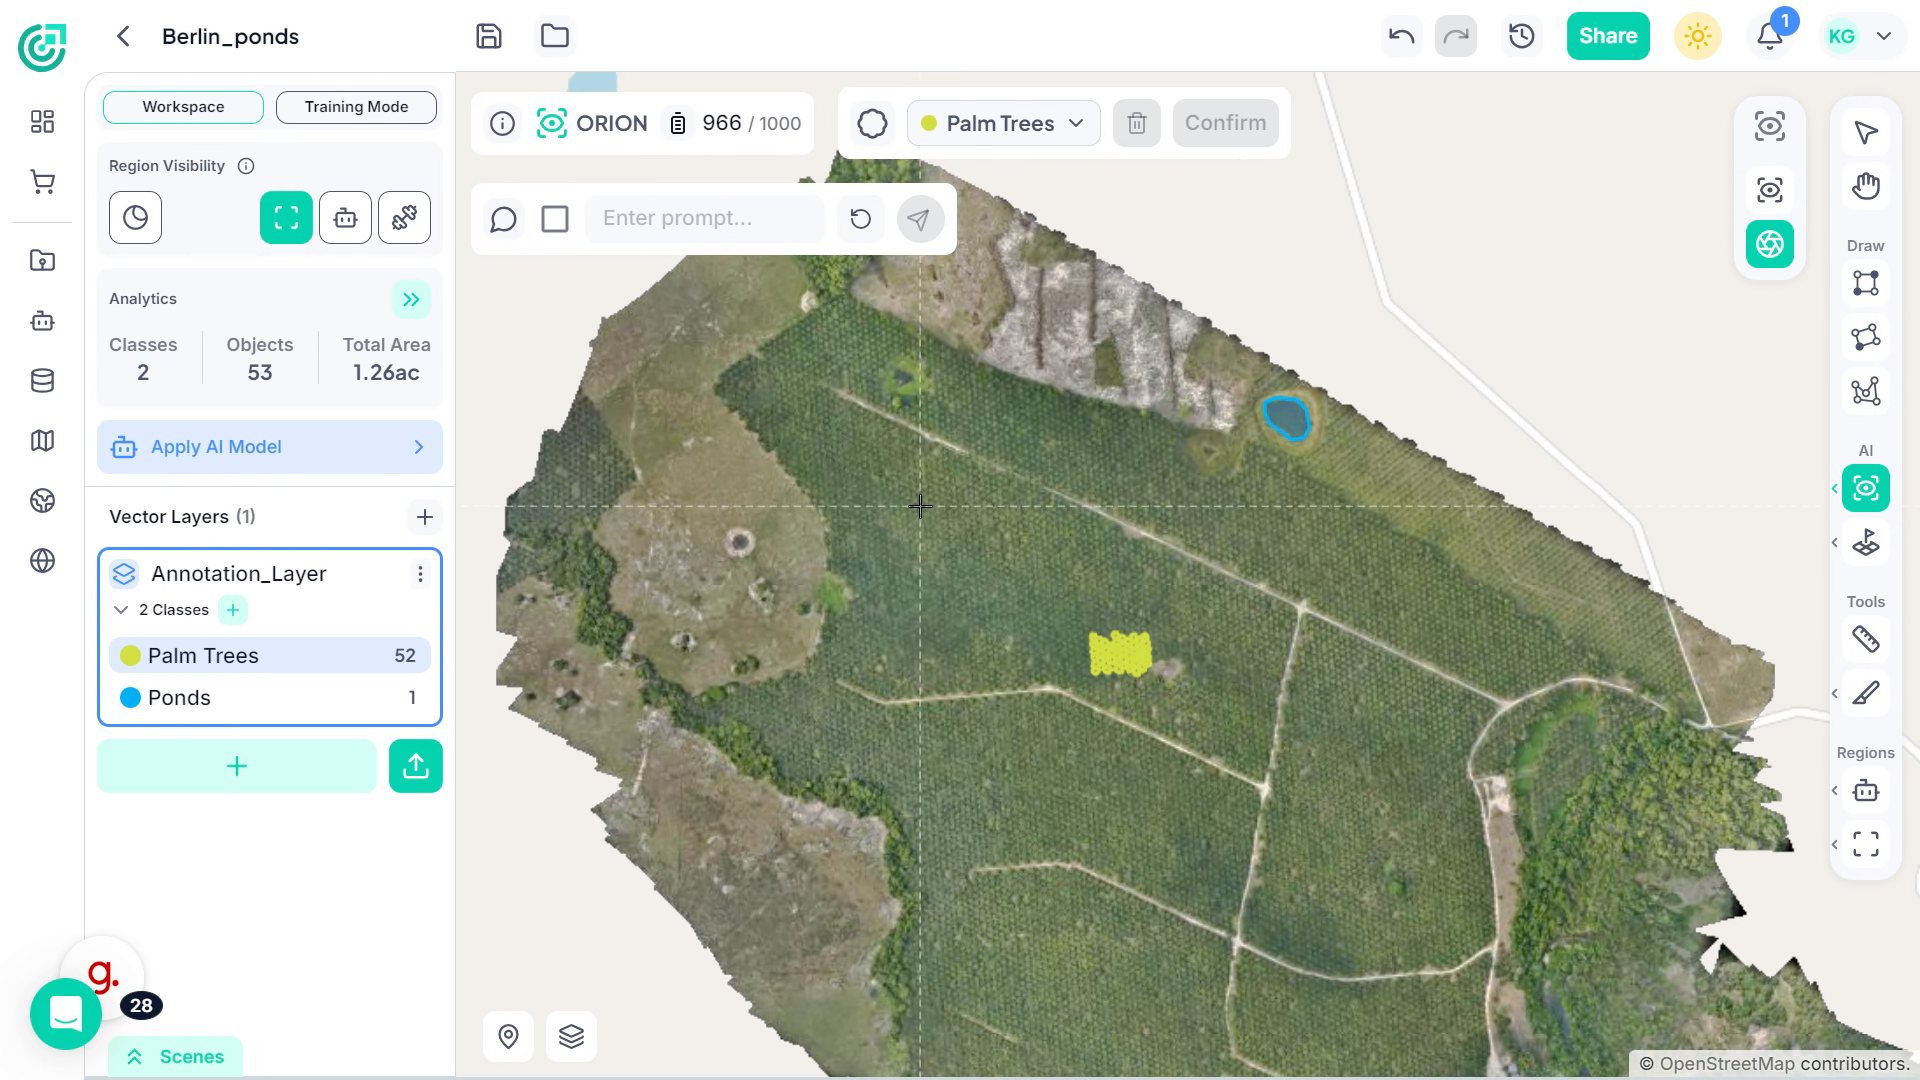
2. Select ORION Tool
Start by clicking on the ORION tool to access its available detection options.

3. Provide Visual Reference
To begin, annotate a sample object directly in the imagery. ORION uses this annotated object as a visual reference and automatically scans the visible area to detect similar objects. You will see highlighted detections appear within the current zoom level. Carefully review these results.
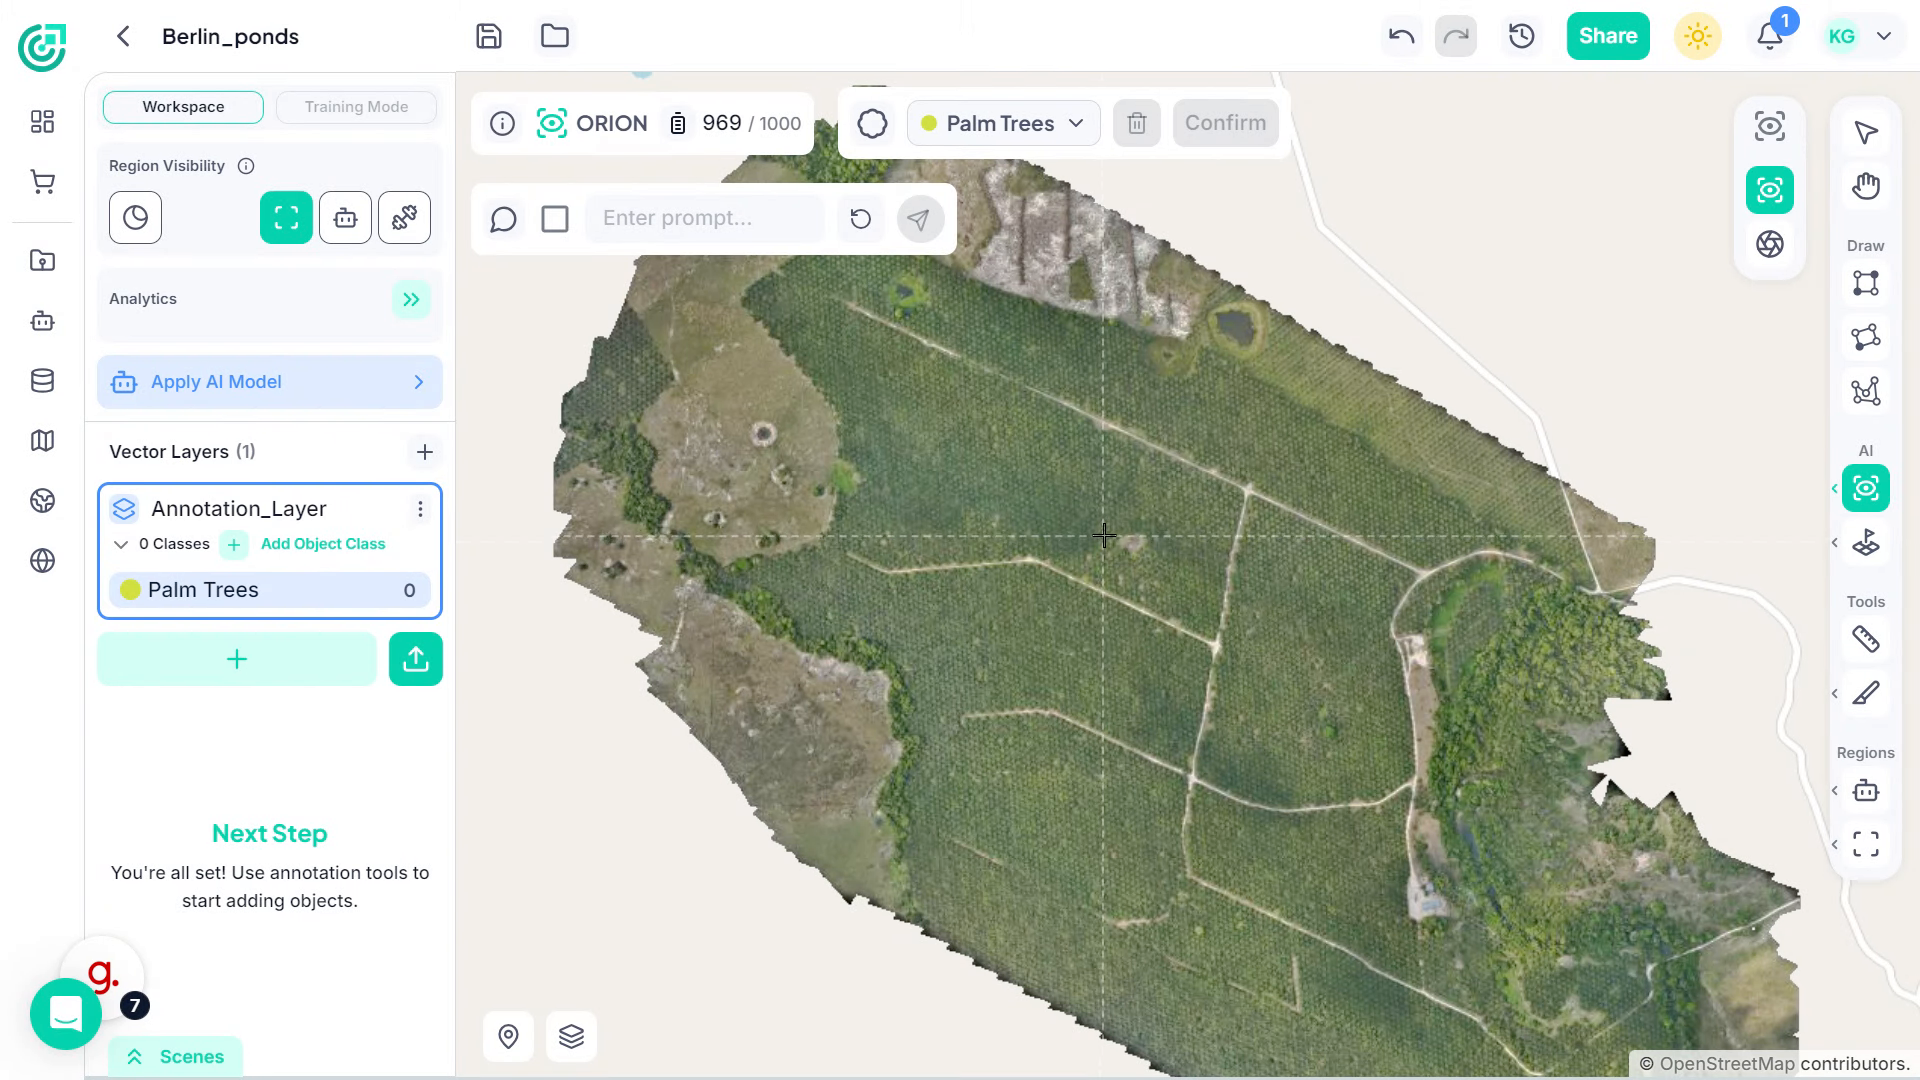
4. Confirm Detections
If the detections are accurate, click Confirm to approve them.
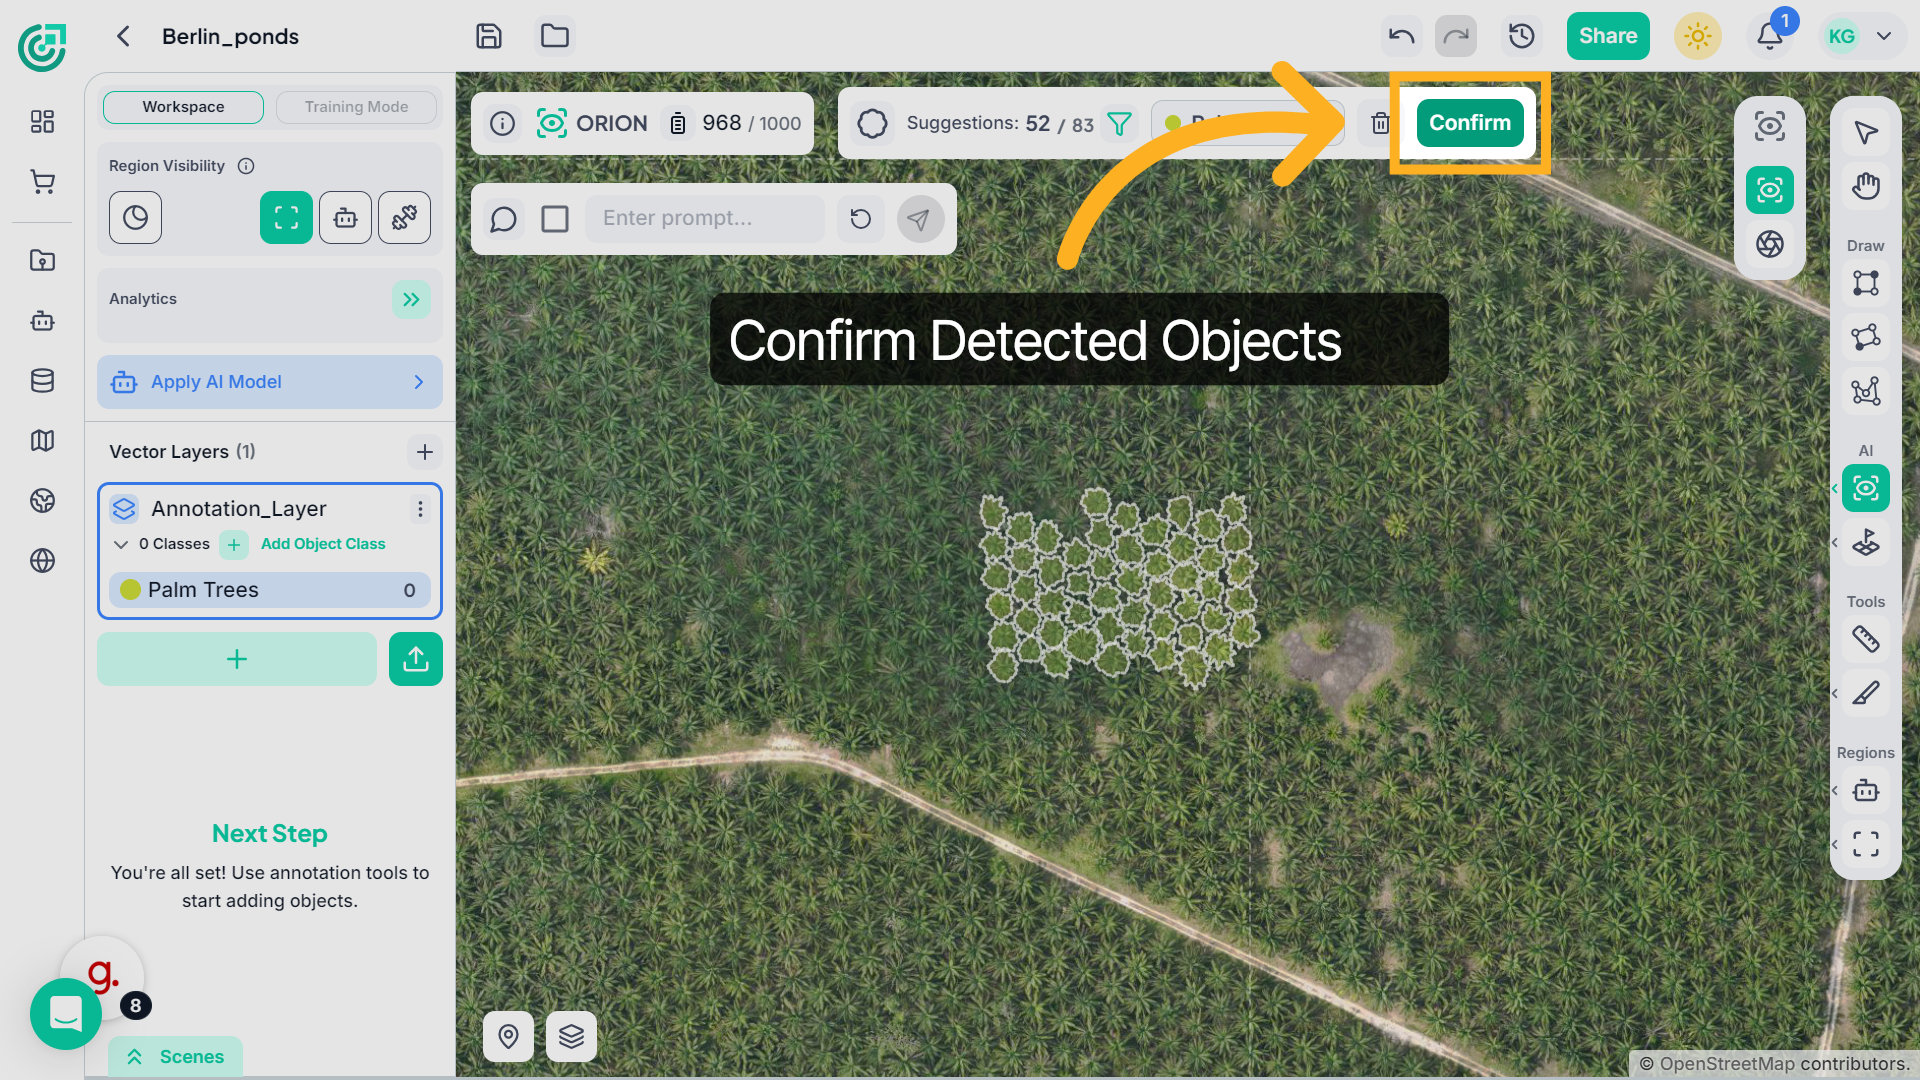
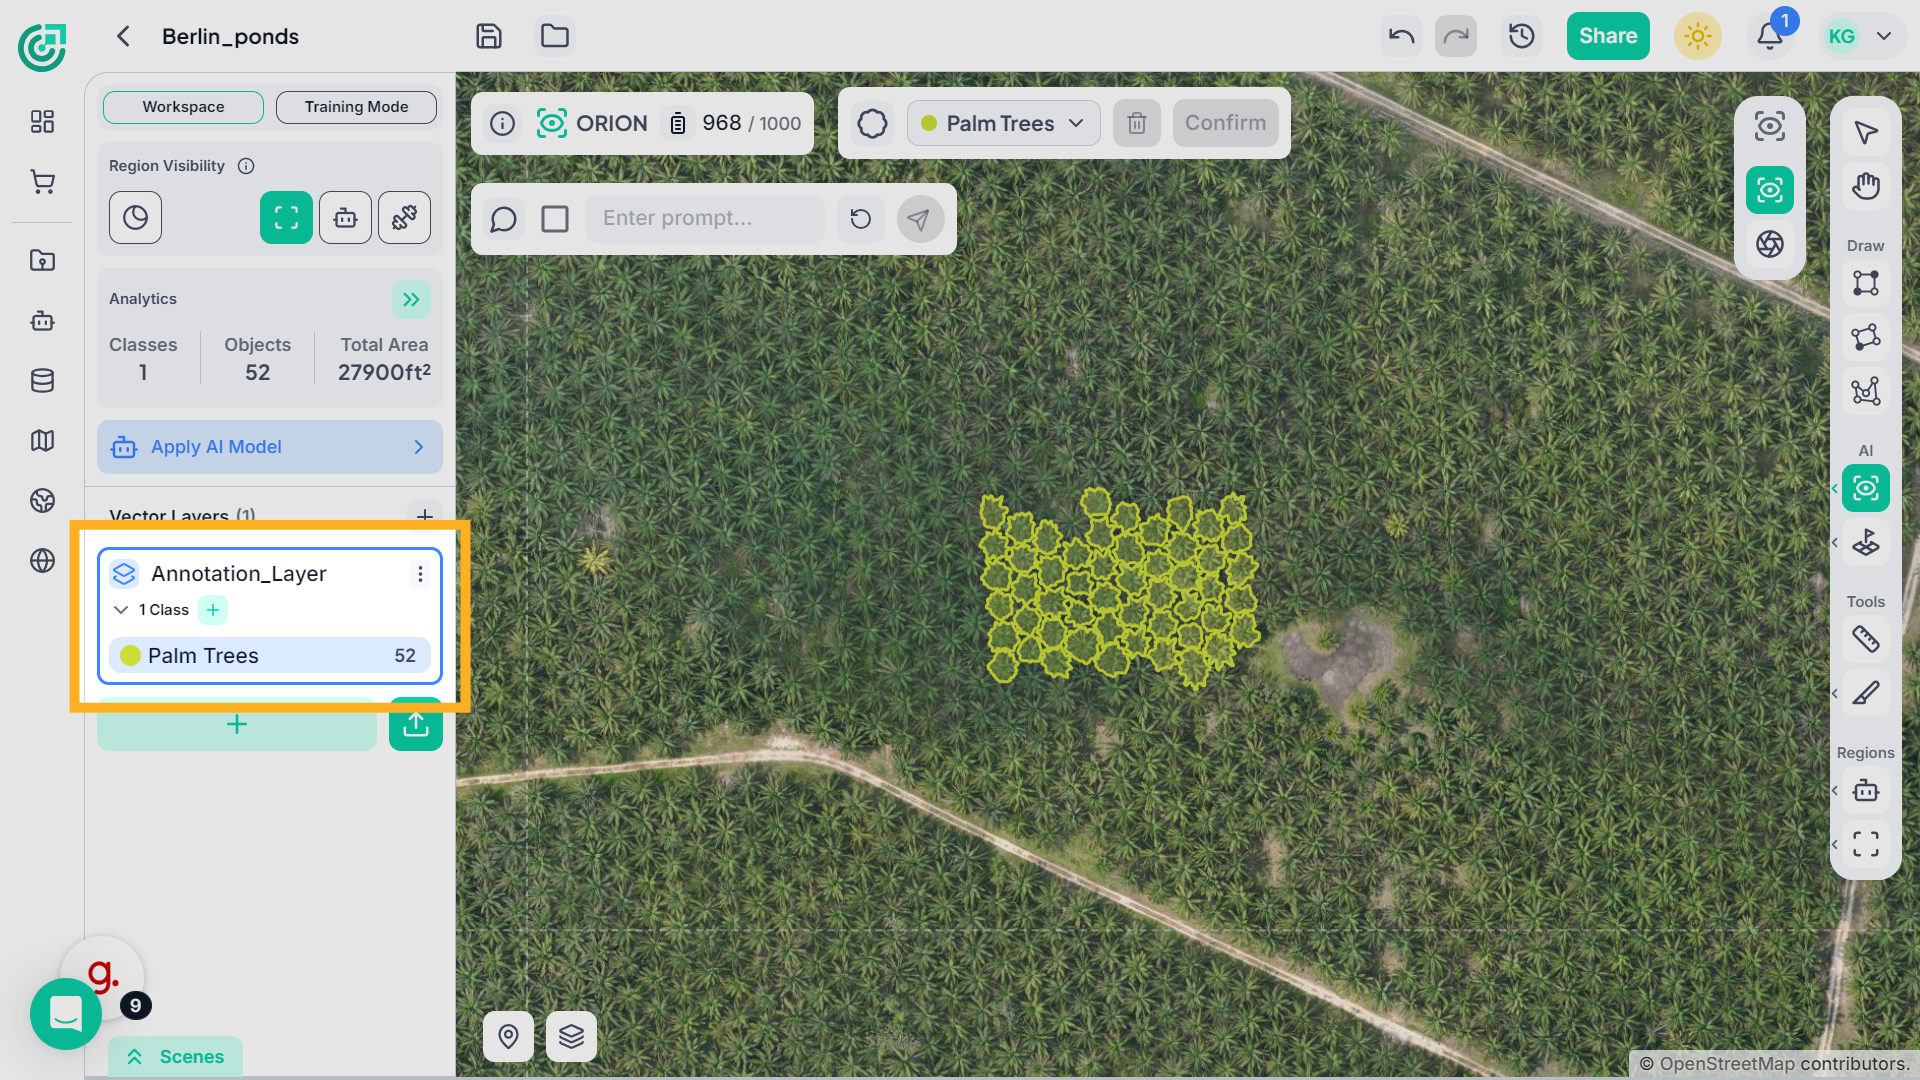
5. Confirm Smart Detections
The system updates the selected annotation layer and assigns the associated class automatically.
6. Use Text Prompt for Detection (Optional)
Instead of using a visual reference, you can guide ORION using a text prompt.

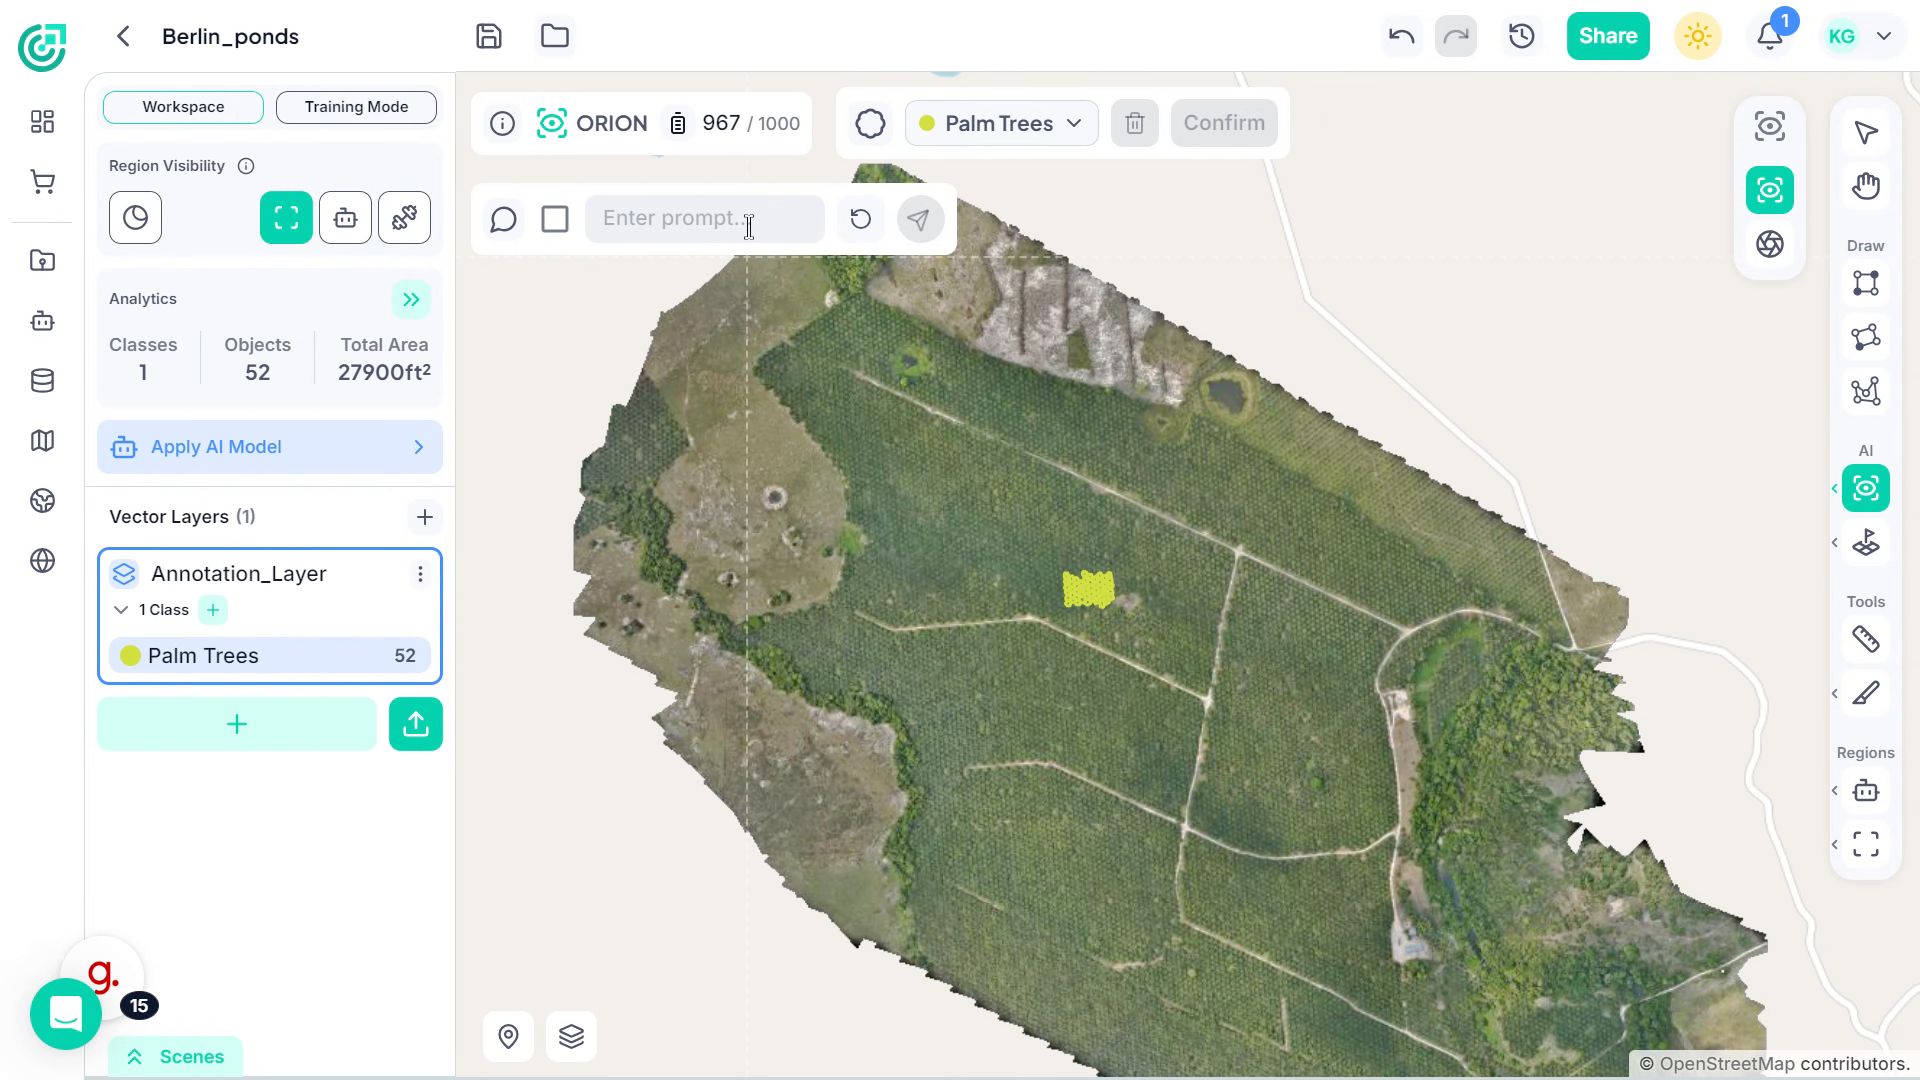
7. Use Text Prompt for Detection
Click inside the prompt field and enter a descriptive keyword, such as “Trees.”
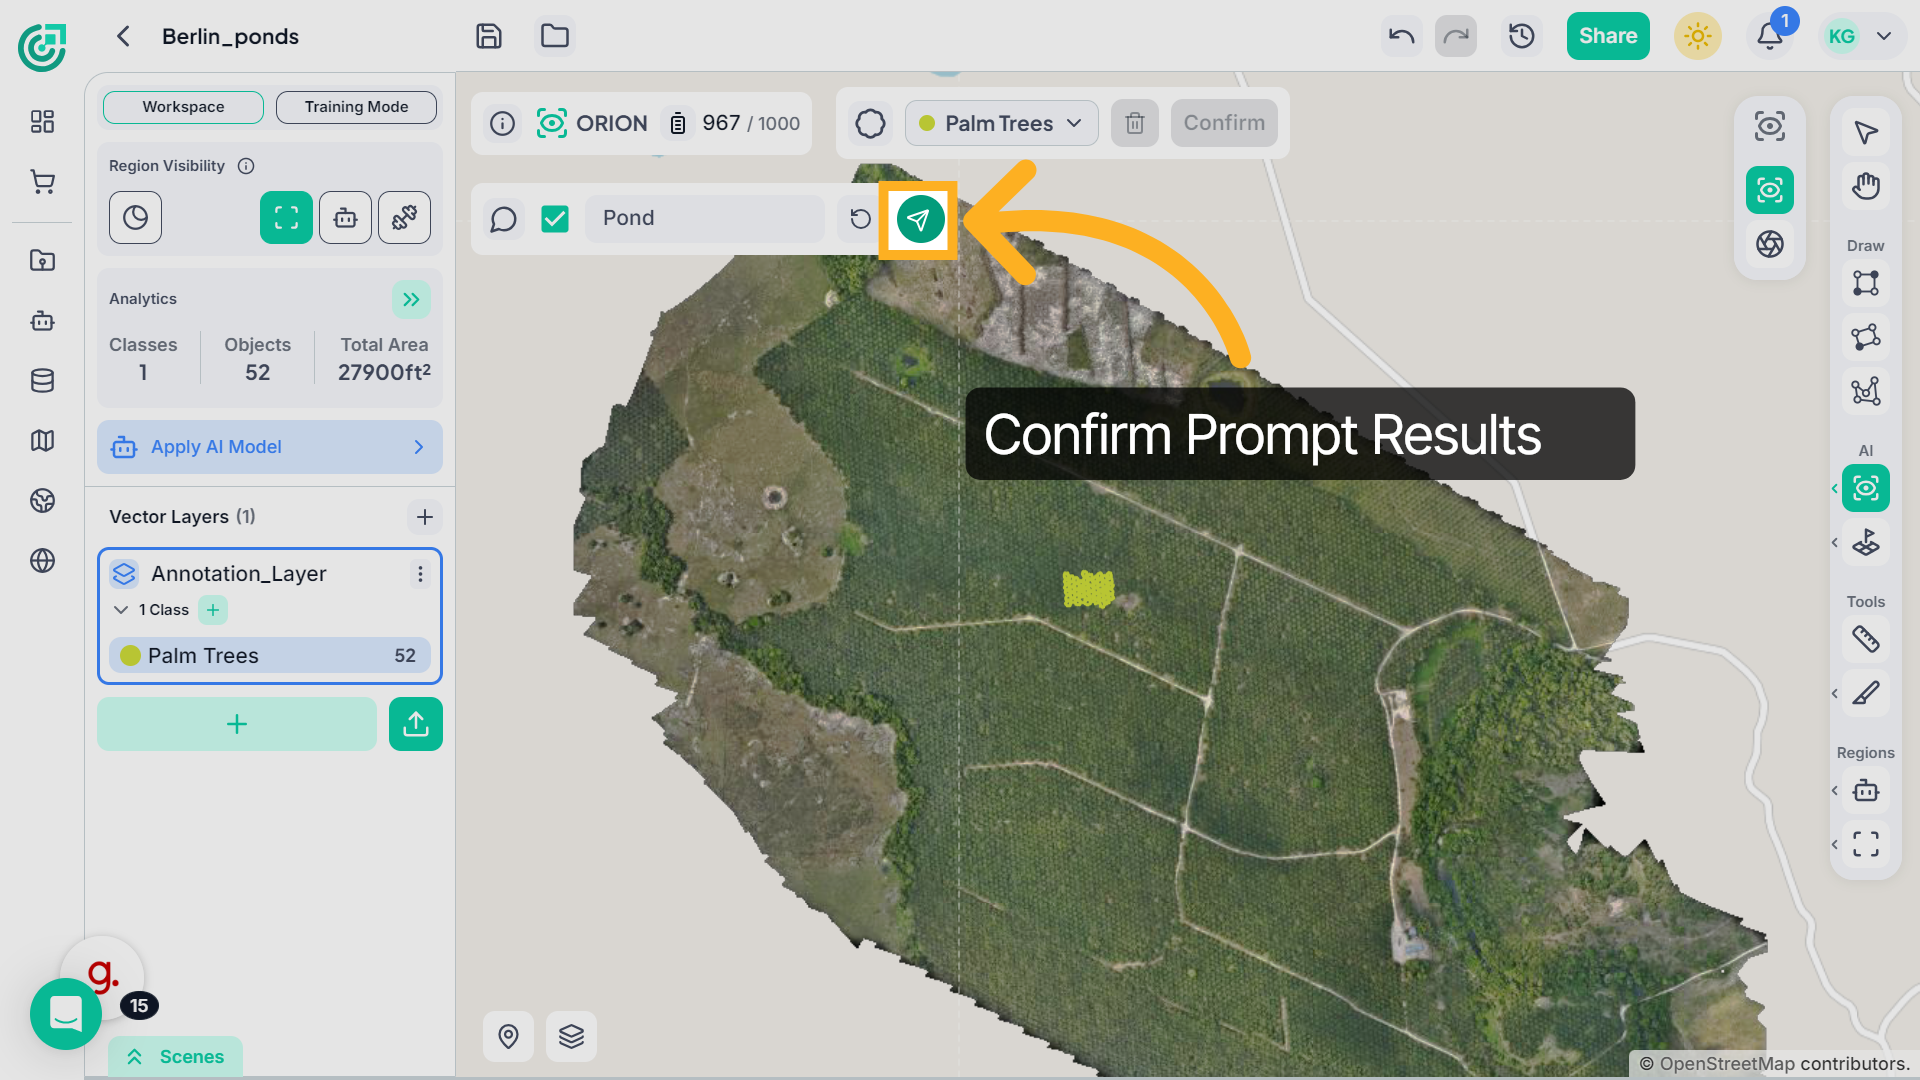
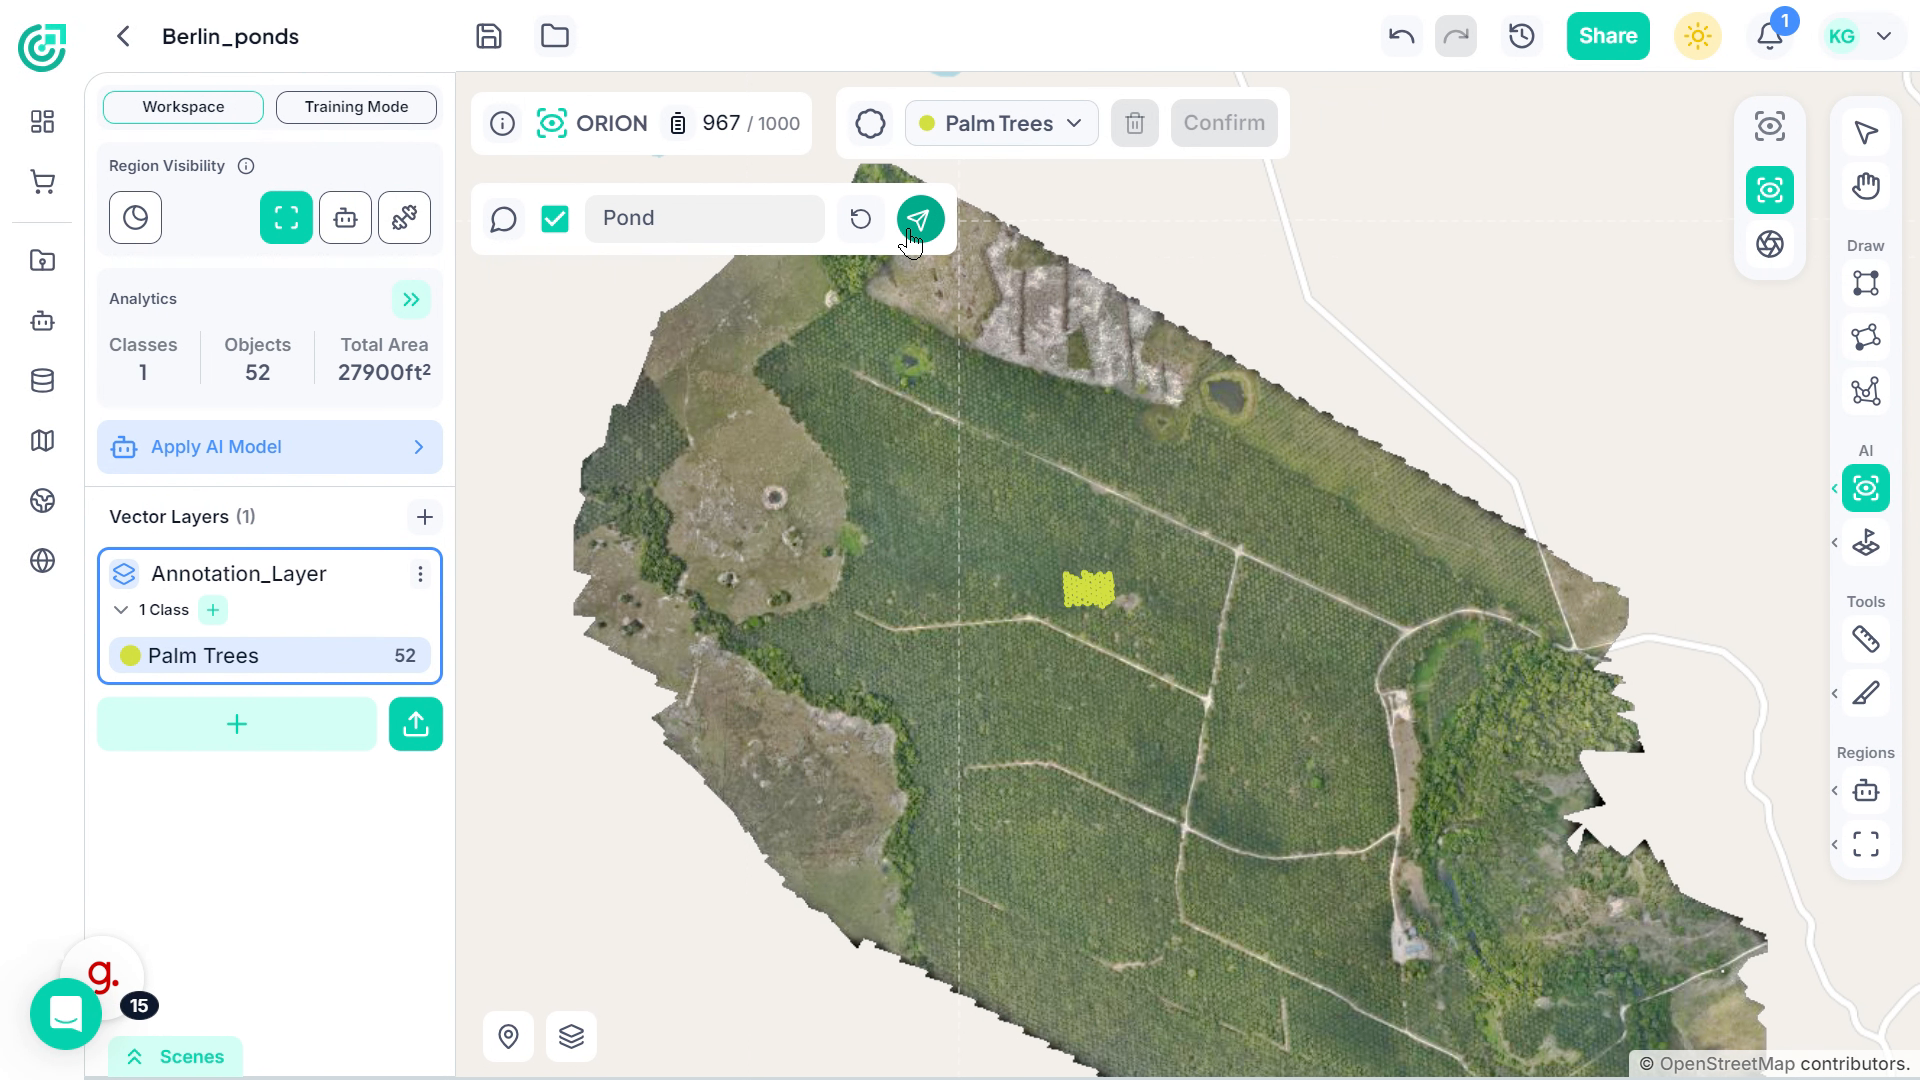
8. Confirm Prompt
After entering the prompt, confirm the input.
9. Review Results
ORION analyzes the visible scene based on your description and highlights matching objects. Review the results carefully. You can either confirm them under the same class or assign them to a different category.
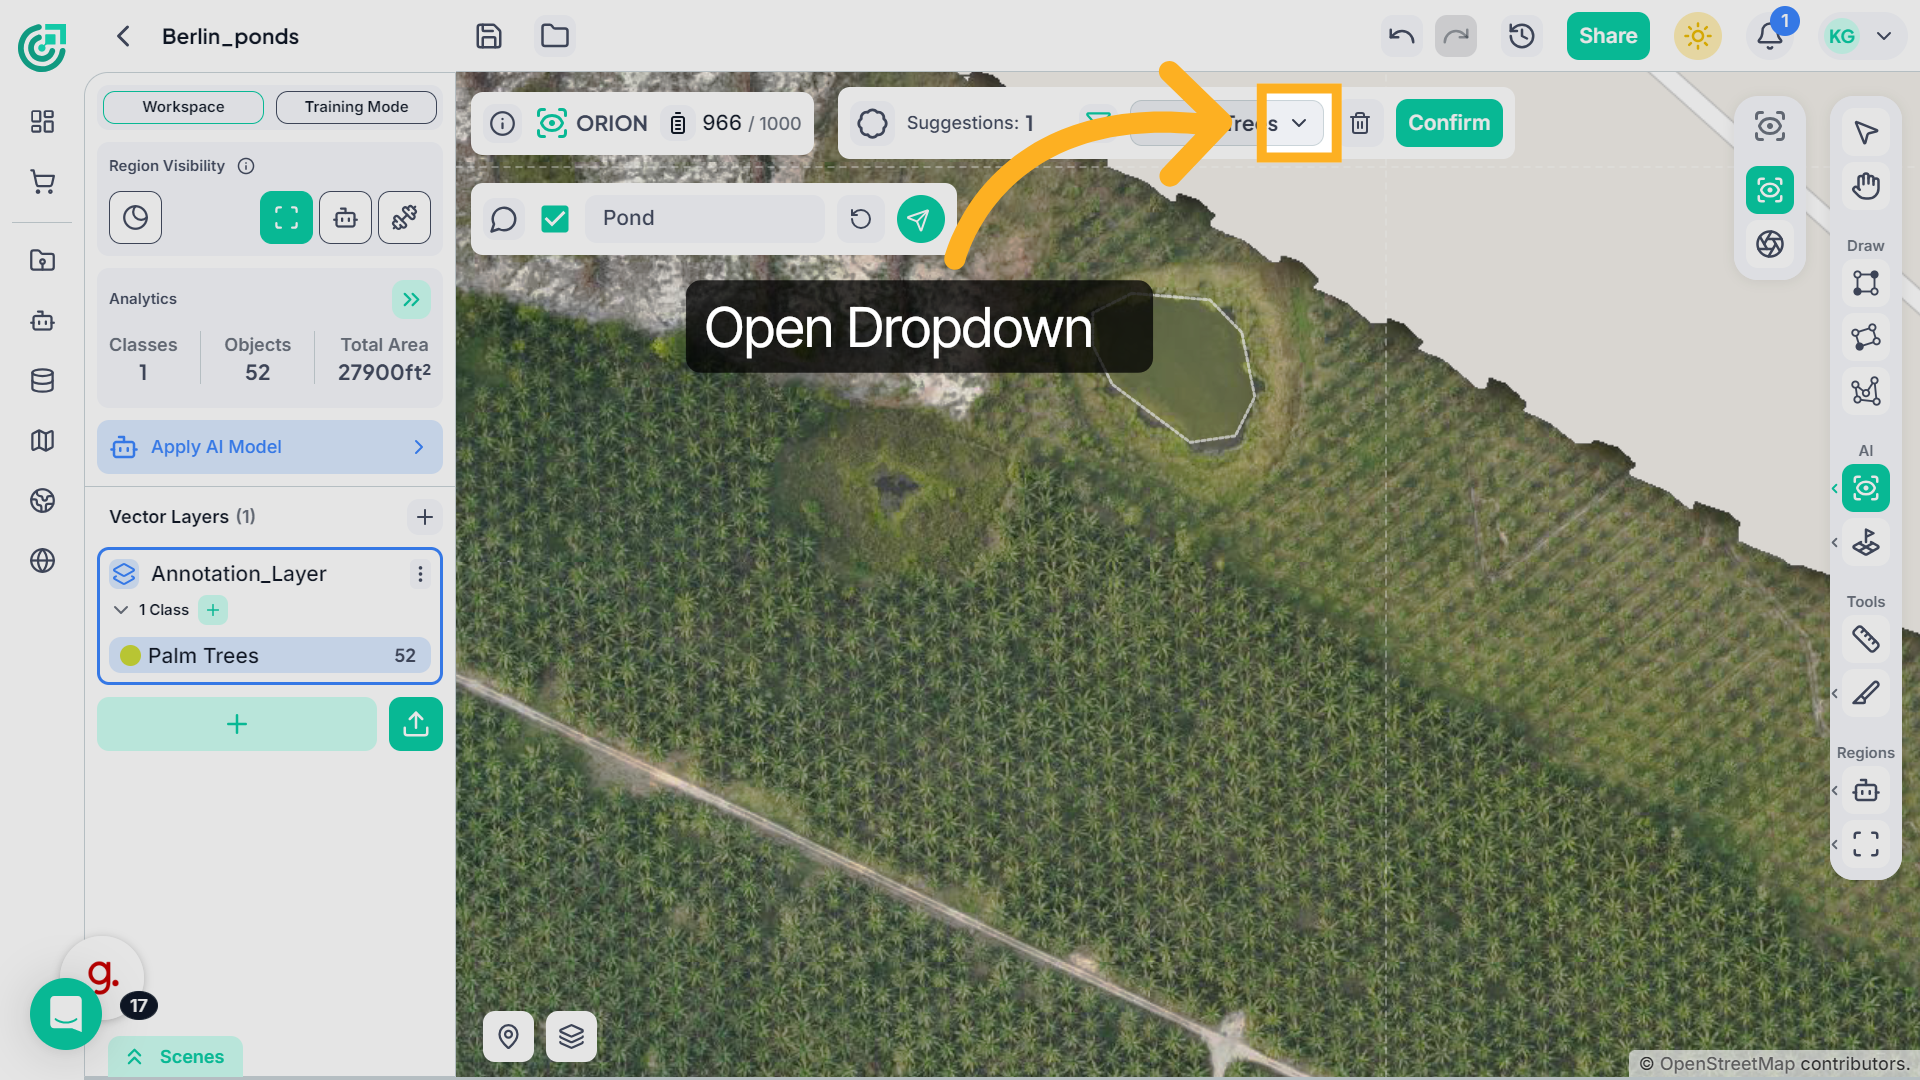
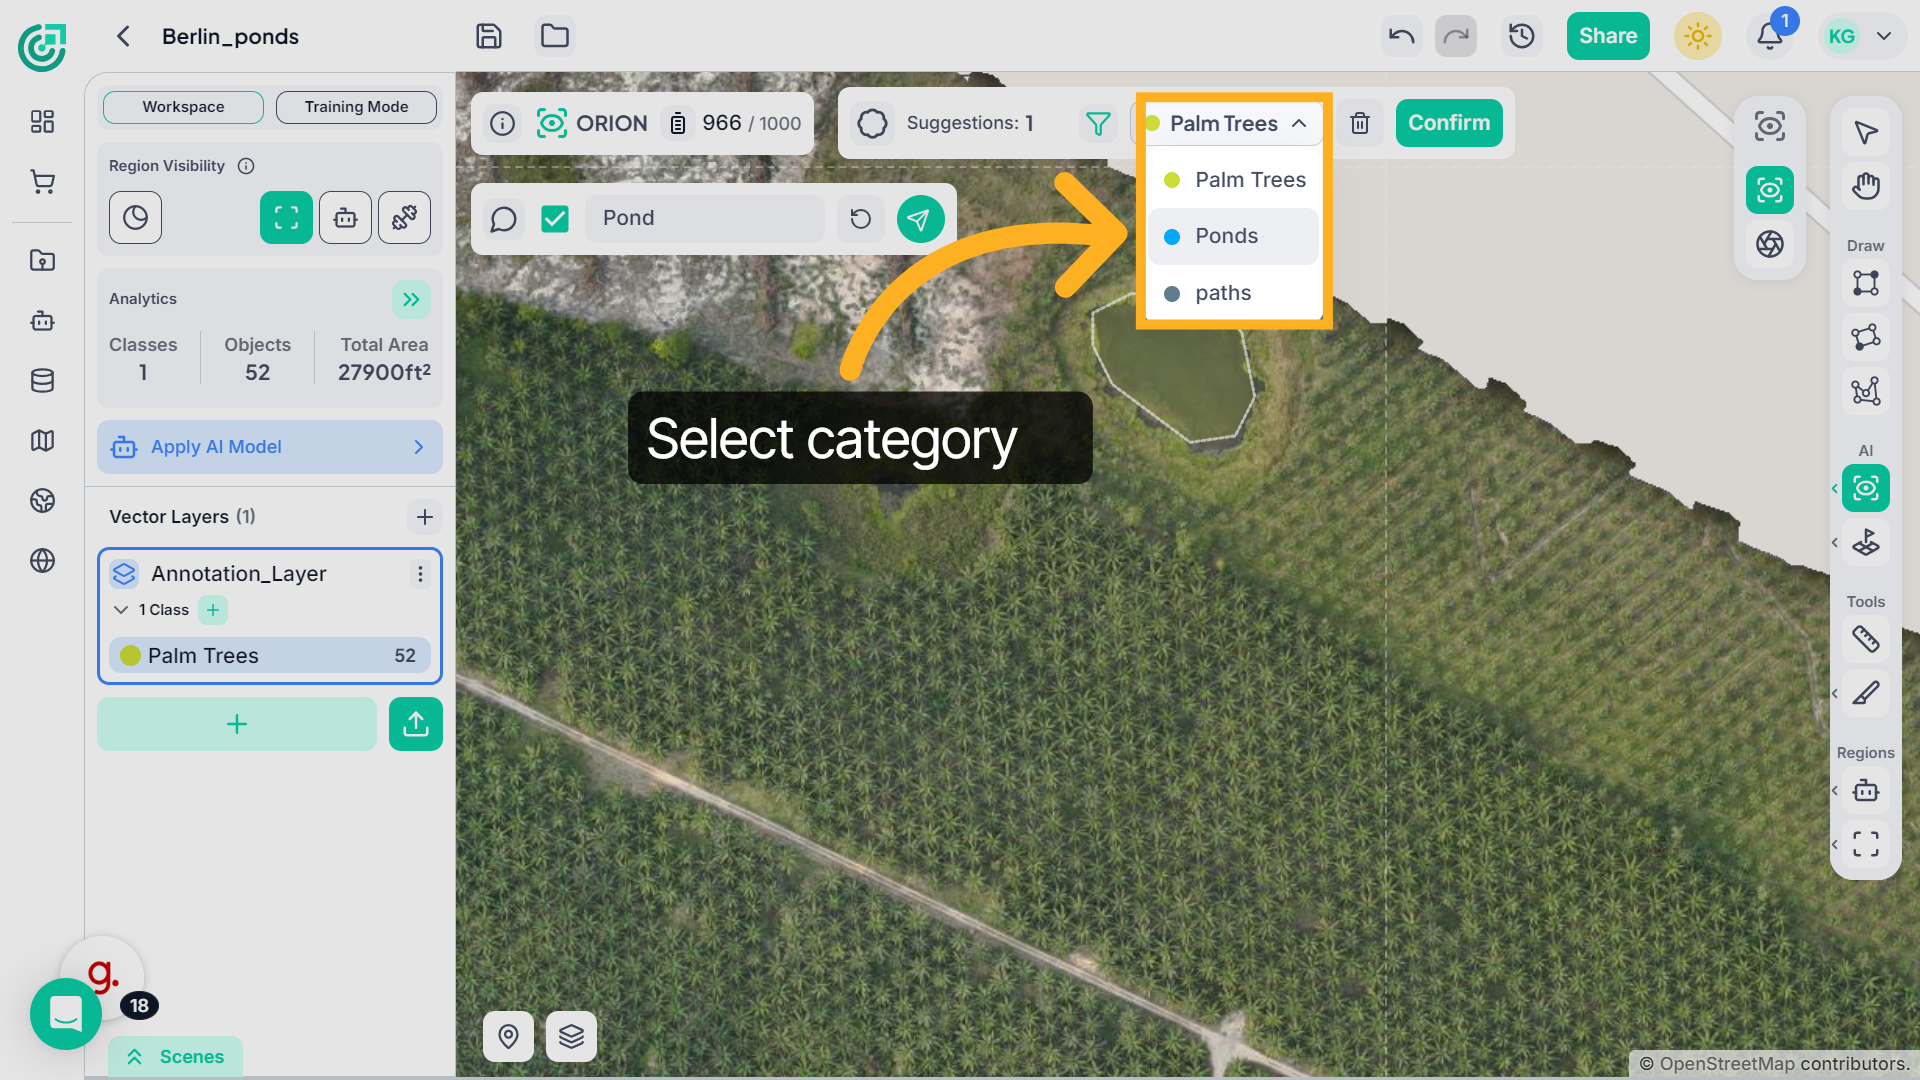
10. Open Prompt Menu
If you want to change the category, open the dropdown menu
11. Choose Prompt Category
Select the appropriate class.
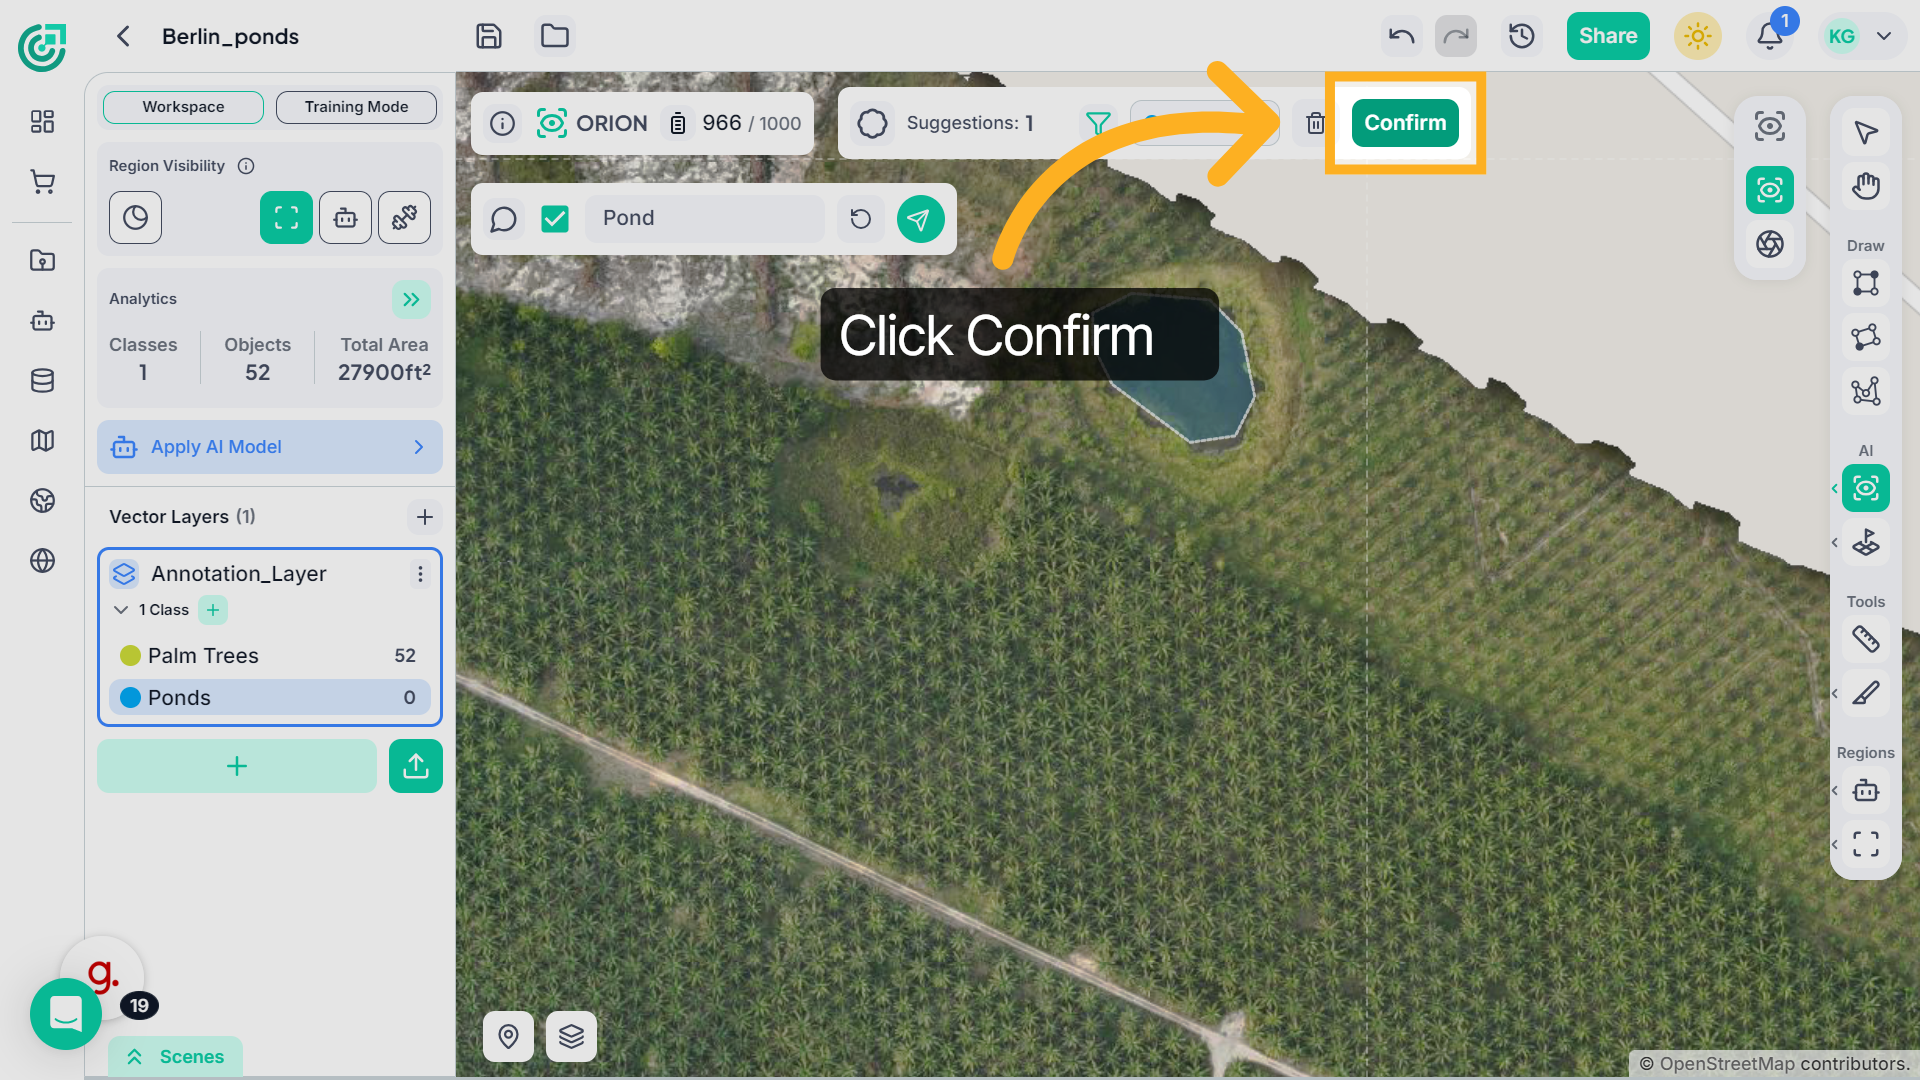
12. Confirm Category Selection
Then click Confirm to apply the updated category to the selected detections.
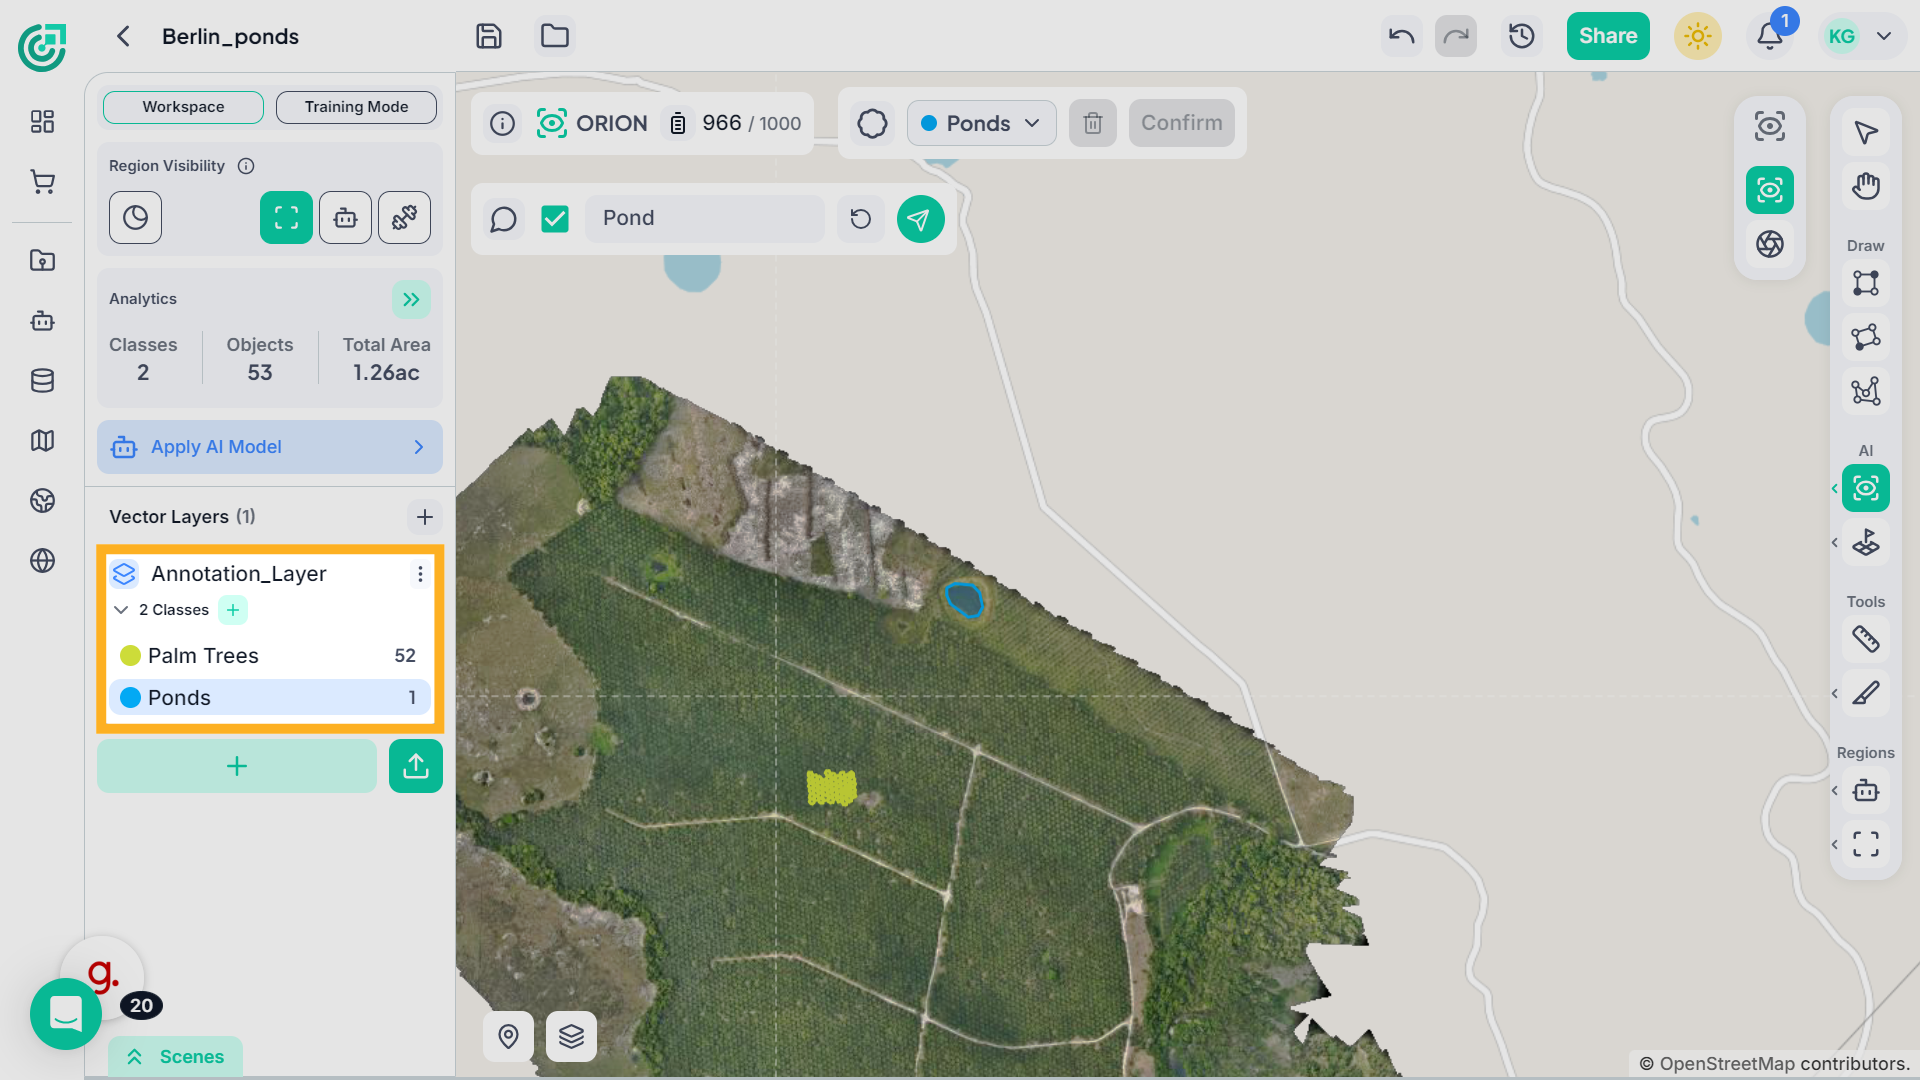
13. Access Additional Features
The system updates the selected annotation layer and selected class automatically.
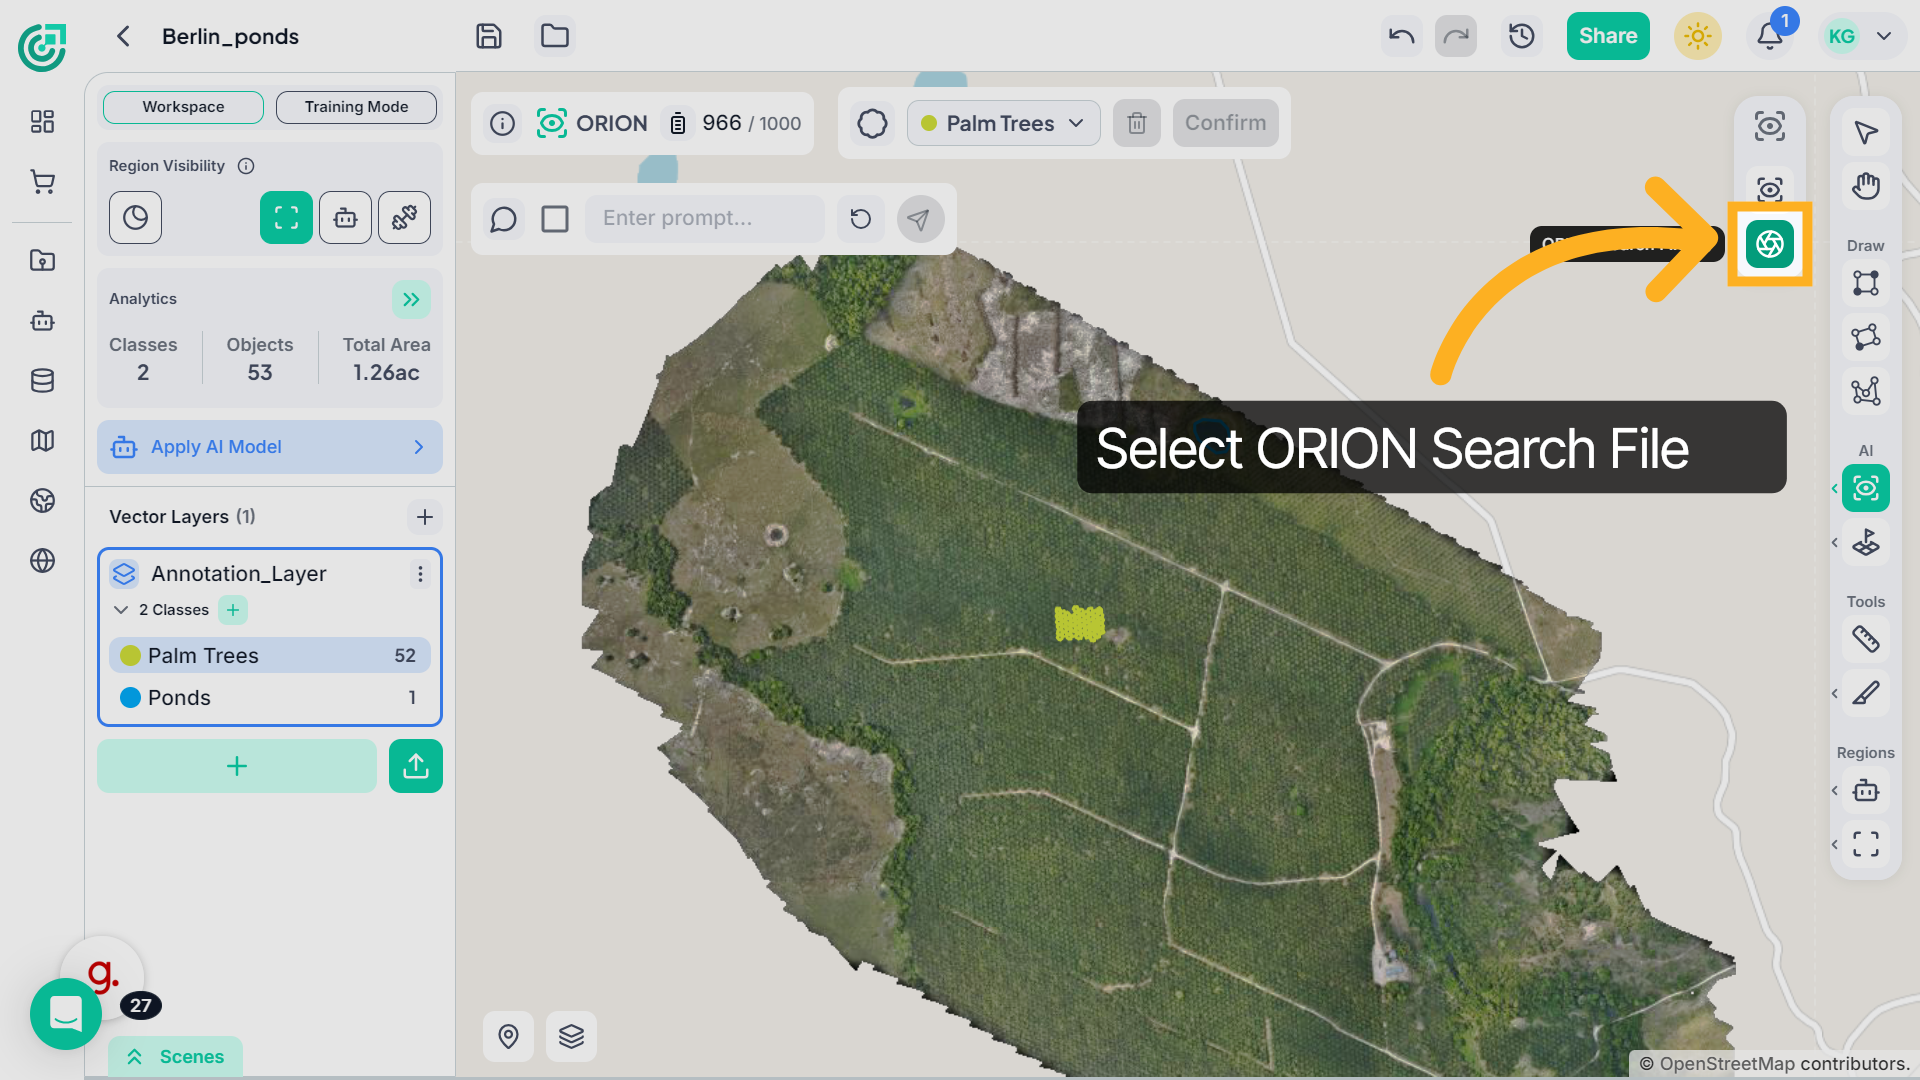
14. ORION Entire File
If you want to find similar objects across the entire file, not just within the visible scene, select ORION Search File to run detection on the full dataset.
15. Annotate Reference Object for Full File
After selecting ORION Search File, annotate a clear sample object in the imagery. This reference will be used to detect similar objects across the entire dataset.
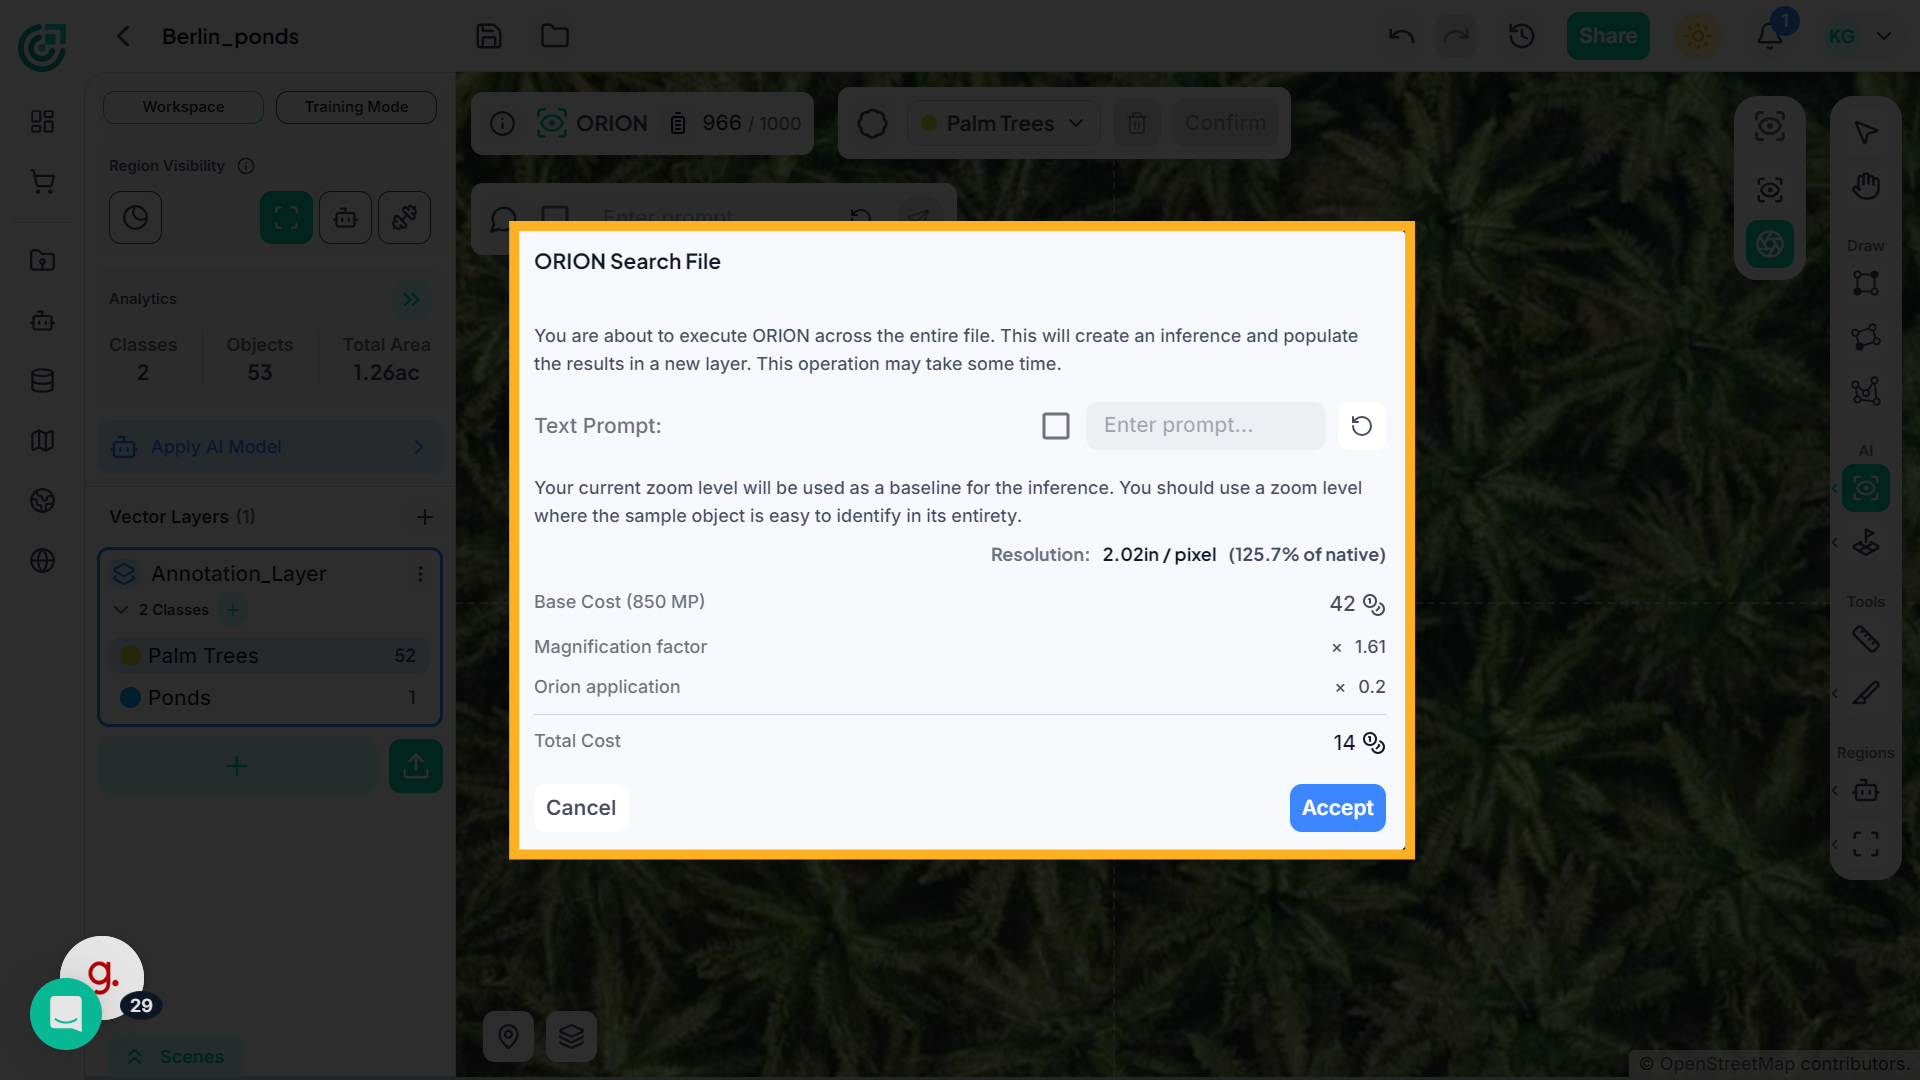
16. Review ORION Search File Window
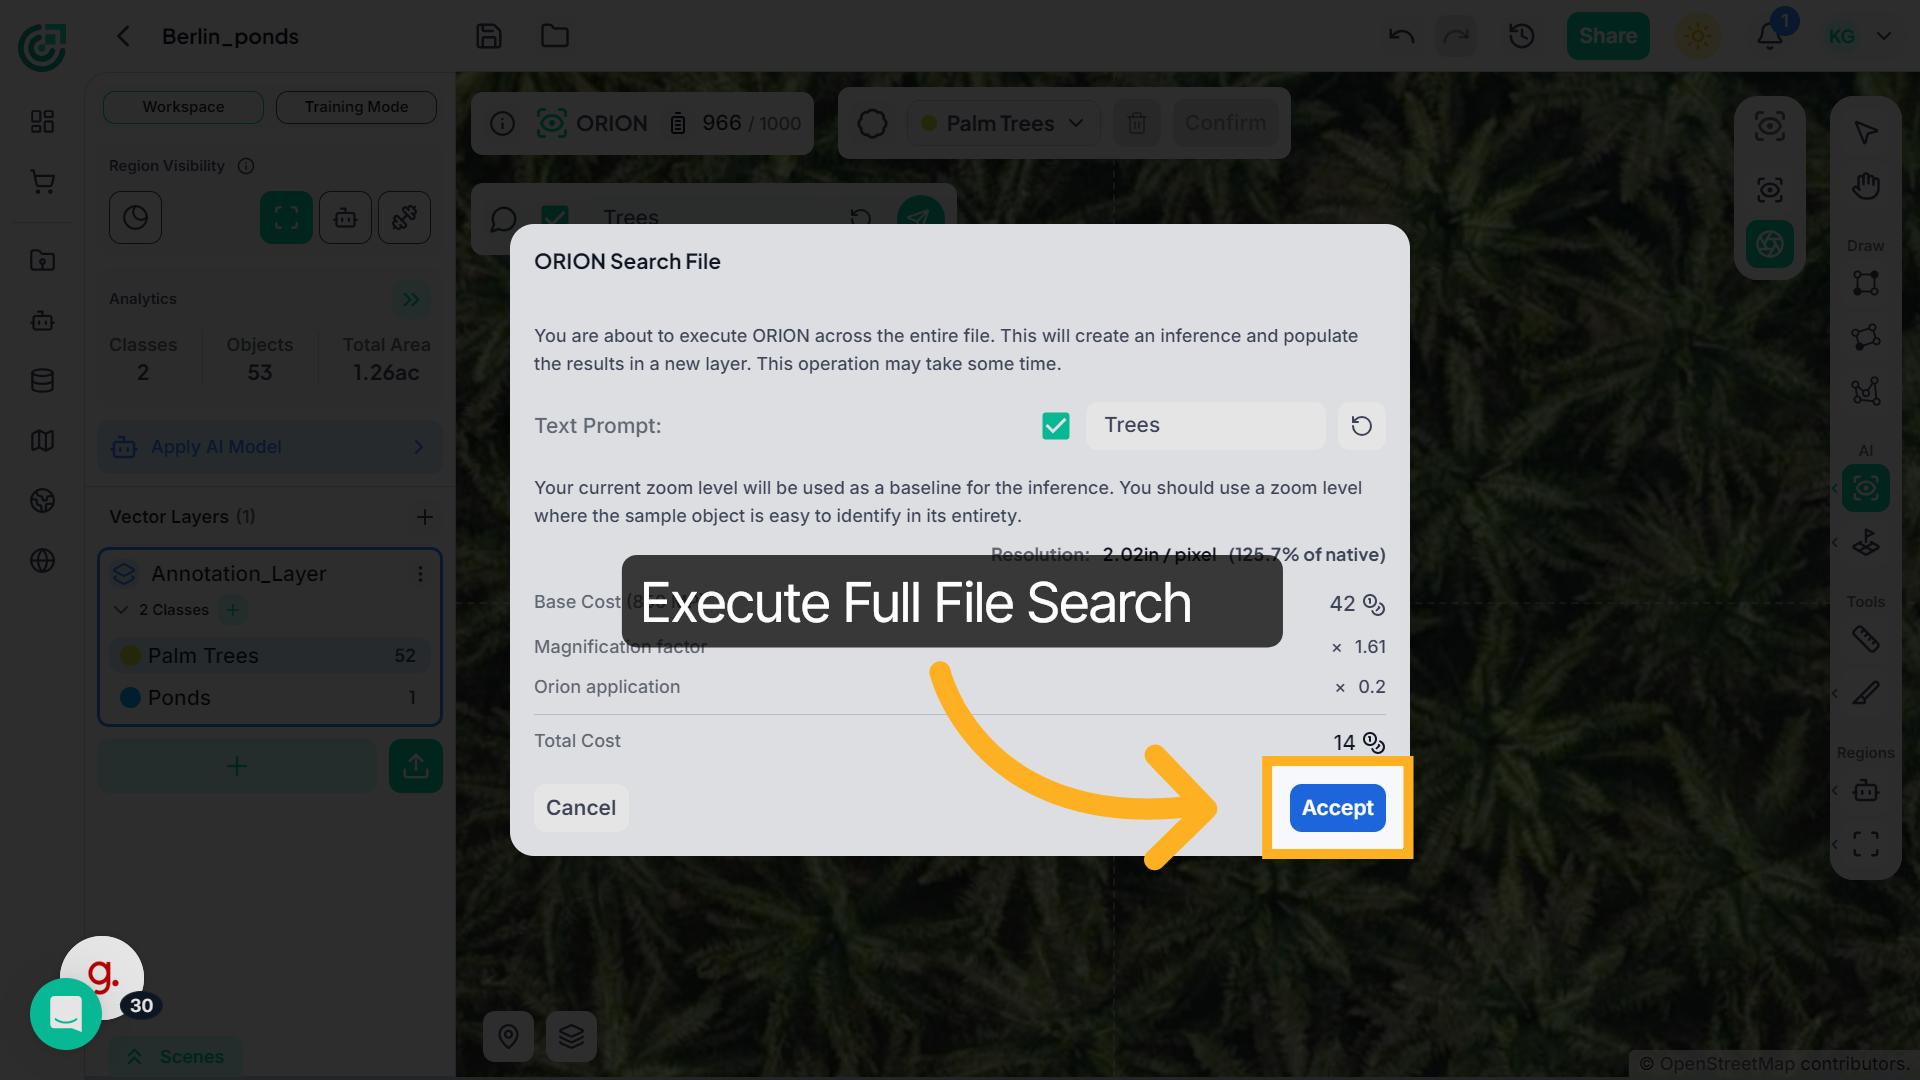
After annotating the object, the ORION Search File window appears, showing the prompt field, resolution, and estimated credit cost before execution.
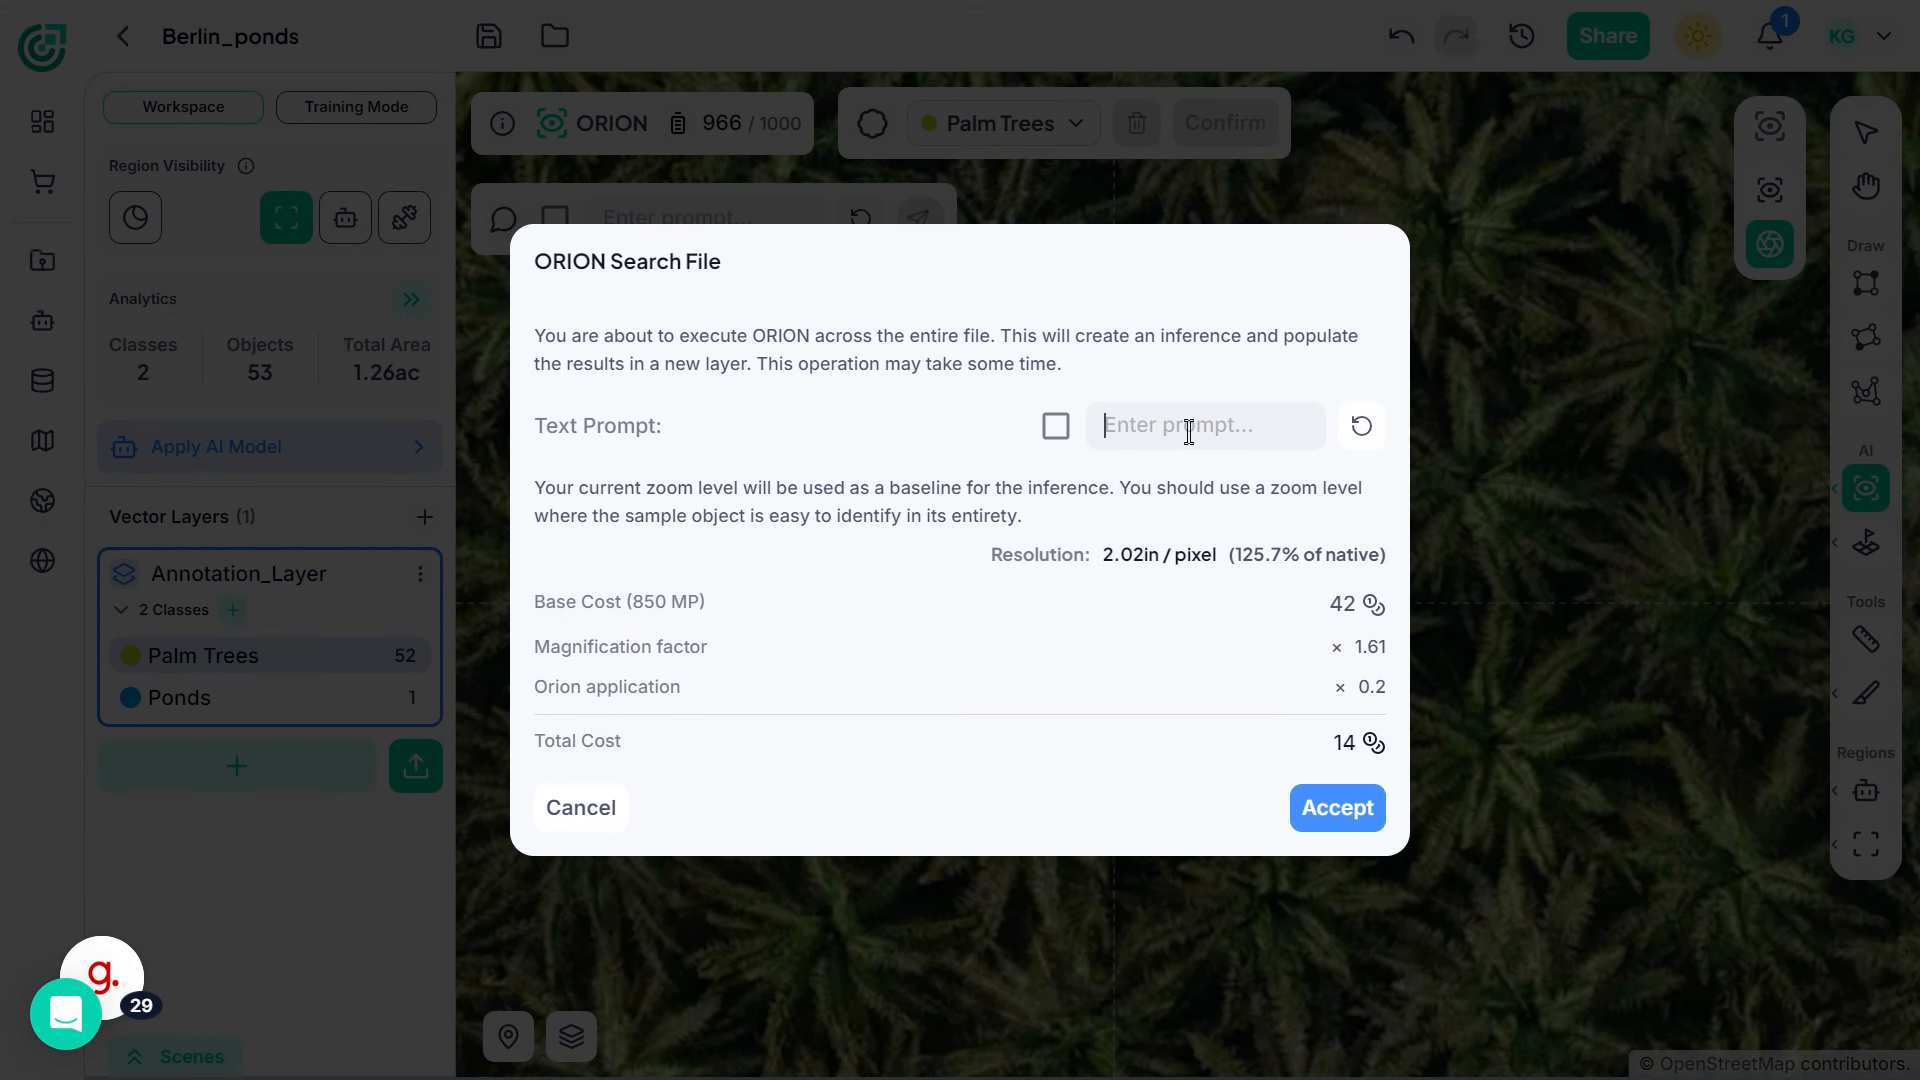
17. Add Text Prompt for Full File
If you want to refine the detection further, click “Enter prompt” to activate the text prompt input field. This allows you to guide ORION using a descriptive keyword.
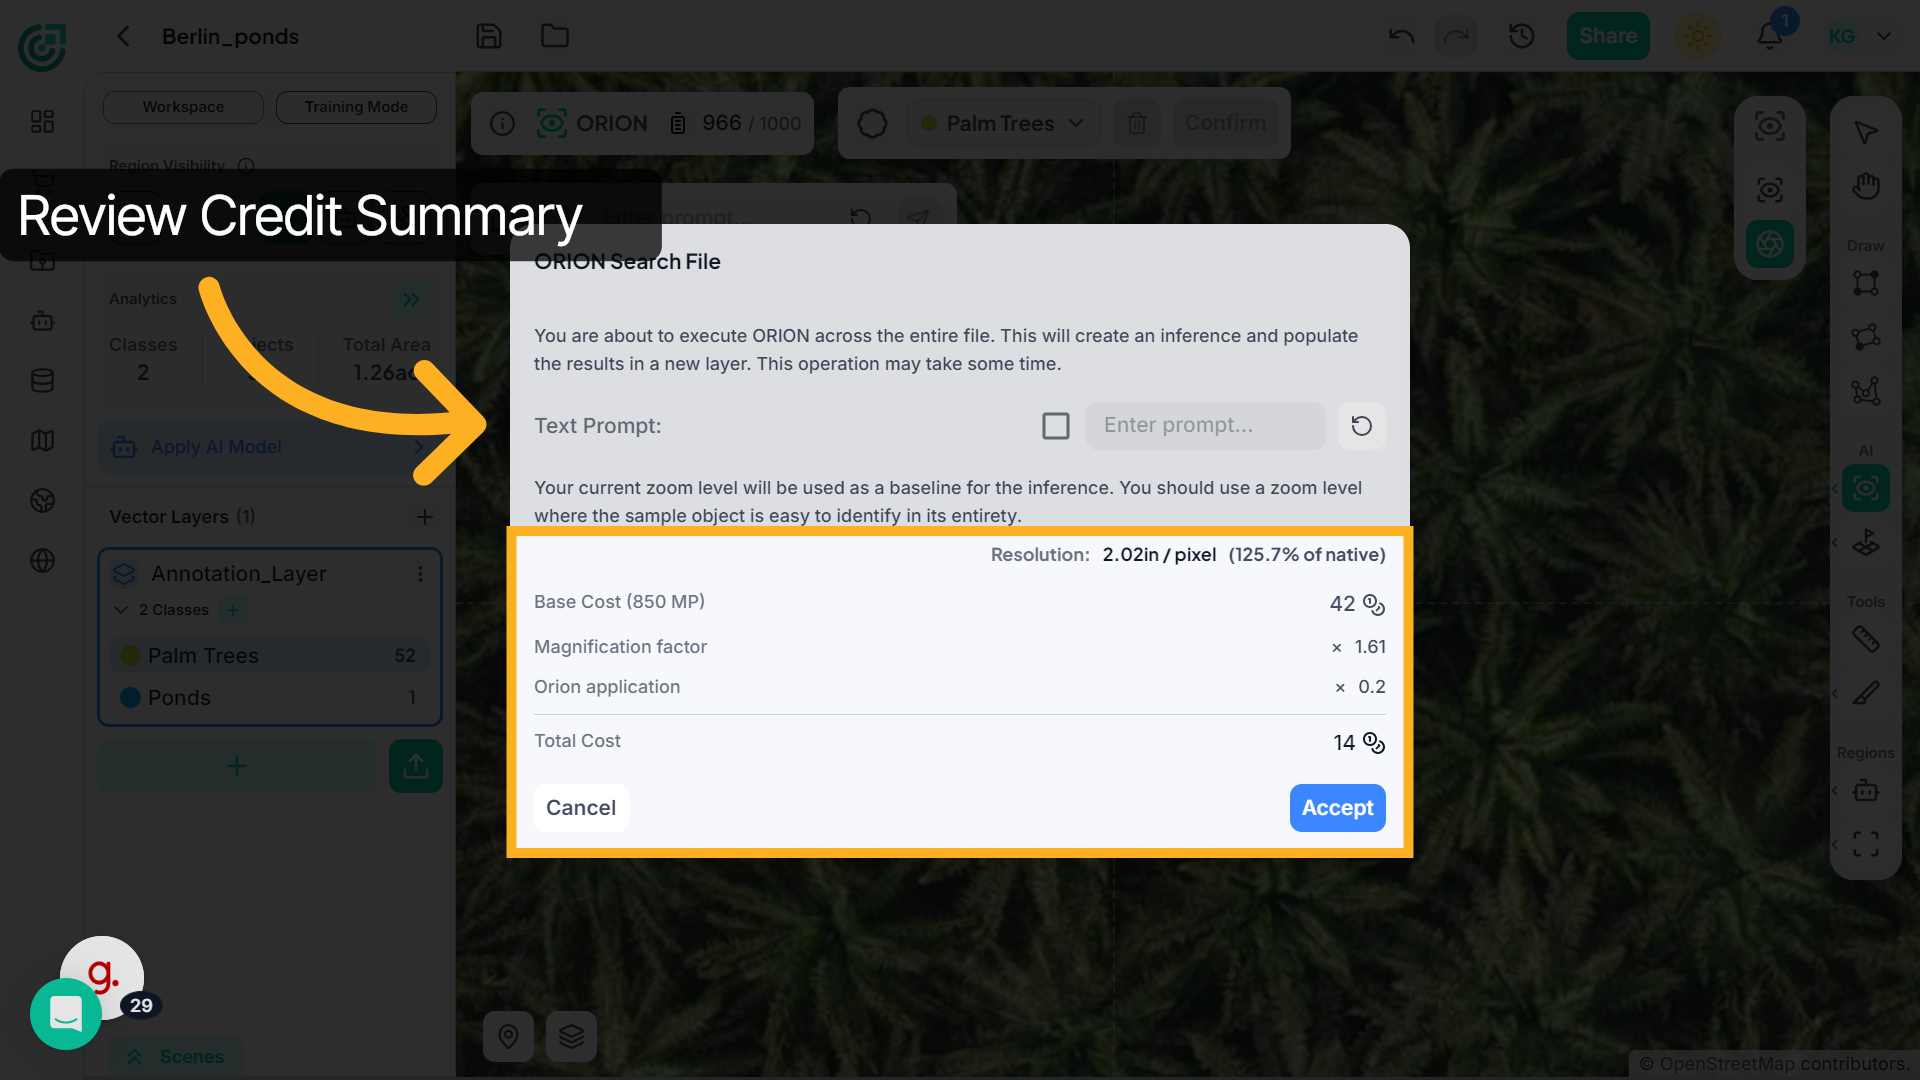
18. Review Credit Usage
When the ORION Search File window opens, the system automatically calculates and displays the estimated credit cost for executing detection across the entire file. The total credit usage is determined by the dataset size, selected resolution, magnification factor, and ORION processing multiplier. Larger files and higher processing scales will require more credits.
19. Execute Full-File Search
Click Accept to begin the full-file search. ORION will scan the entire dataset.
20. Inference Layer Creation
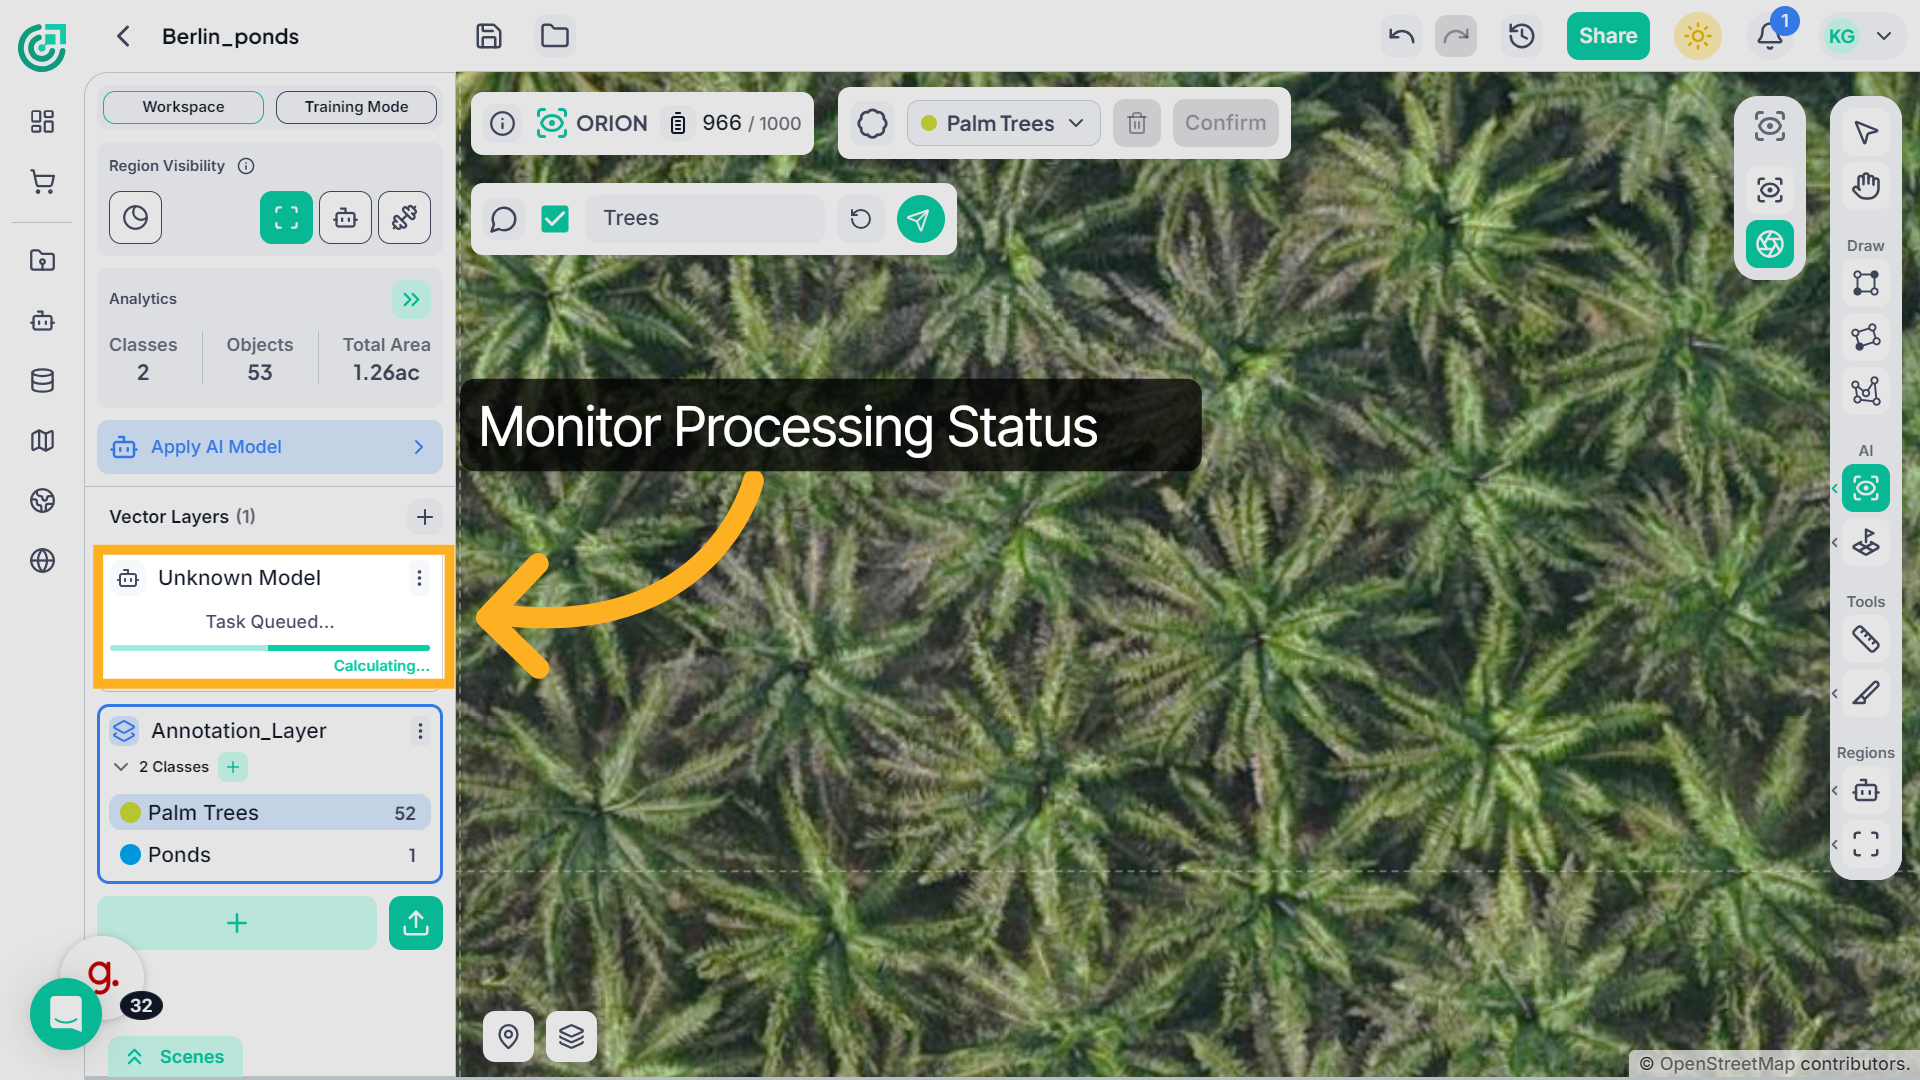
ORION begins processing the entire file. A new inference layer is created automatically, and detected objects are populated across the dataset once processing completes.
21. Review Final Results
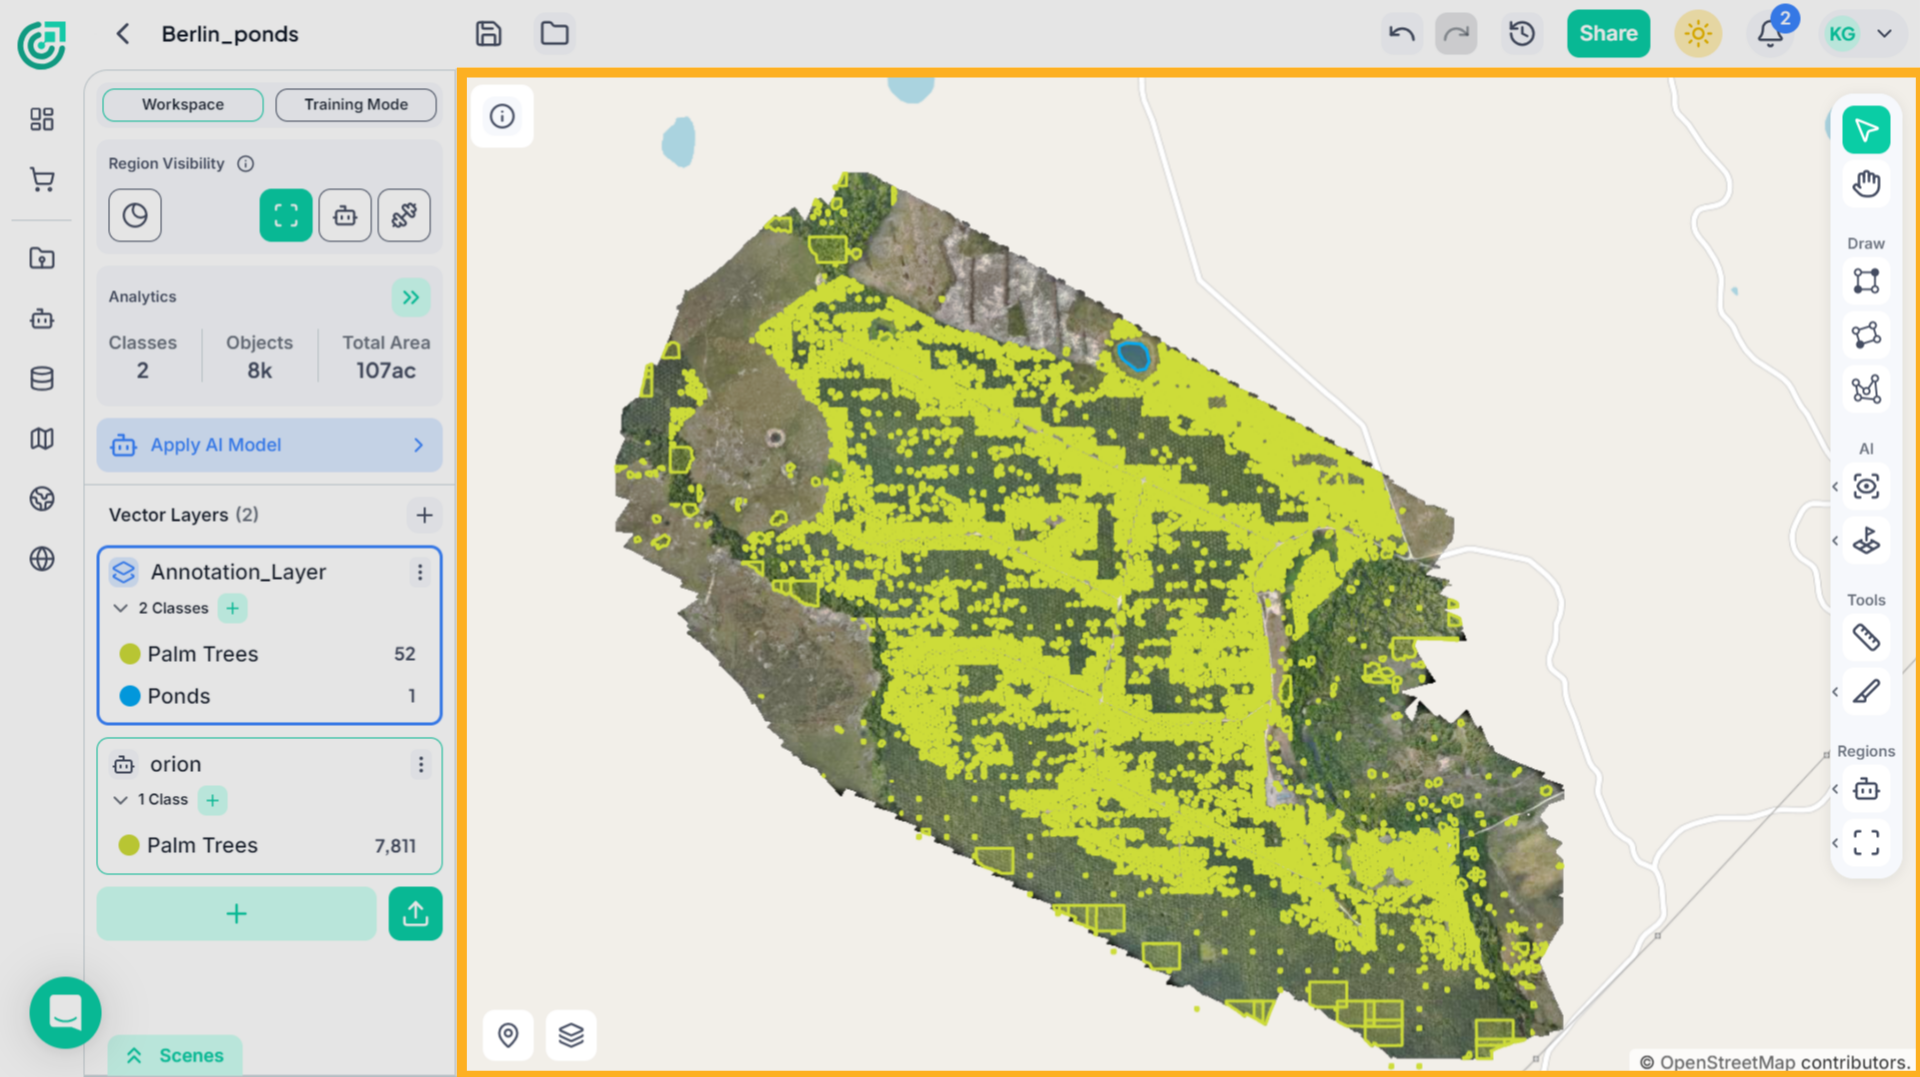
Now, after the process is complete, the detected objects appear directly on the imagery within a newly created inference layer. You will see the annotations overlaid across the relevant scenes, allowing you to review, confirm, or refine the results as needed.
This demo highlights how FlyPix AI streamlines workspace management by enabling efficient annotation selection, prompt input, and task confirmation. Experience how these features enhance your productivity and simplify complex workflows.