Train AI Model Workflow Using FlyPix AI Platform
This product demo showcases how to train an AI model using the FlyPix AI platform.
Go to app.flypix.ai
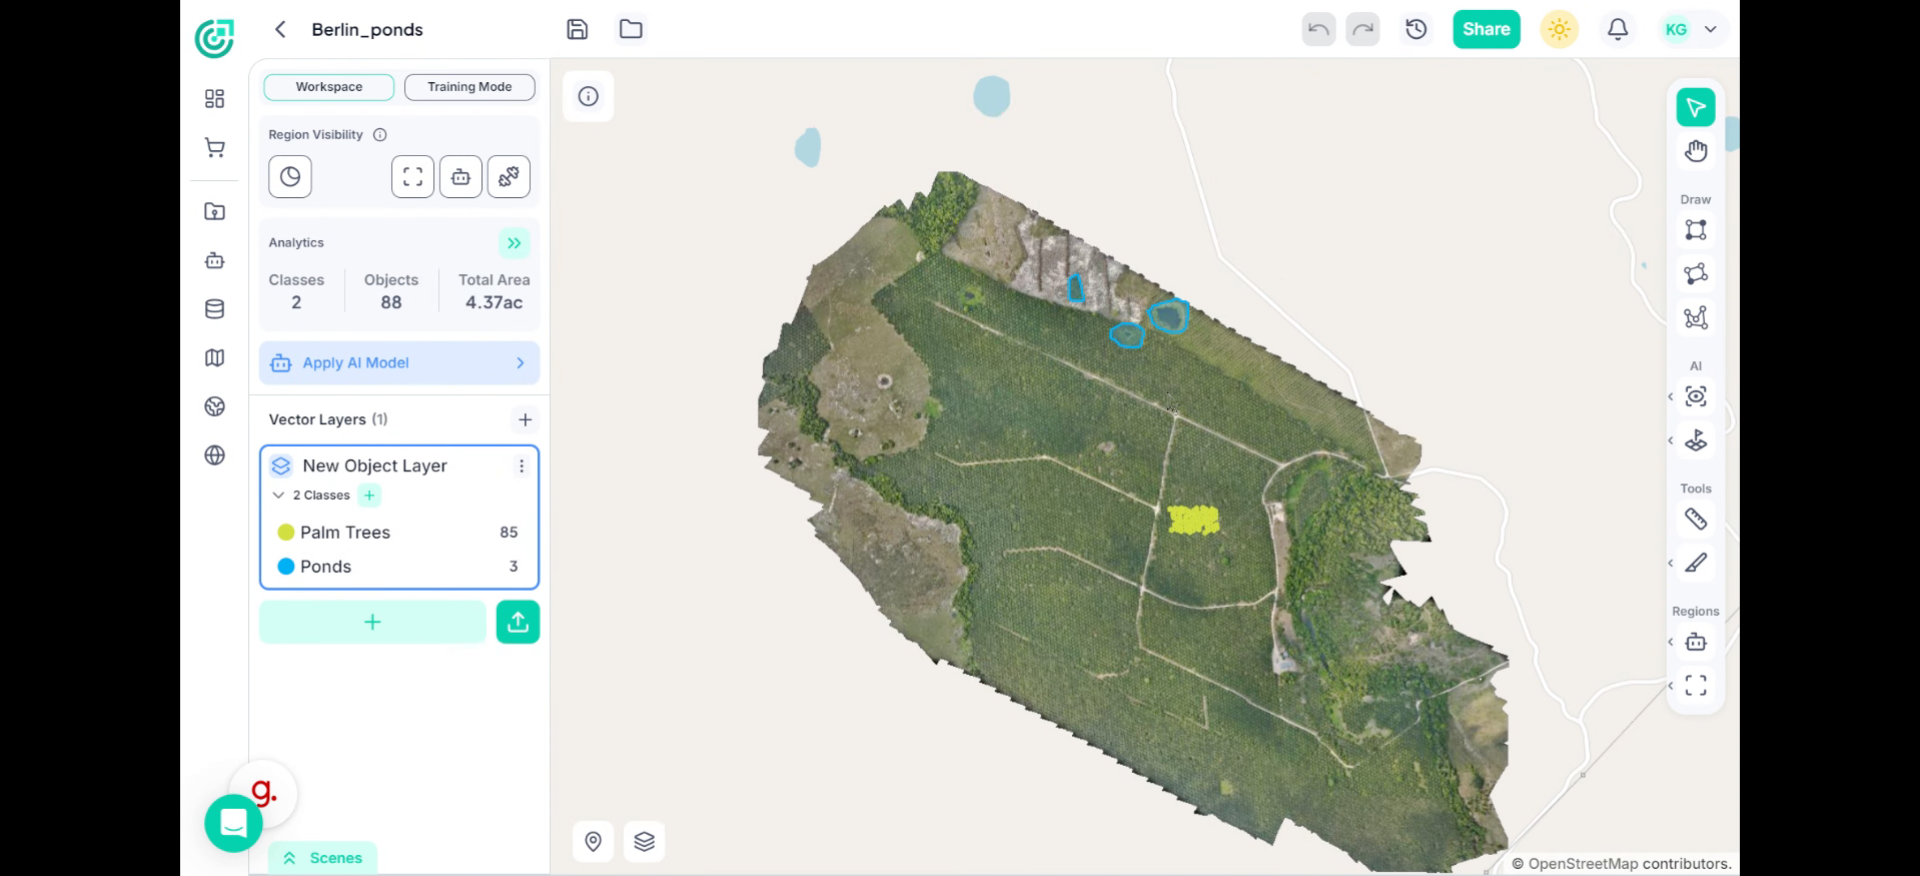
1. Introduction
You will see how to import data, configure settings, and start the training process efficiently.
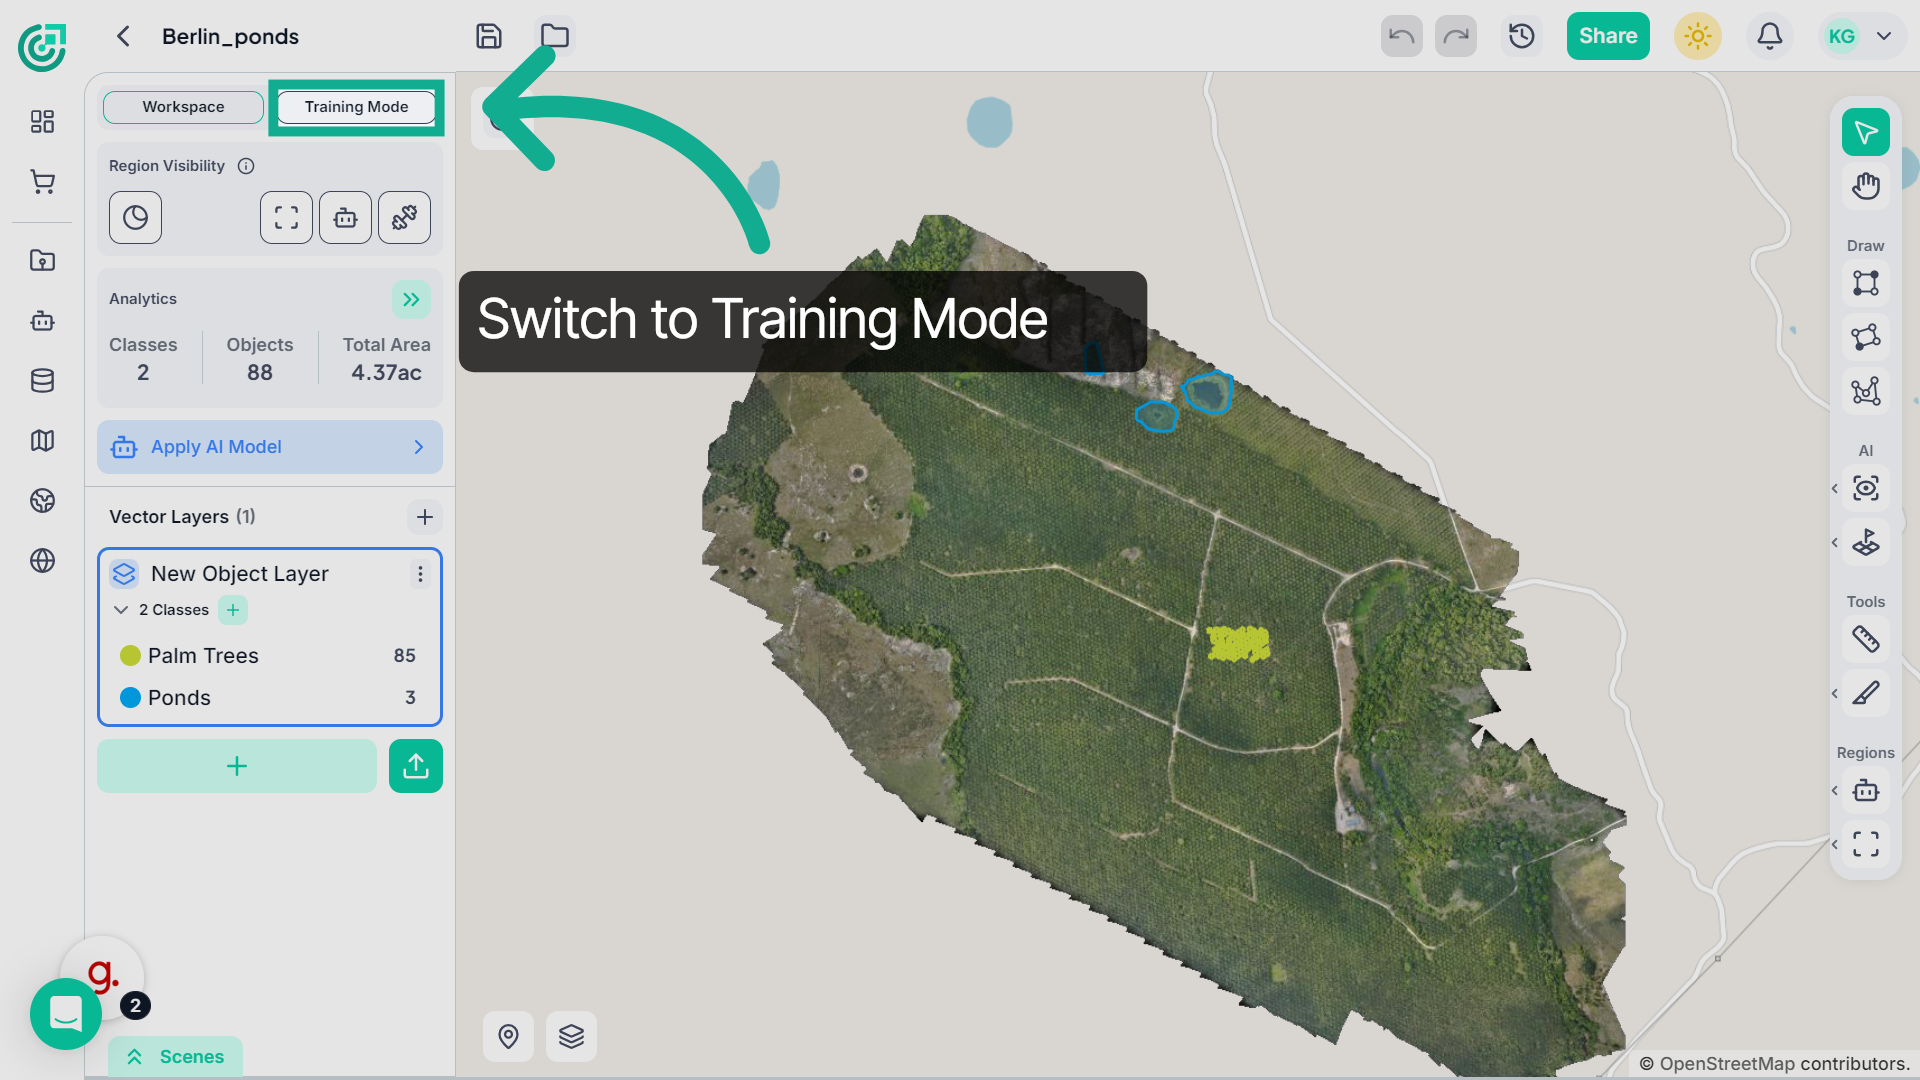
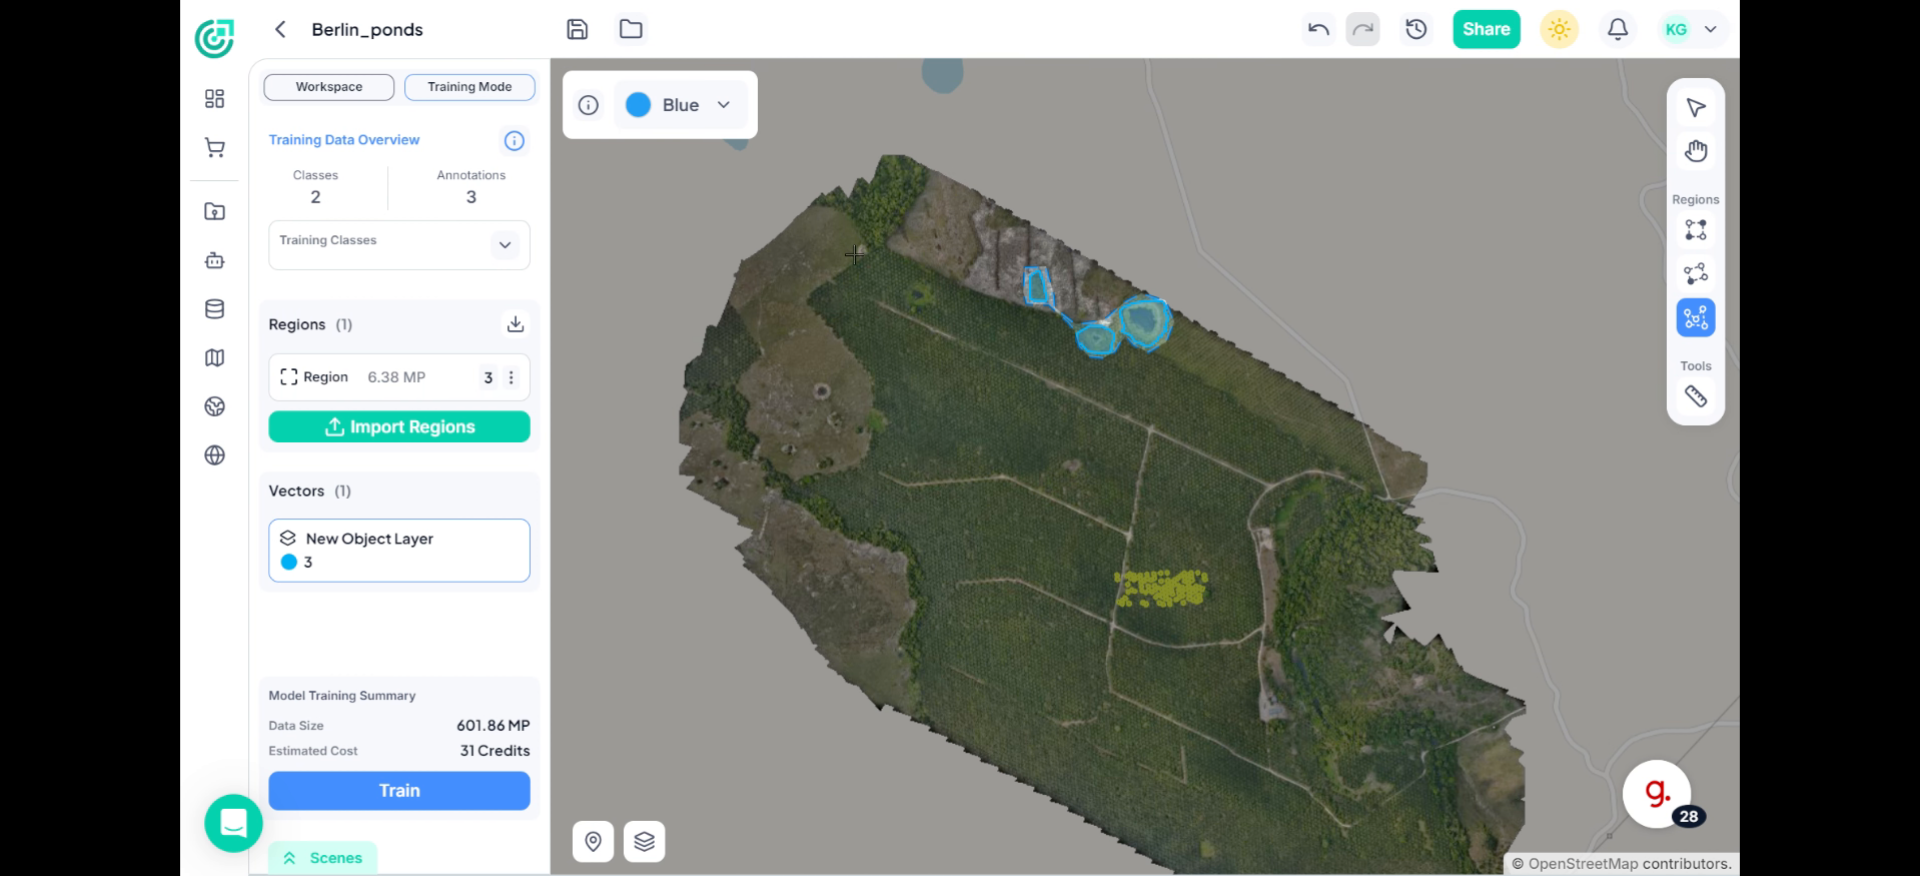
2. Enter Training Mode
Click "Training Mode" to switch the workspace into the environment designed specifically for AI model training.
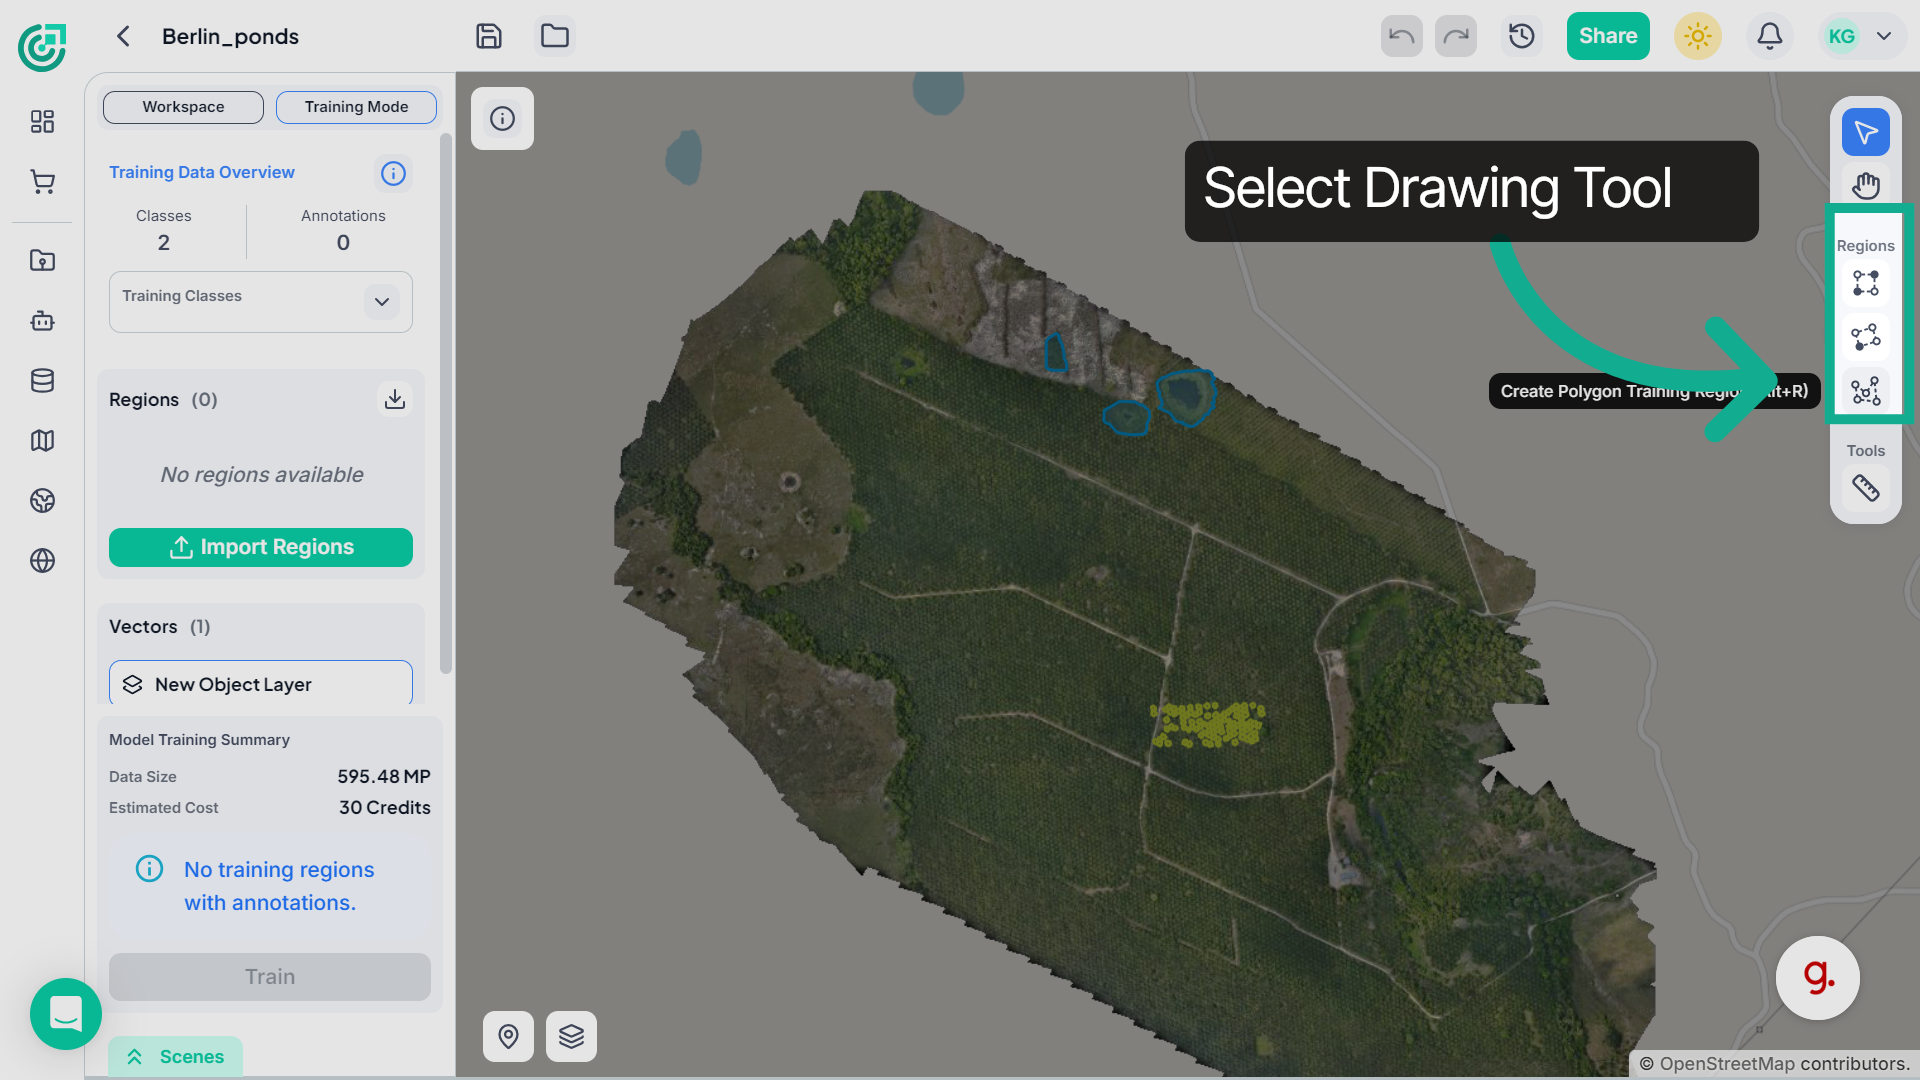
3. Navigate Workspace Interface
If required, you can create training or negative regions directly in the workspace. Select one of the "drawing tools", then define an area on the map where you want to mark a training region or a negative region.
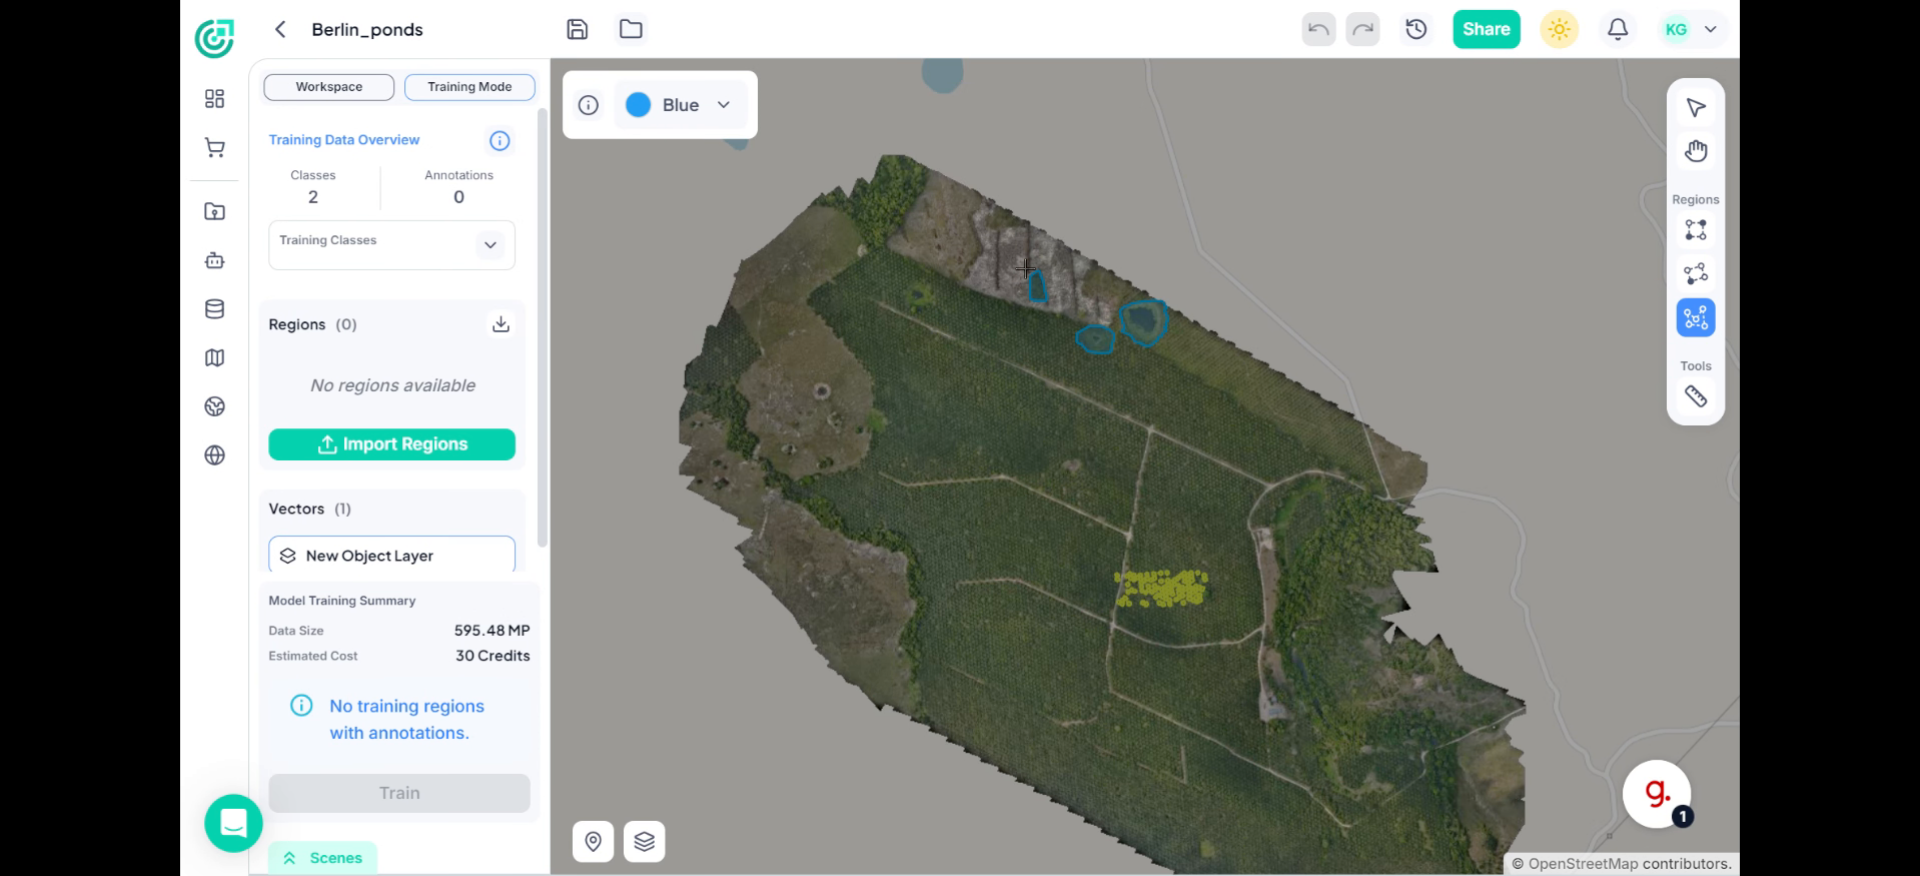
4. Annotate Objects in the Region
Within the training region, carefully annotate every object that belongs to the selected training class. Each labeled object provides an example that helps the AI model understand what it needs to detect. It is important that all objects of that class appearing inside the region are annotated. If some objects are left unlabeled, the model may interpret them as background instead of valid targets. This can confuse the model during training and significantly reduce its detection accuracy and overall performance.
5. Add Regions Without Objects
Include Regions Without Target Objects Along with regions that contain annotated objects, also create regions where no training class objects are present. These regions help the model learn what background areas look like and improve its ability to distinguish between actual objects and areas without objects, making the model more accurate.
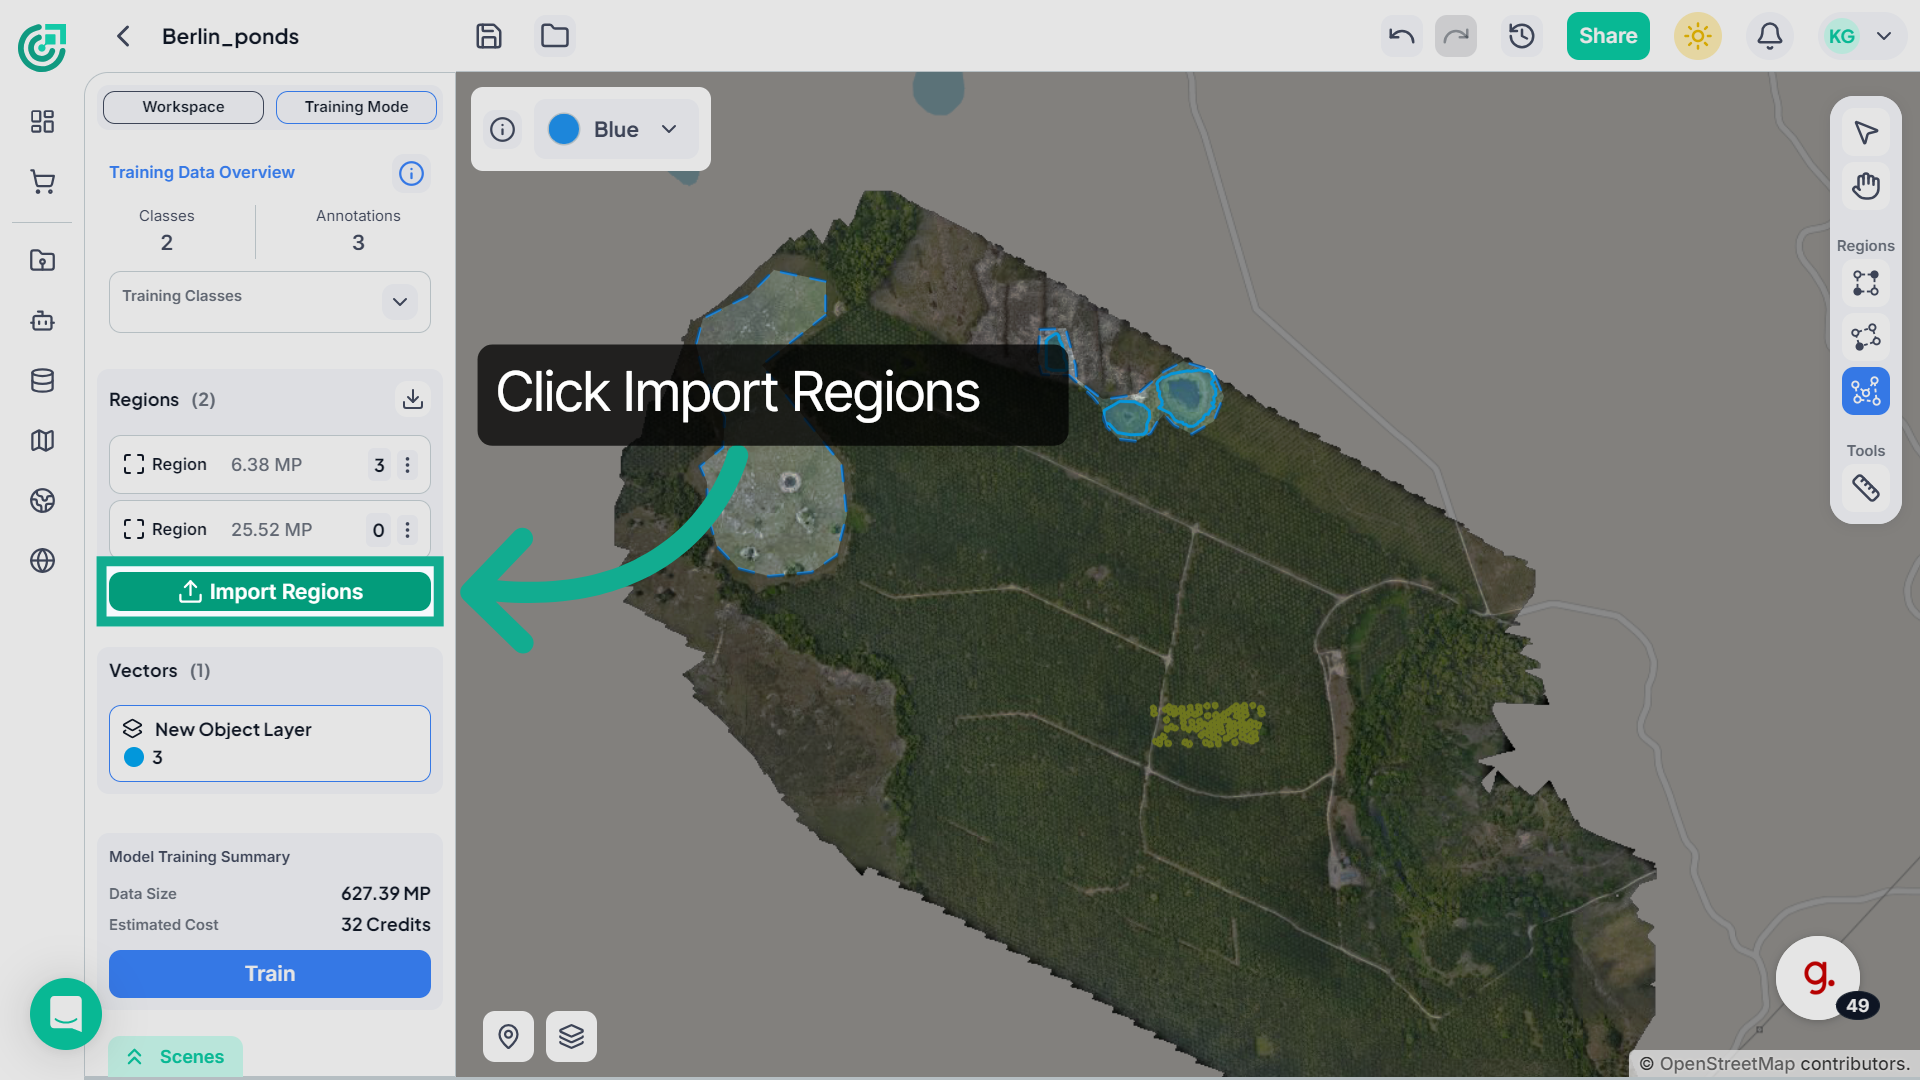
6. Import Region Data
If you already have region files prepared, click Import Regions to upload the file and add training regions directly into the workspace.
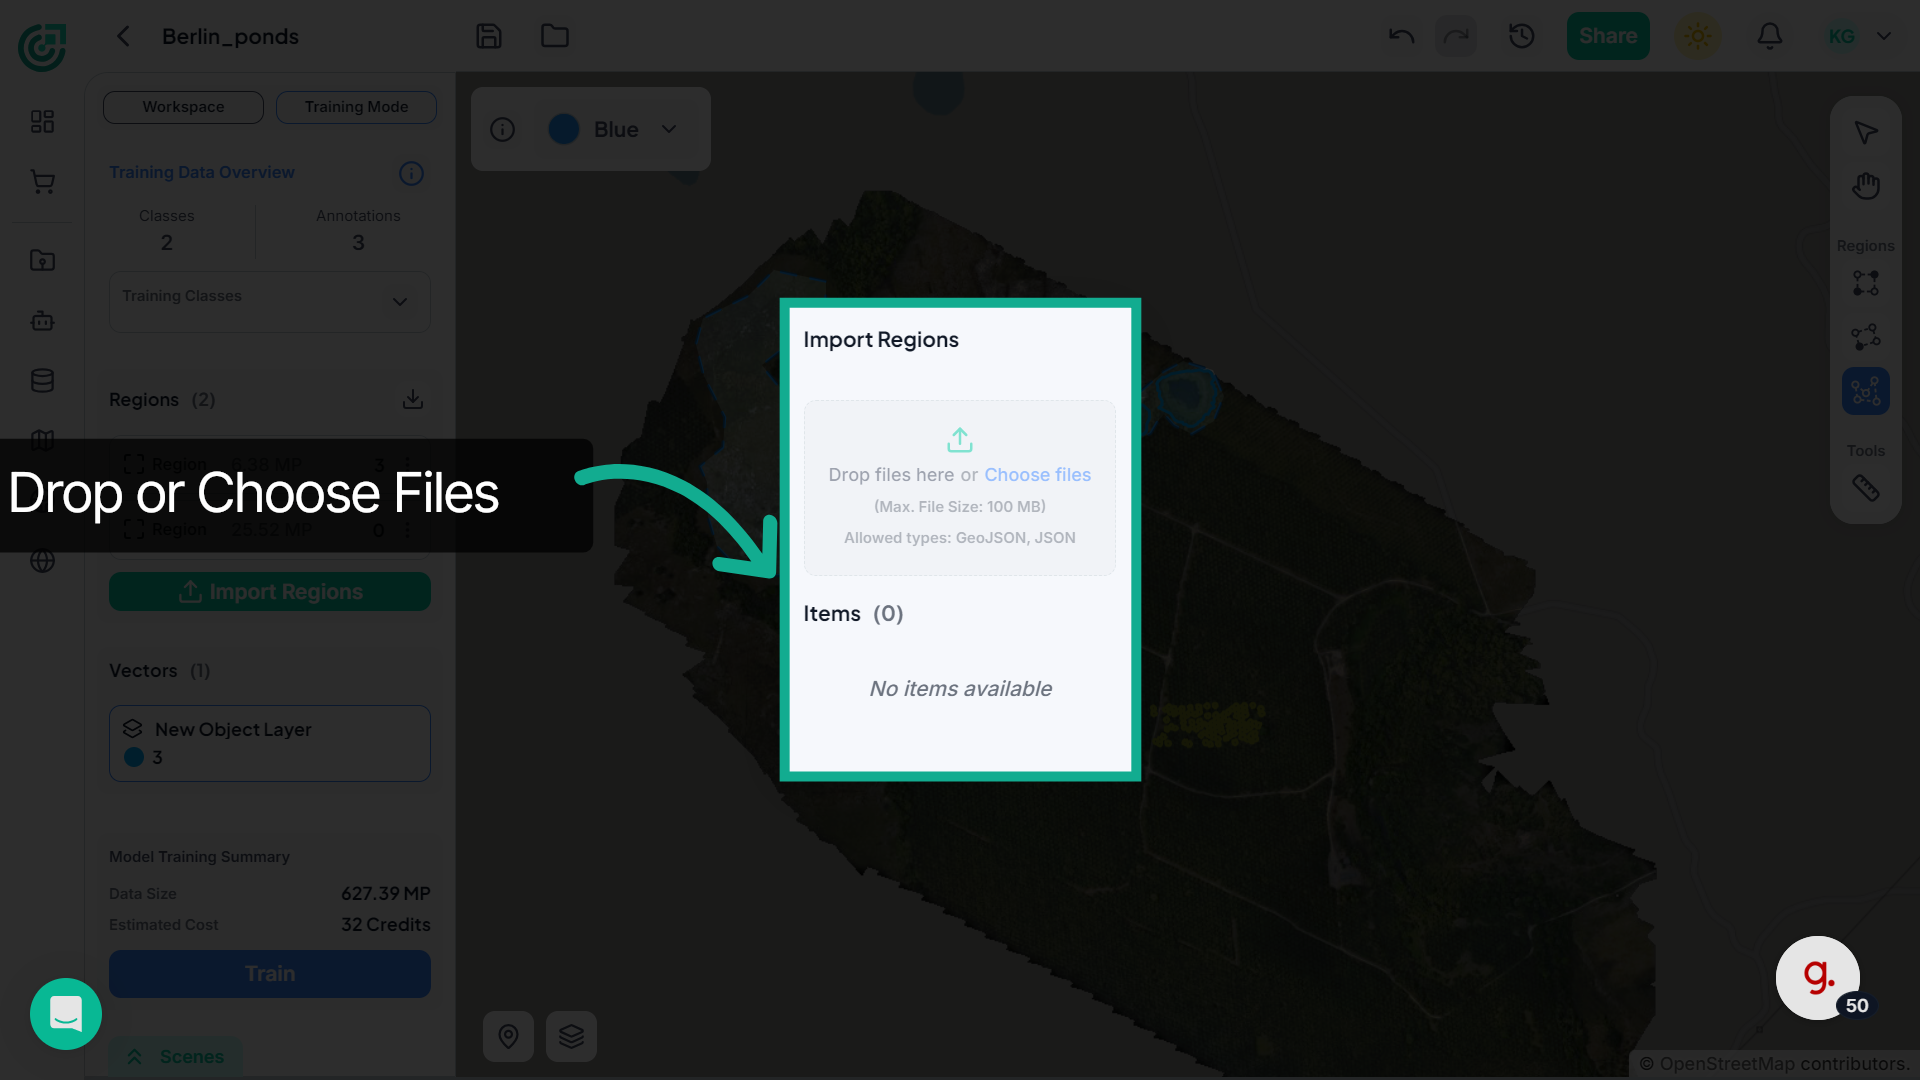
7. Choose Import Method
Drag and drop the region file or upload it from your local system to import the regions into the workspace.
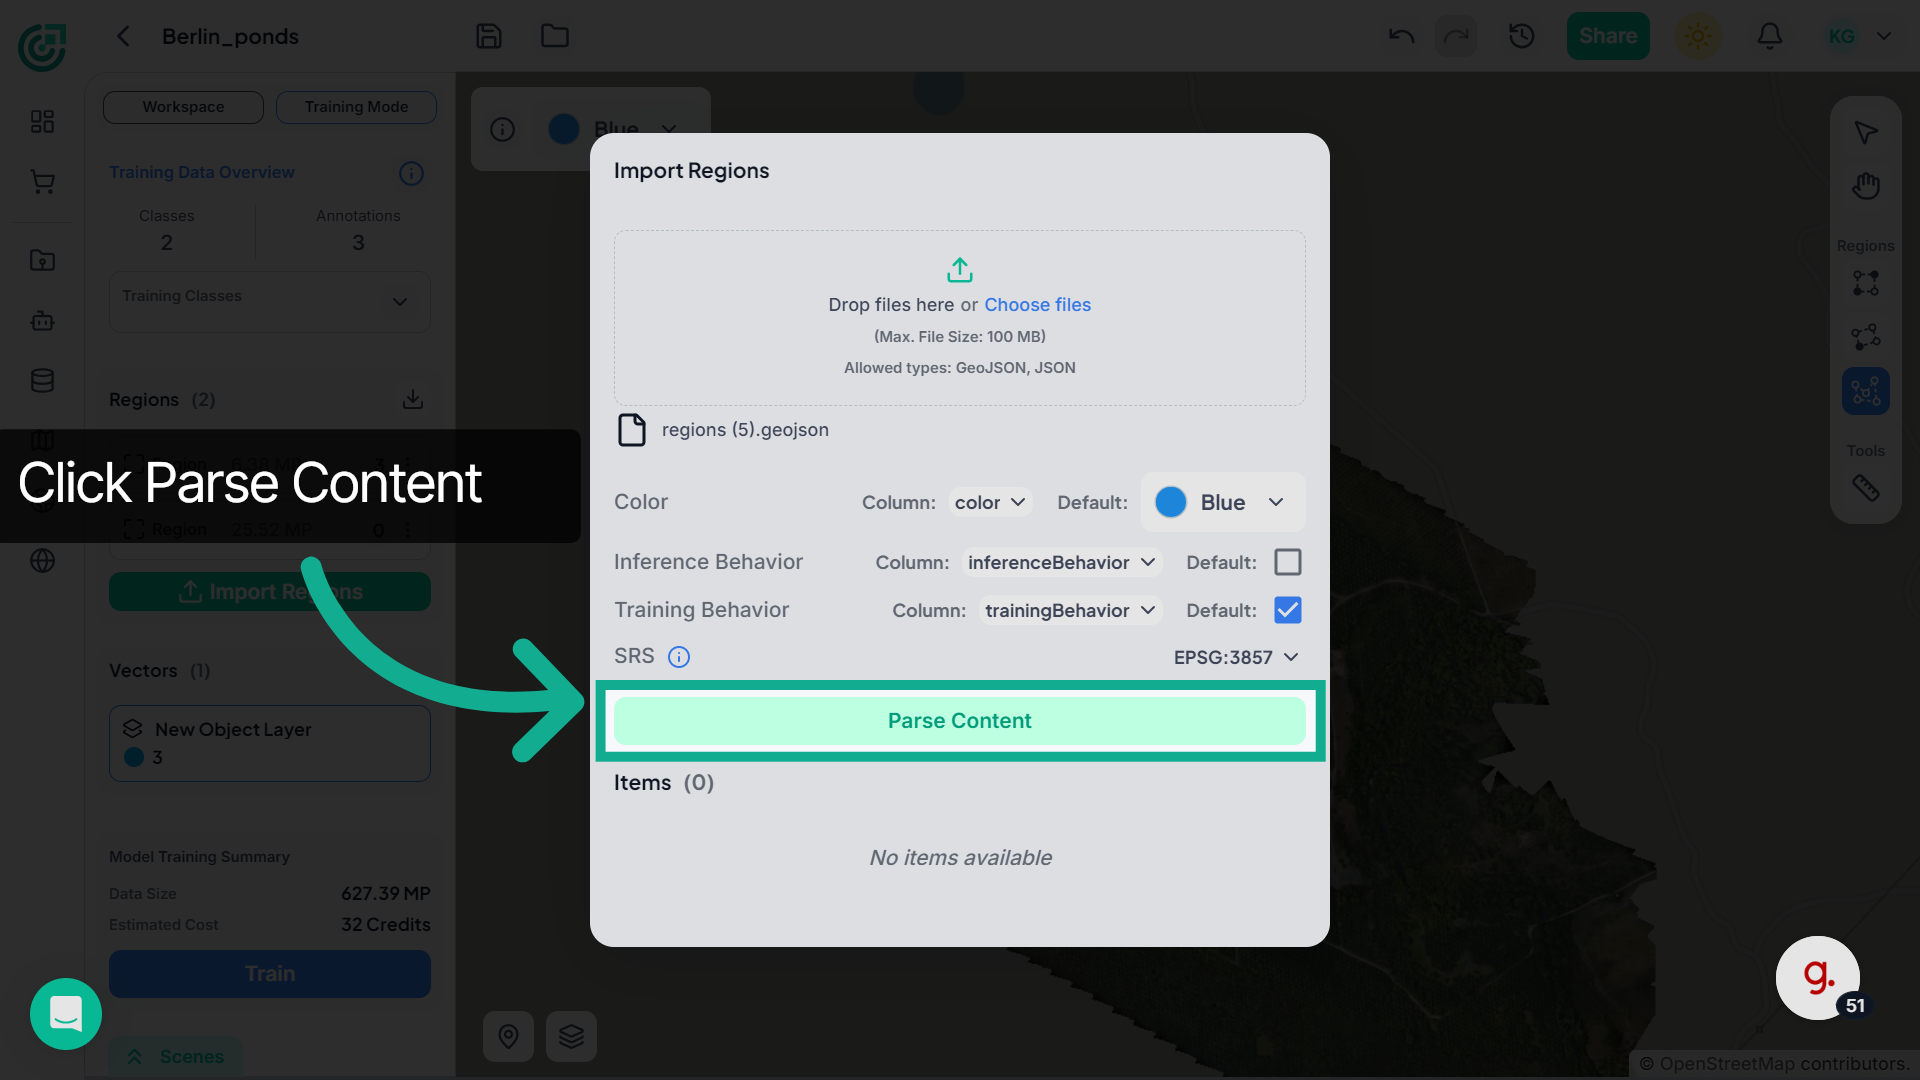
8. Parse Region Content
Once the file is uploaded, review the region settings if necessary and click Parse Content to process the file and extract the region data.
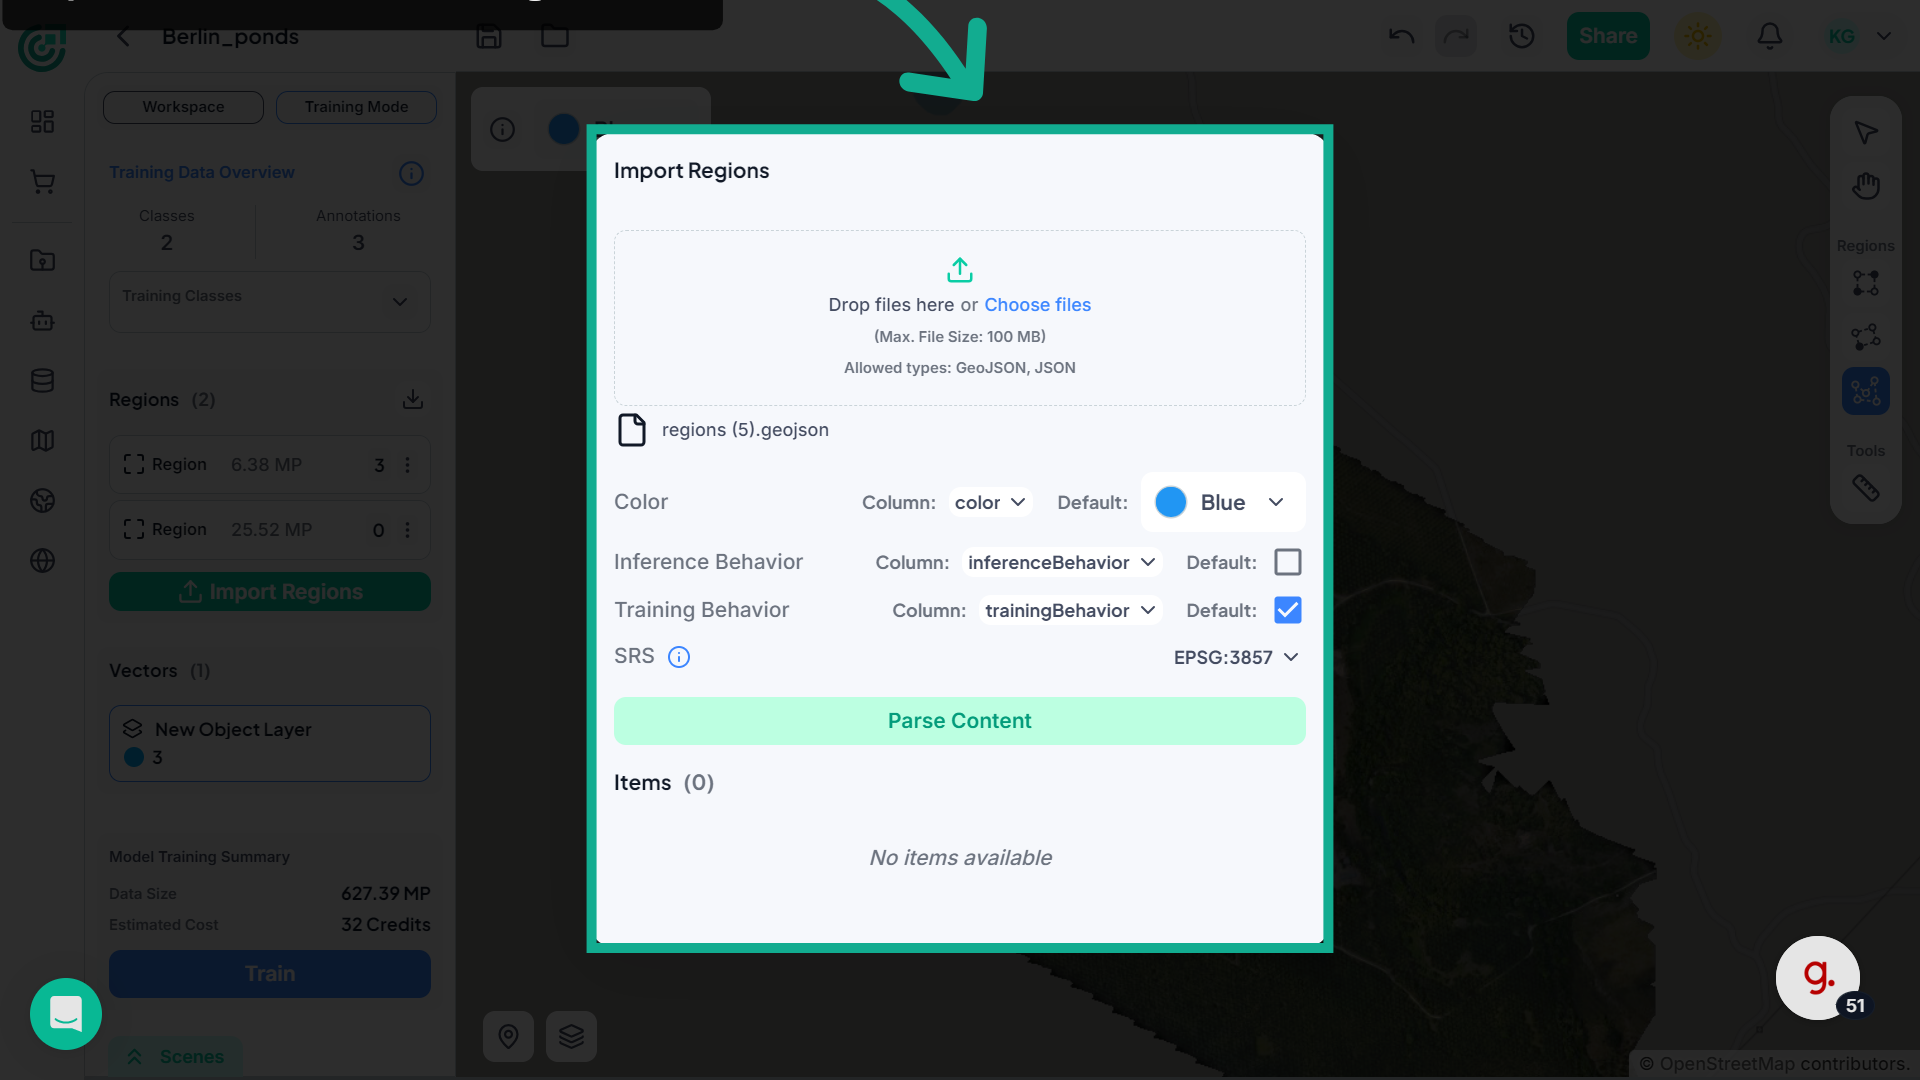
9. Parse Region Data
Click "Parse Content" to analyze and extract data from the imported region file.
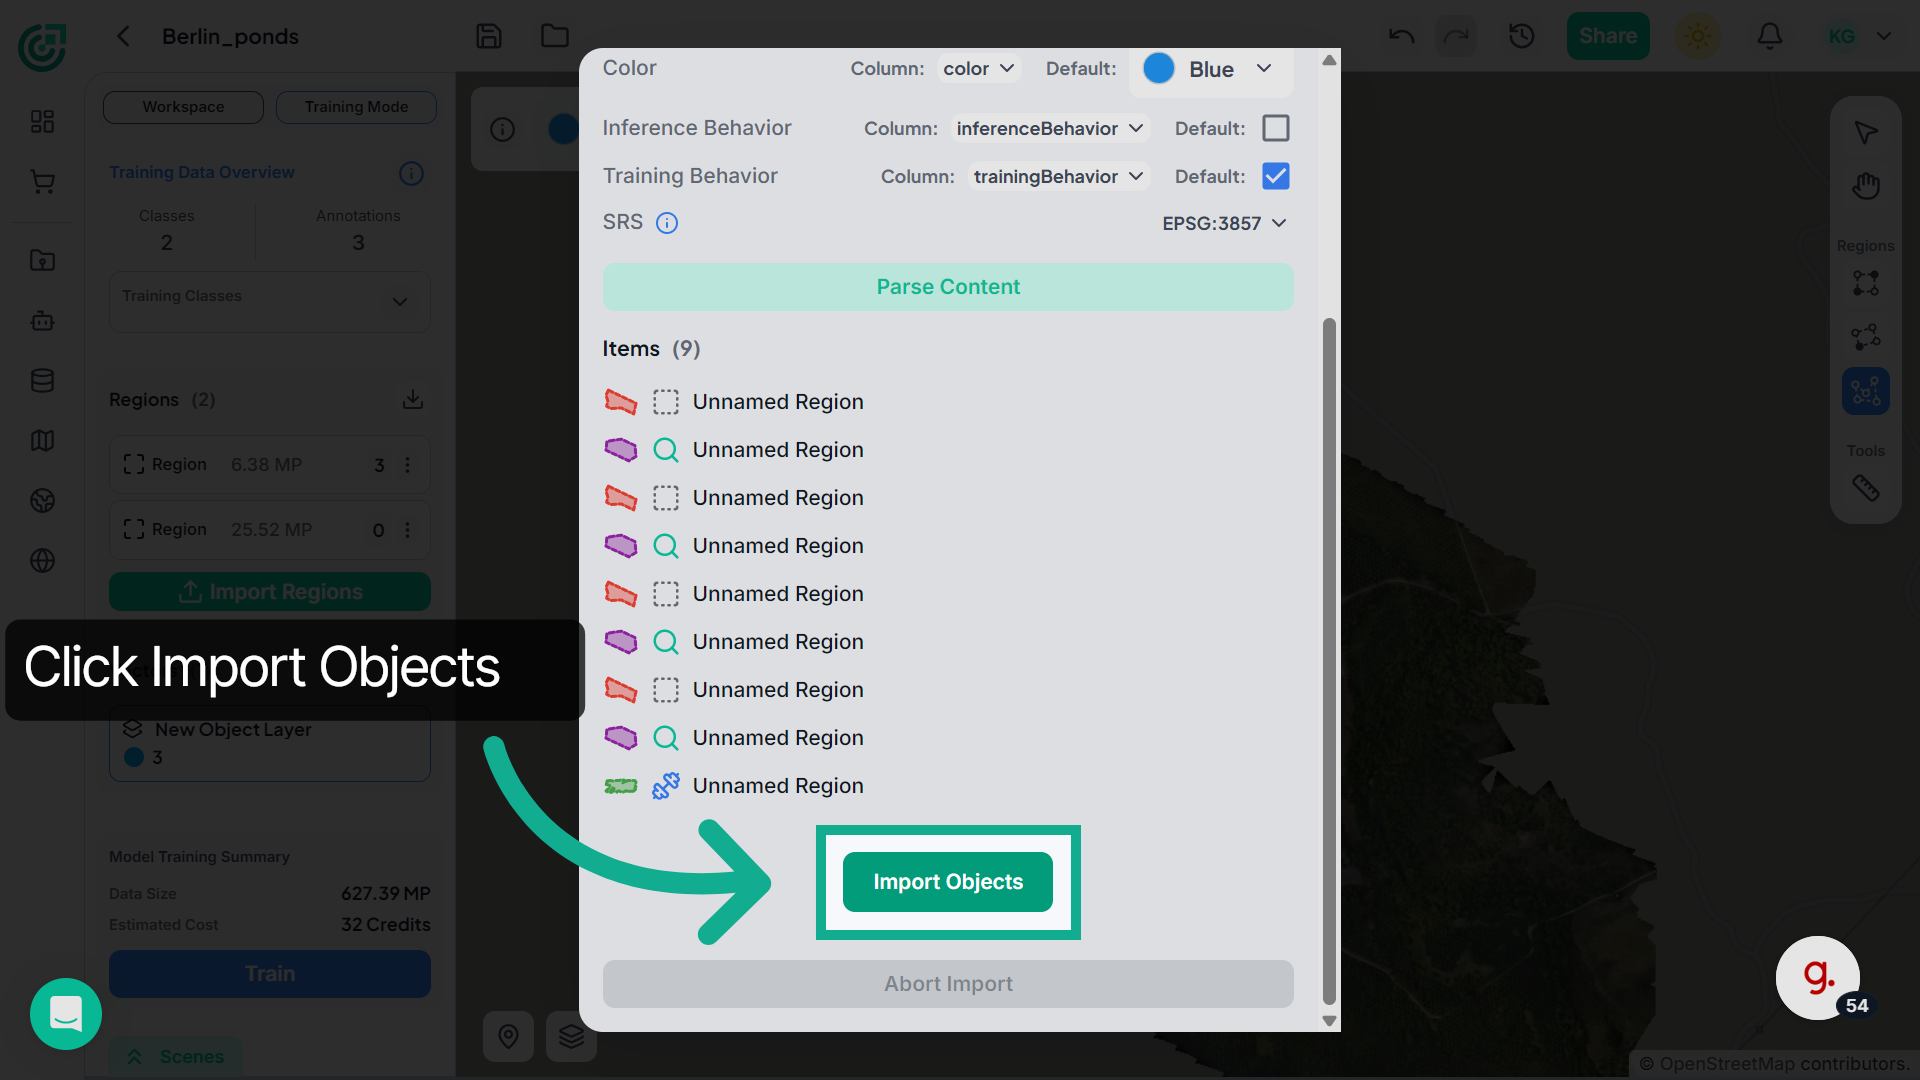
10. Select Region
After parsing is completed, the detected regions will appear in the Items list, allowing you to review the regions before importing them.

11. Import Objects
After confirming the regions, click "Import Objects" to add them into the workspace.
12. Access Import Object
Once imported, the regions will appear on the map.These regions can now be used as training data for your AI model.

13. Open Training Classes
Next, click Training Classes to view all the available classes in your training dataset.

14. Enable or Disable Classes
Here you can enable or disable specific classes depending on your training requirements.When a class is disabled, its annotations disappear from the workspace. When enabled again, the annotations reappear.

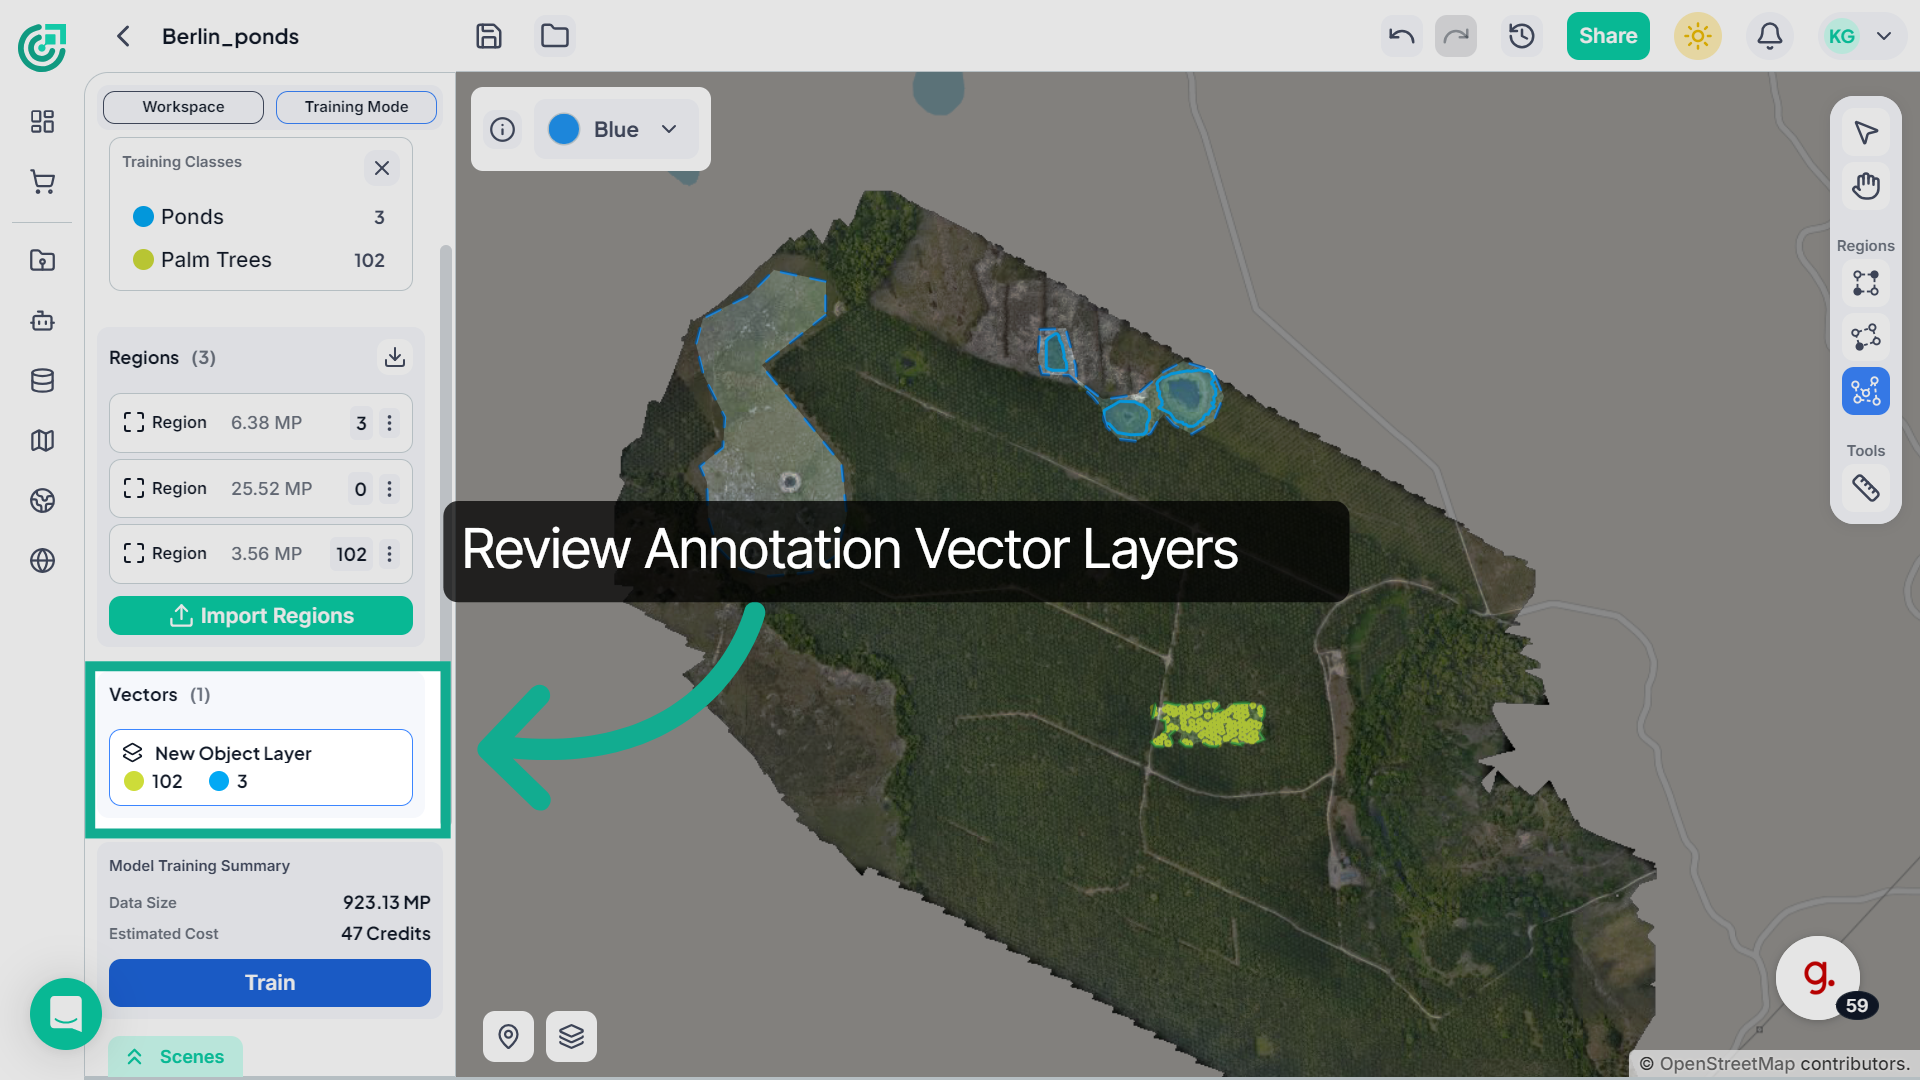
15. Review Vector Layers
Scroll down to the"Vector Layers" section. This shows the total number of labeled objects available for model training.
16. View Model Training Summary
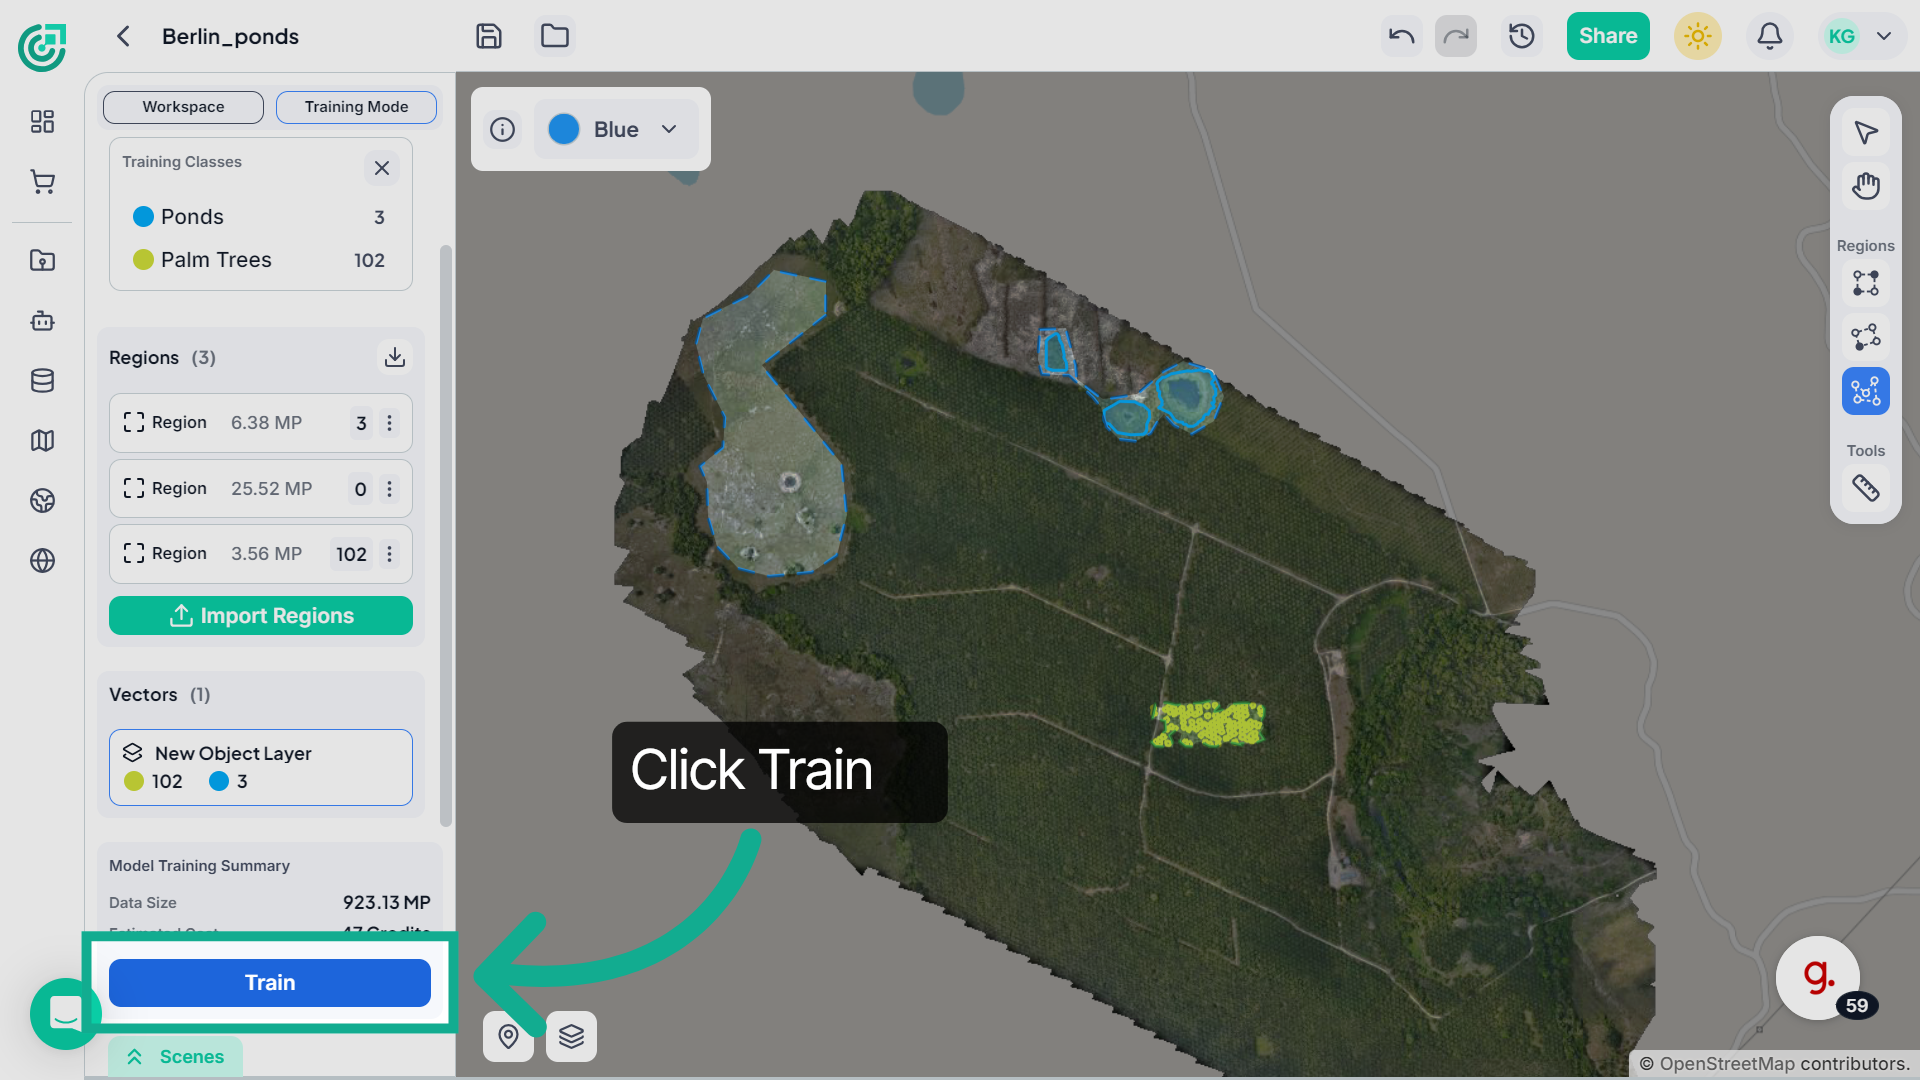
Review the Model Training Summary to check the dataset size and the estimated credit cost required for training.
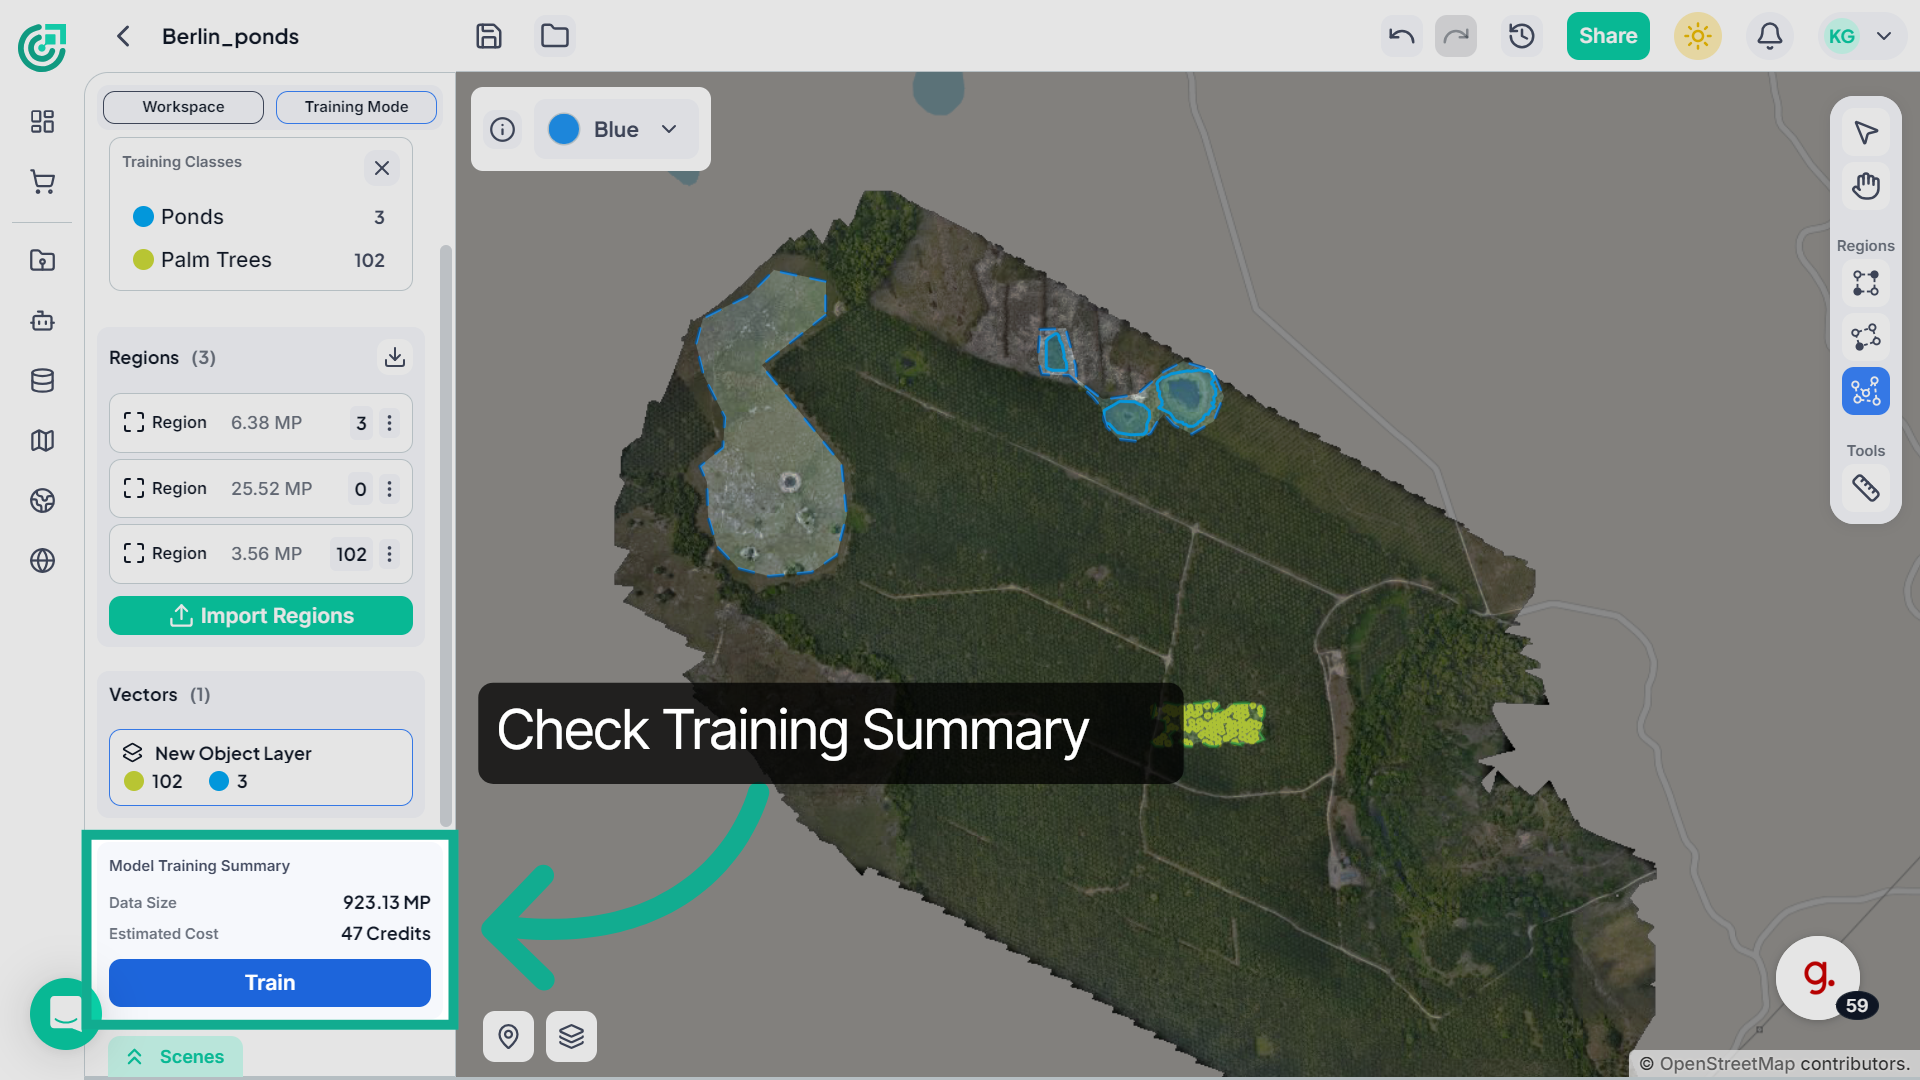
17. Start Training Process
Once everything is verified, click "Train" to begin configuring the AI model training process.
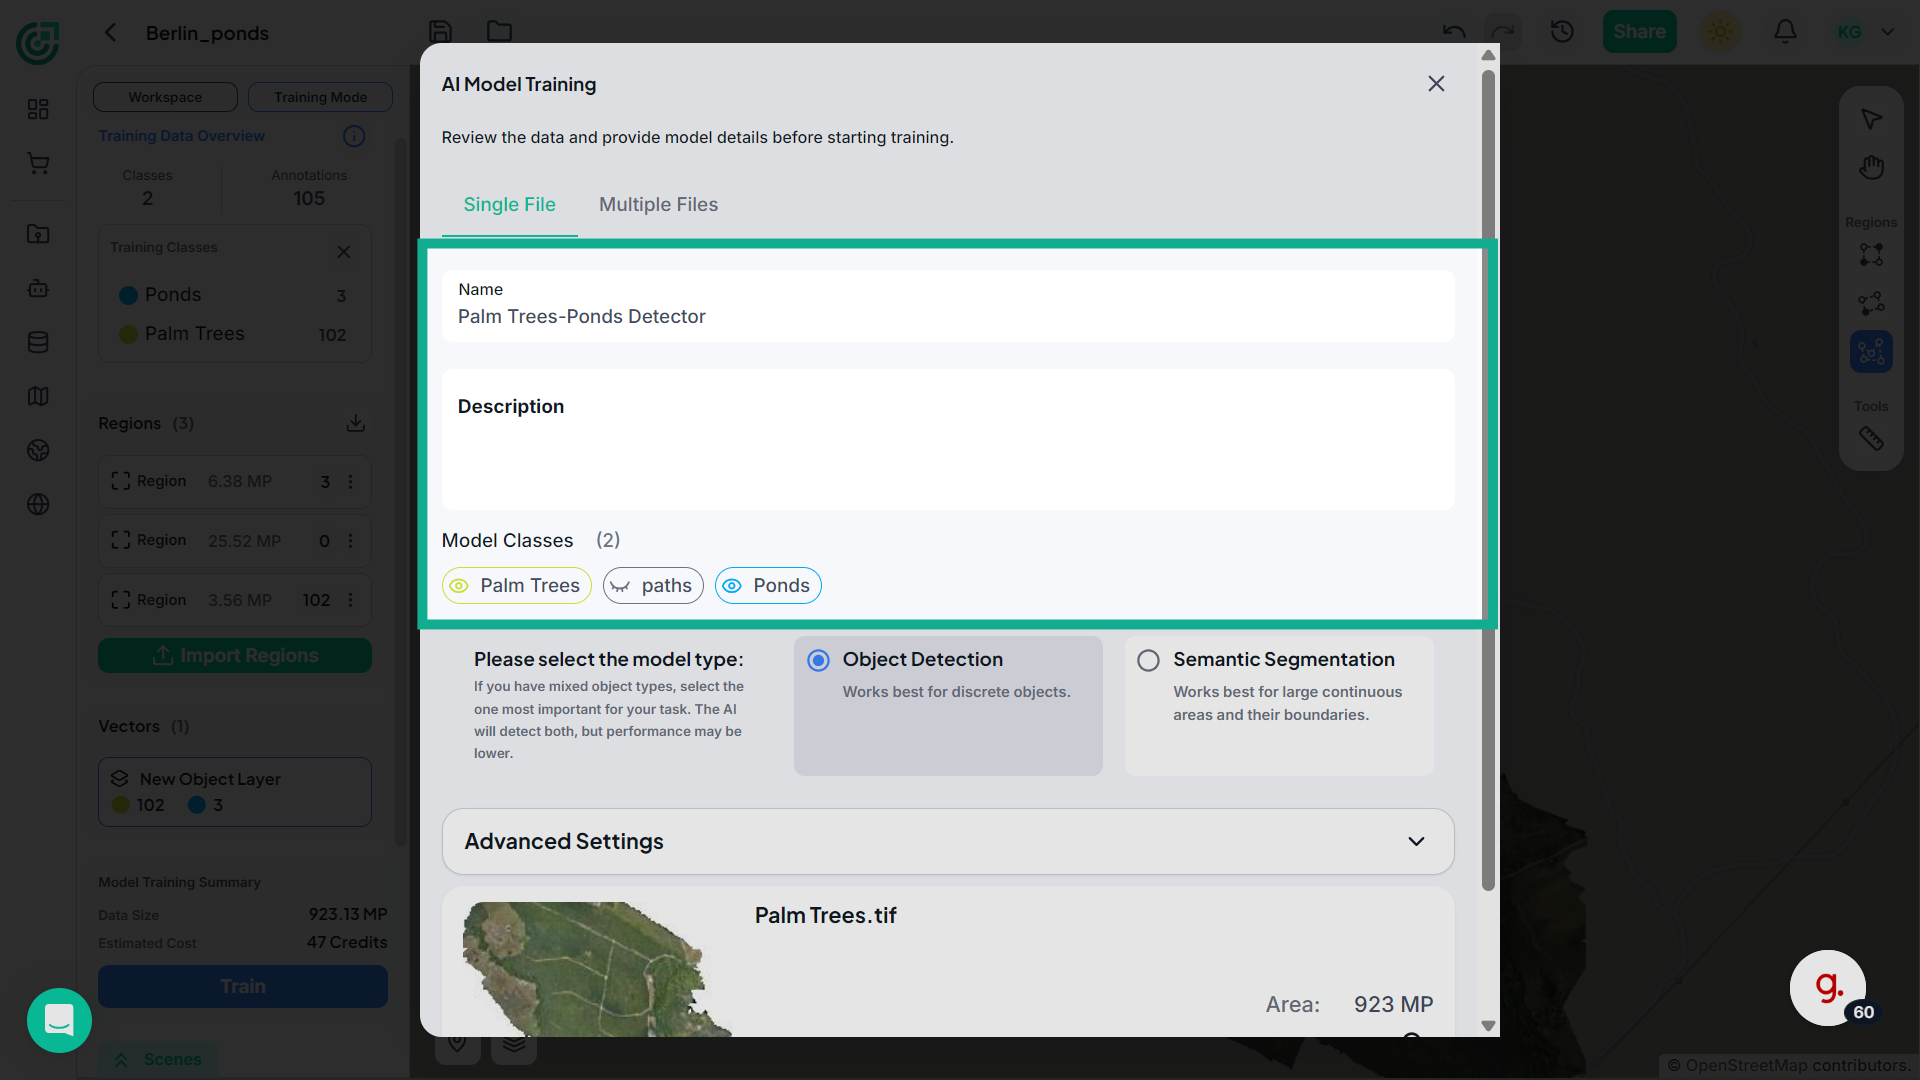
18. Review Training Details
If you want to train the model using a single file, stay in the Single File tab. Here you can review the selected file, check the dataset area, and proceed with training.

19. Configure Model Details
Enter a model name, add a description, and choose which classes should be included in the training process.
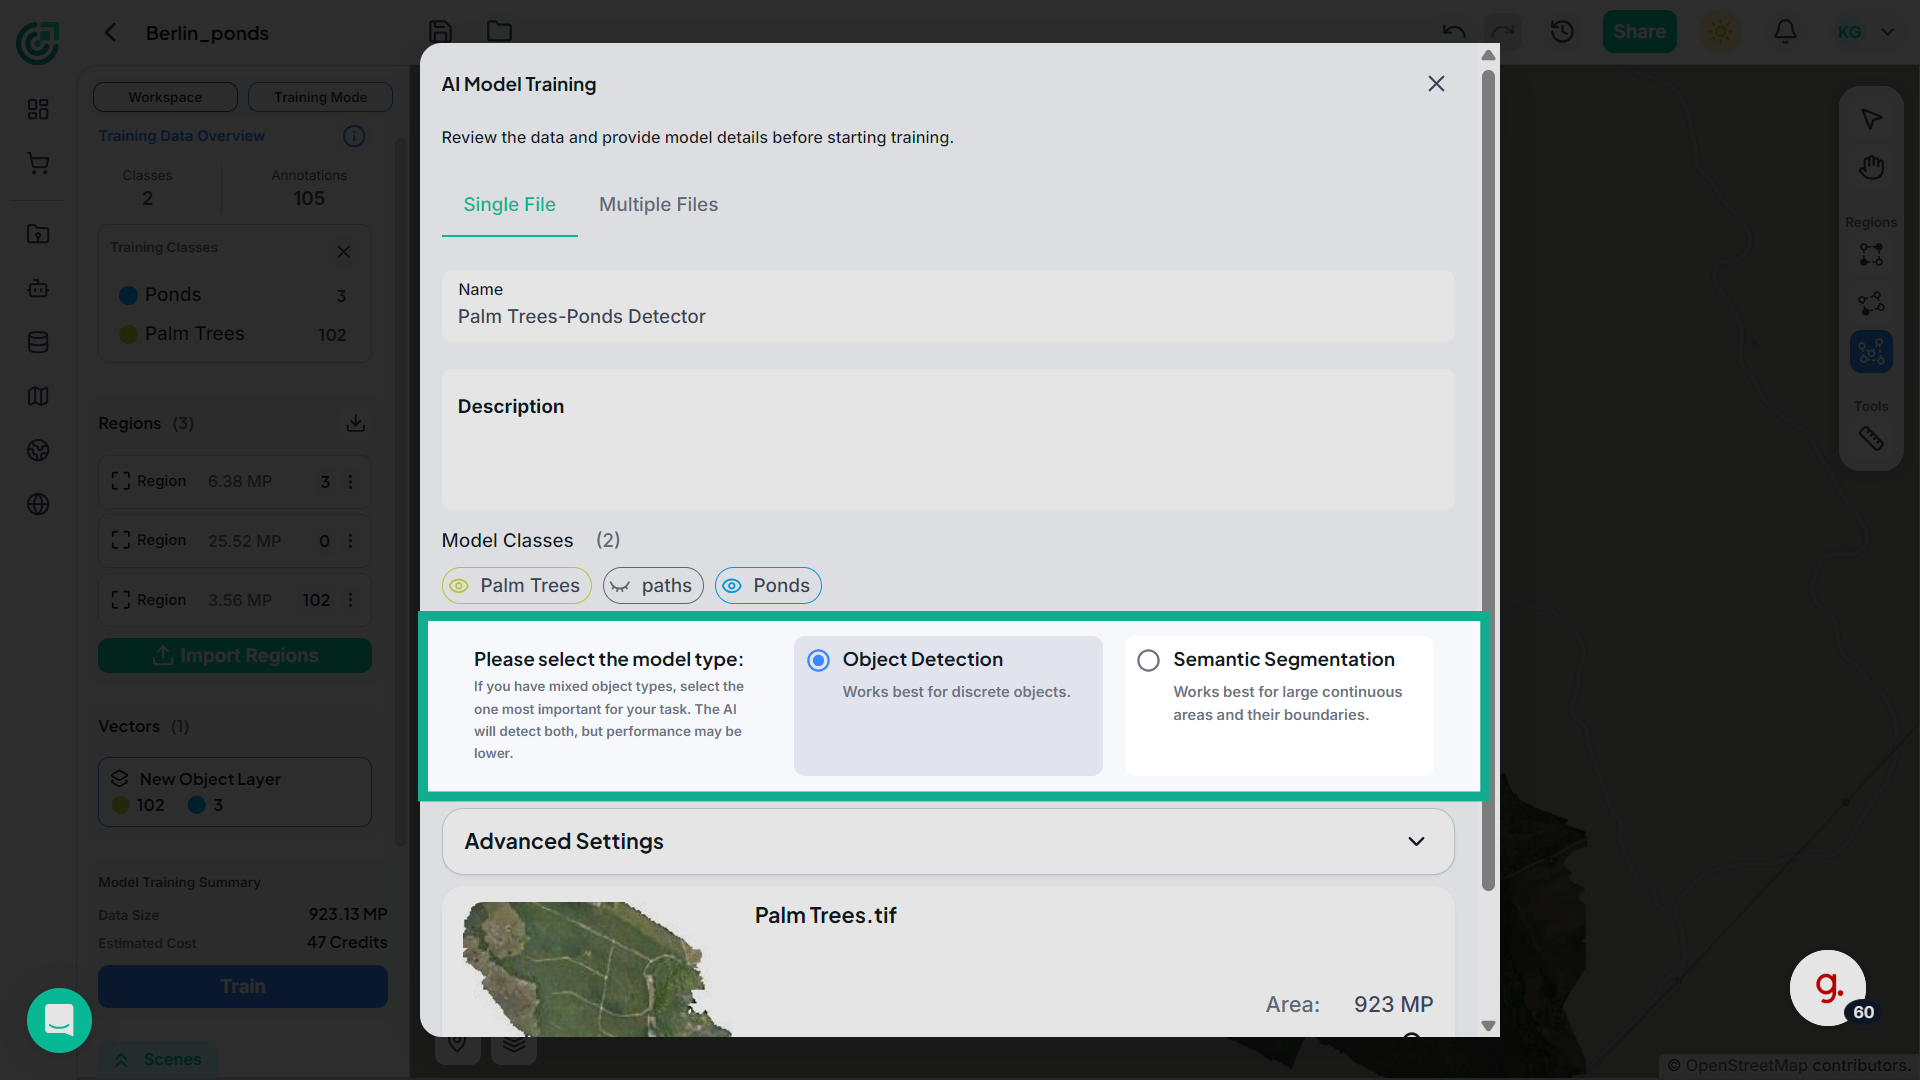
20. Select Model Type
Now select the model type.Choose Object Detection if you want the model to detect individual objects, or Semantic Segmentation if you want the model to identify continuous areas and boundaries.
21. Adjust Advanced Settings (Optional)
If needed, expand Advanced Settings to modify parameters such as crop size or training epochs. These settings can affect the training duration and model performance.
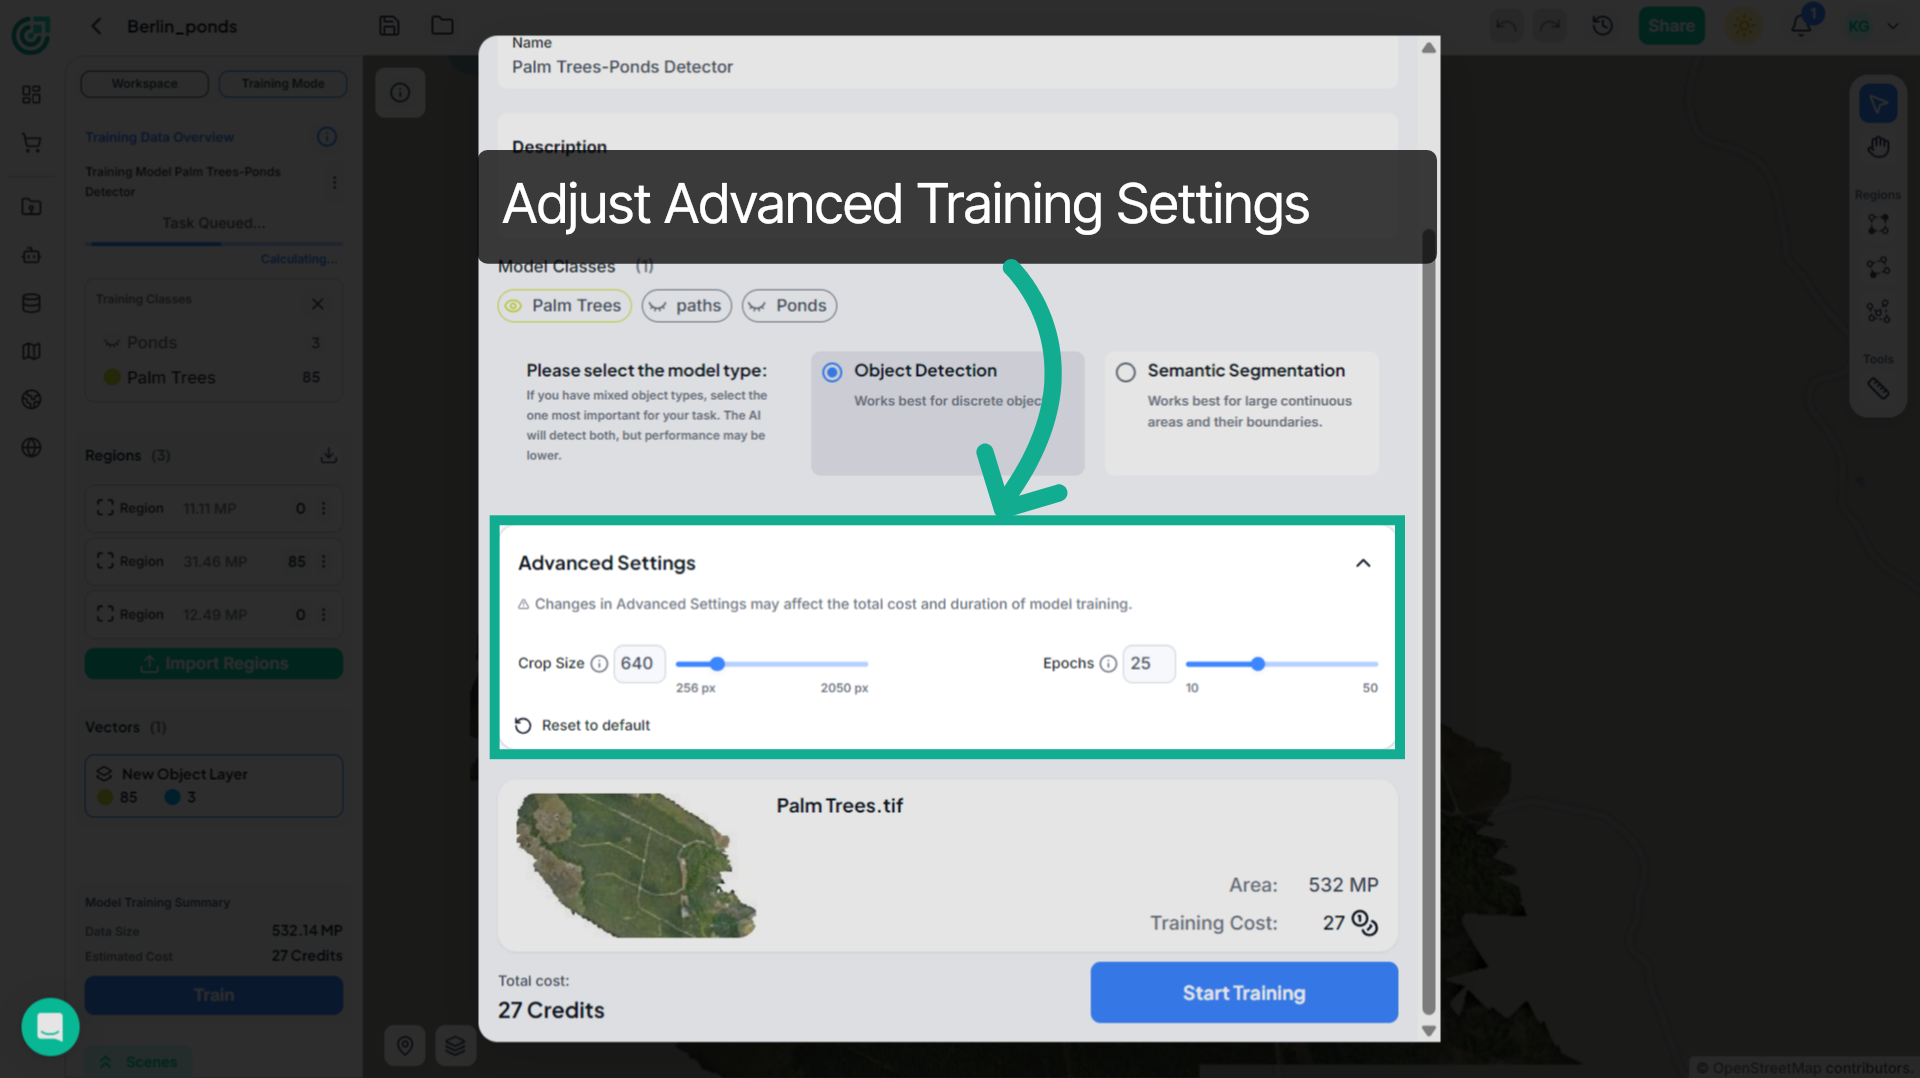
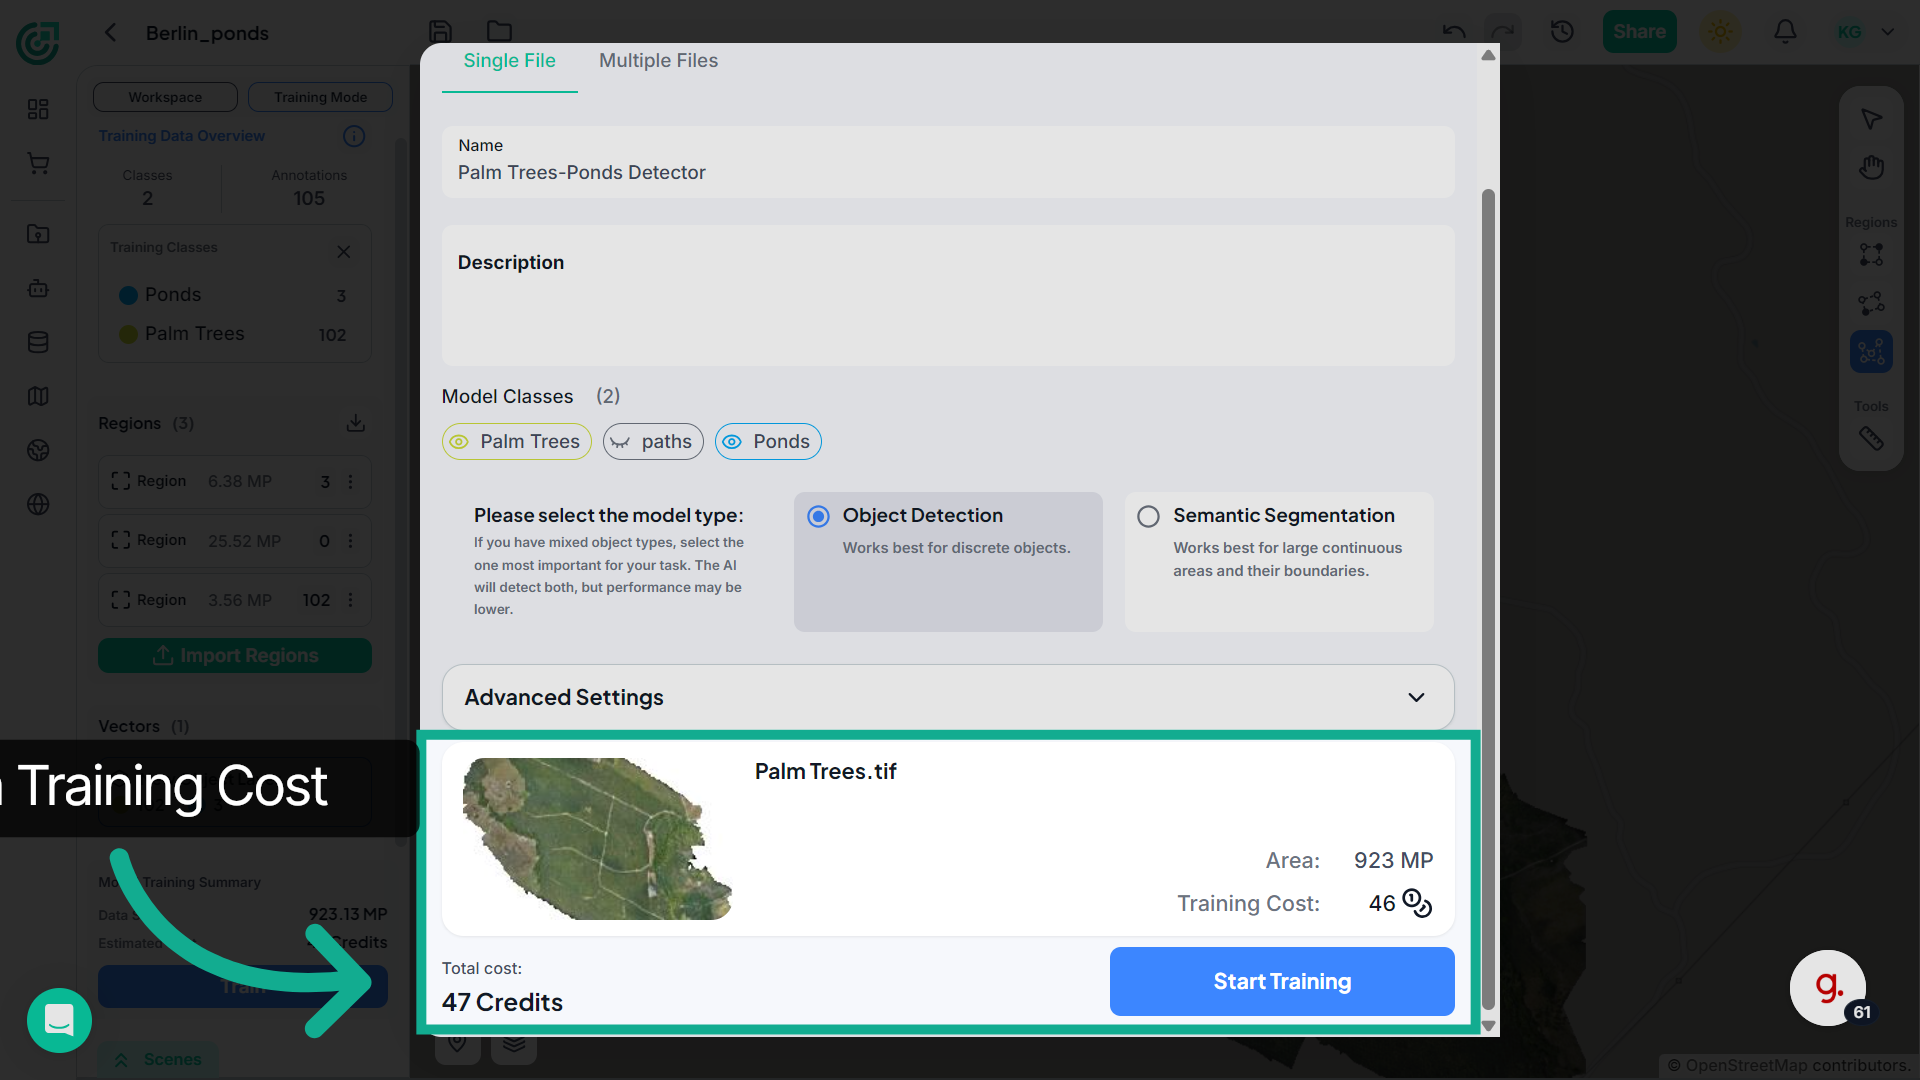
22. Confirm Training Cost
Review the selected training file, dataset area, and the estimated credit cost.Once everything is confirmed, click Start Training to begin the training process.
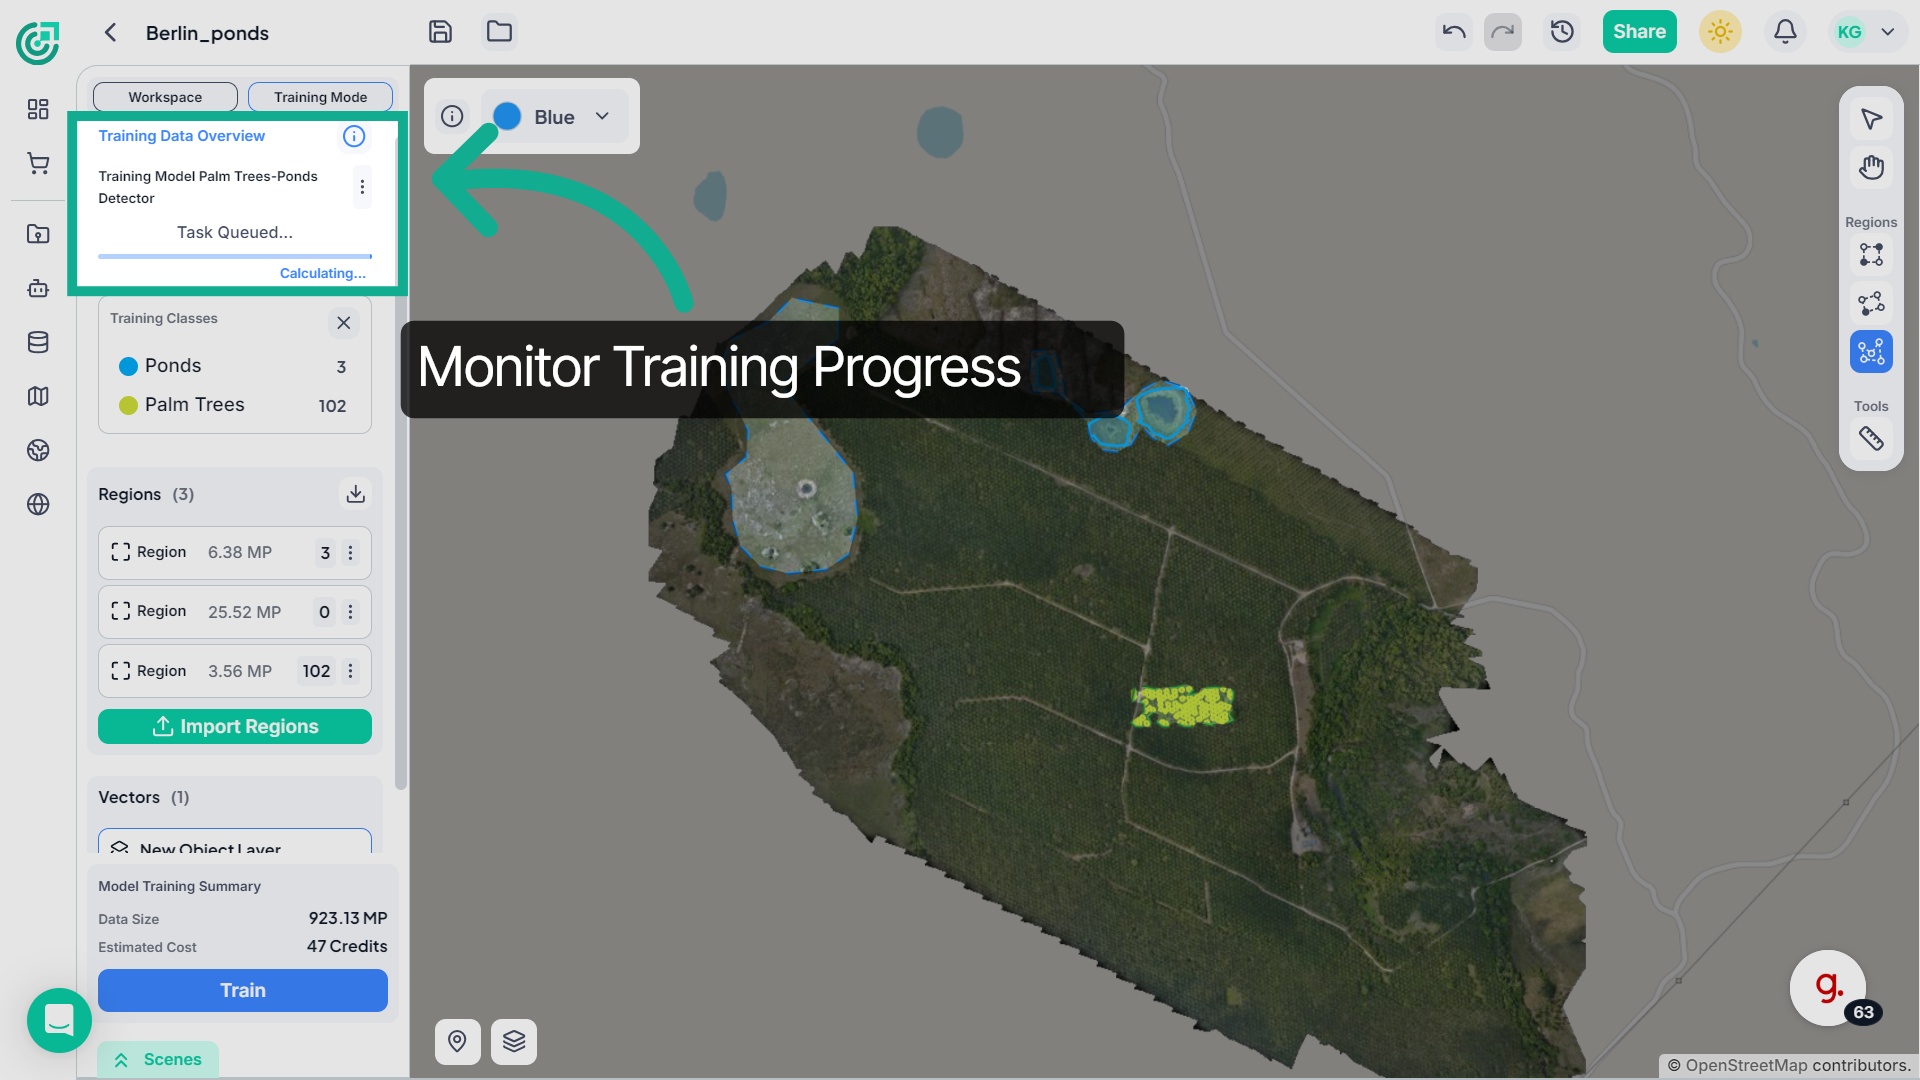
23. Monitor Training Progress
After training begins, you can track its progress in the Training Data Overview panel.The system will display the training task and its current status.
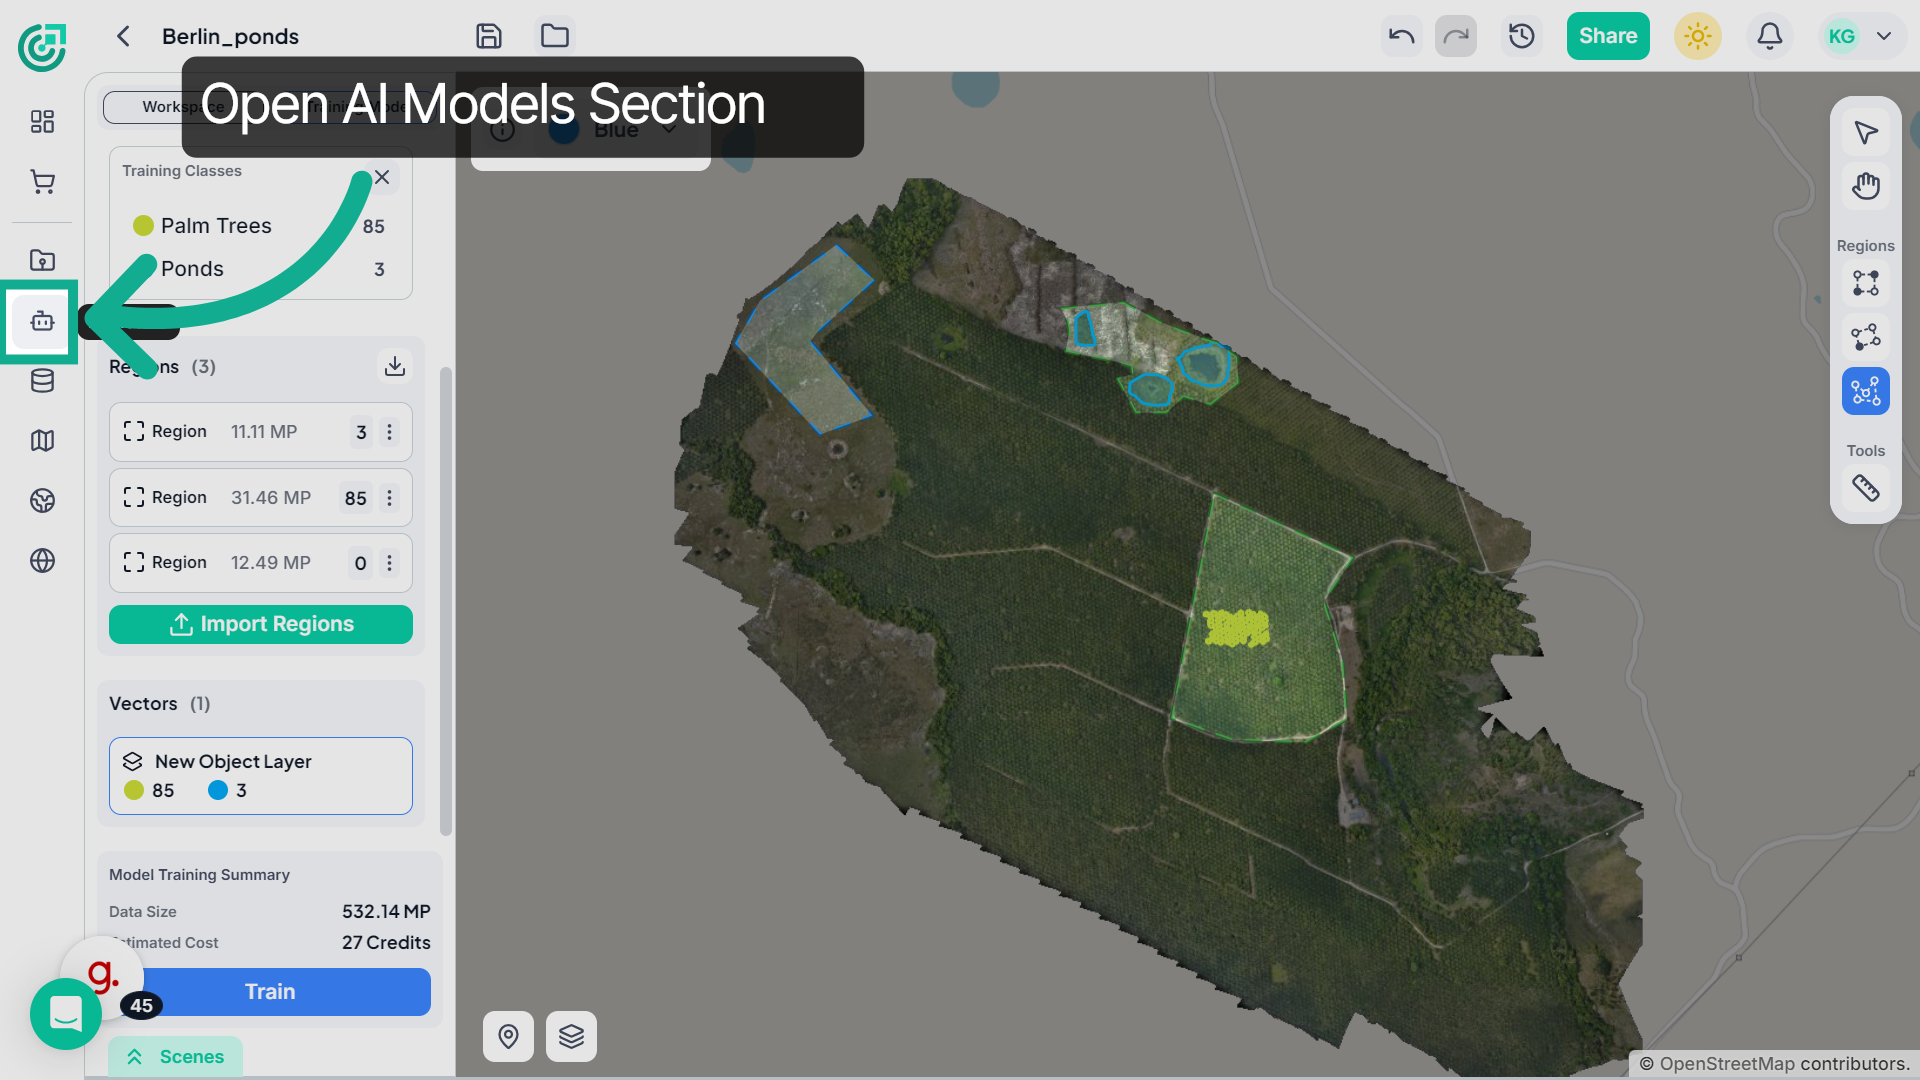
24. Open AI Models
To review the trained model, go to the AI Models section from the main navigation panel.
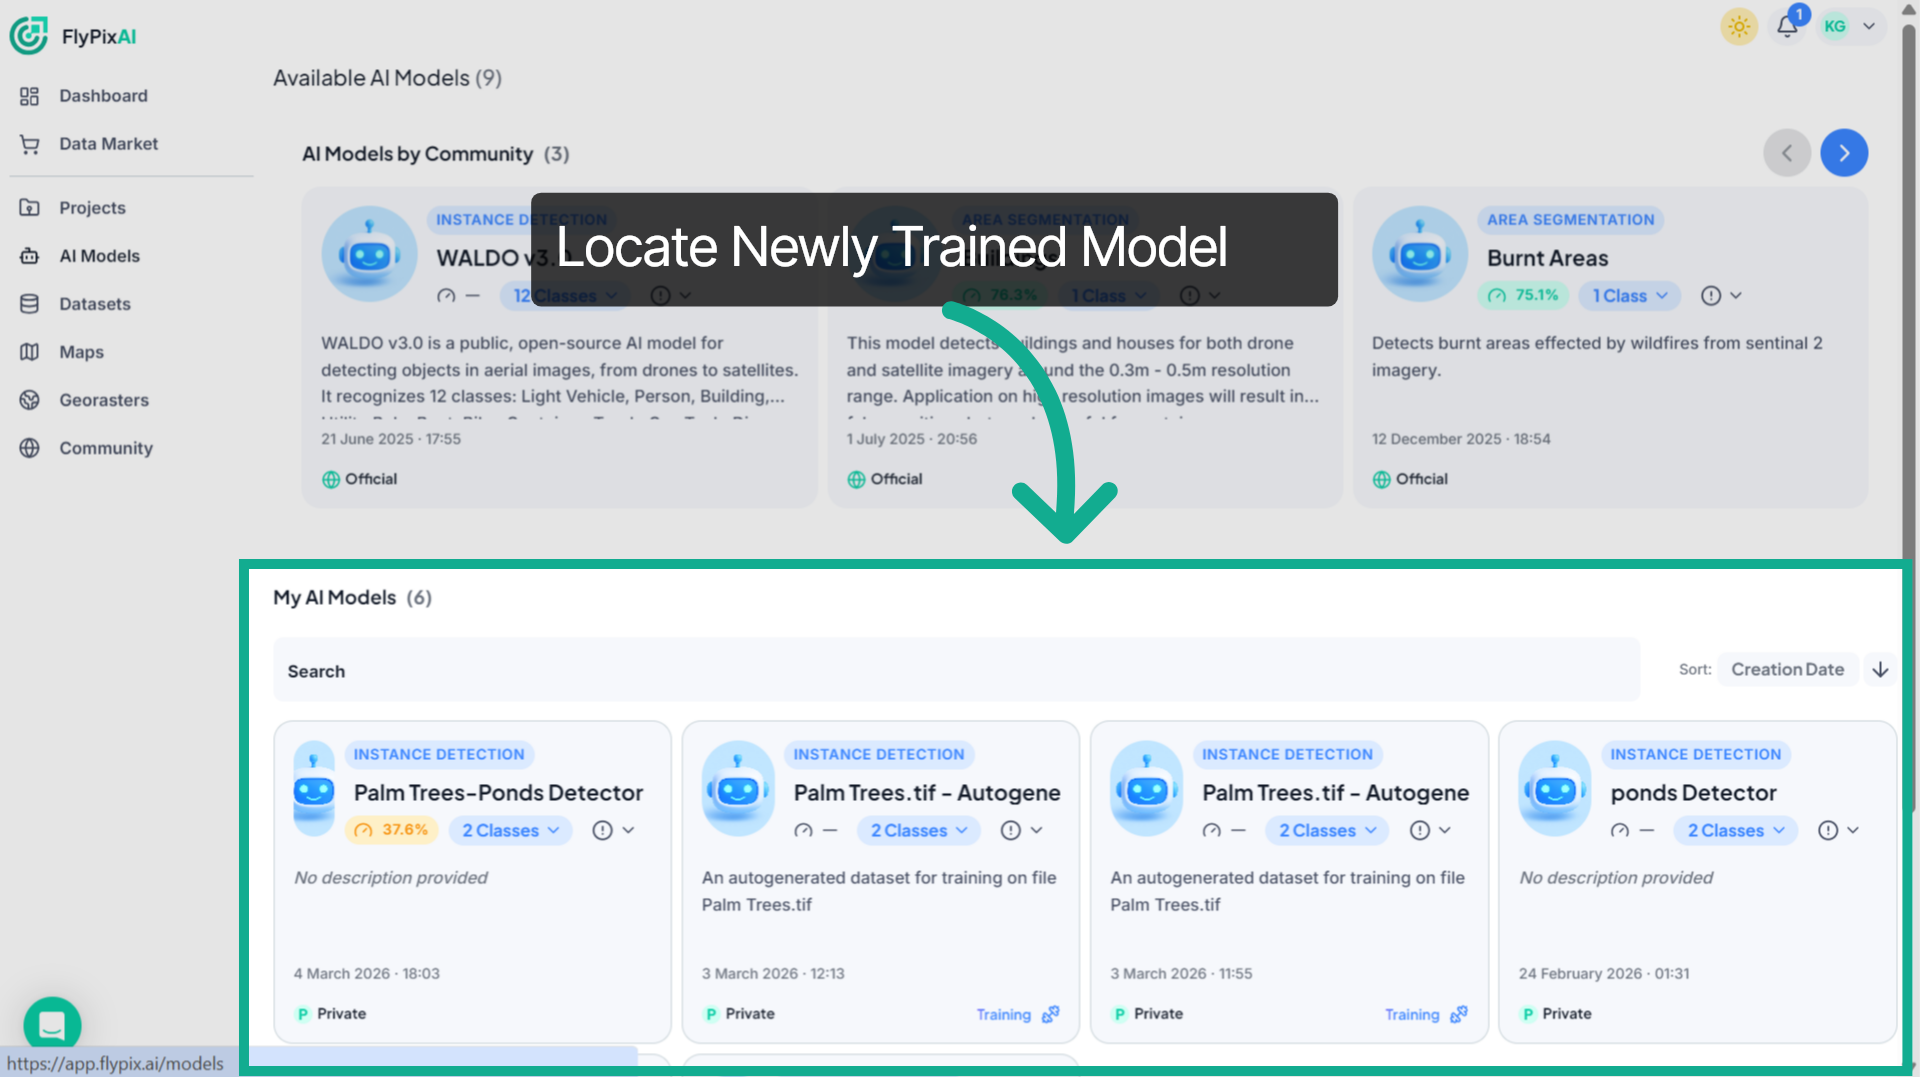
25. Locate the Created Model
Here you will find the newly created model in the list.Check its status to confirm that the training process has completed successfully.
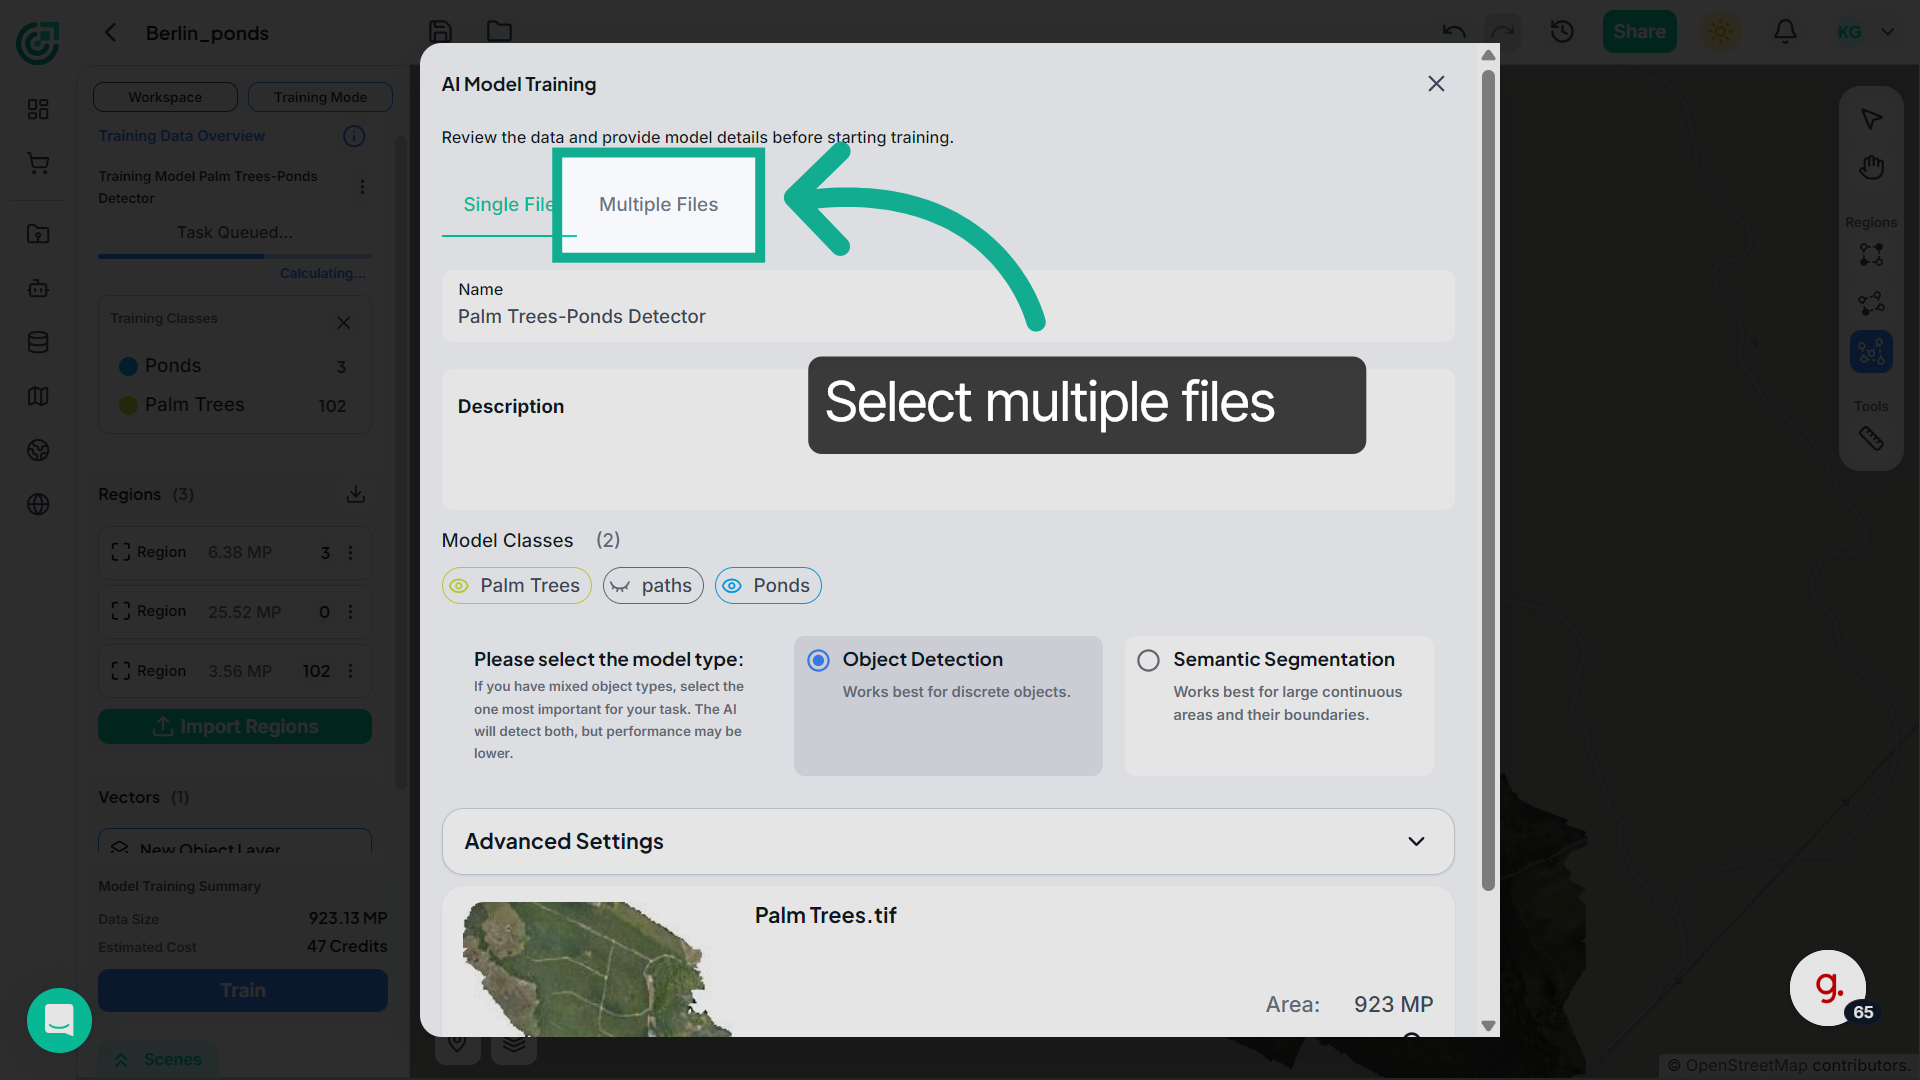
26. Select Multiple Files
If you want to train the model using multiple files, switch to the Multiple Files tab. Here you can organize several files into a dataset and click Create Dataset to prepare them for training.
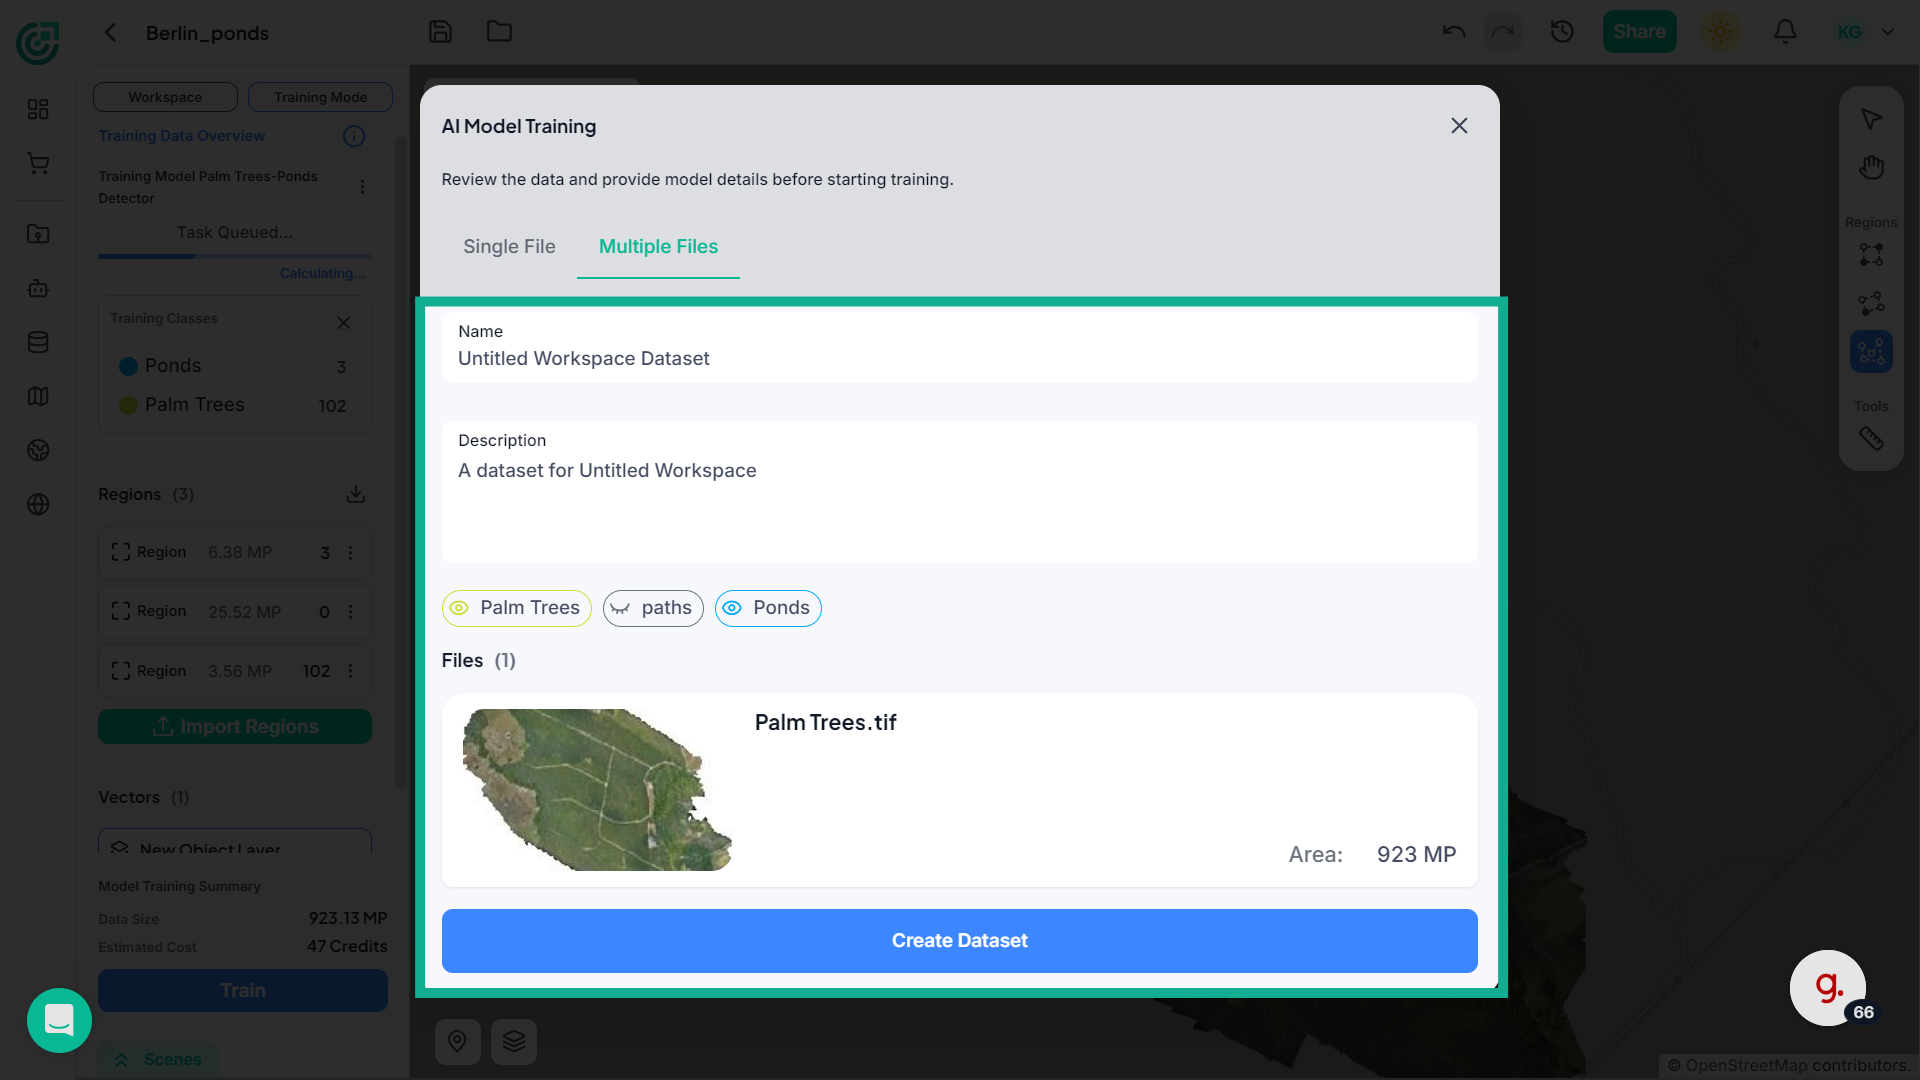
27. Review Training Setup
Open "AI Model Training" to review the training setup and configuration before creating the dataset.
28. Sort by Name
Click "Name" to sort datasets or files alphabetically for easier navigation.
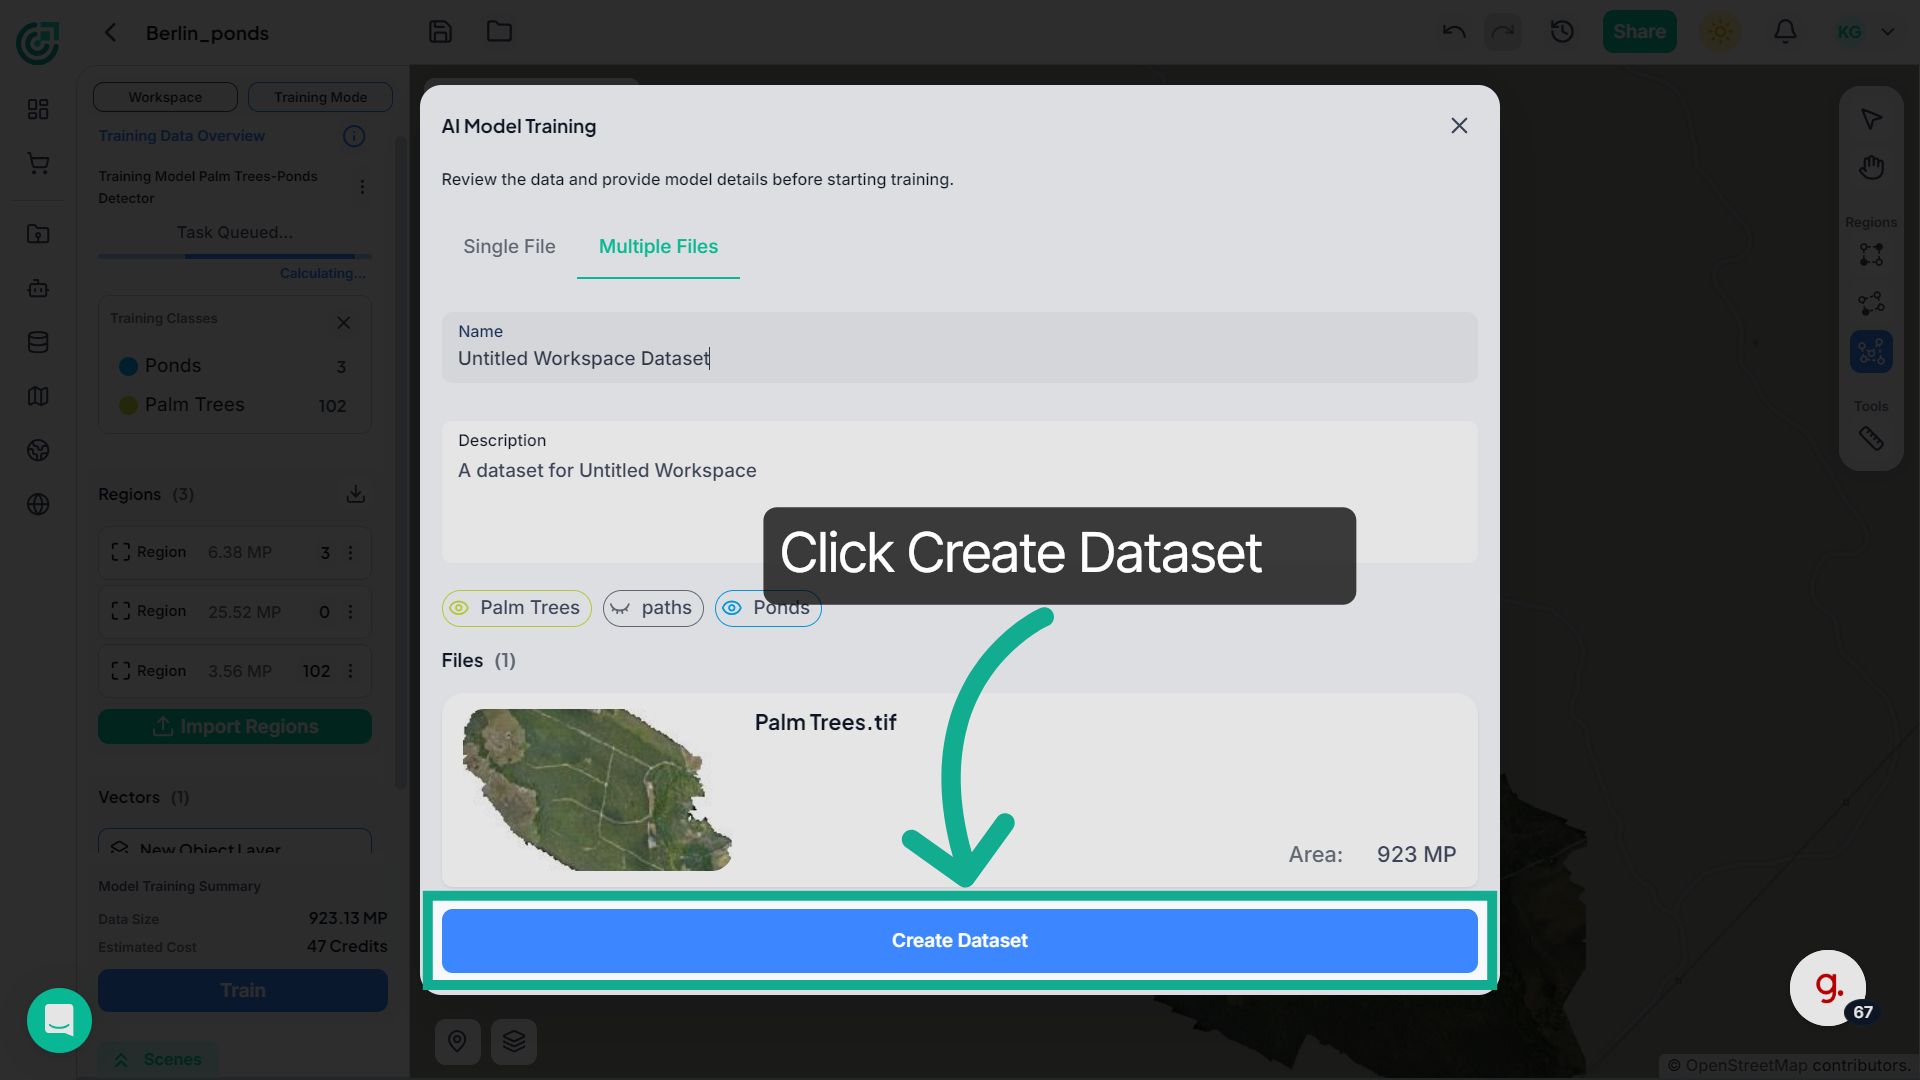
29. Review Model Training
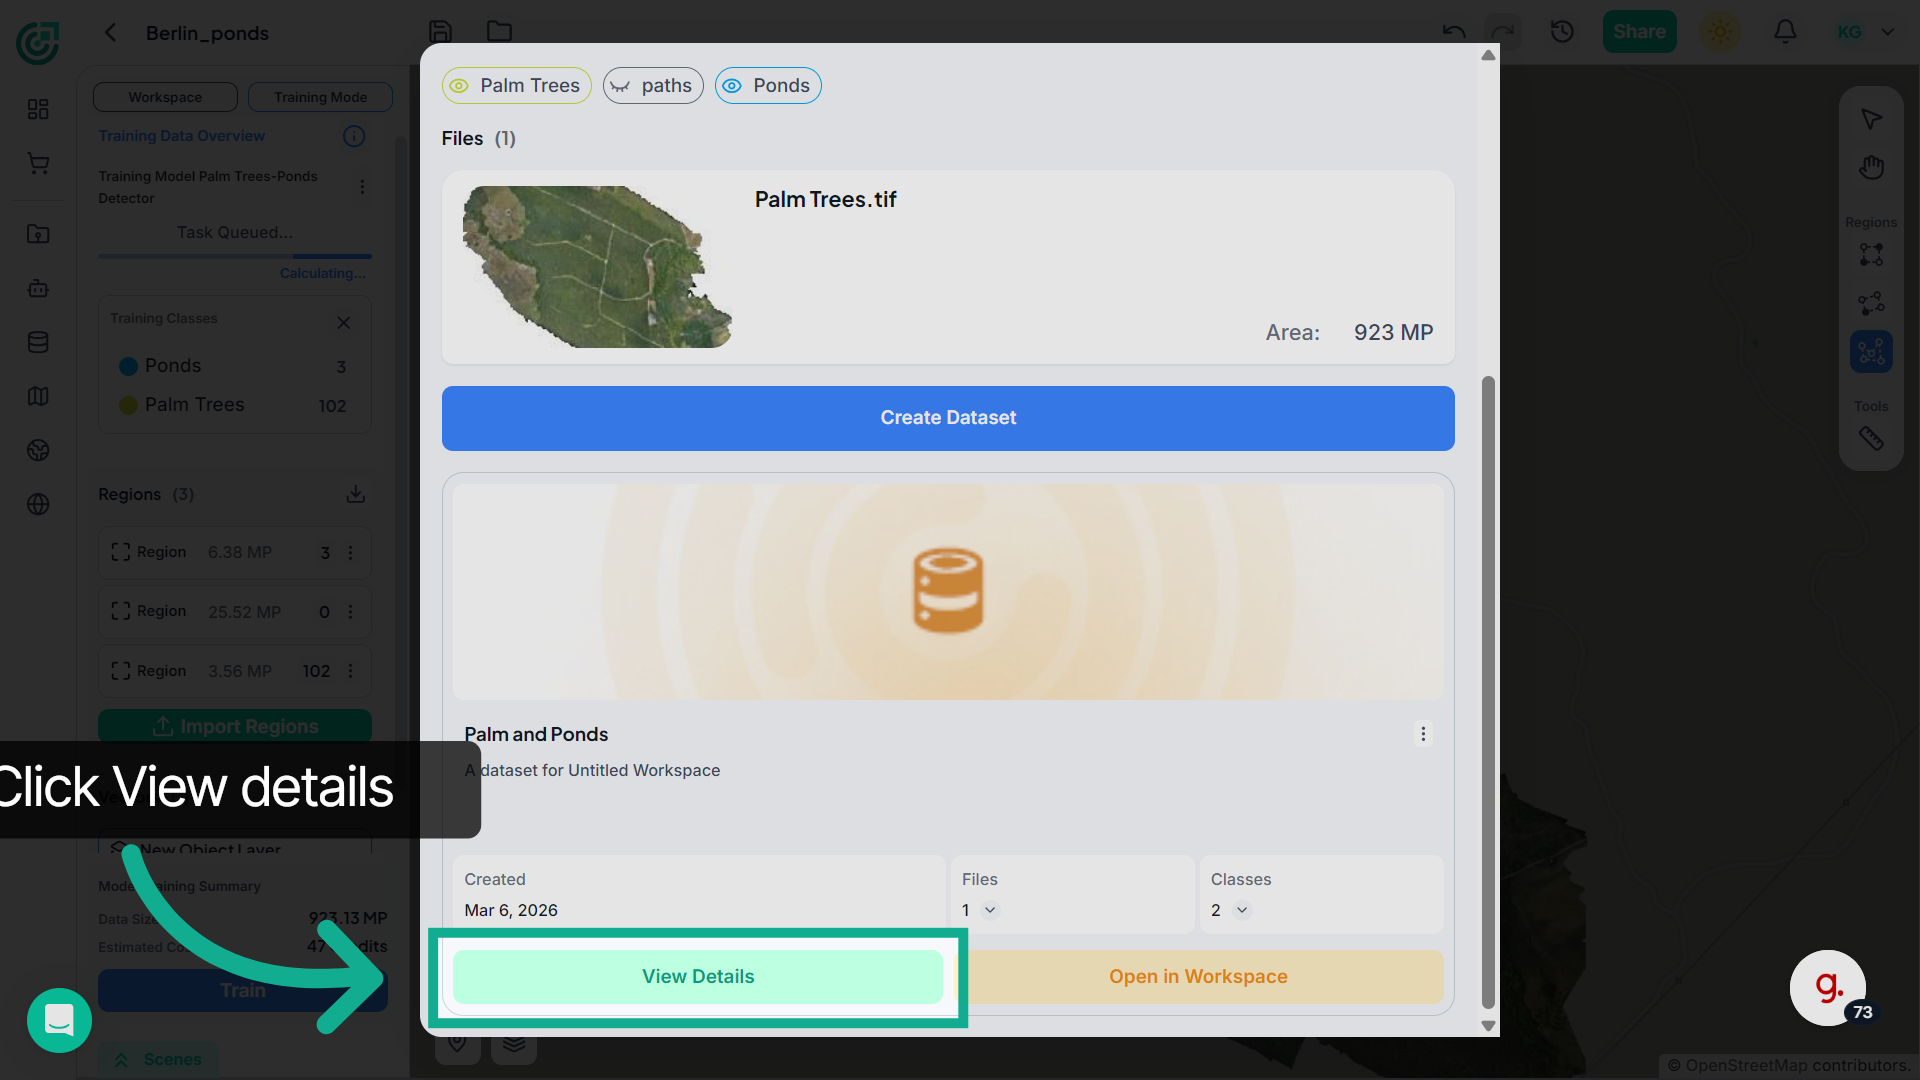
After clicking "Create Dataset" review the dataset summary including annotation regions and labeled object layers.
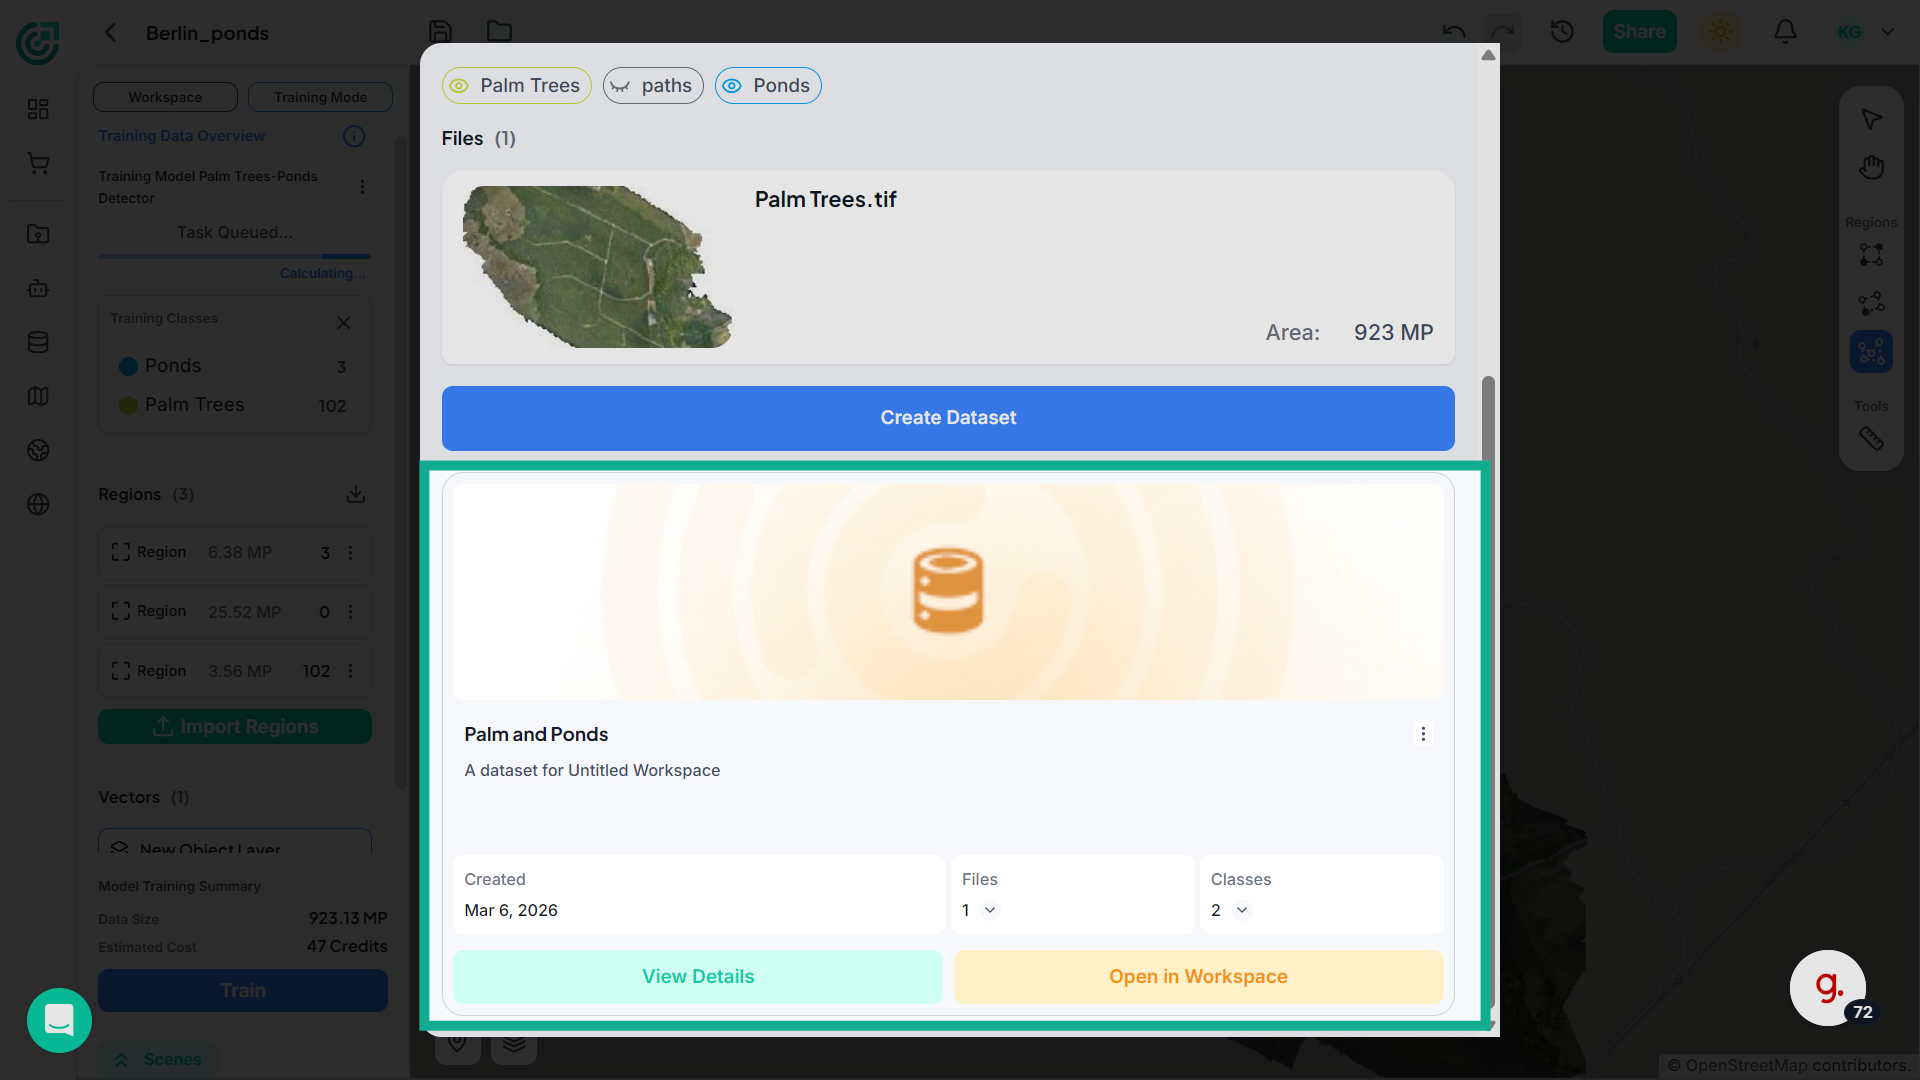
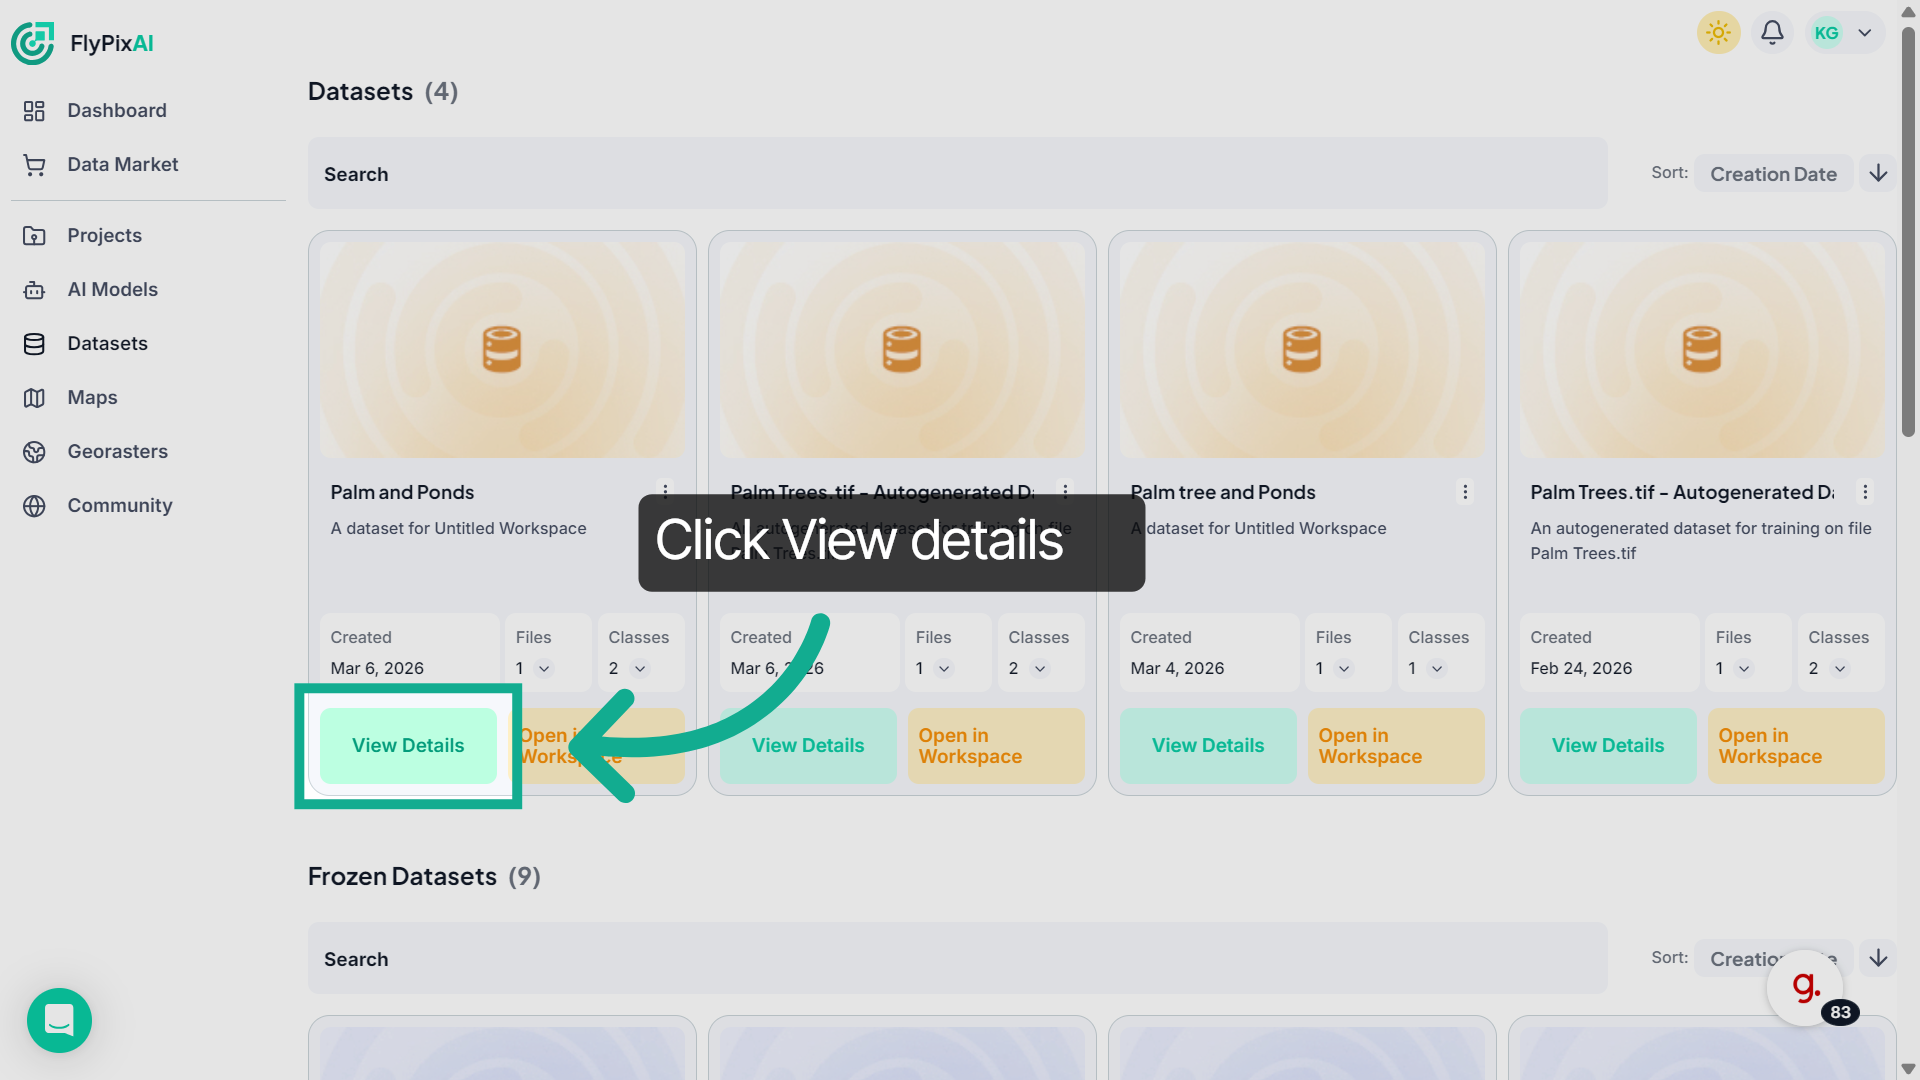
30. View Dataset Details
Click "View Details" to see detailed information about the dataset and its configuration.
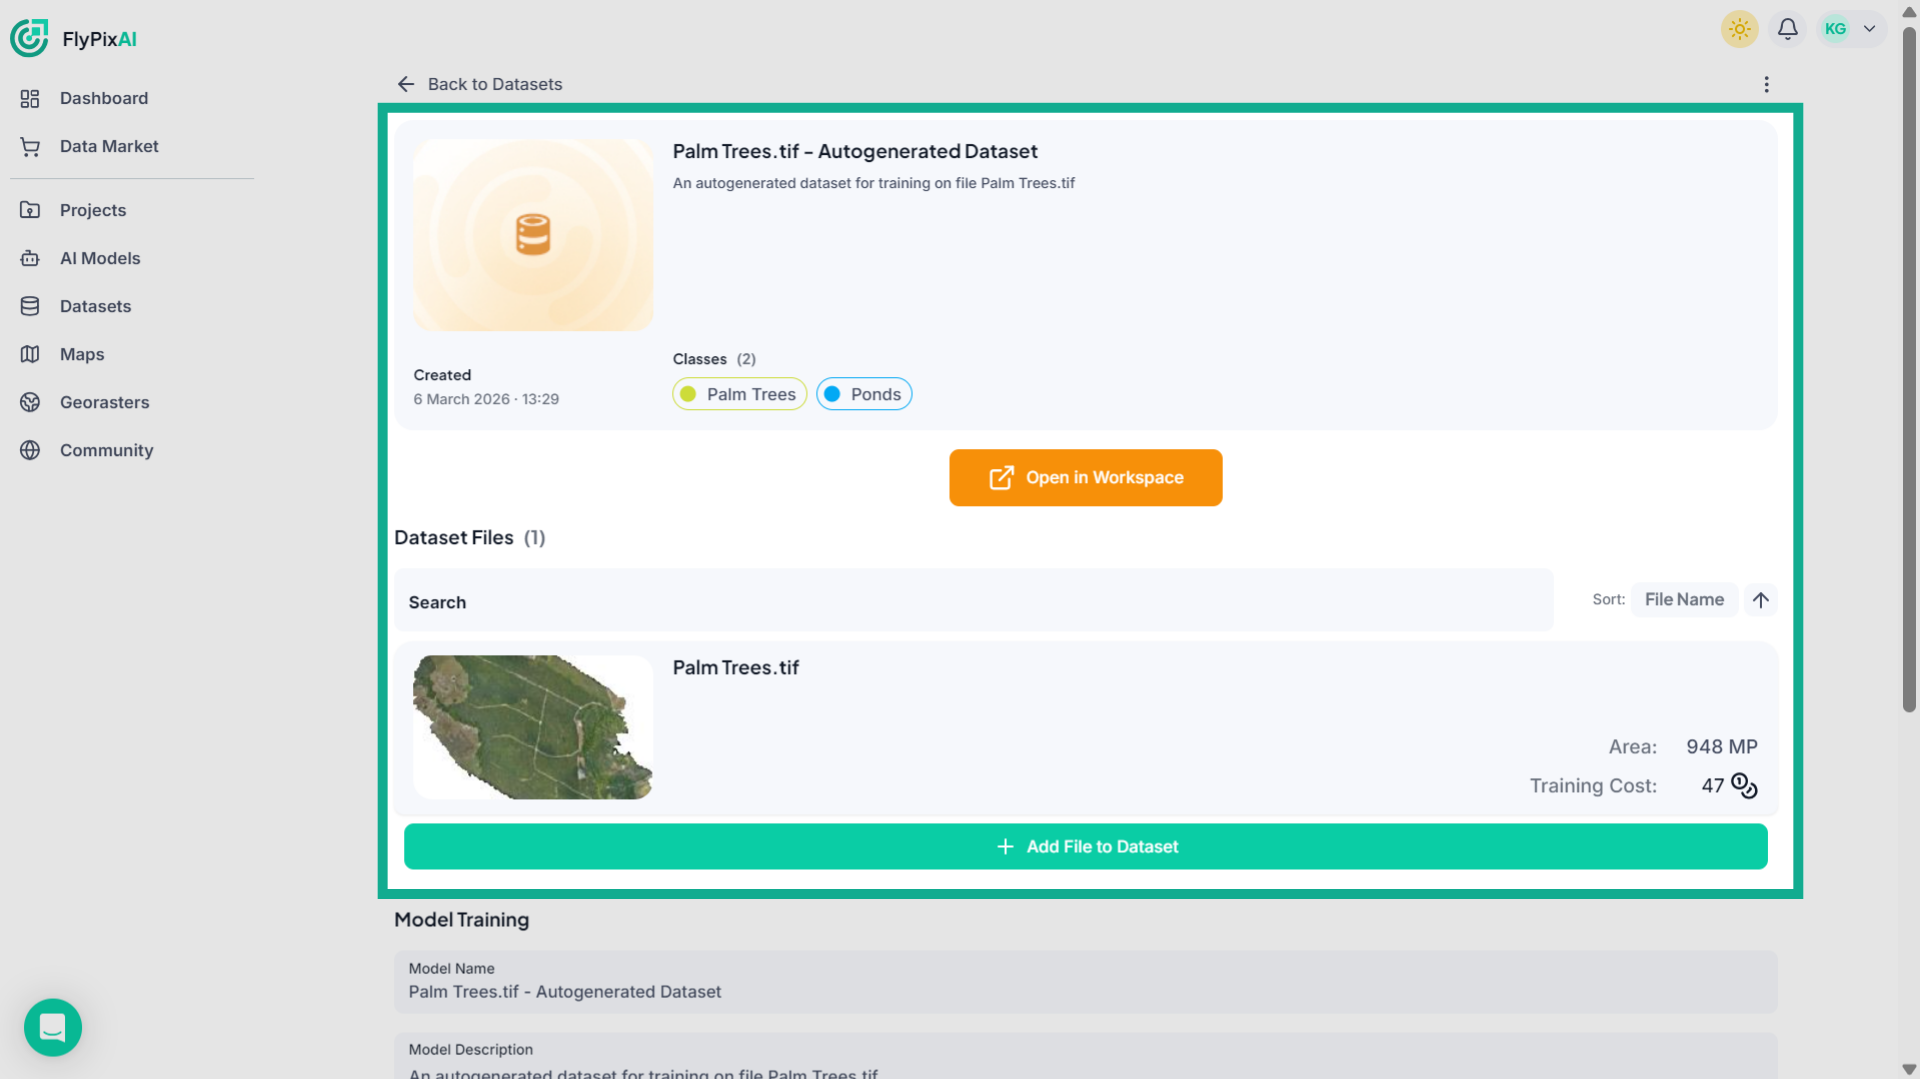
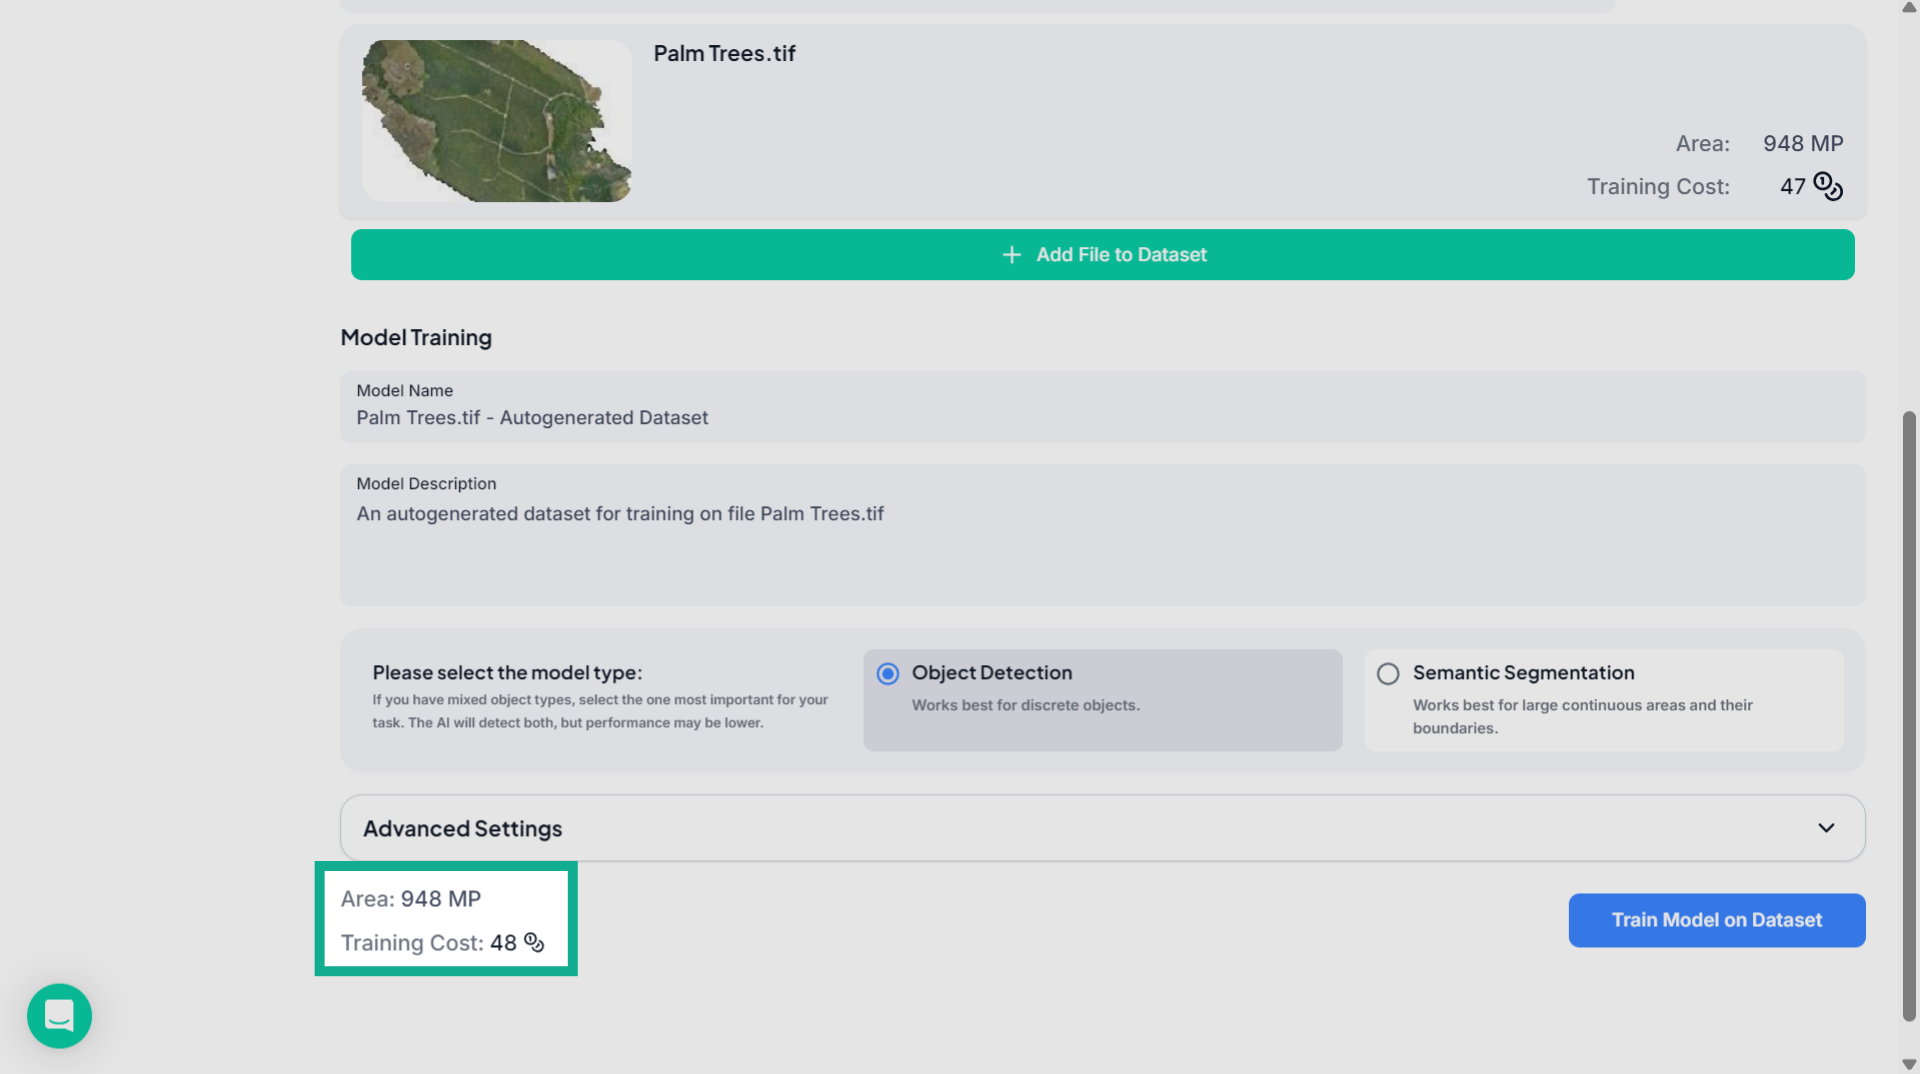
31. Review Dataset Files
In the Dataset Files section, review the files included in the dataset along with their total area and estimated training cost.
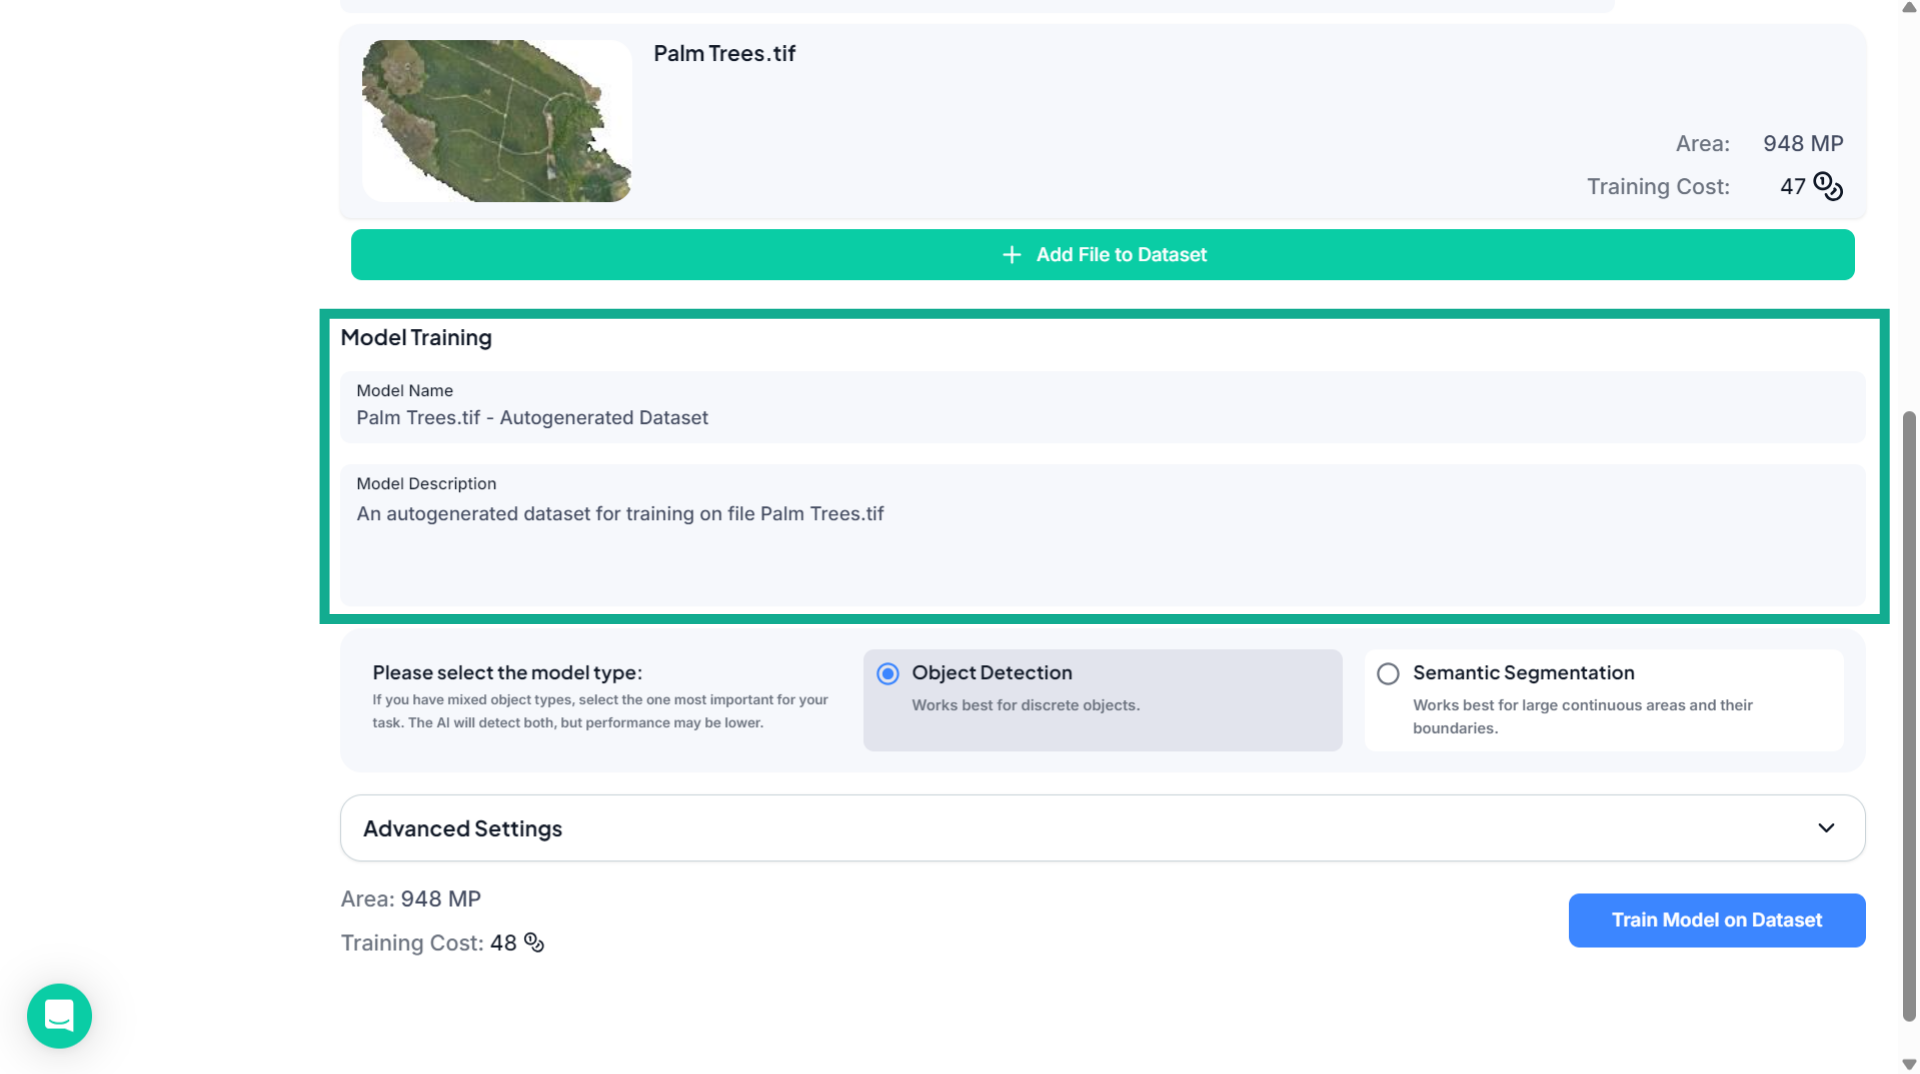
32. Access Model Training Settings
Scroll down to the Model Training section where you can configure the AI model that will be trained using this dataset.
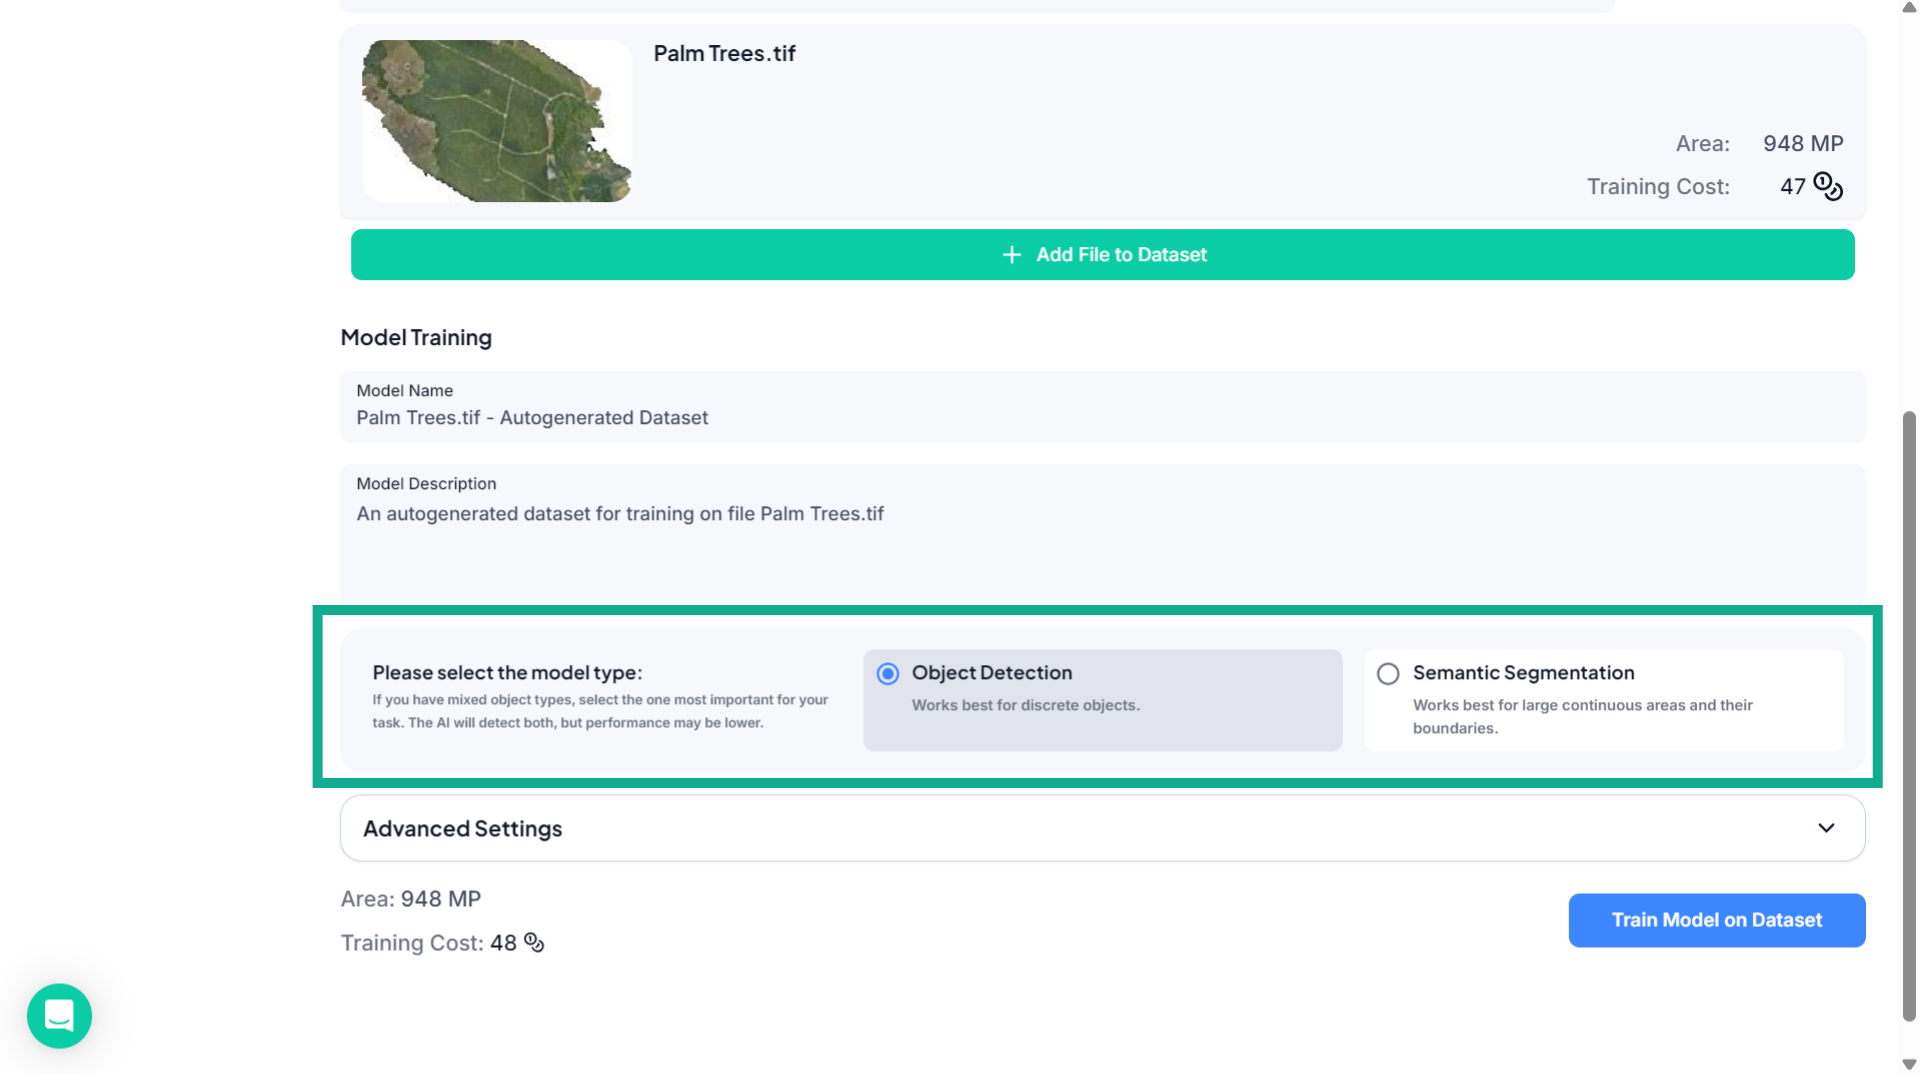
33. Select the Model Type
Choose the appropriate model type depending on your training objective.
34. Adjust Advanced Settings (Optional)
If required, expand Advanced Settings to modify parameters such as crop size or training epochs.
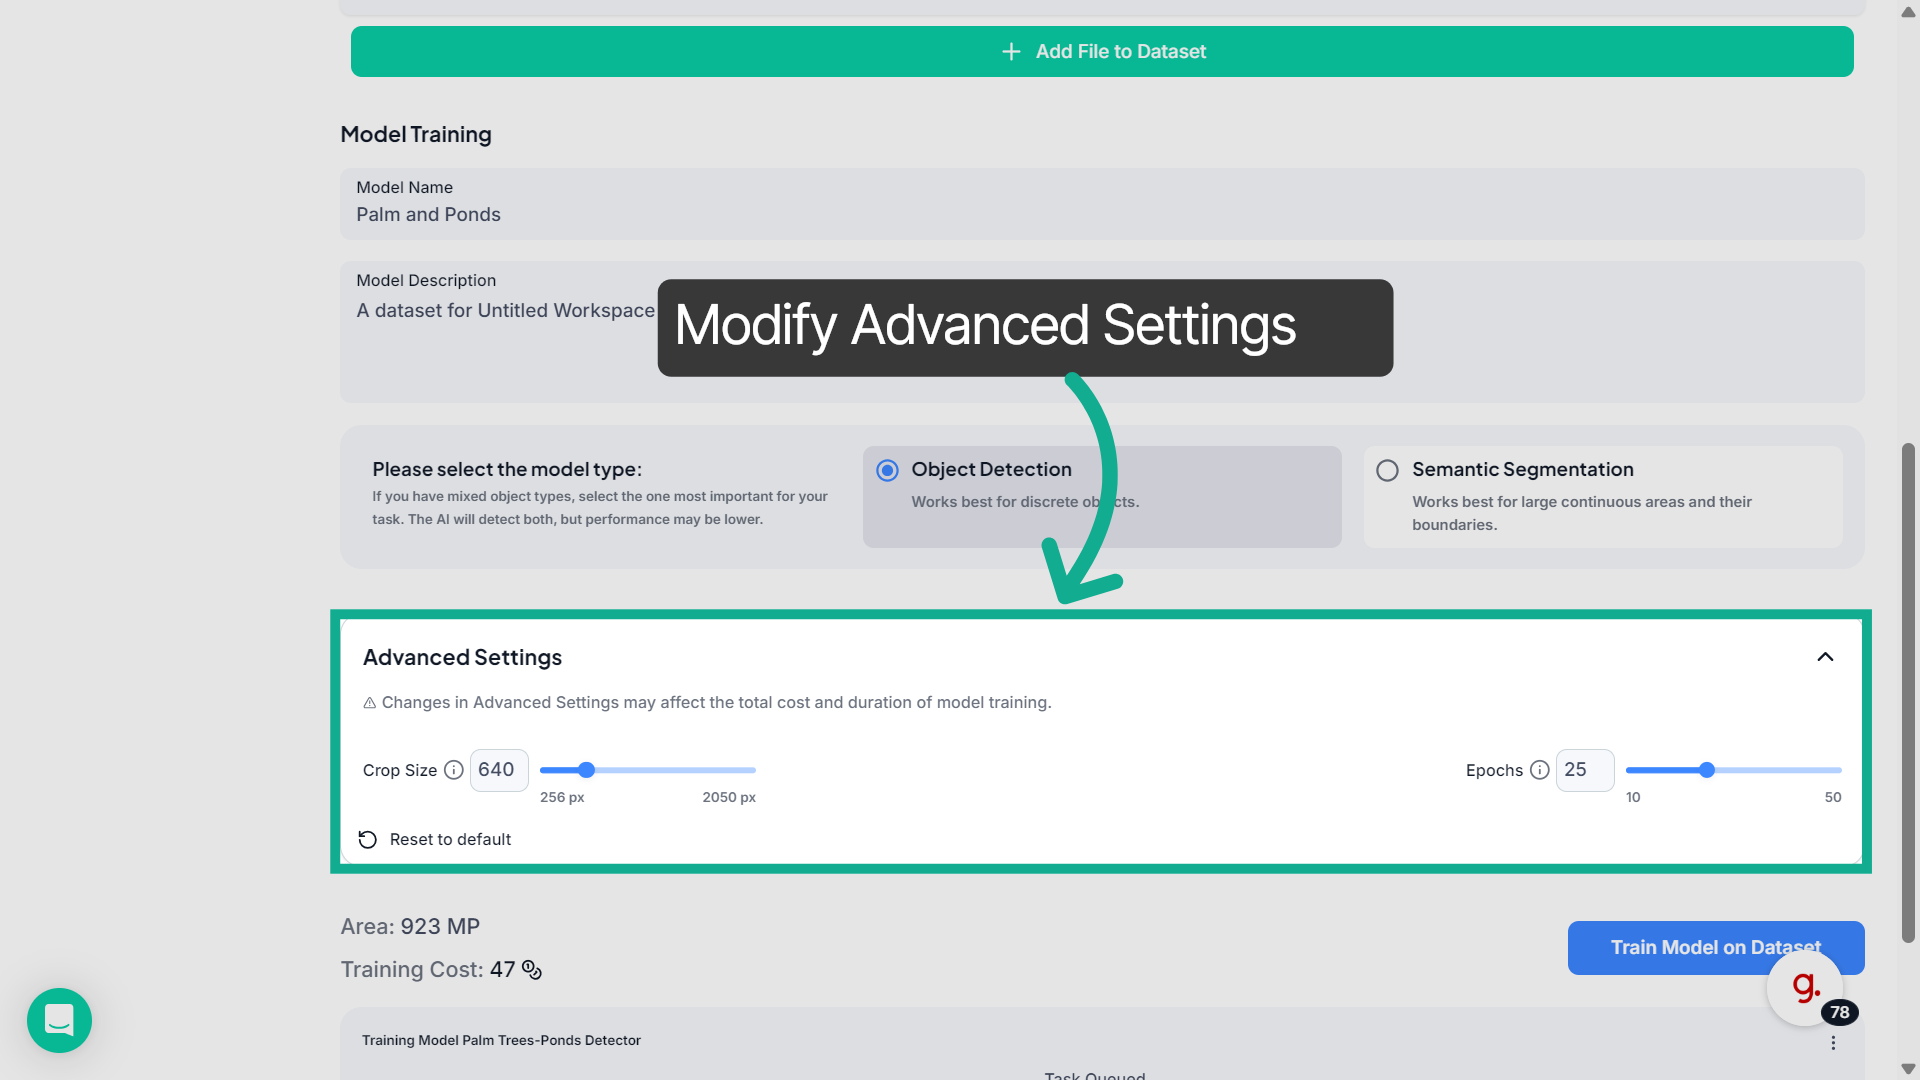
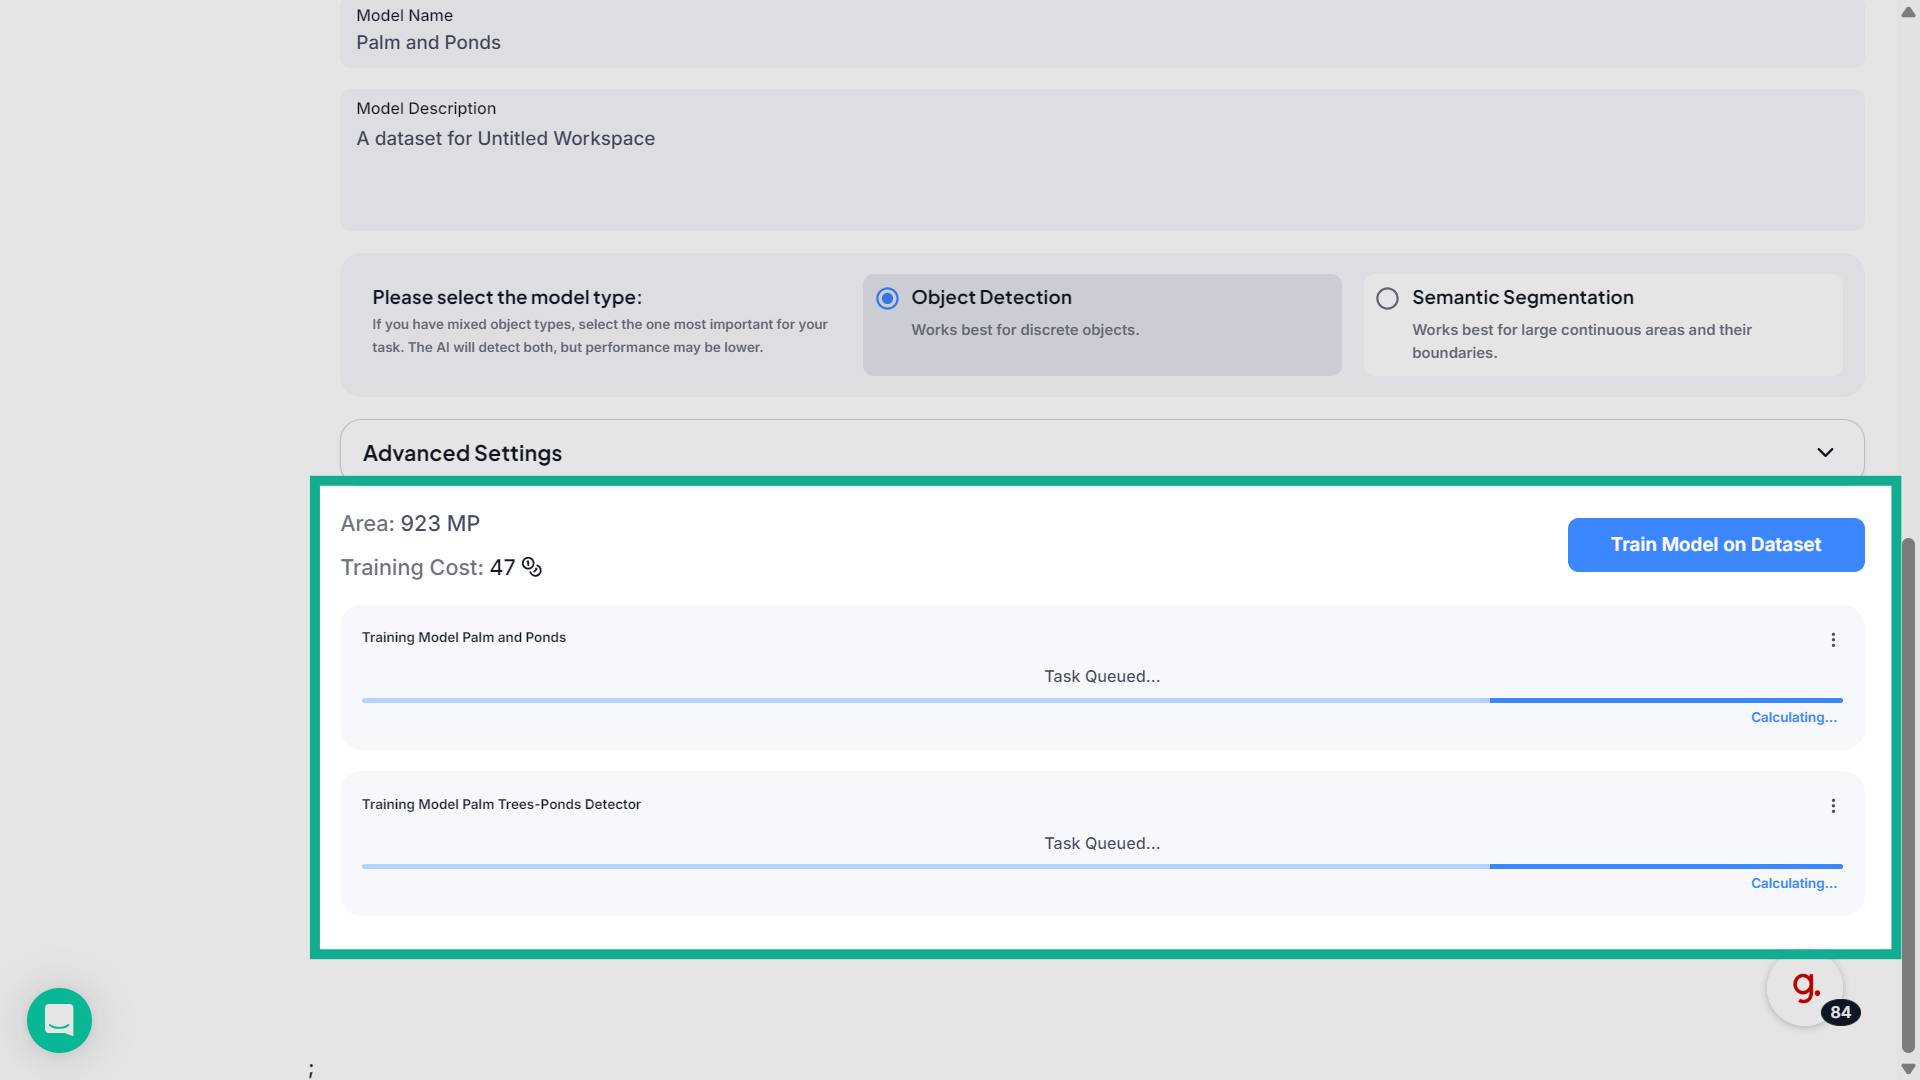
35. Review Training Details
Before starting the training process, verify the dataset area and the estimated training cost.
36. Train Model on Dataset
Click "Train Model" on Dataset to begin training the AI model using the selected dataset.
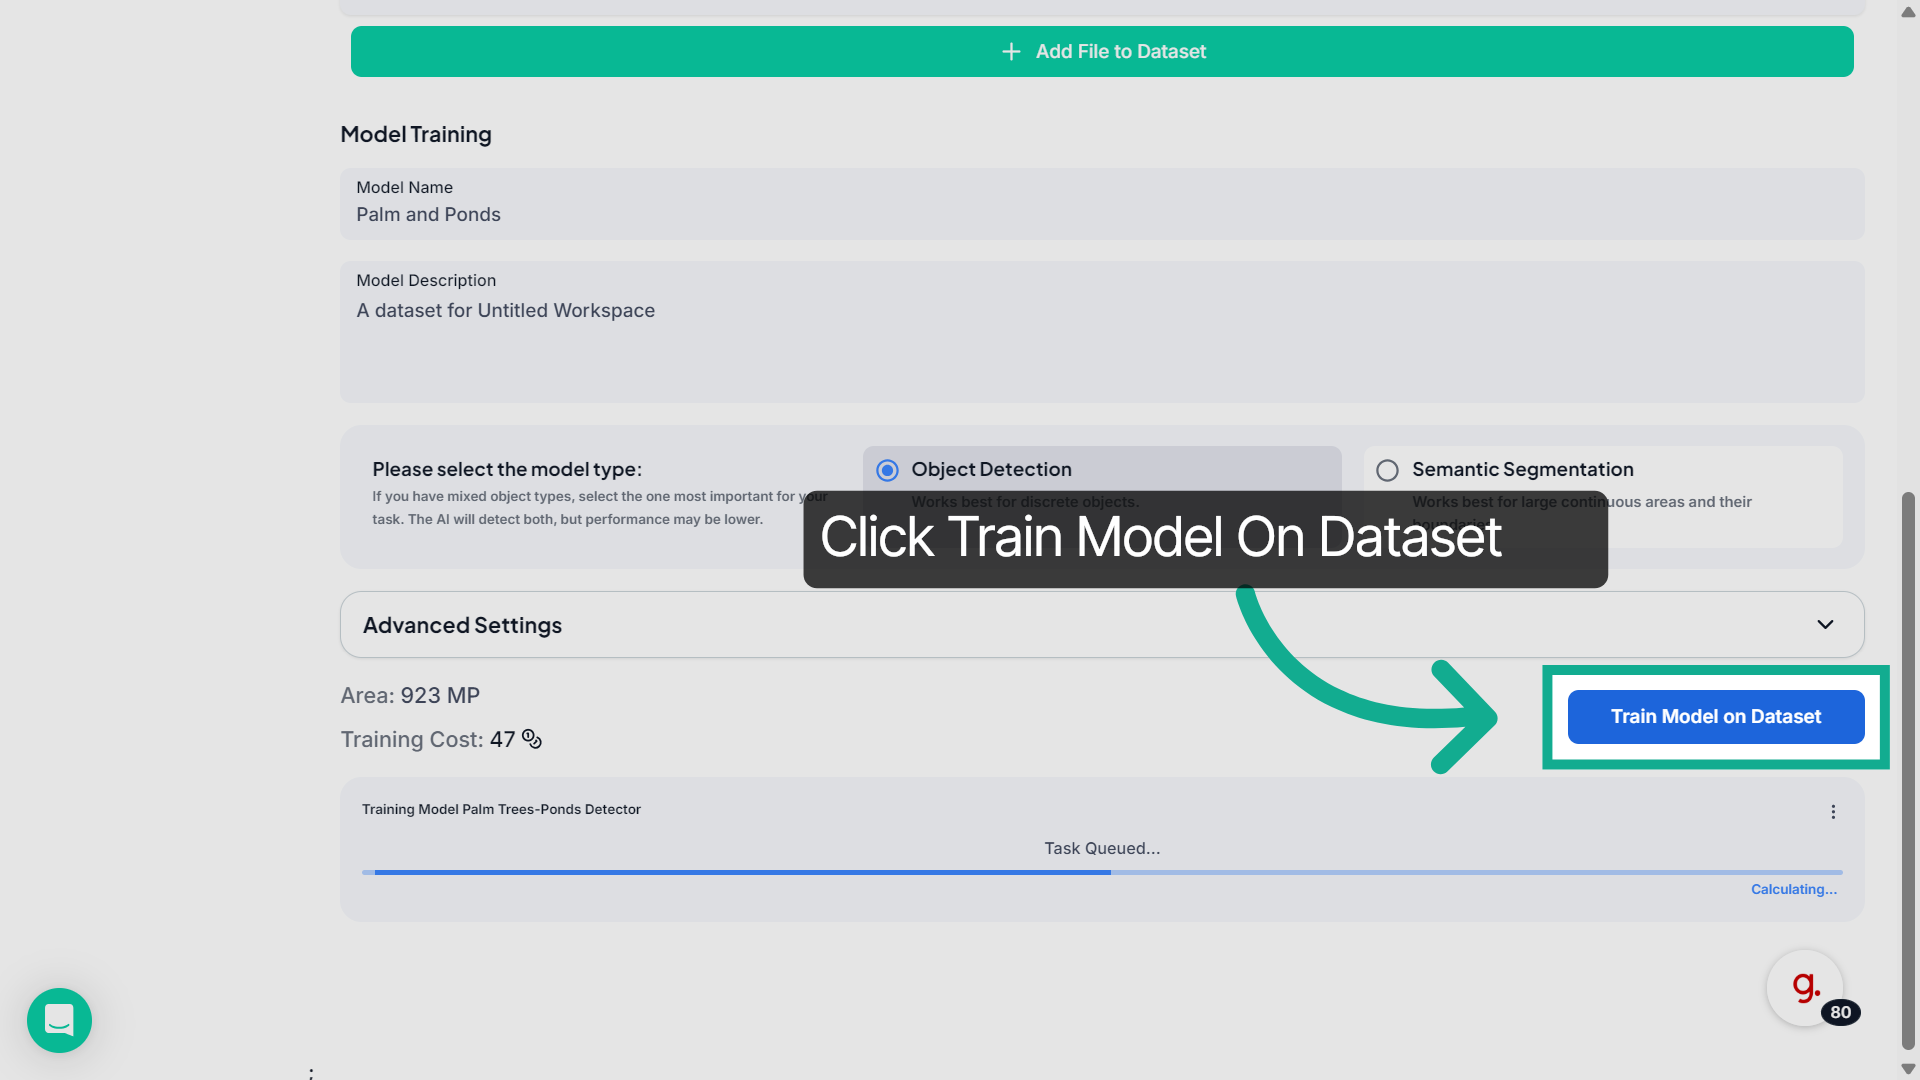
37. Monitor Training Progress
The system will queue the training task and display the progress status while the model is being trained.

38. Open Datasets Section
From the main page, click on Datasets to access and review all the datasets available in your workspace.
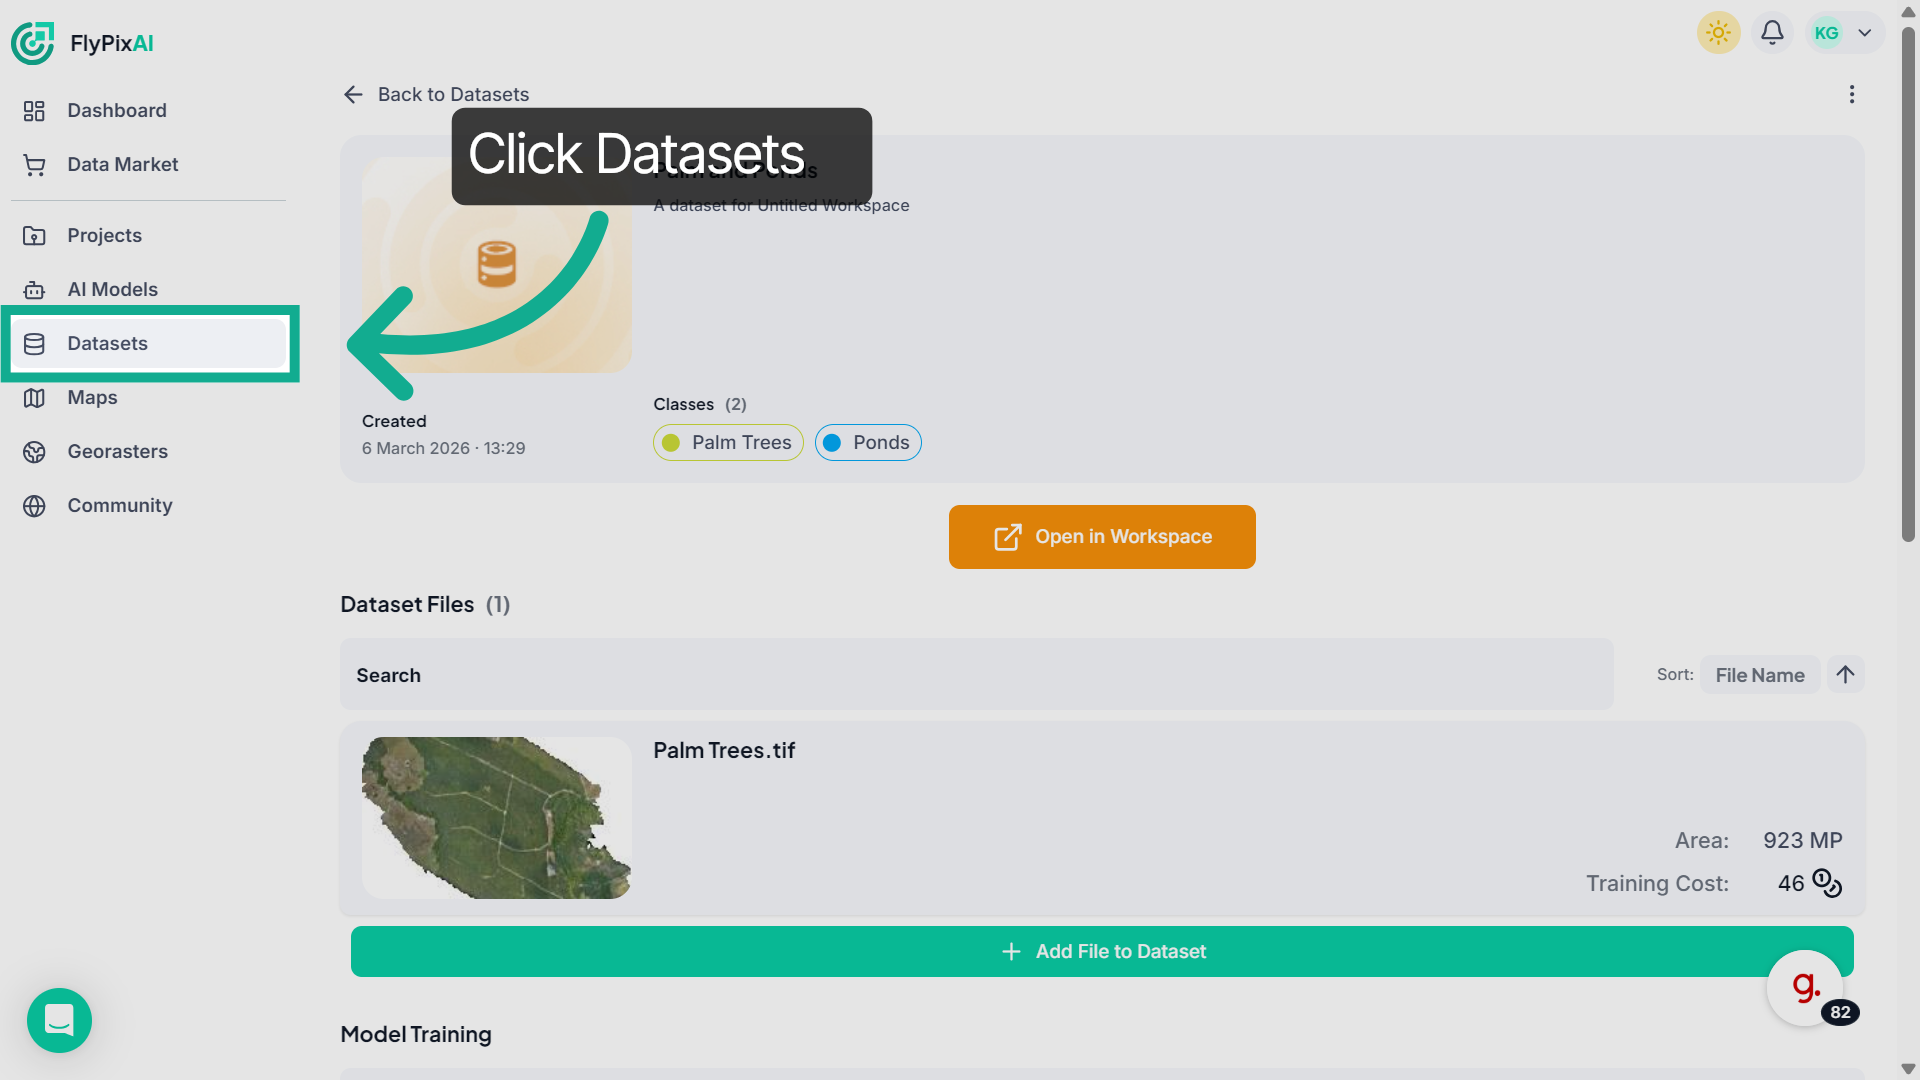
39. View Dataset Details
In this section, you can review dataset information and monitor training progress.Click View Details to see additional information.
40. Return to Datasets Overview
Here you can view the system will queue the task and display the progress status while the model is being trained.
This demo illustrated how to train an AI model using FlyPix AI by importing region data, creating datasets, configuring model classes, and initiating training. You can now apply these steps to efficiently build and train your own AI models with FlyPix AI.