Explore AI Models and Manage Configurations in FlyPix
FlyPix AI allows you to easily explore available AI models and manage your own trained models within the platform. In this walkthrough, you’ll learn how to review model details, update model information, change thumbnails, and remove models when necessary.
Go to app.flypix.ai
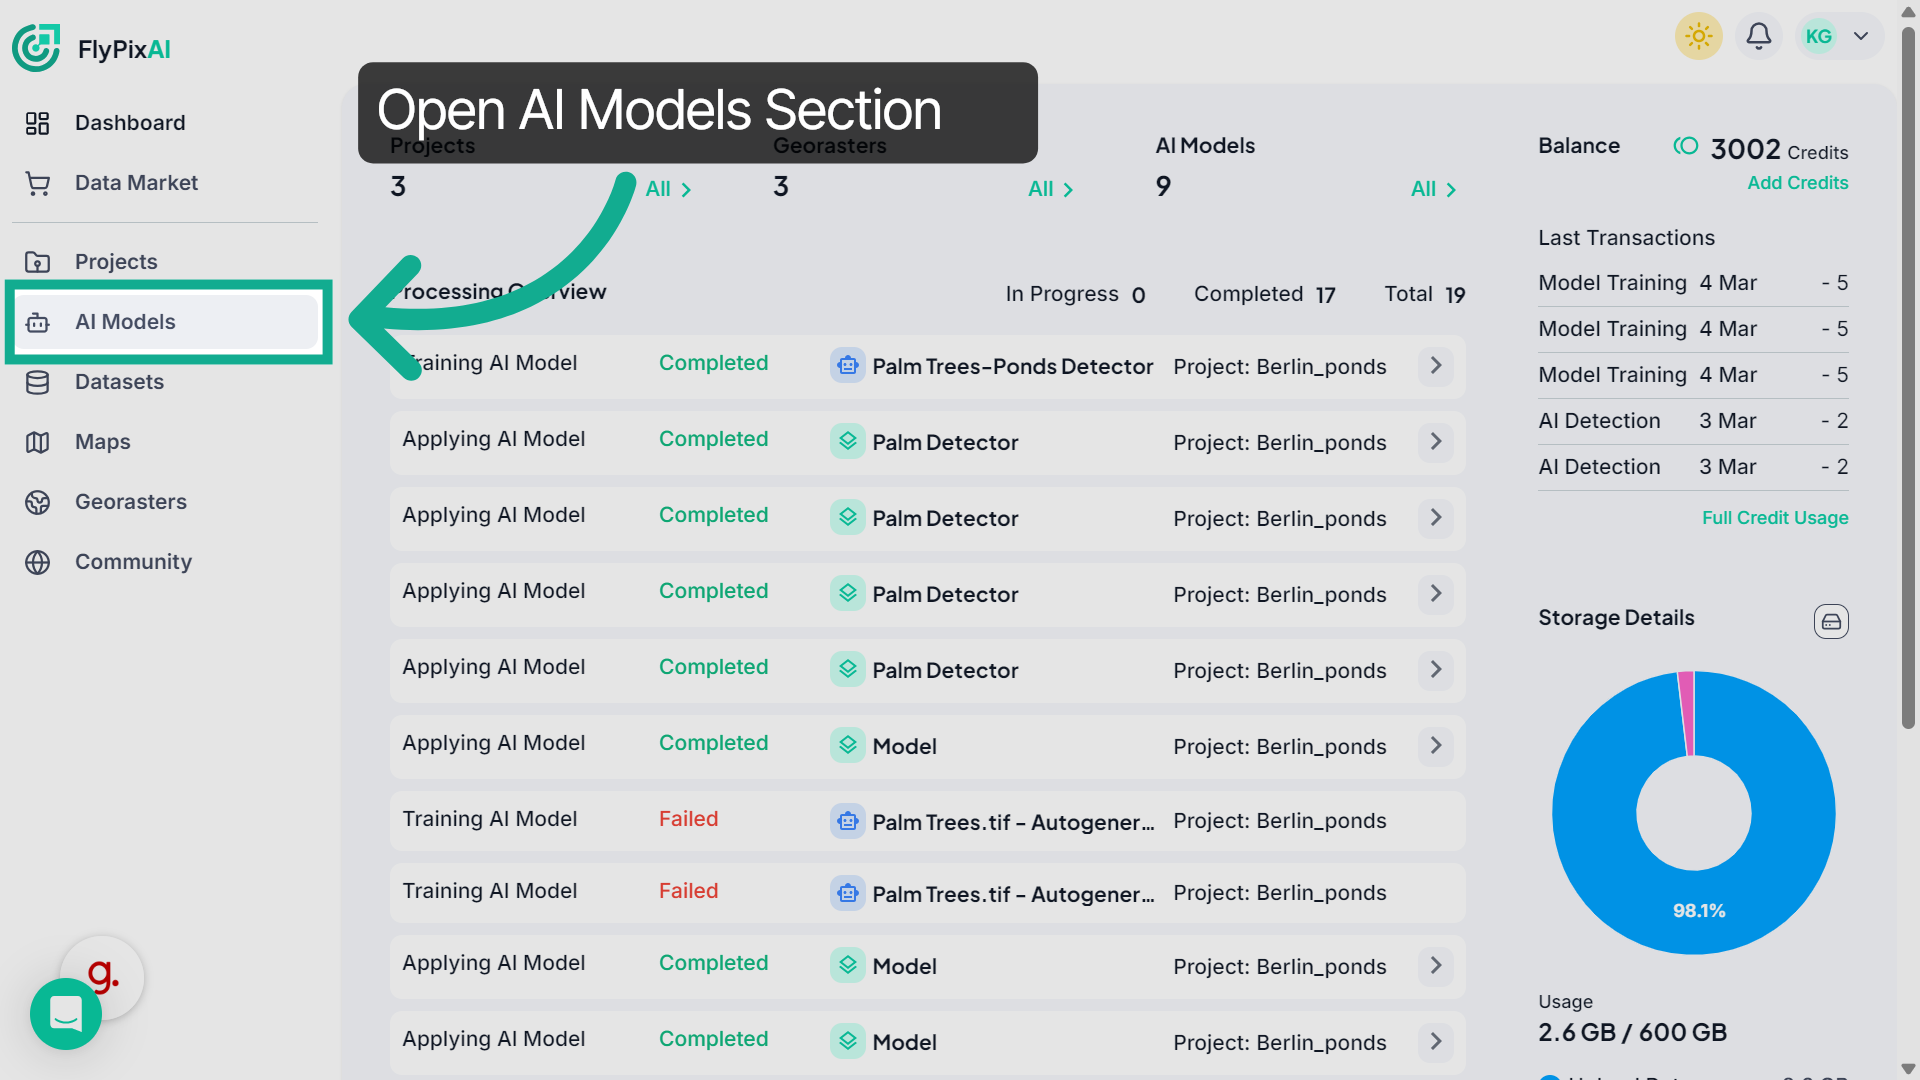
1. Access AI Models Section
From the left navigation panel, click AI Models to open the models workspace where all available AI models are listed.
2. View All AI Models
On this page, you can view all available AI models, including community models and the models created or trained in your own workspace.
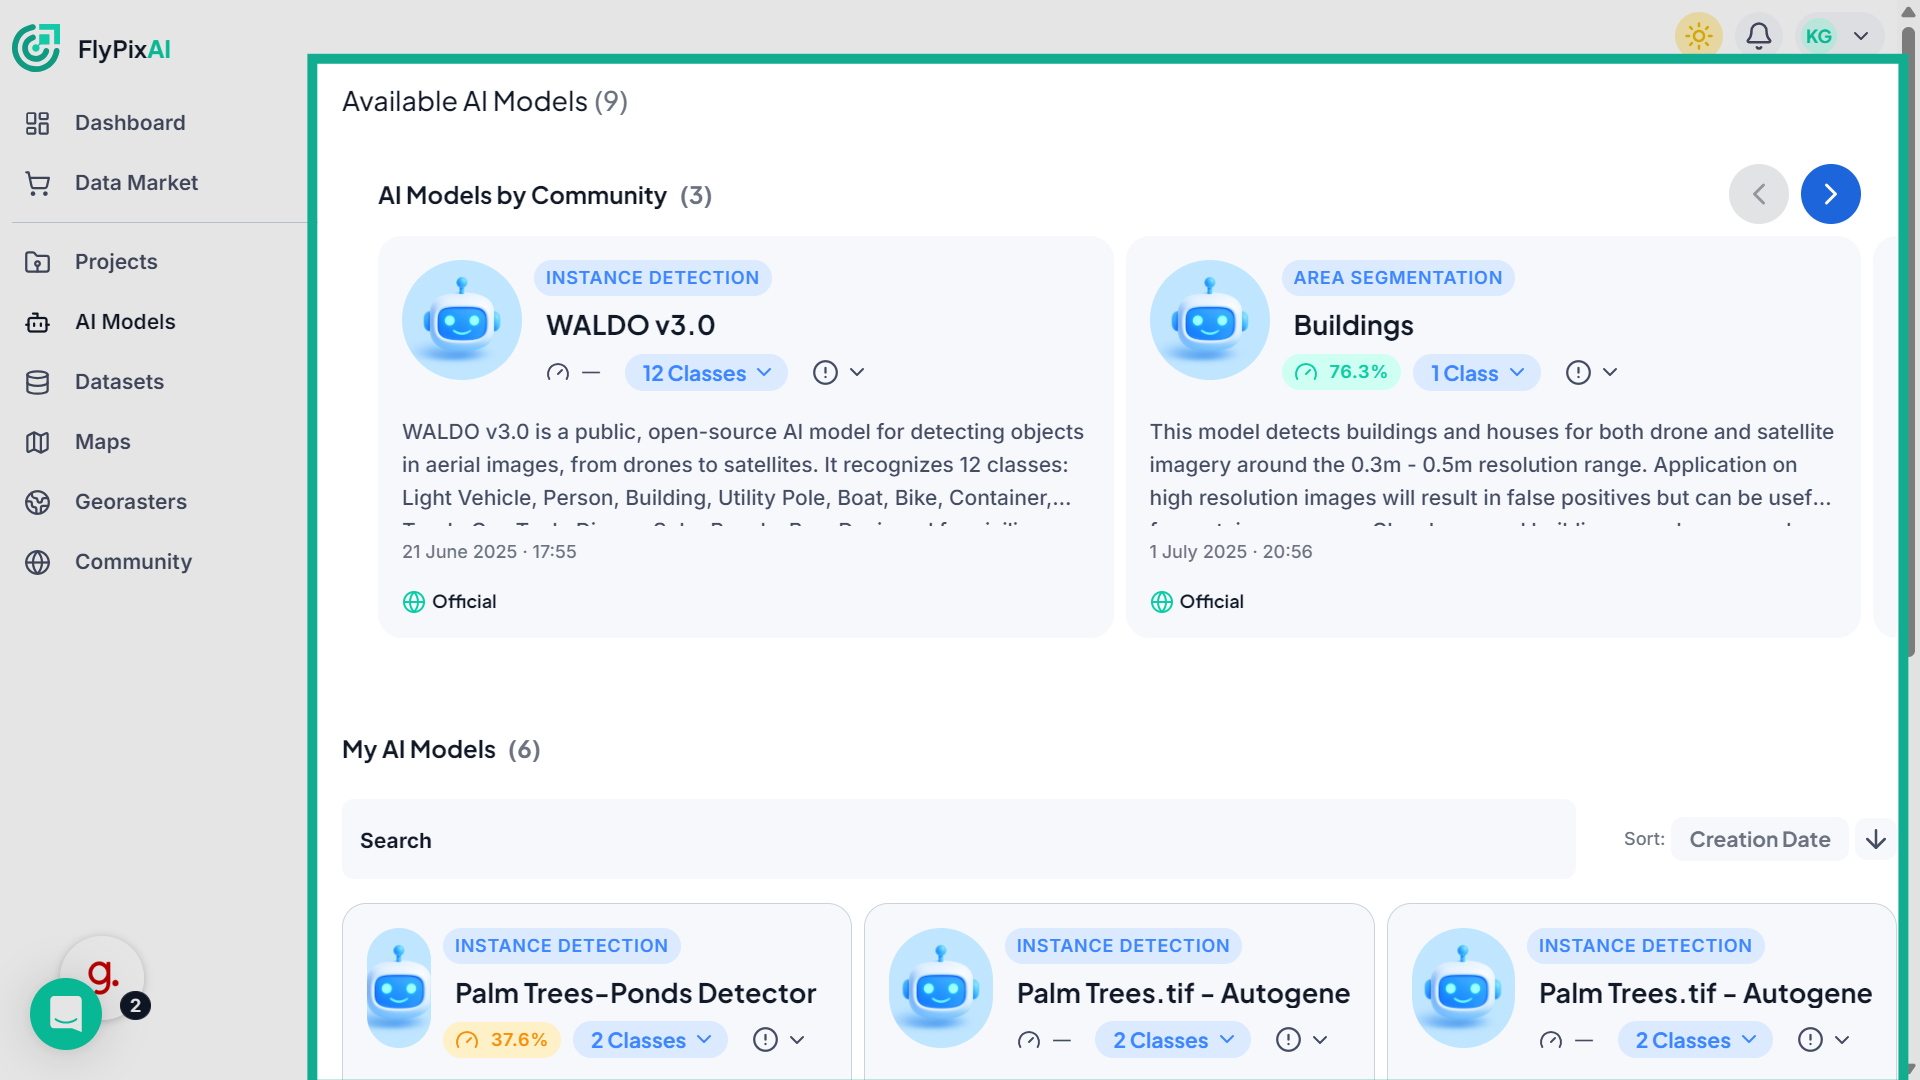
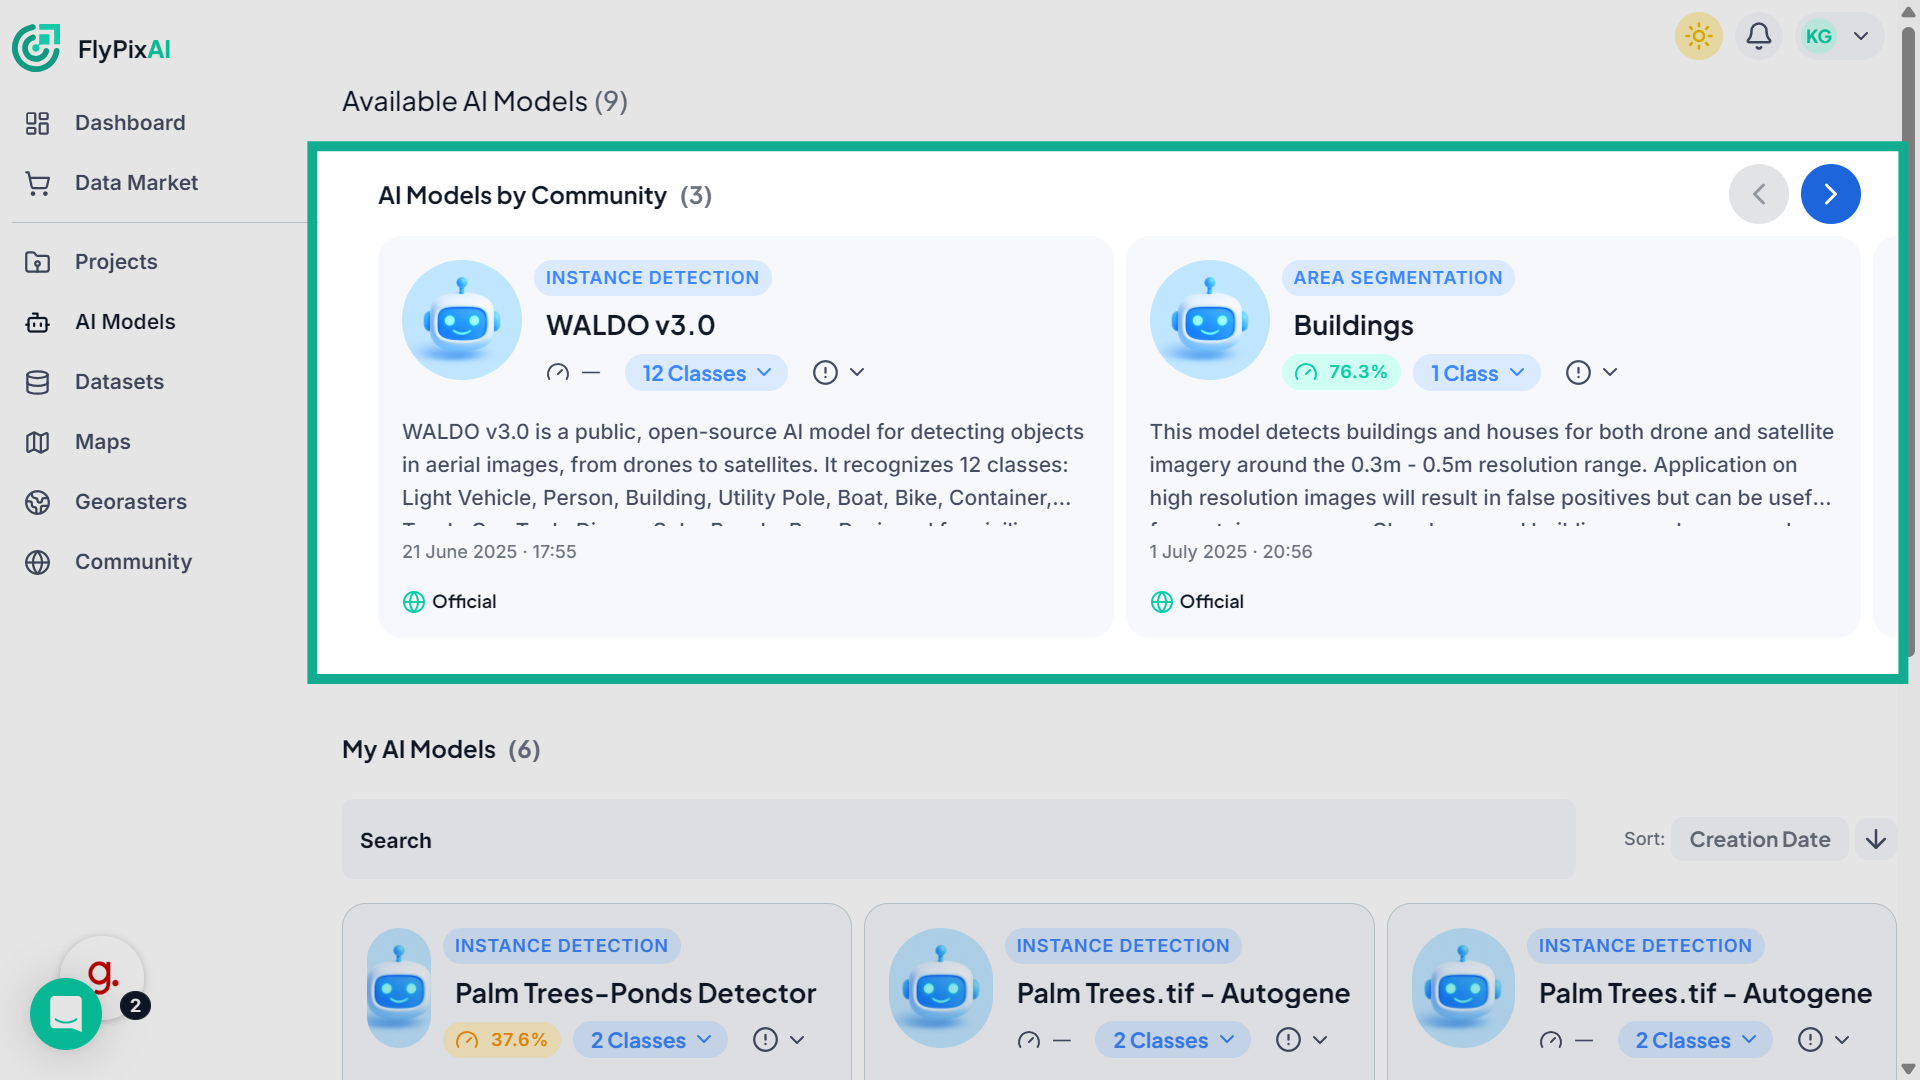
3. Explore Community AI Models
At the top of the page, you’ll find the AI Models by Community section, which includes publicly available models that can be explored and reviewed.
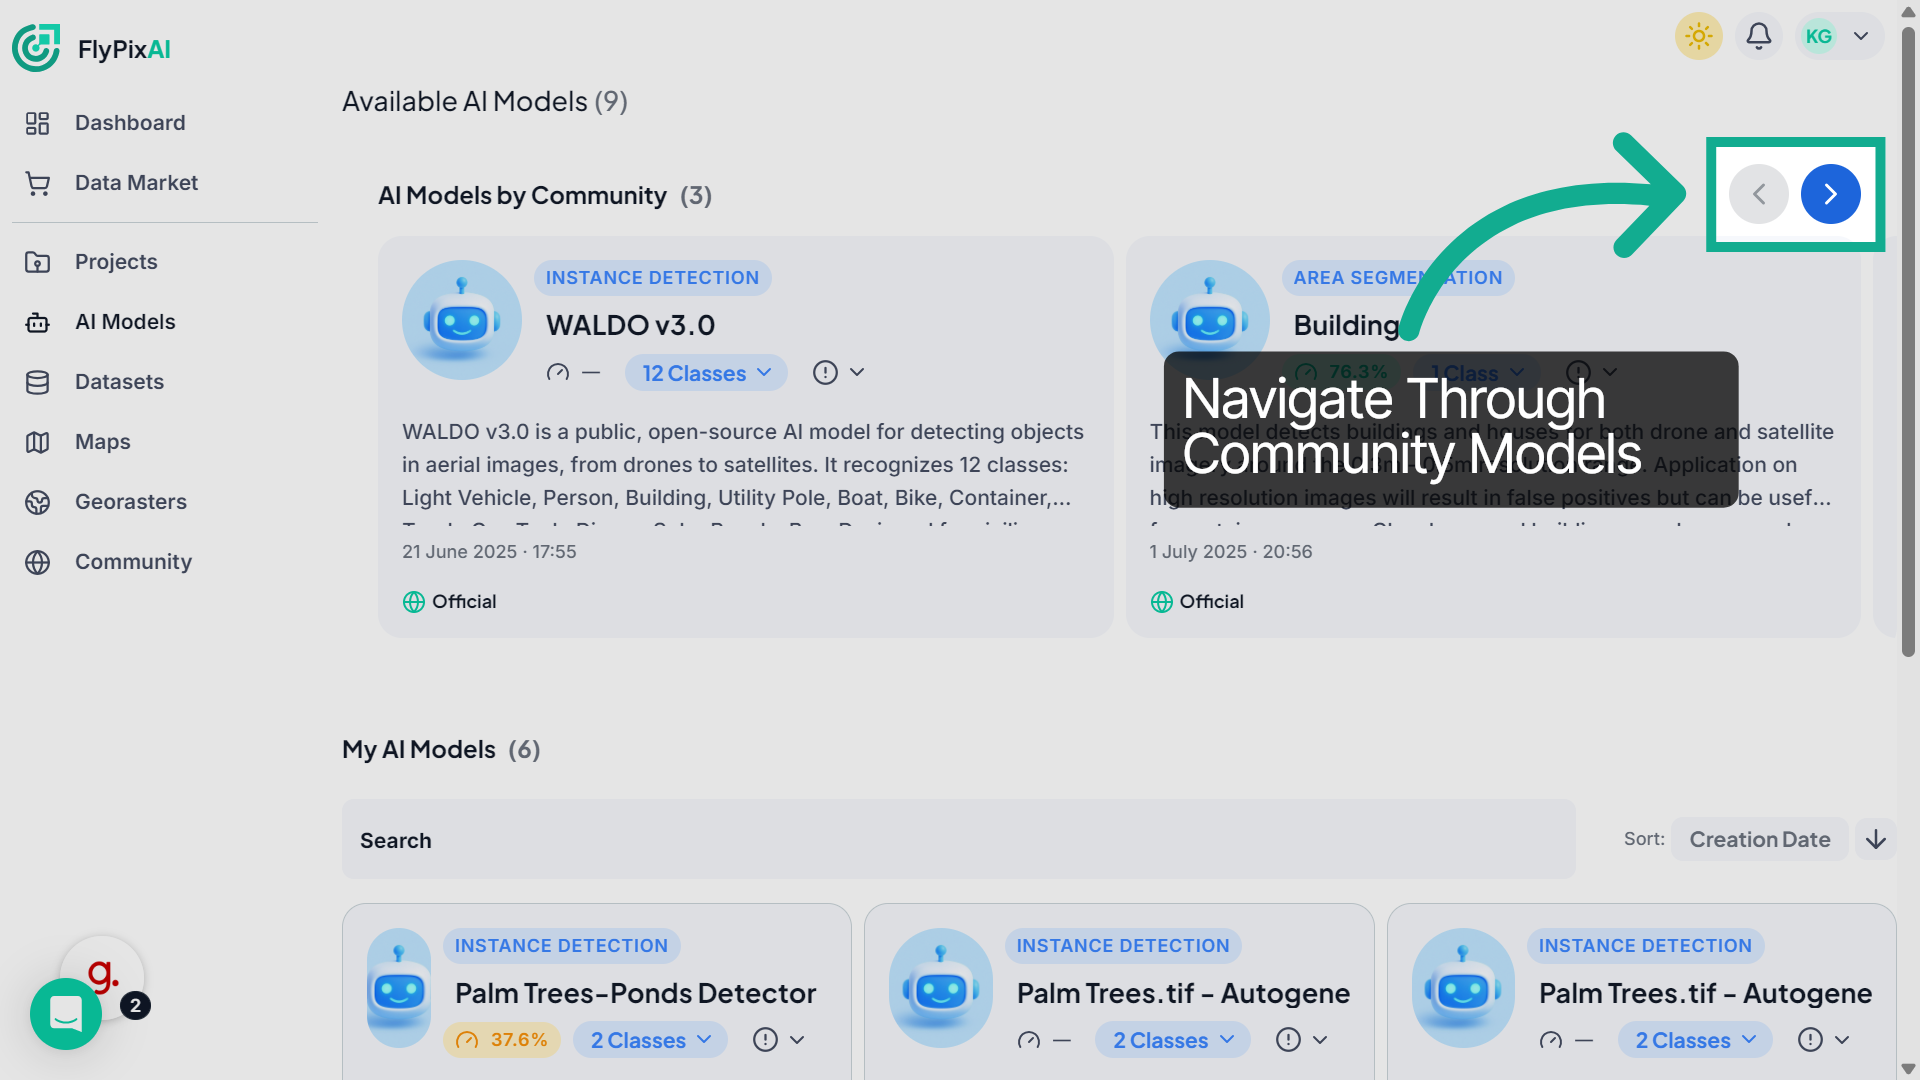
4. Navigate Model List
Use the arrow buttons to move through additional community models. Click the right arrow to view more models and the left arrow to return to previous ones.
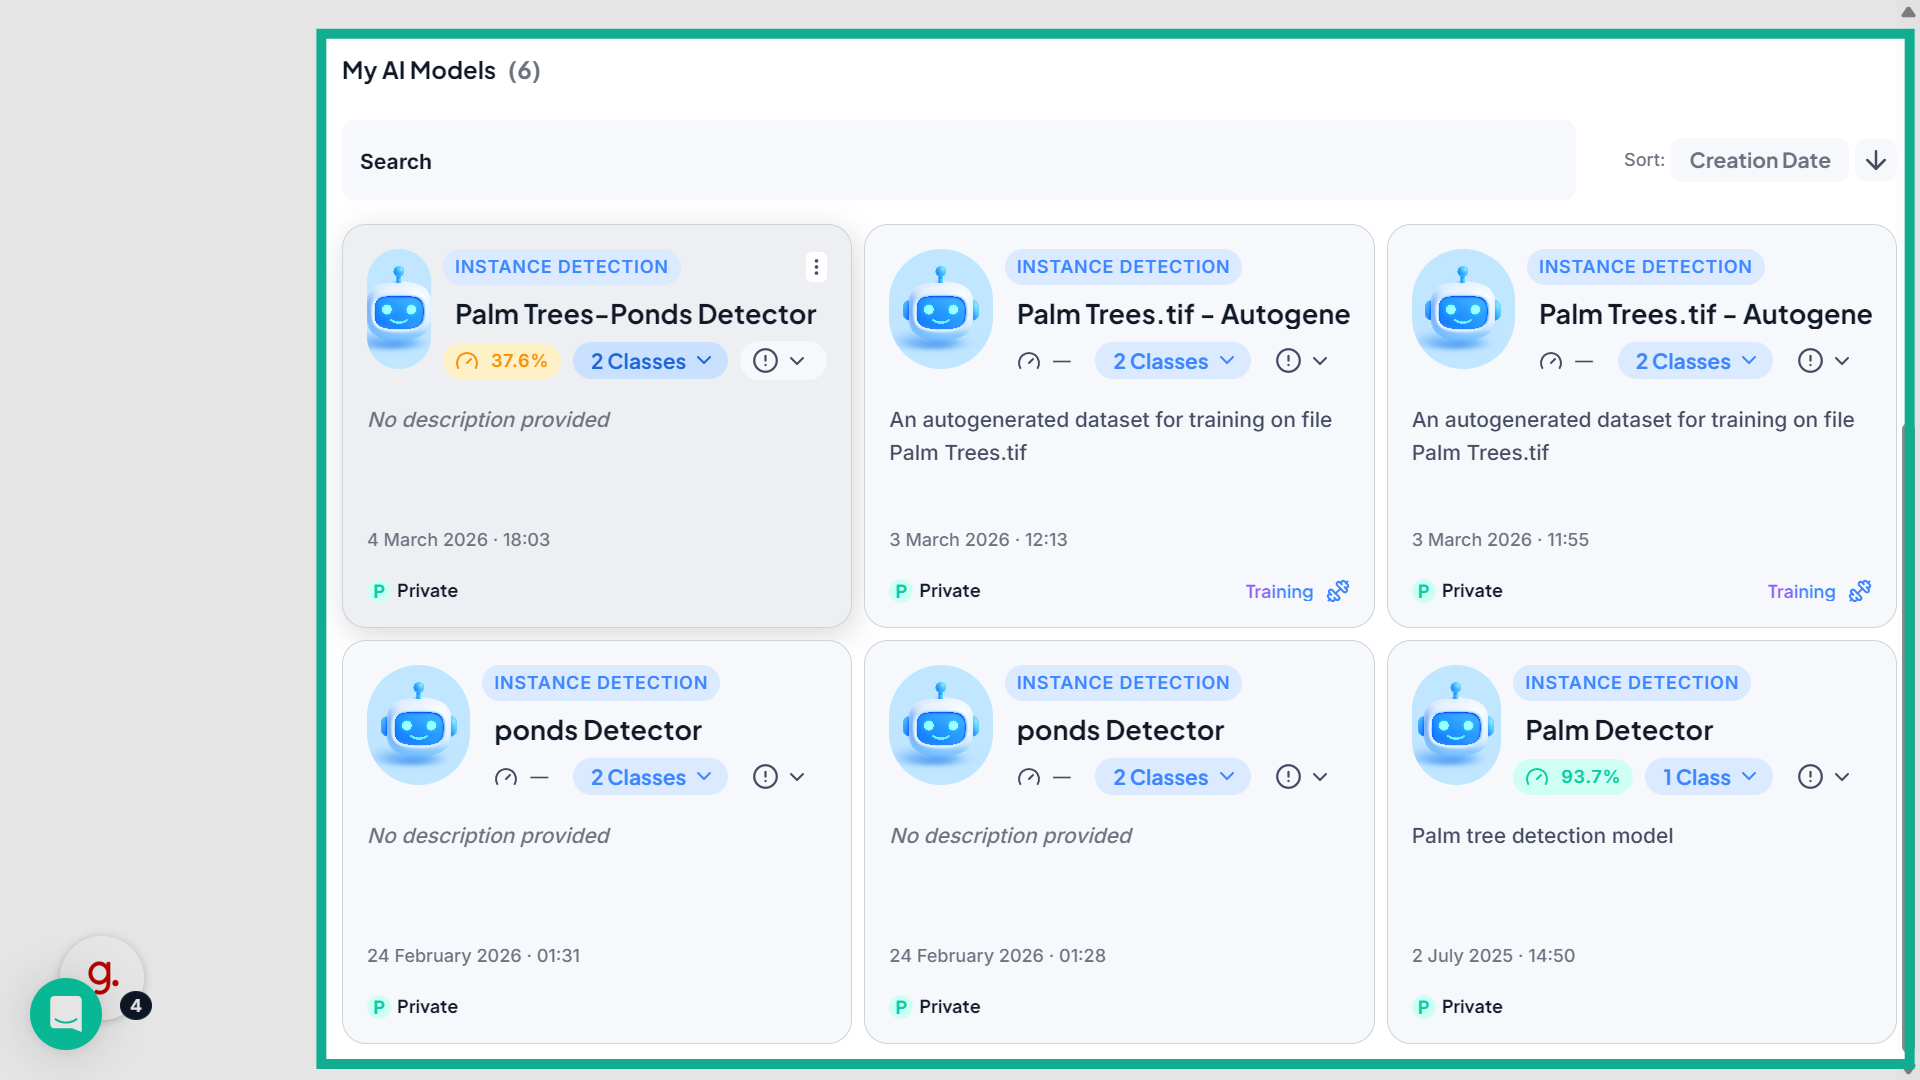
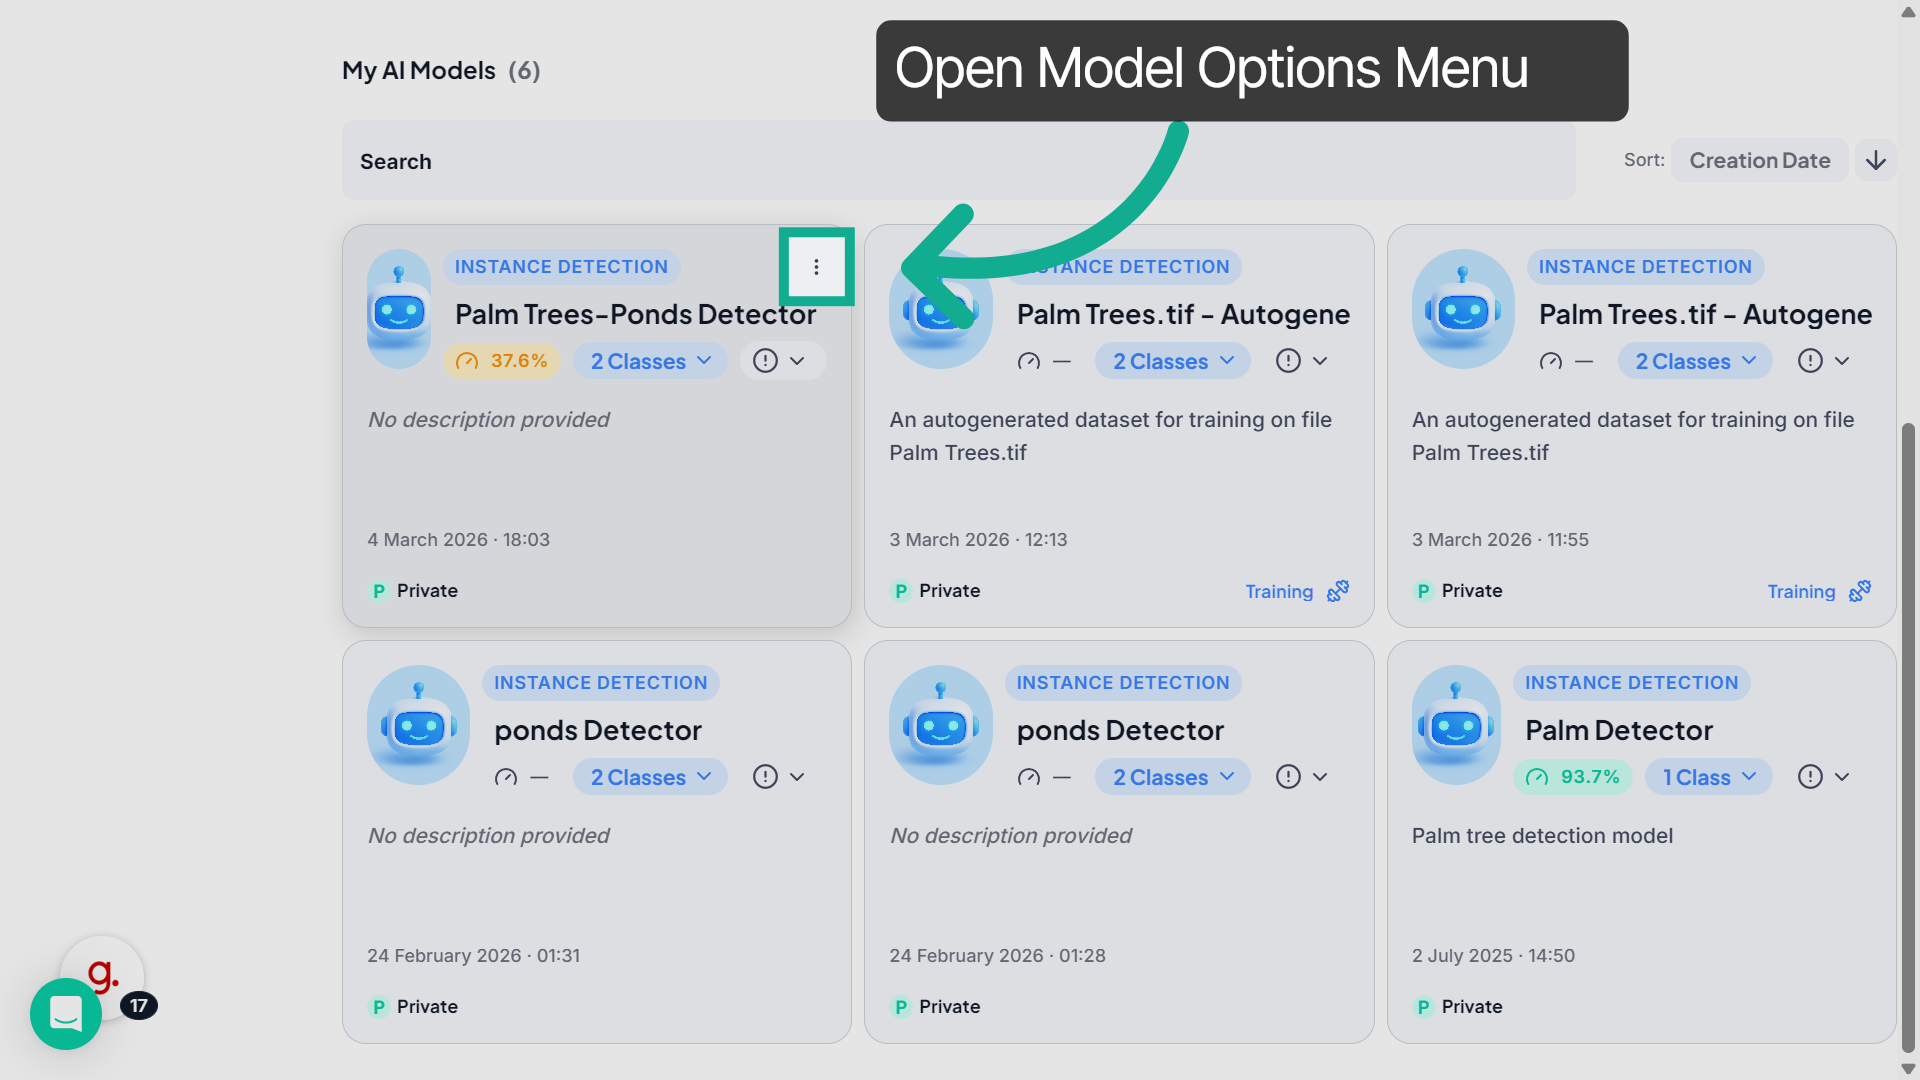
5. View Your AI Models
Scroll down to the My AI Models section to see the models that you have trained or generated within your workspace.
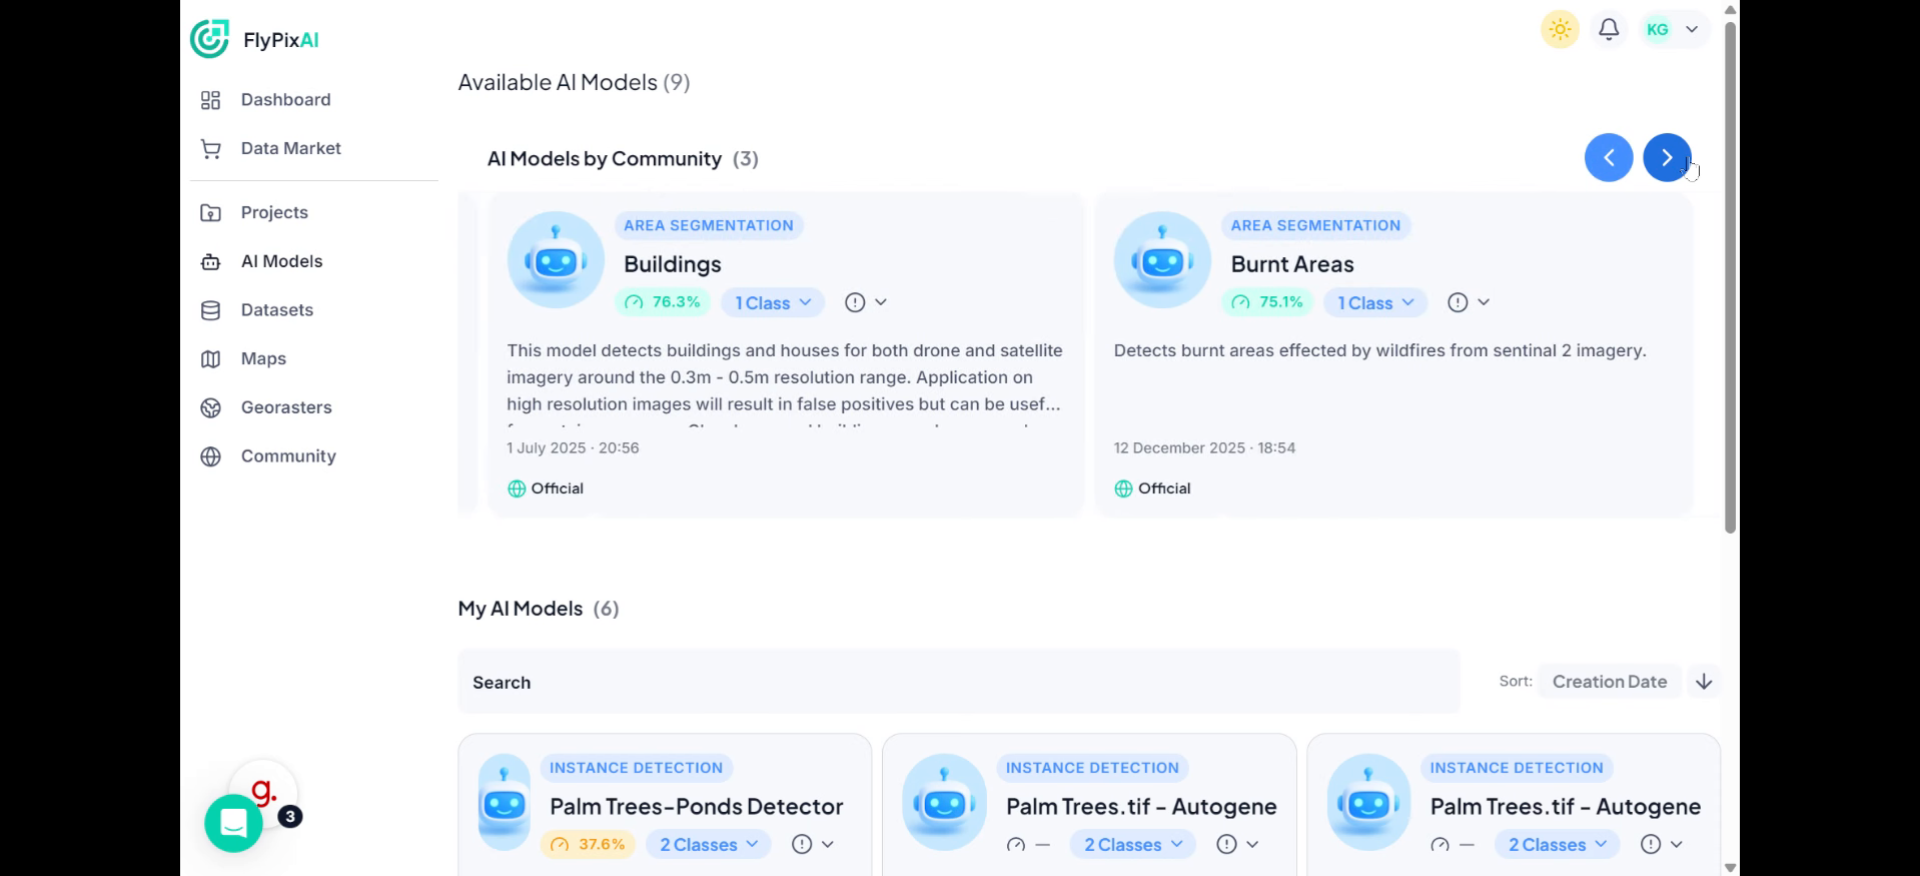
6. Review Model Cards
Each model appears as a card displaying important information such as the model type, name, performance score, number of classes, description, creation date, and visibility status.
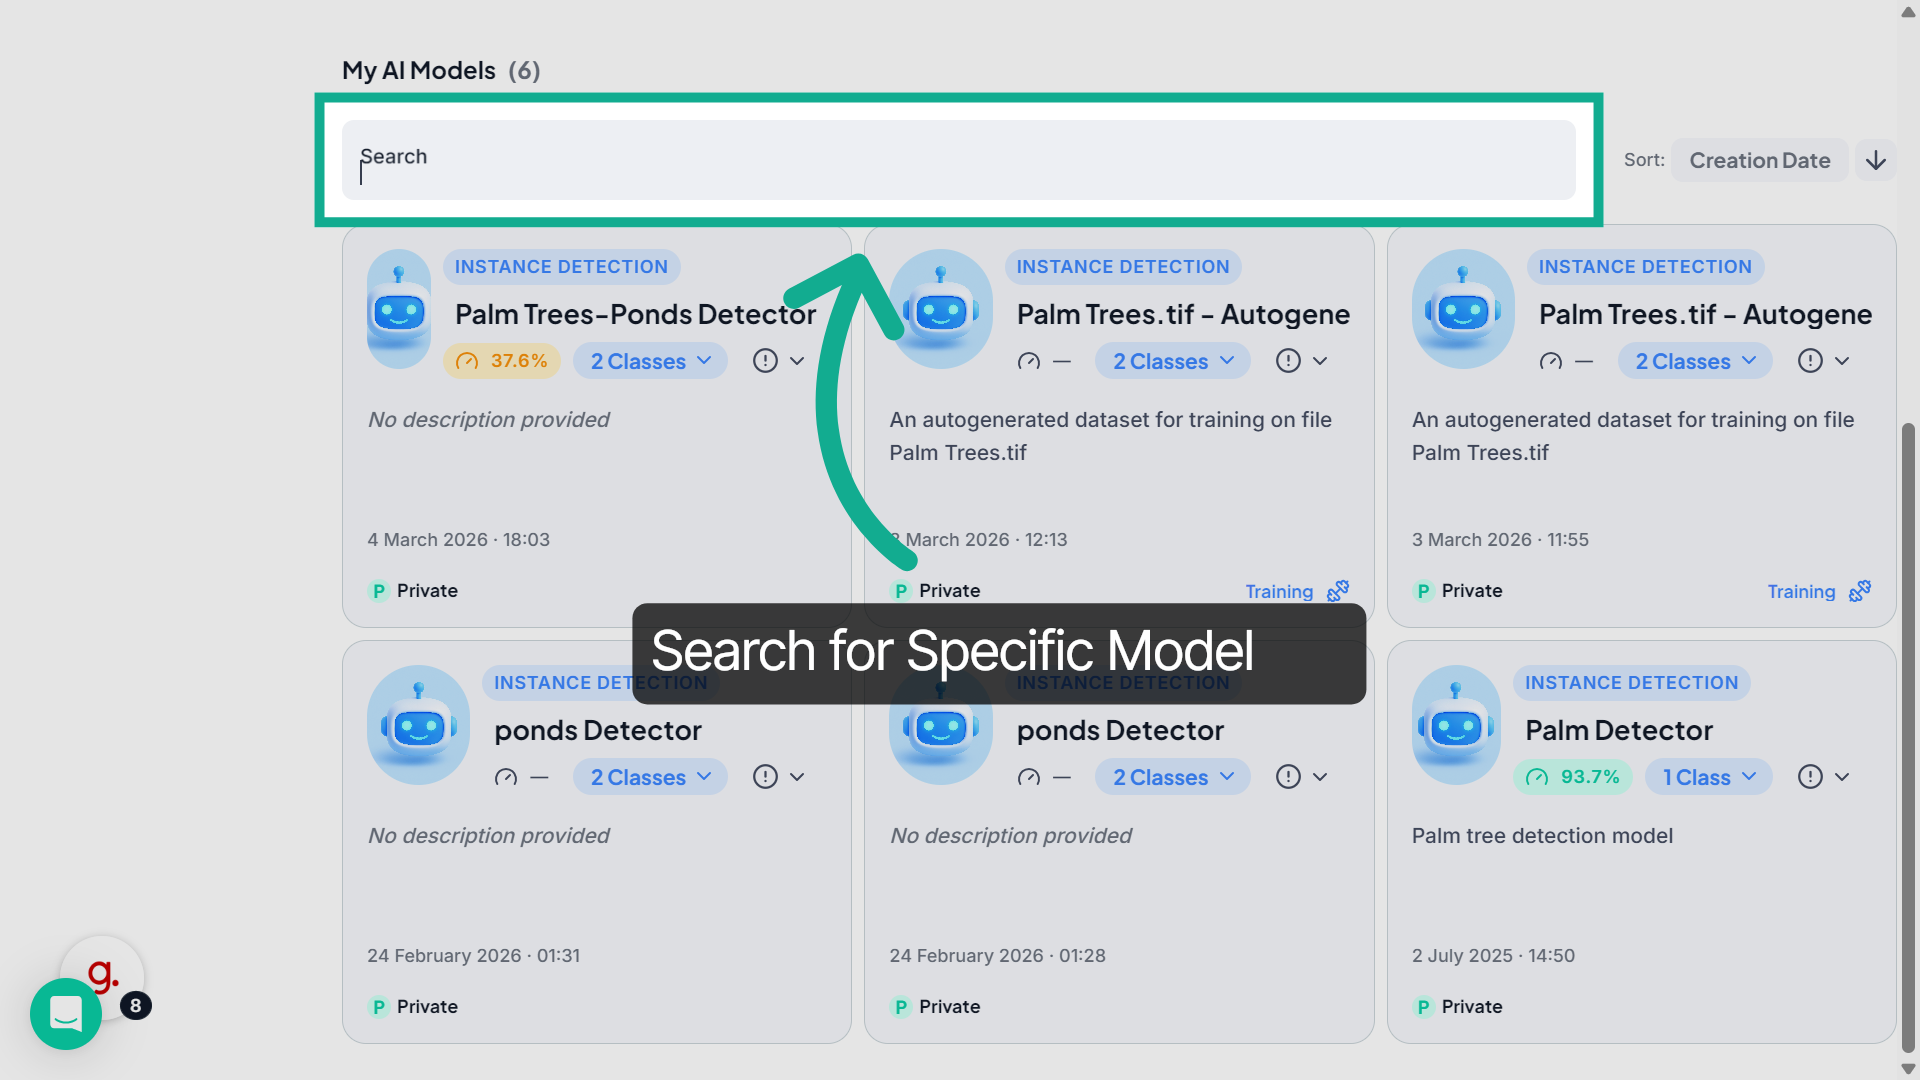
7. Search Specific Model
Use the Search bar to quickly locate a specific model within your workspace.
8. Sort Model List
You can organize the model list using the Sort menu, where models can be sorted by Creation Date or Name.
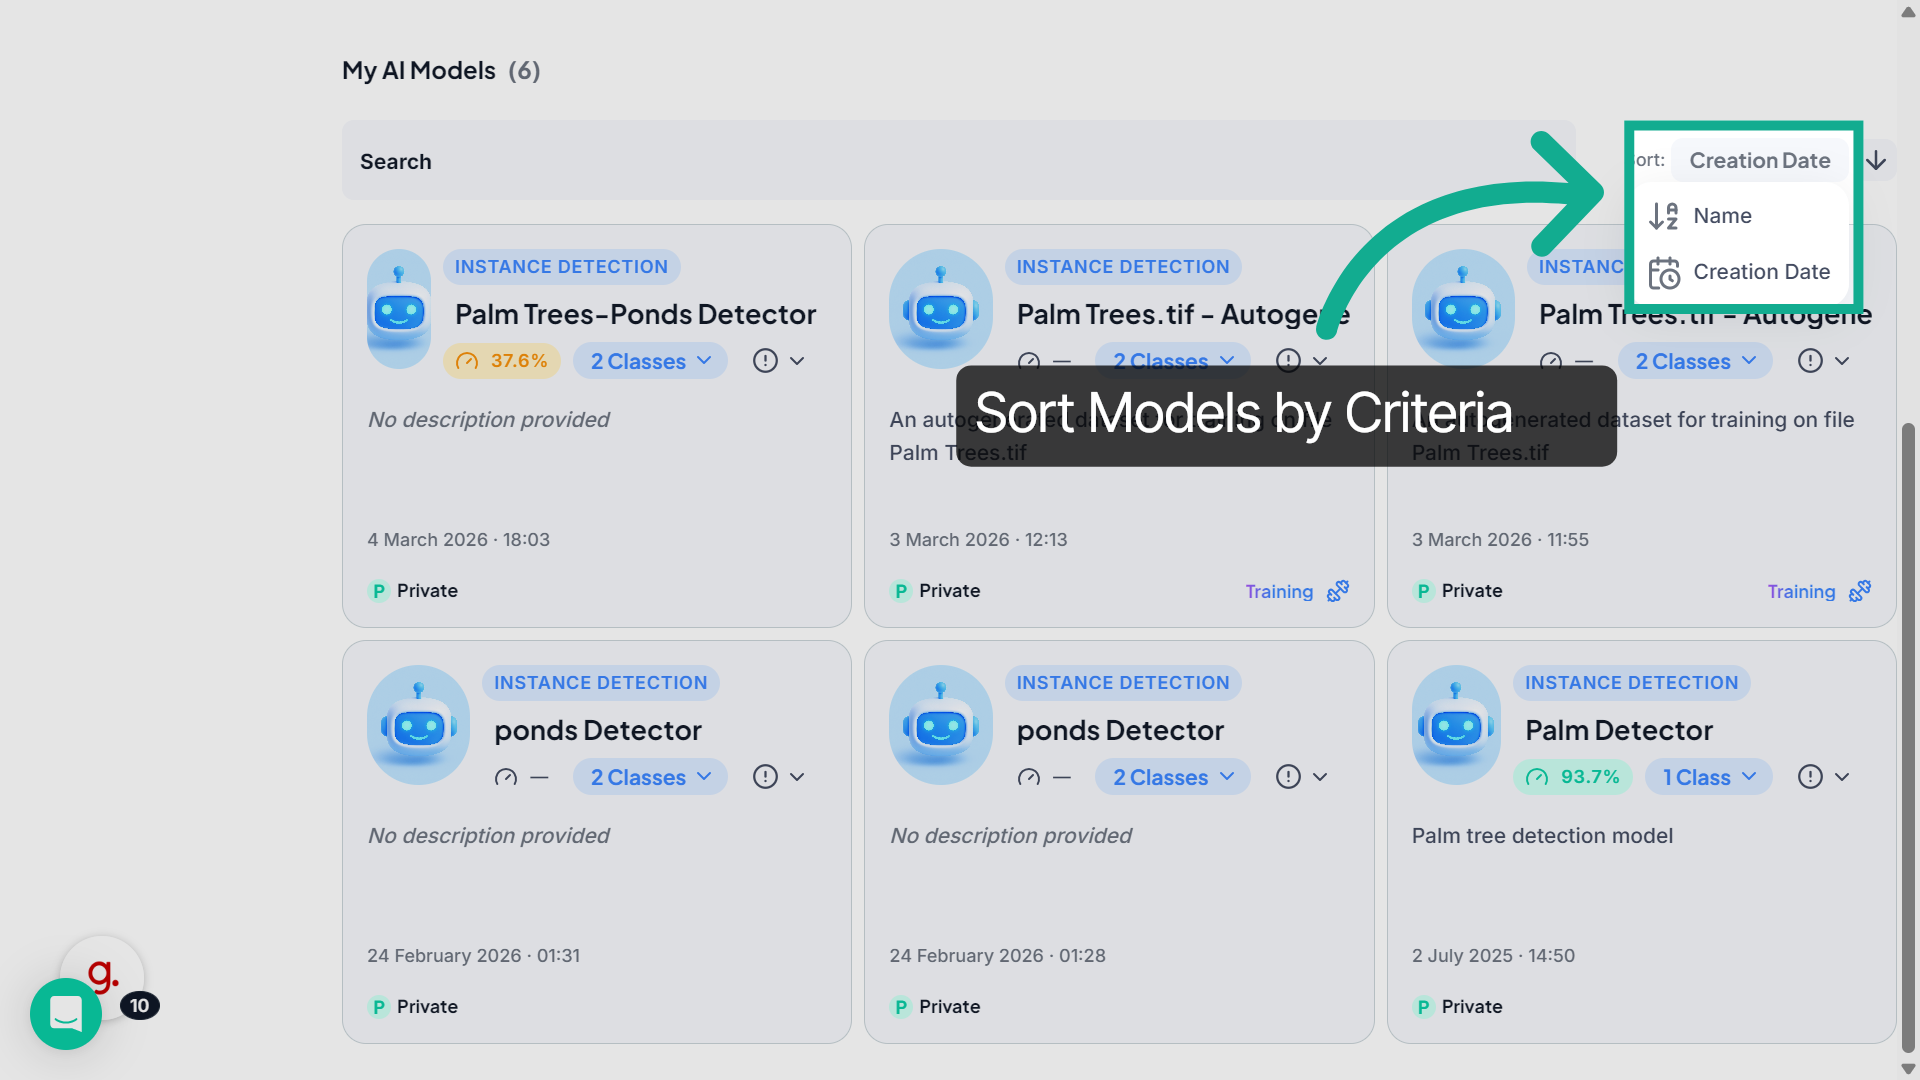
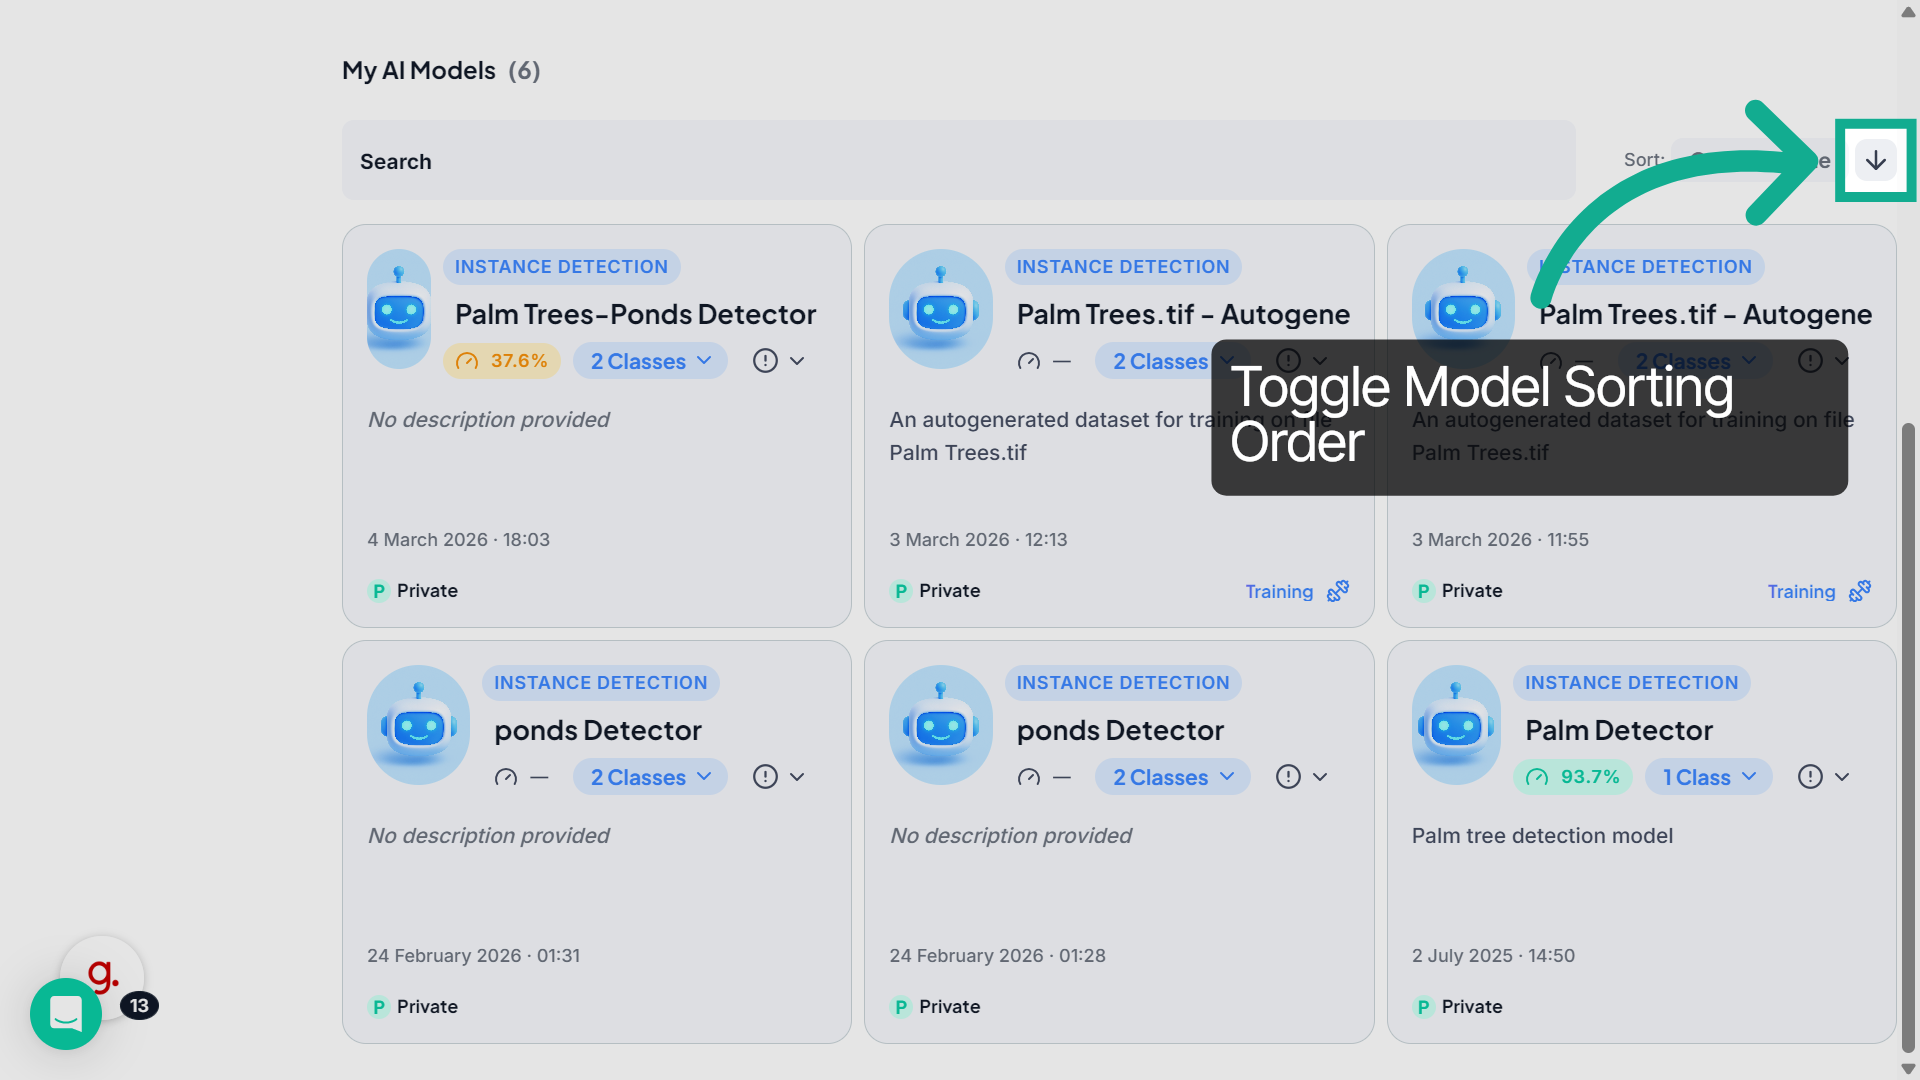
9. Change Sort Order
Click the arrow icon next to the sorting option to toggle between ascending and descending order.
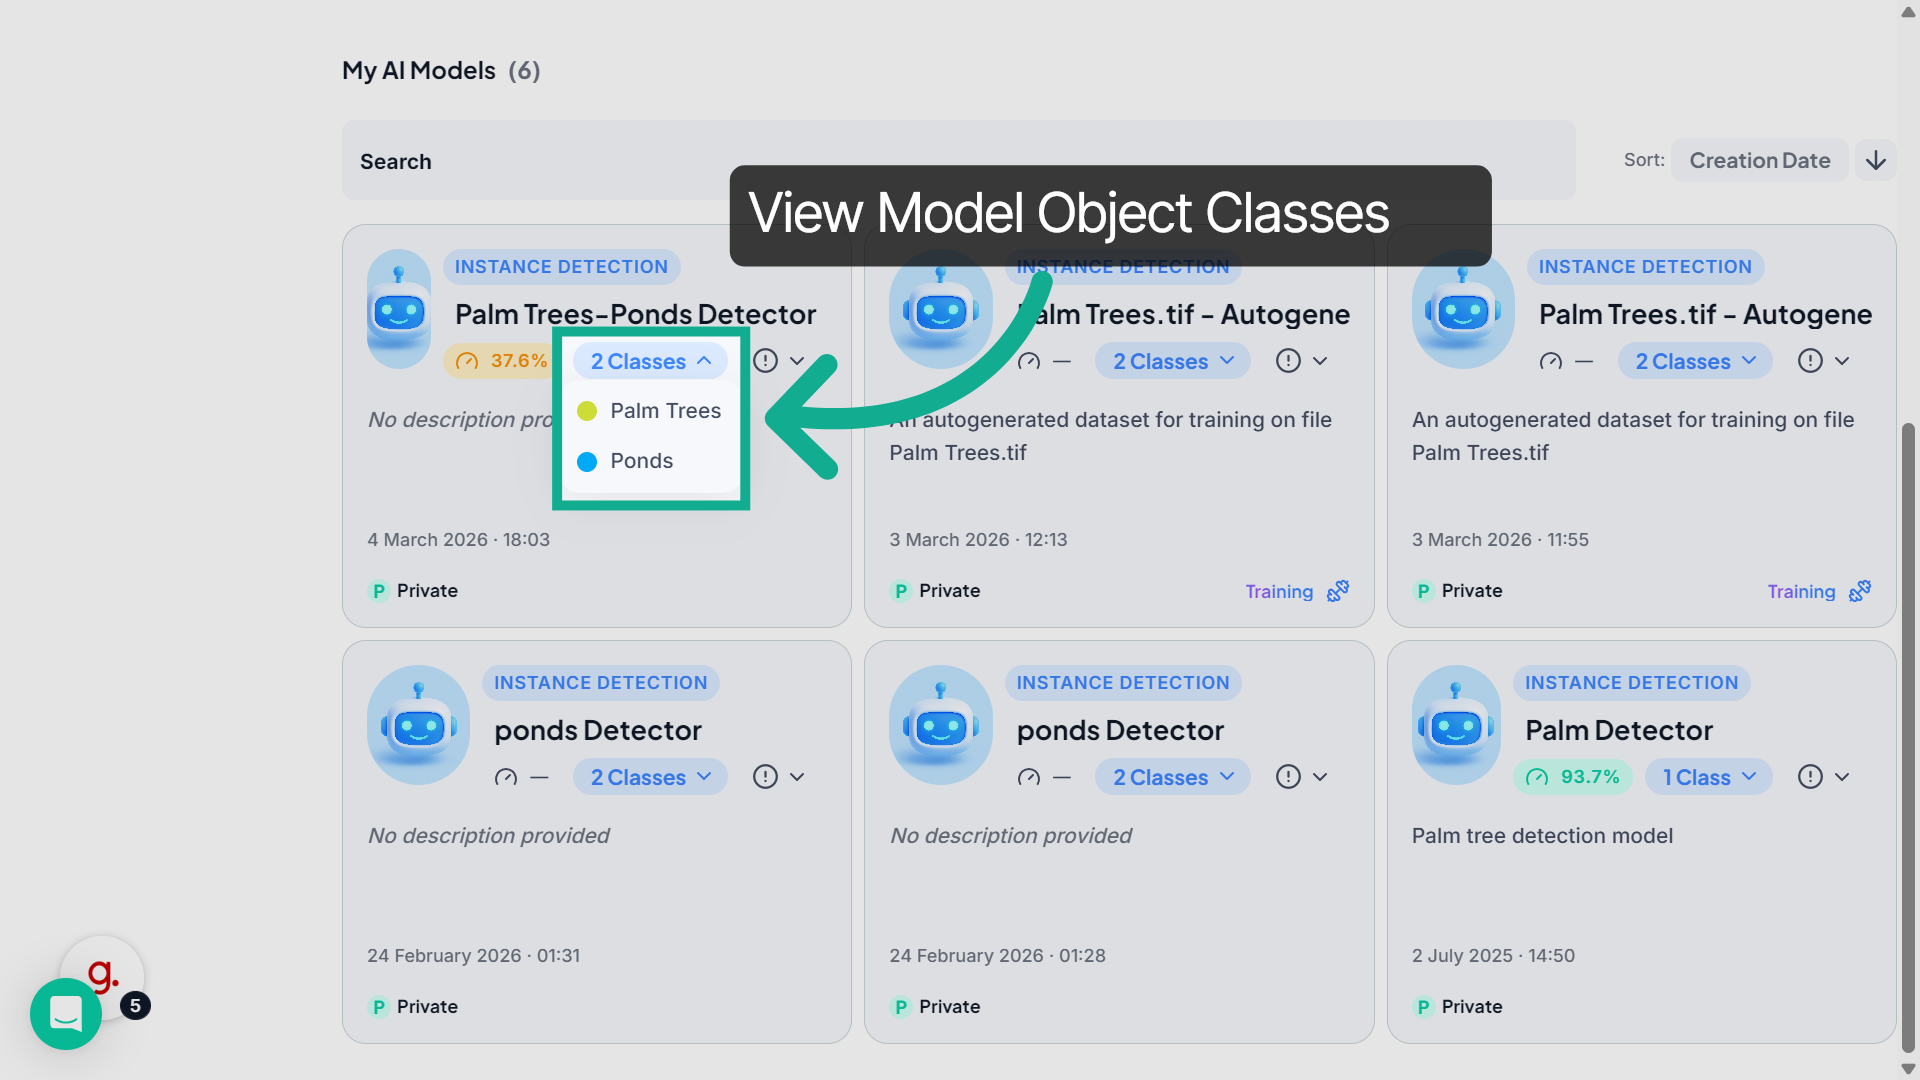
10. View Model Classes
Click the Classes dropdown to see the object classes that the model can detect.
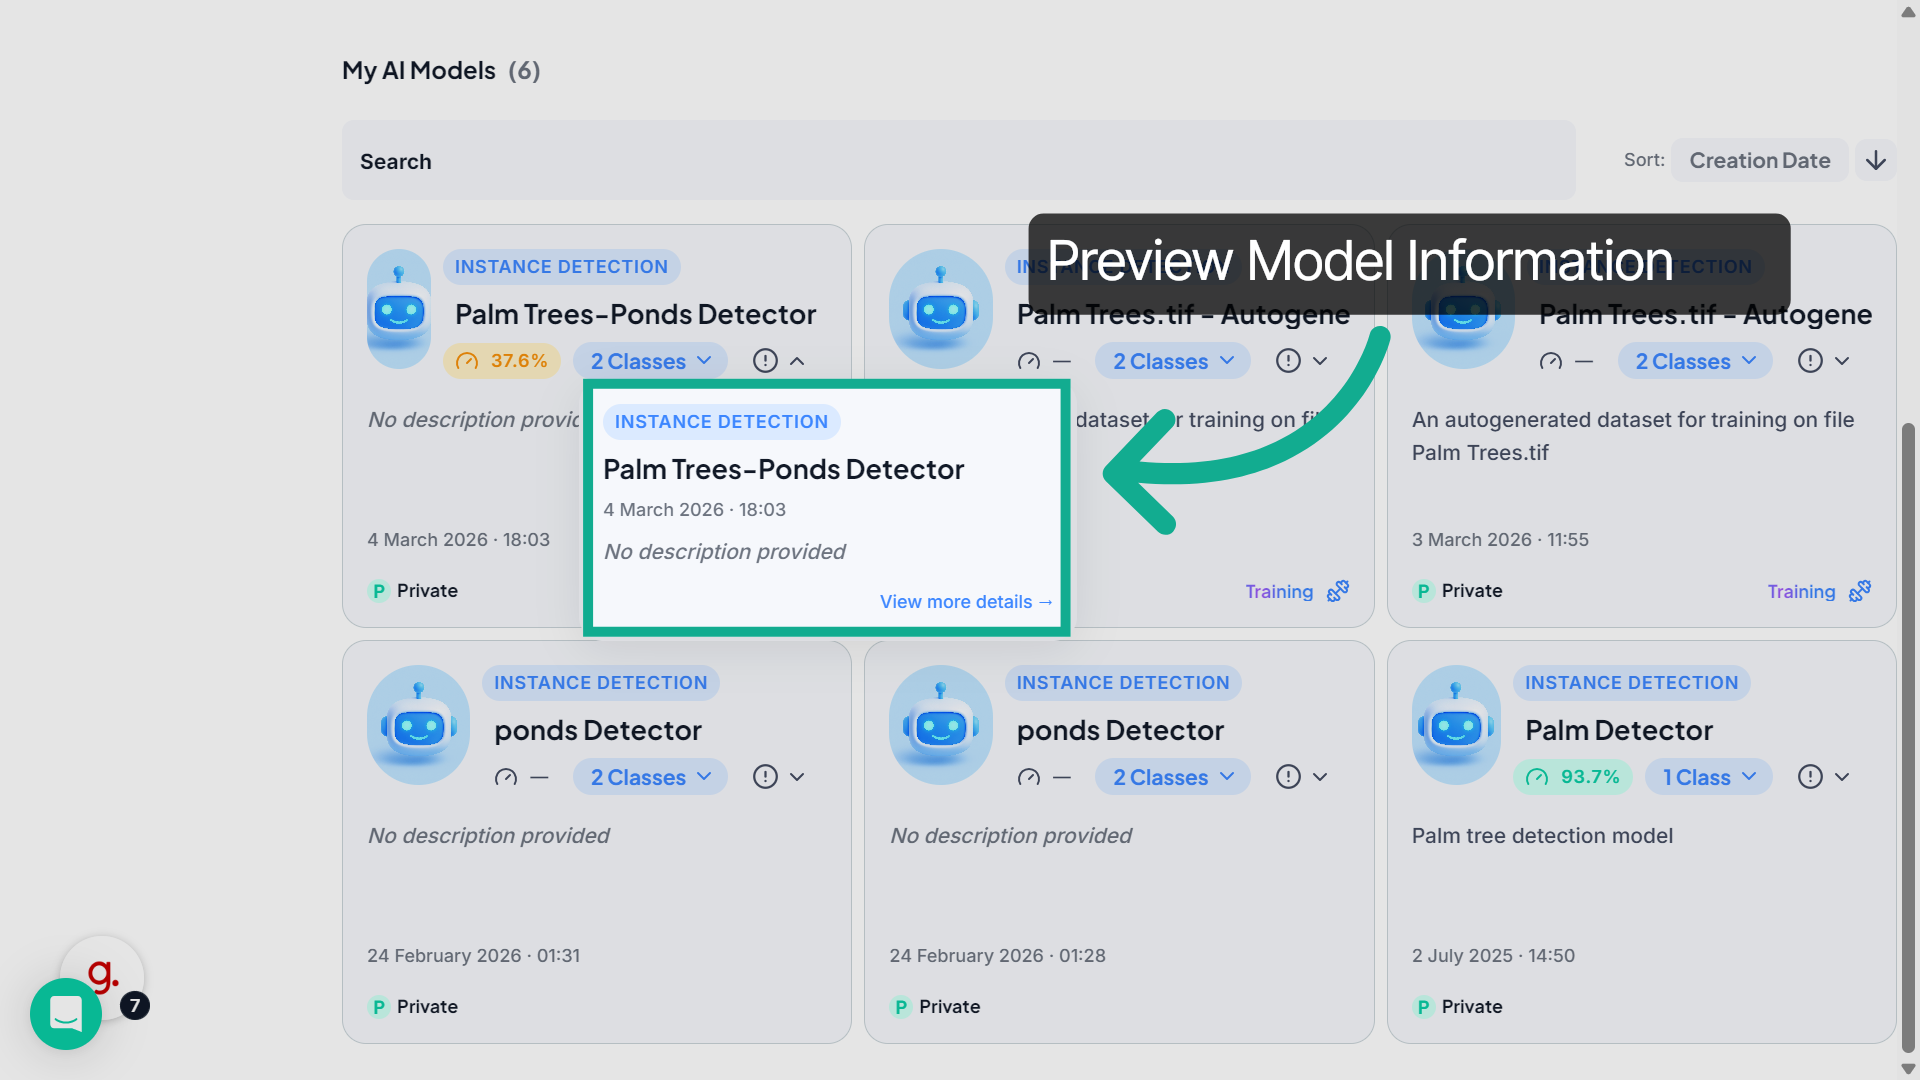
11. Preview Model Information
Click the information icon on a model card to quickly preview key details such as the model name, description, and creation date.
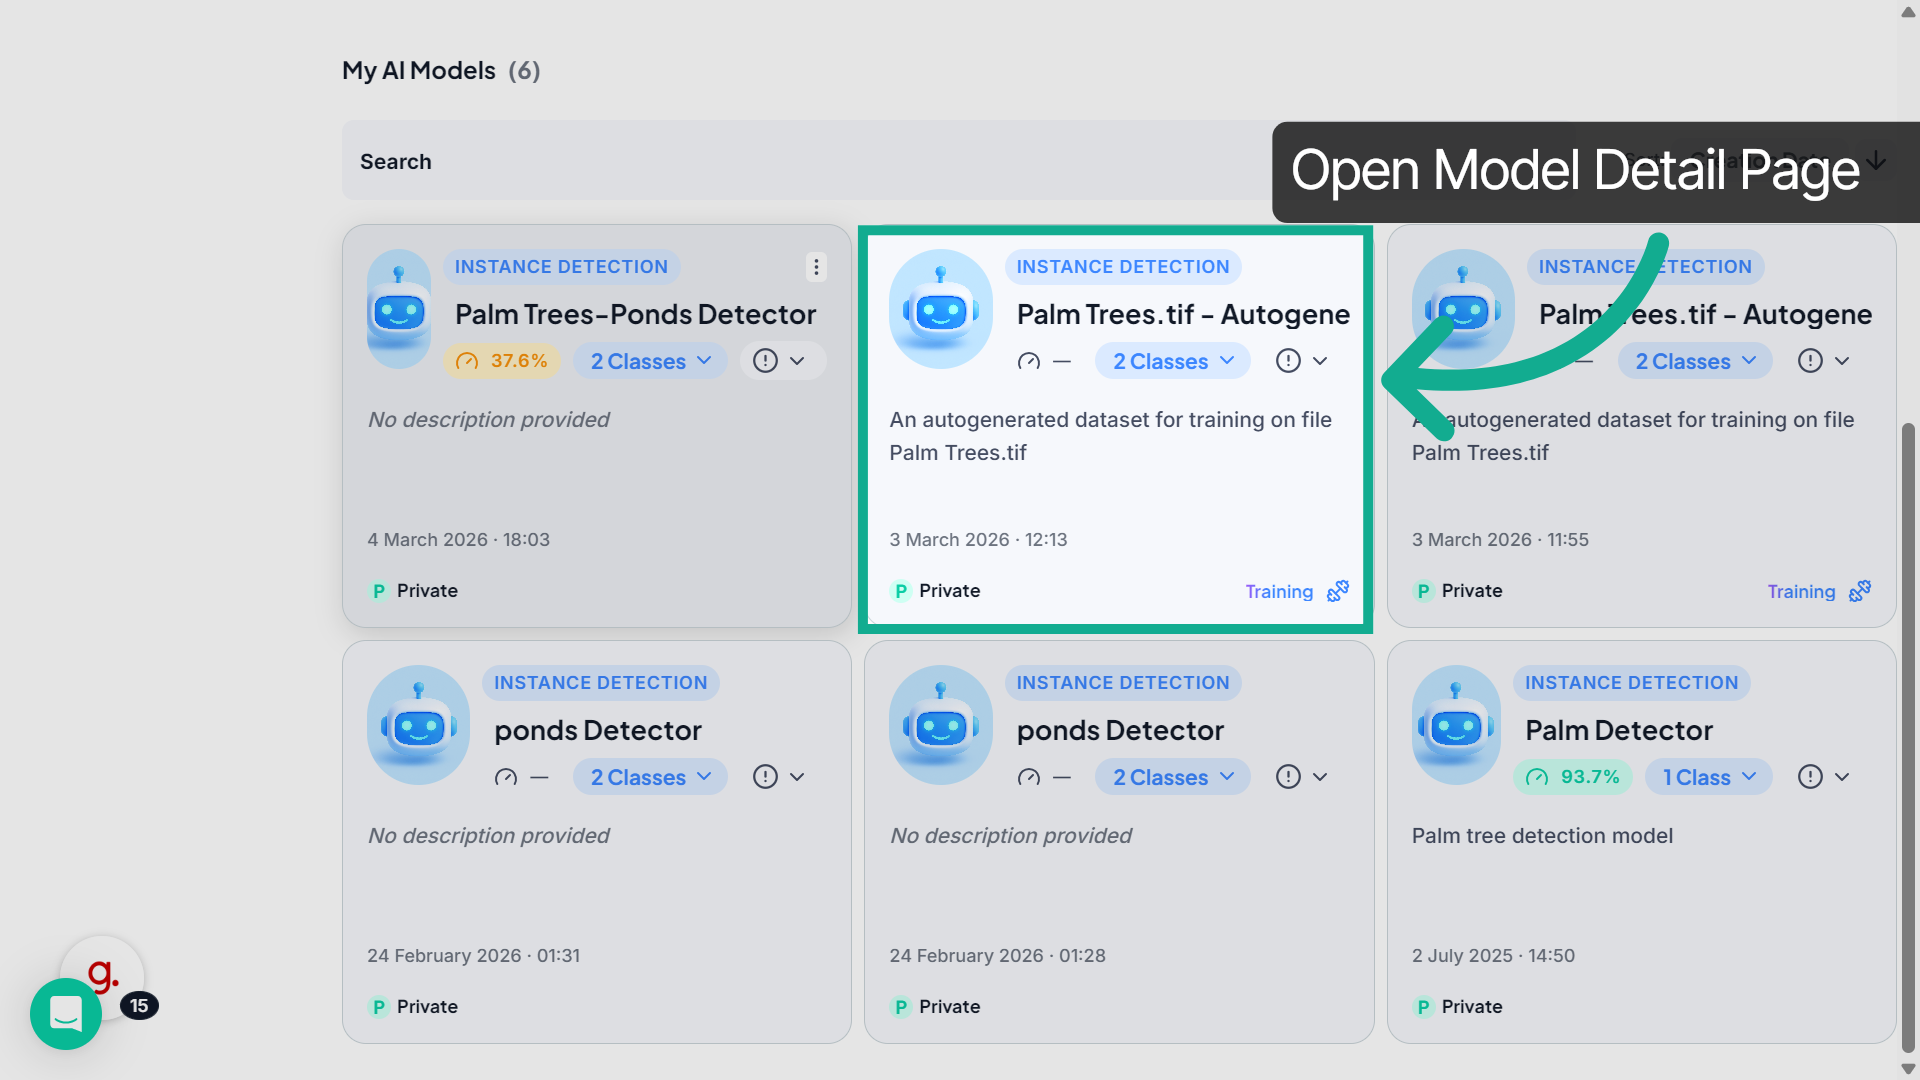
12. Open Model Details
Select a model card, such as Palm Trees–Ponds Detector, to open its detailed view and review its performance metrics.
13. Review Model Overview
At the top of the model page, you can view the model name, type, description, performance indicator, and detected object classes.
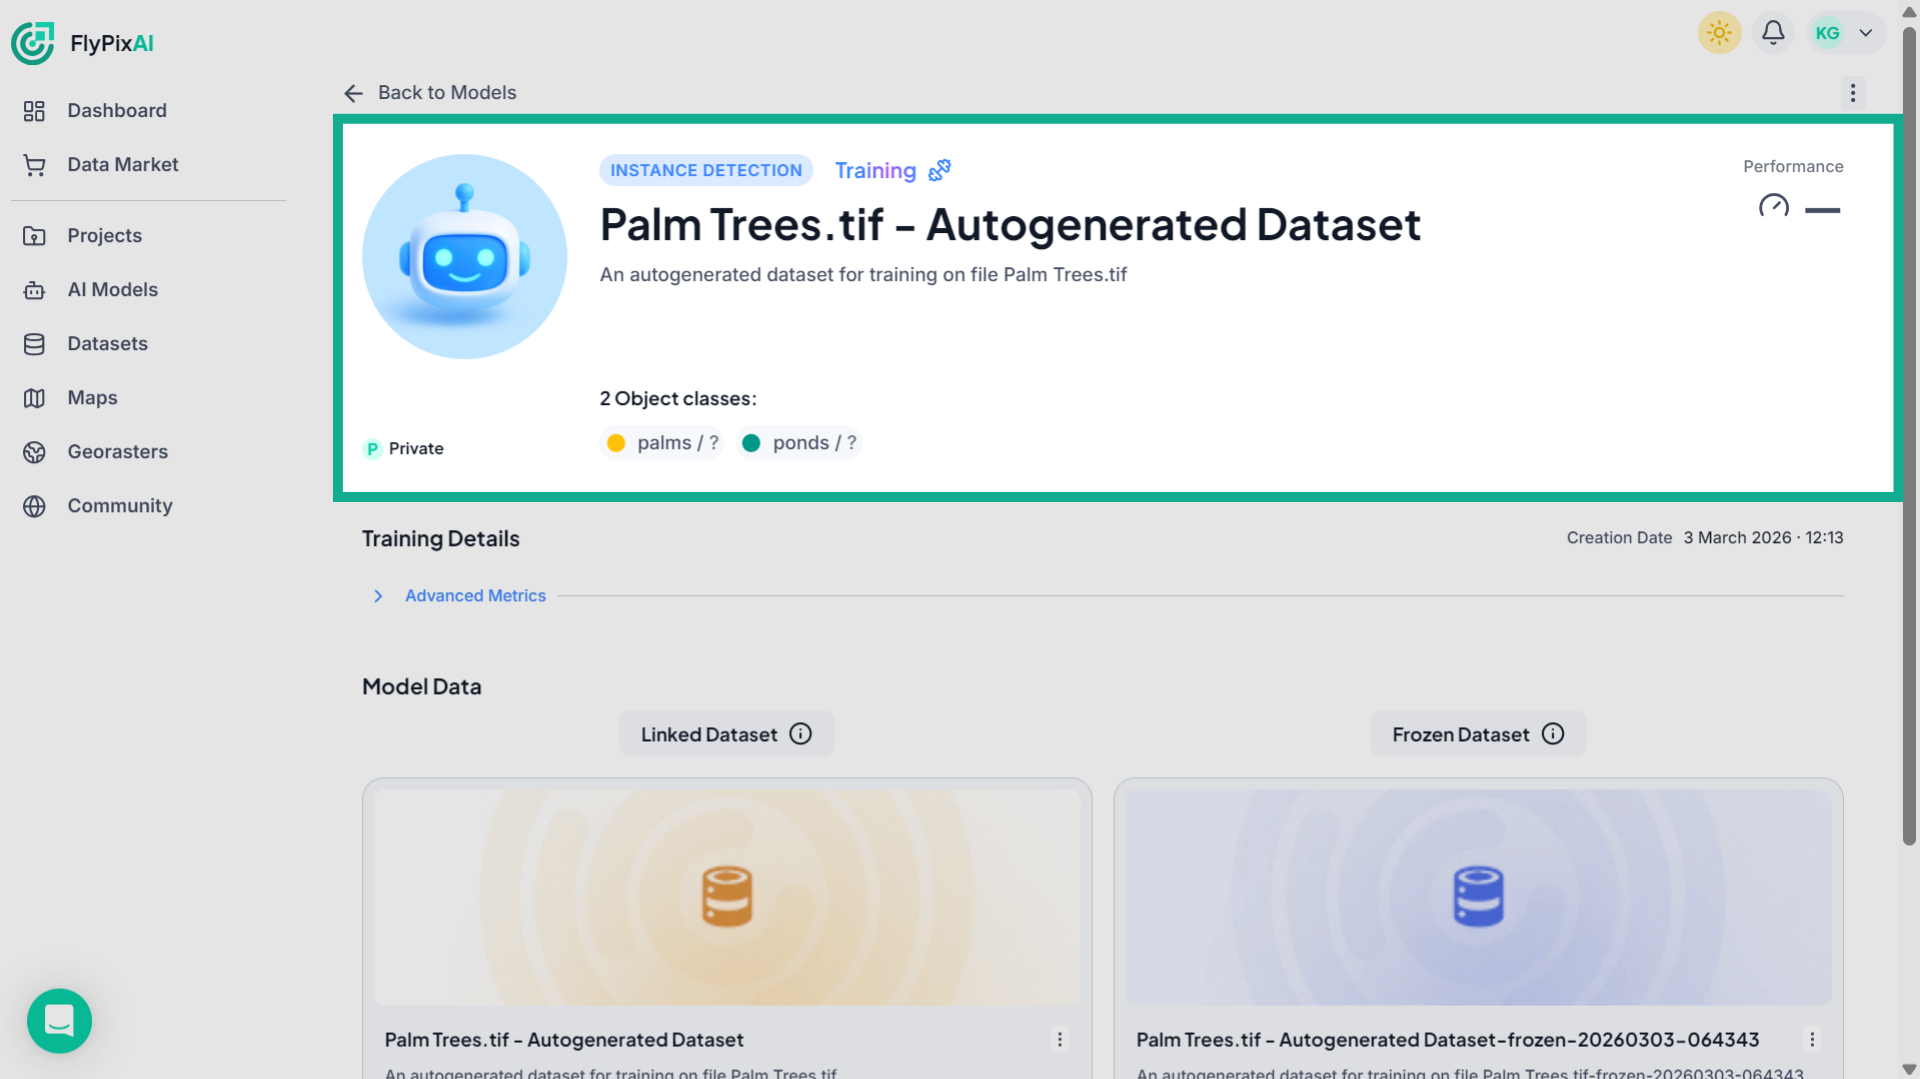
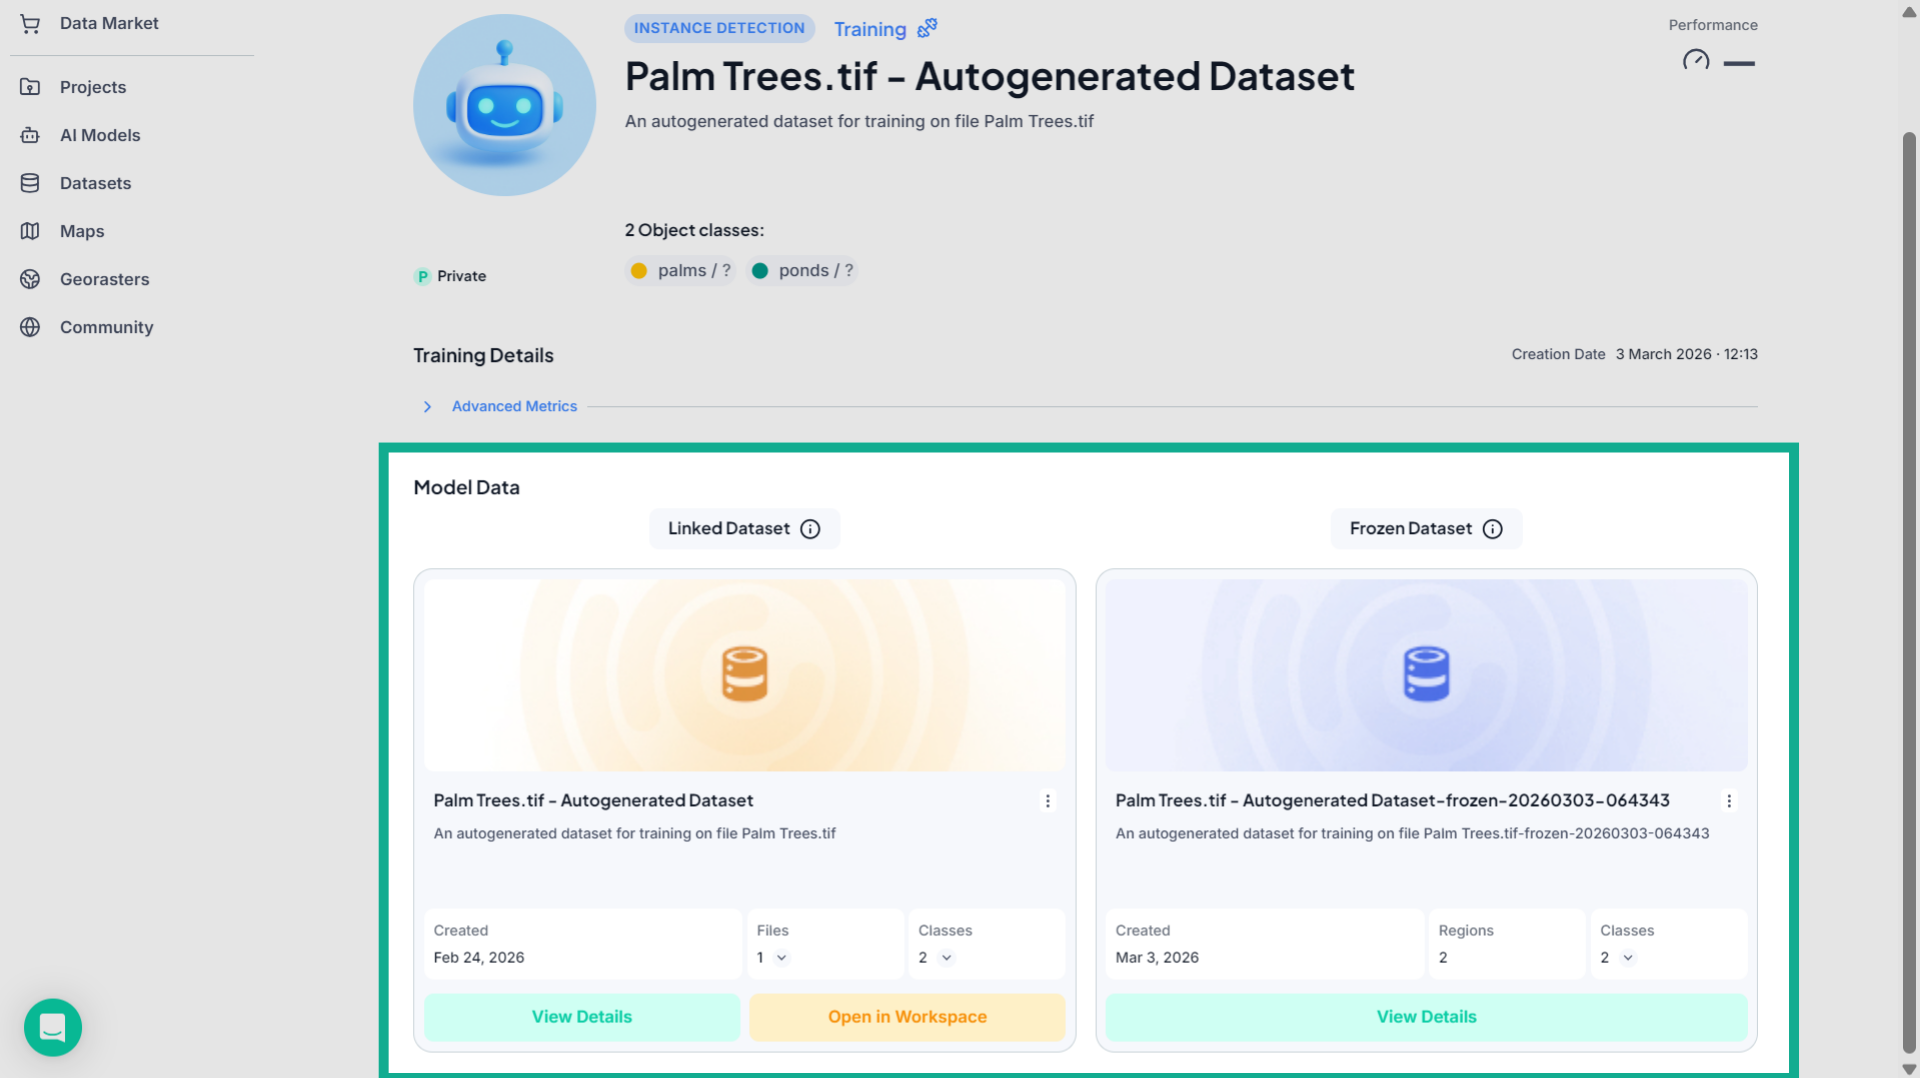
14. Explore Model Data
Scroll down to the Model Data section to see the datasets associated with the model.
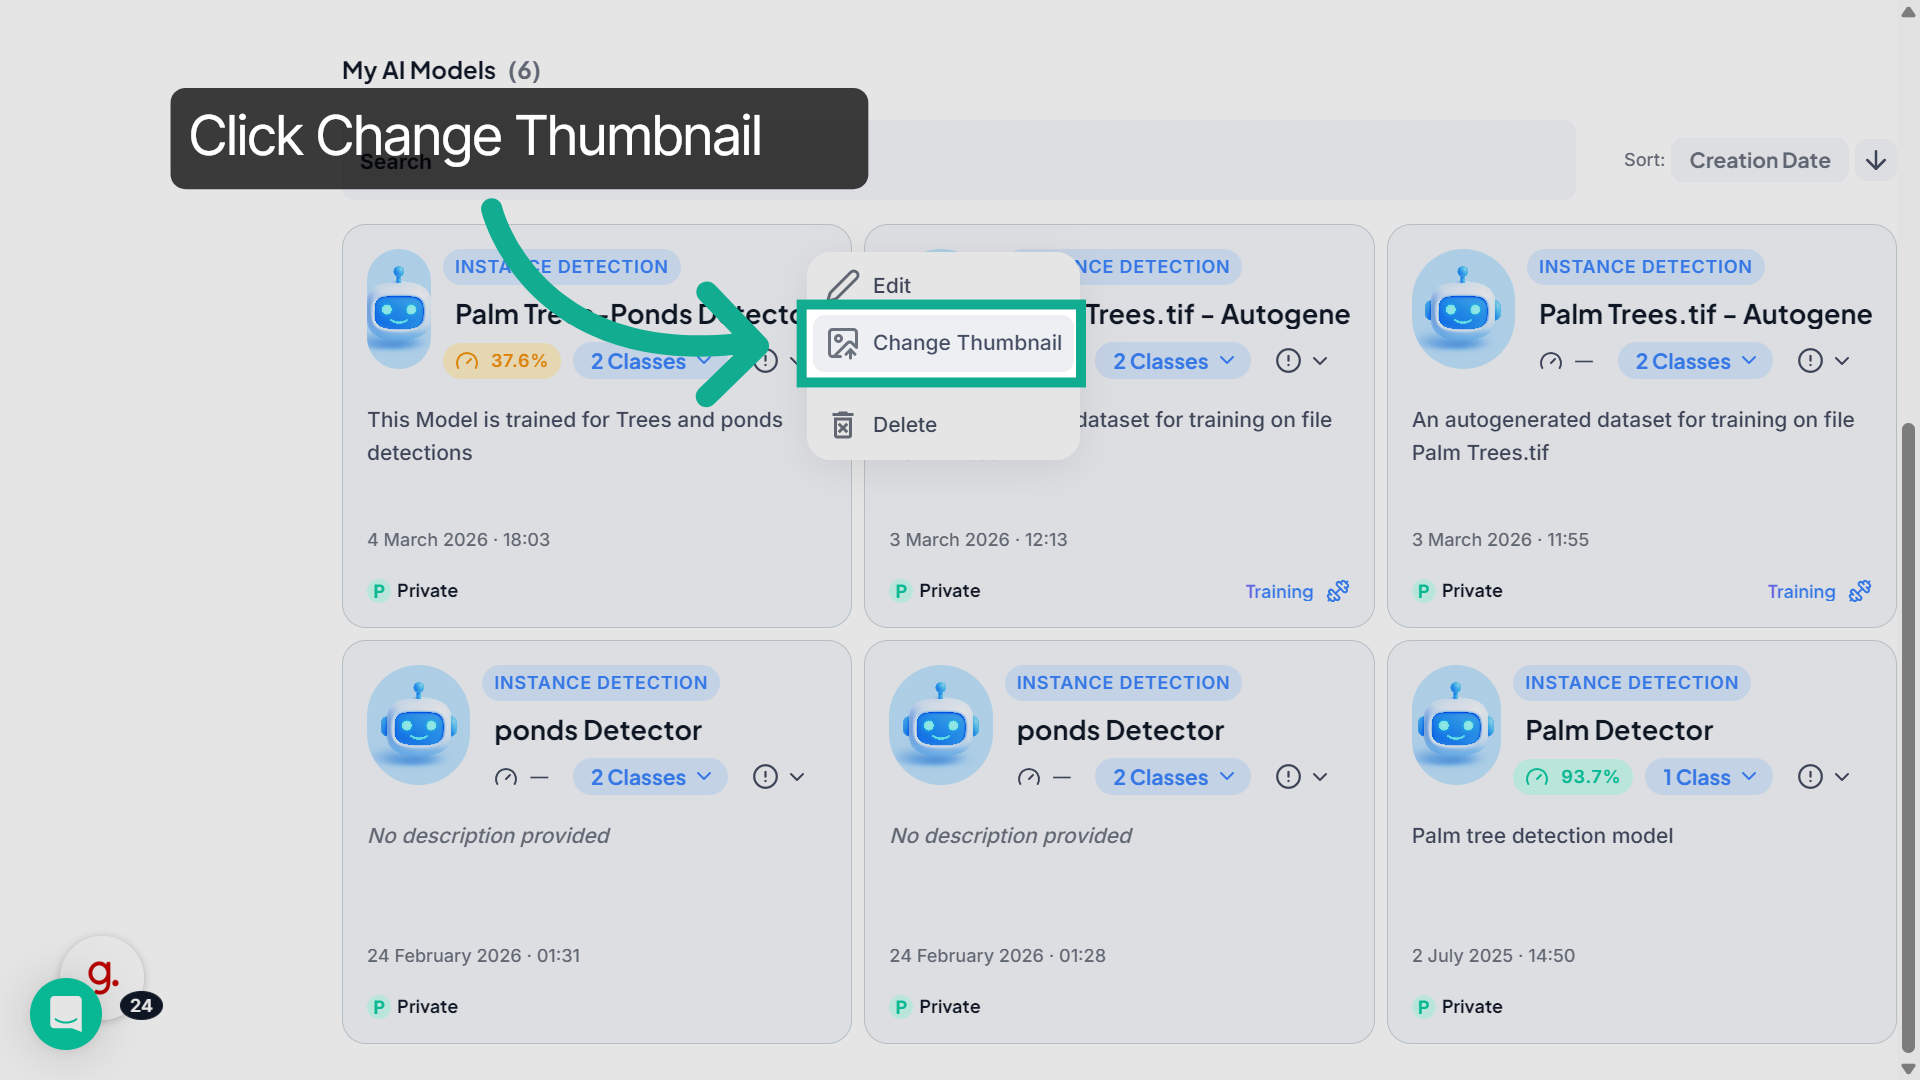
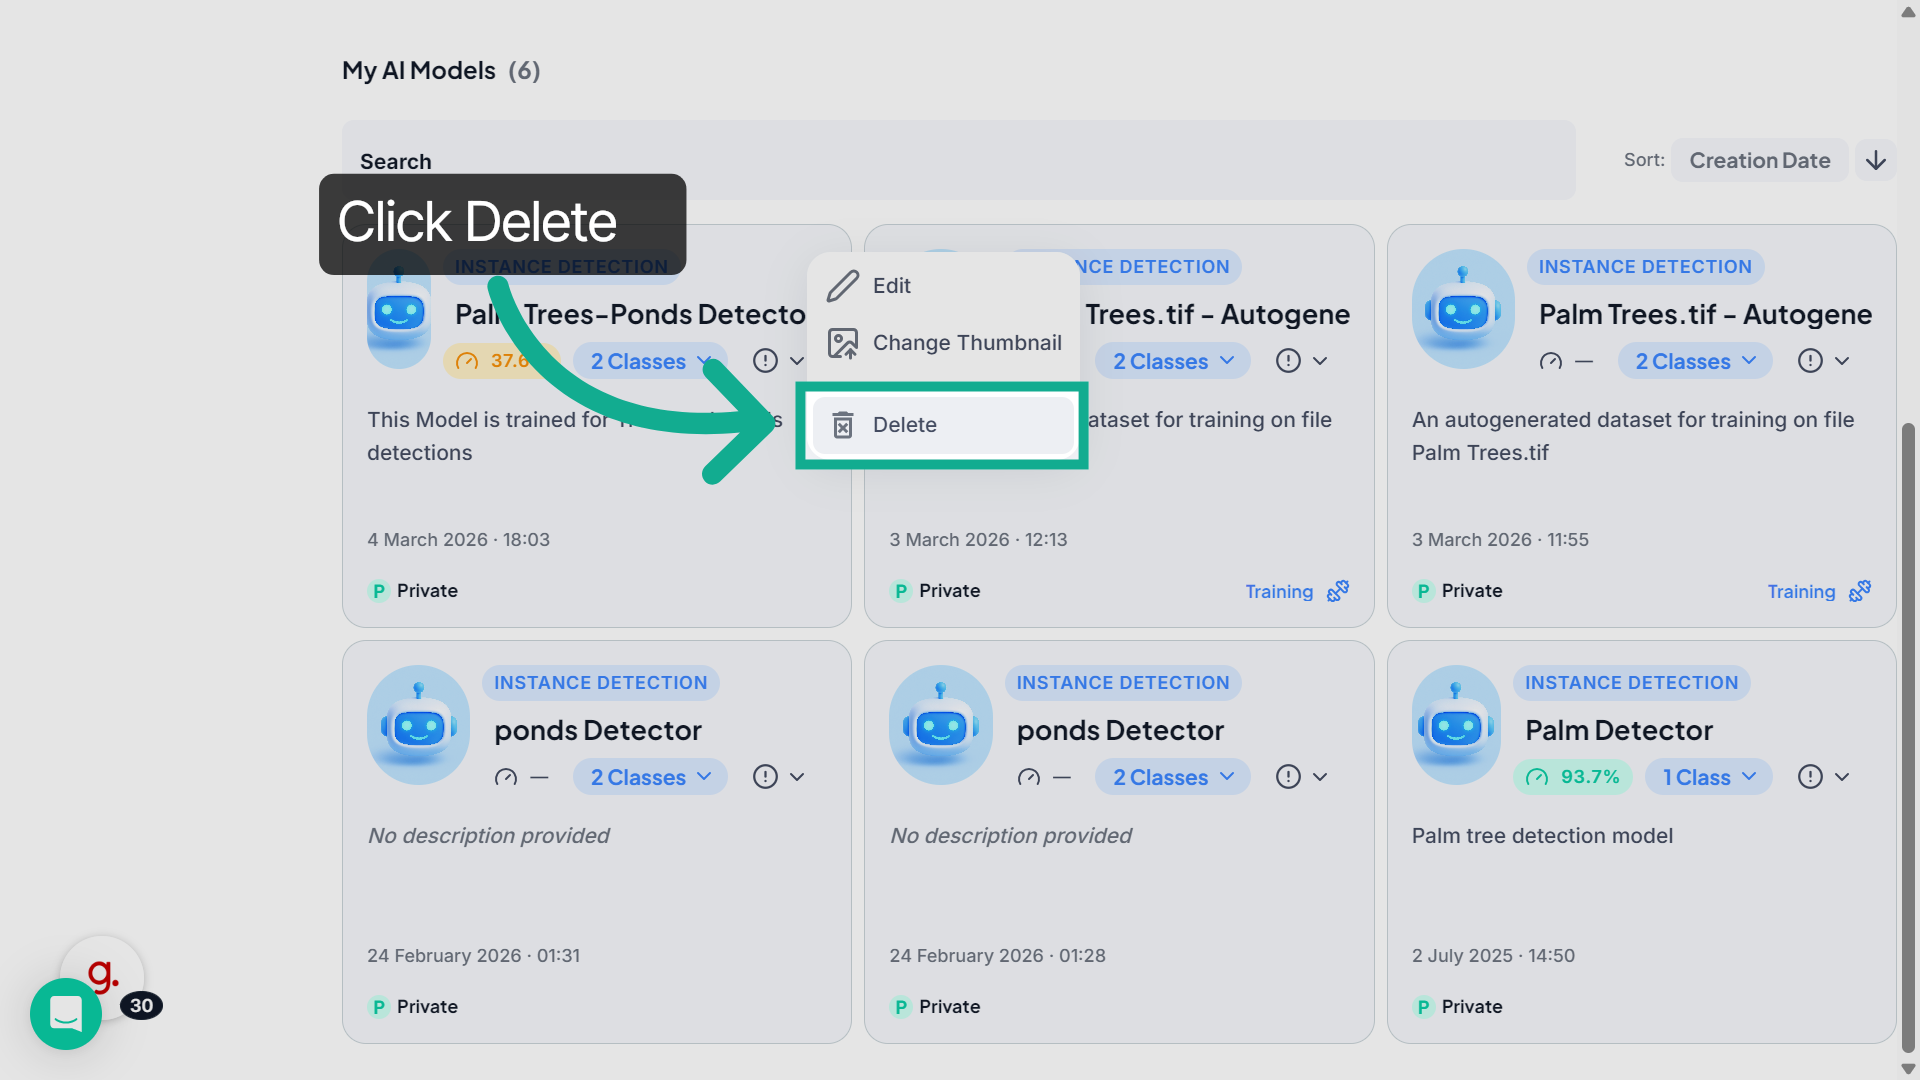
15. Open Model Options
Return to the model card and click the three-dot menu to access additional actions for the model.
16. Manage Model Settings
From this menu, you can edit the model information, change the model thumbnail, or delete the model.
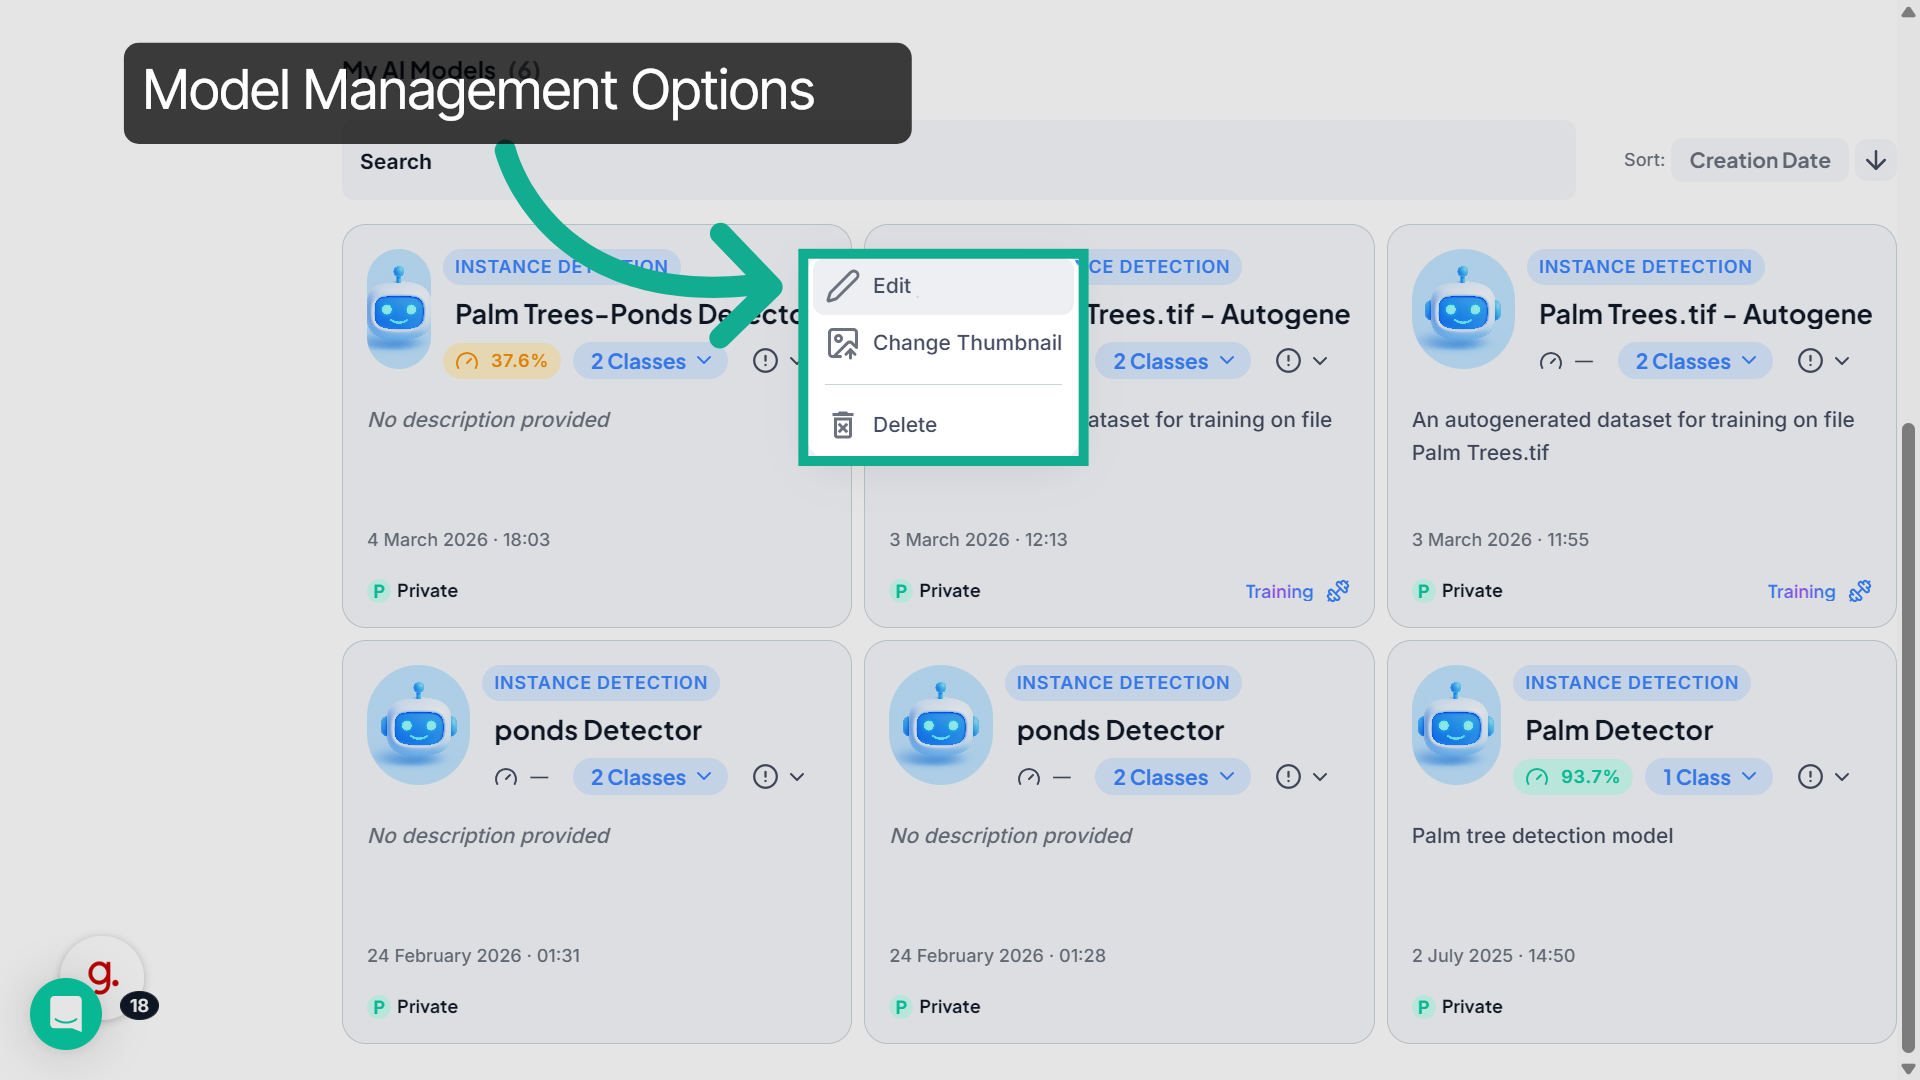
17. Edit Model Details
Select Edit to modify the model’s name or description.

18. Update Model Information
In the Edit Model window, update the description or name to better represent the model’s purpose.
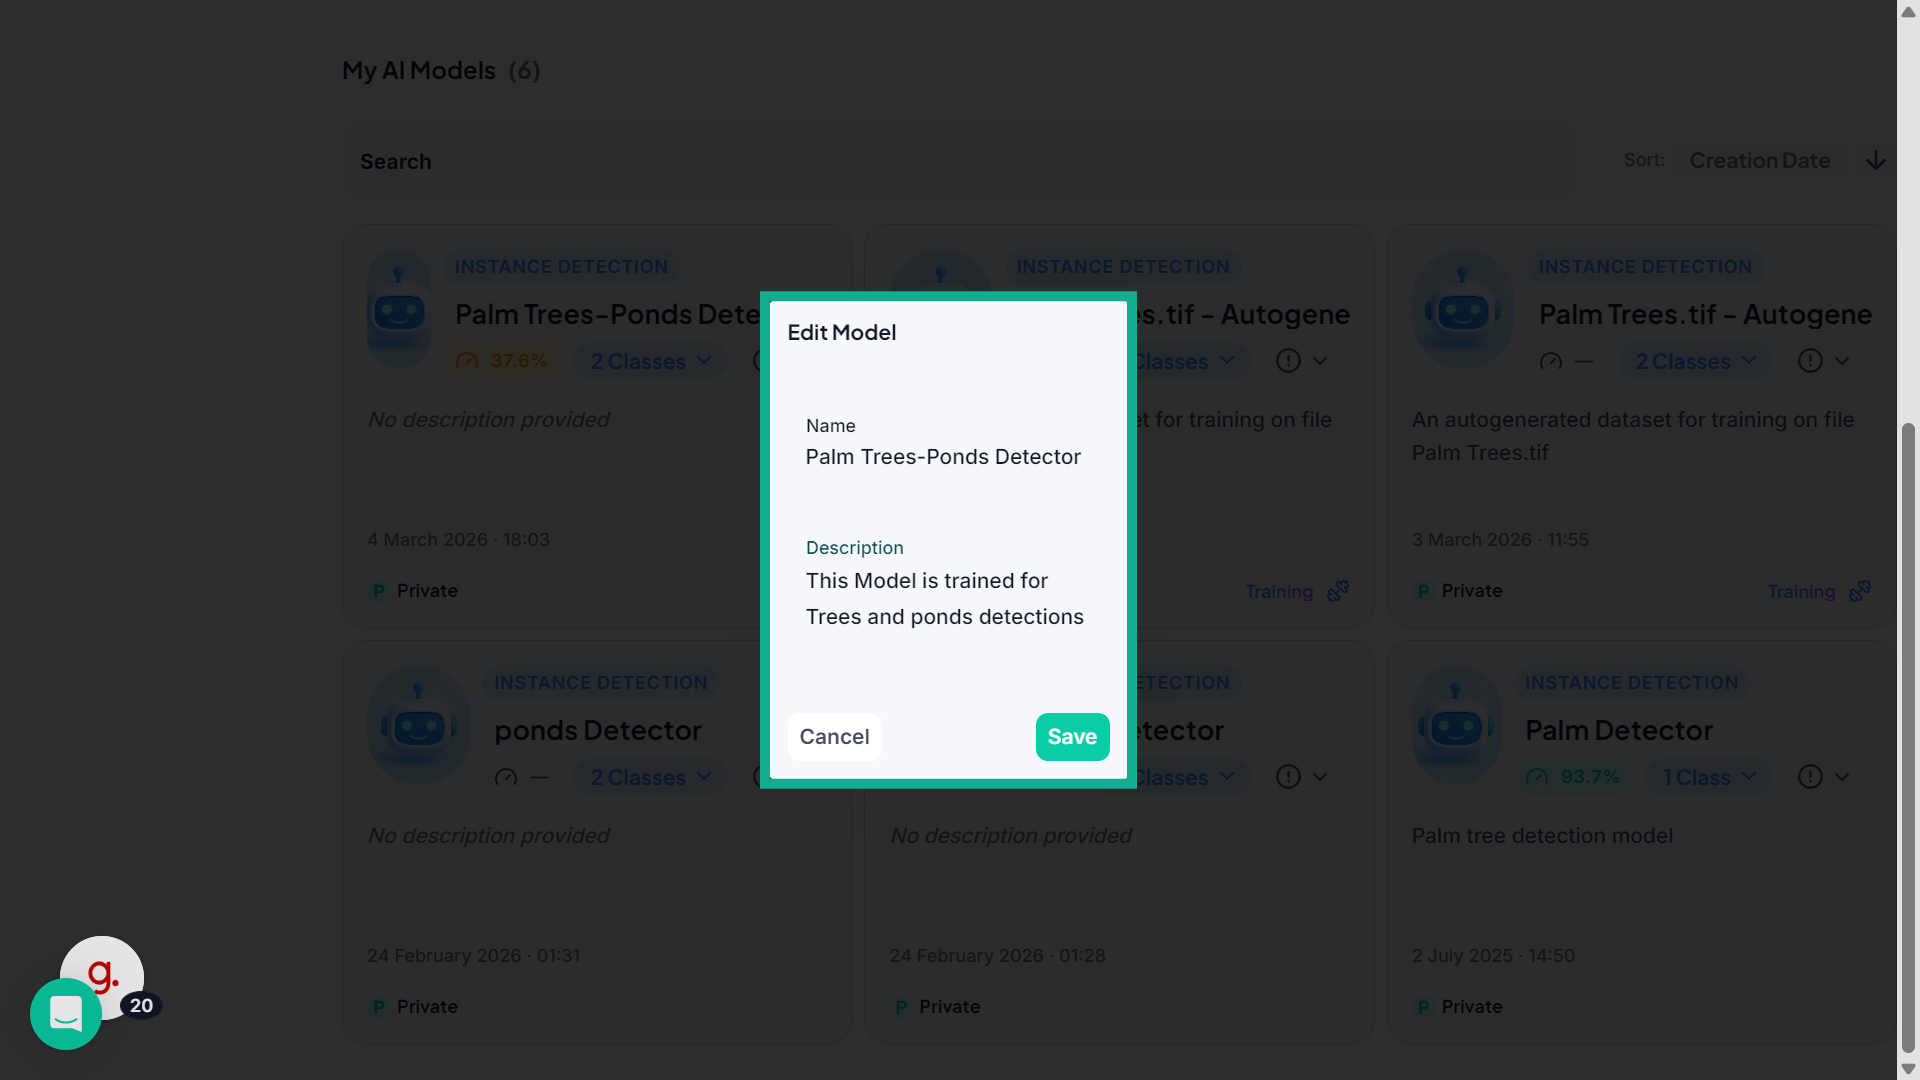
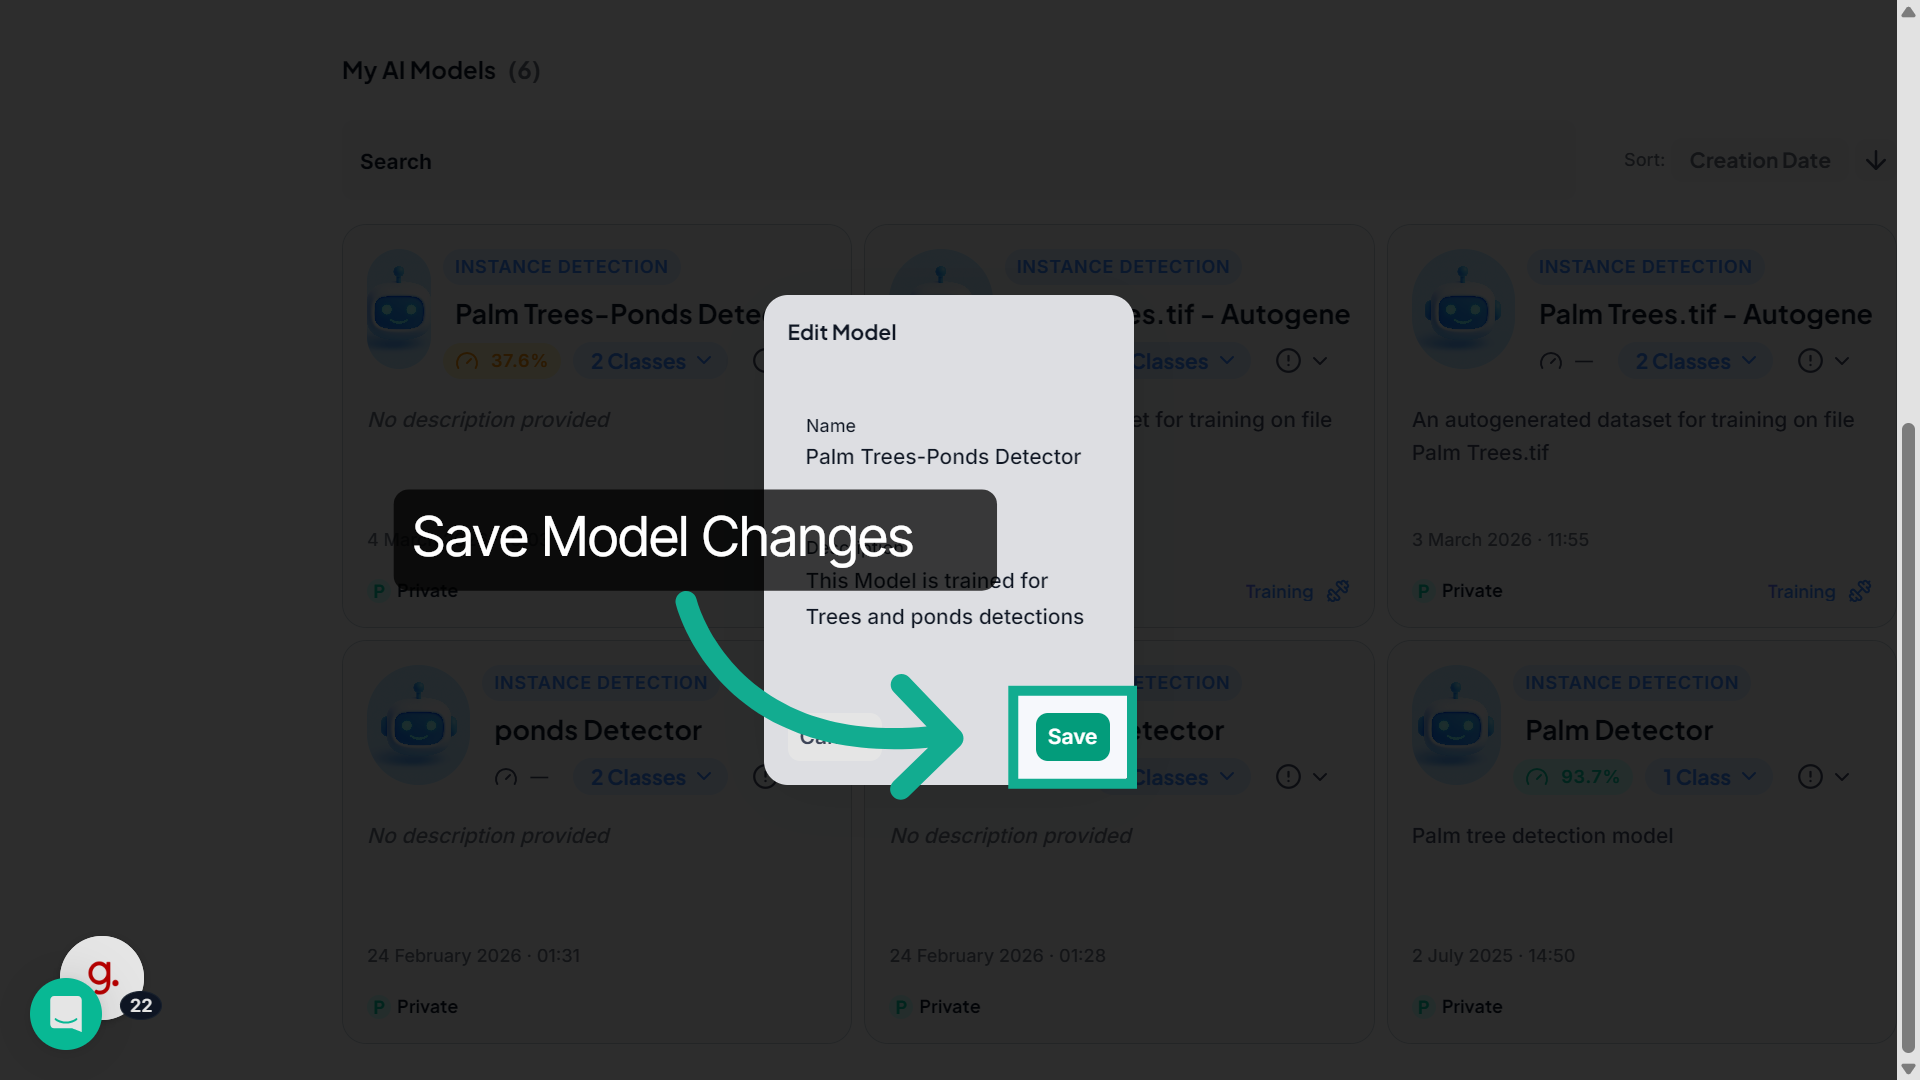
19. Save Model Changes
Click Save to apply and store the updated model information.
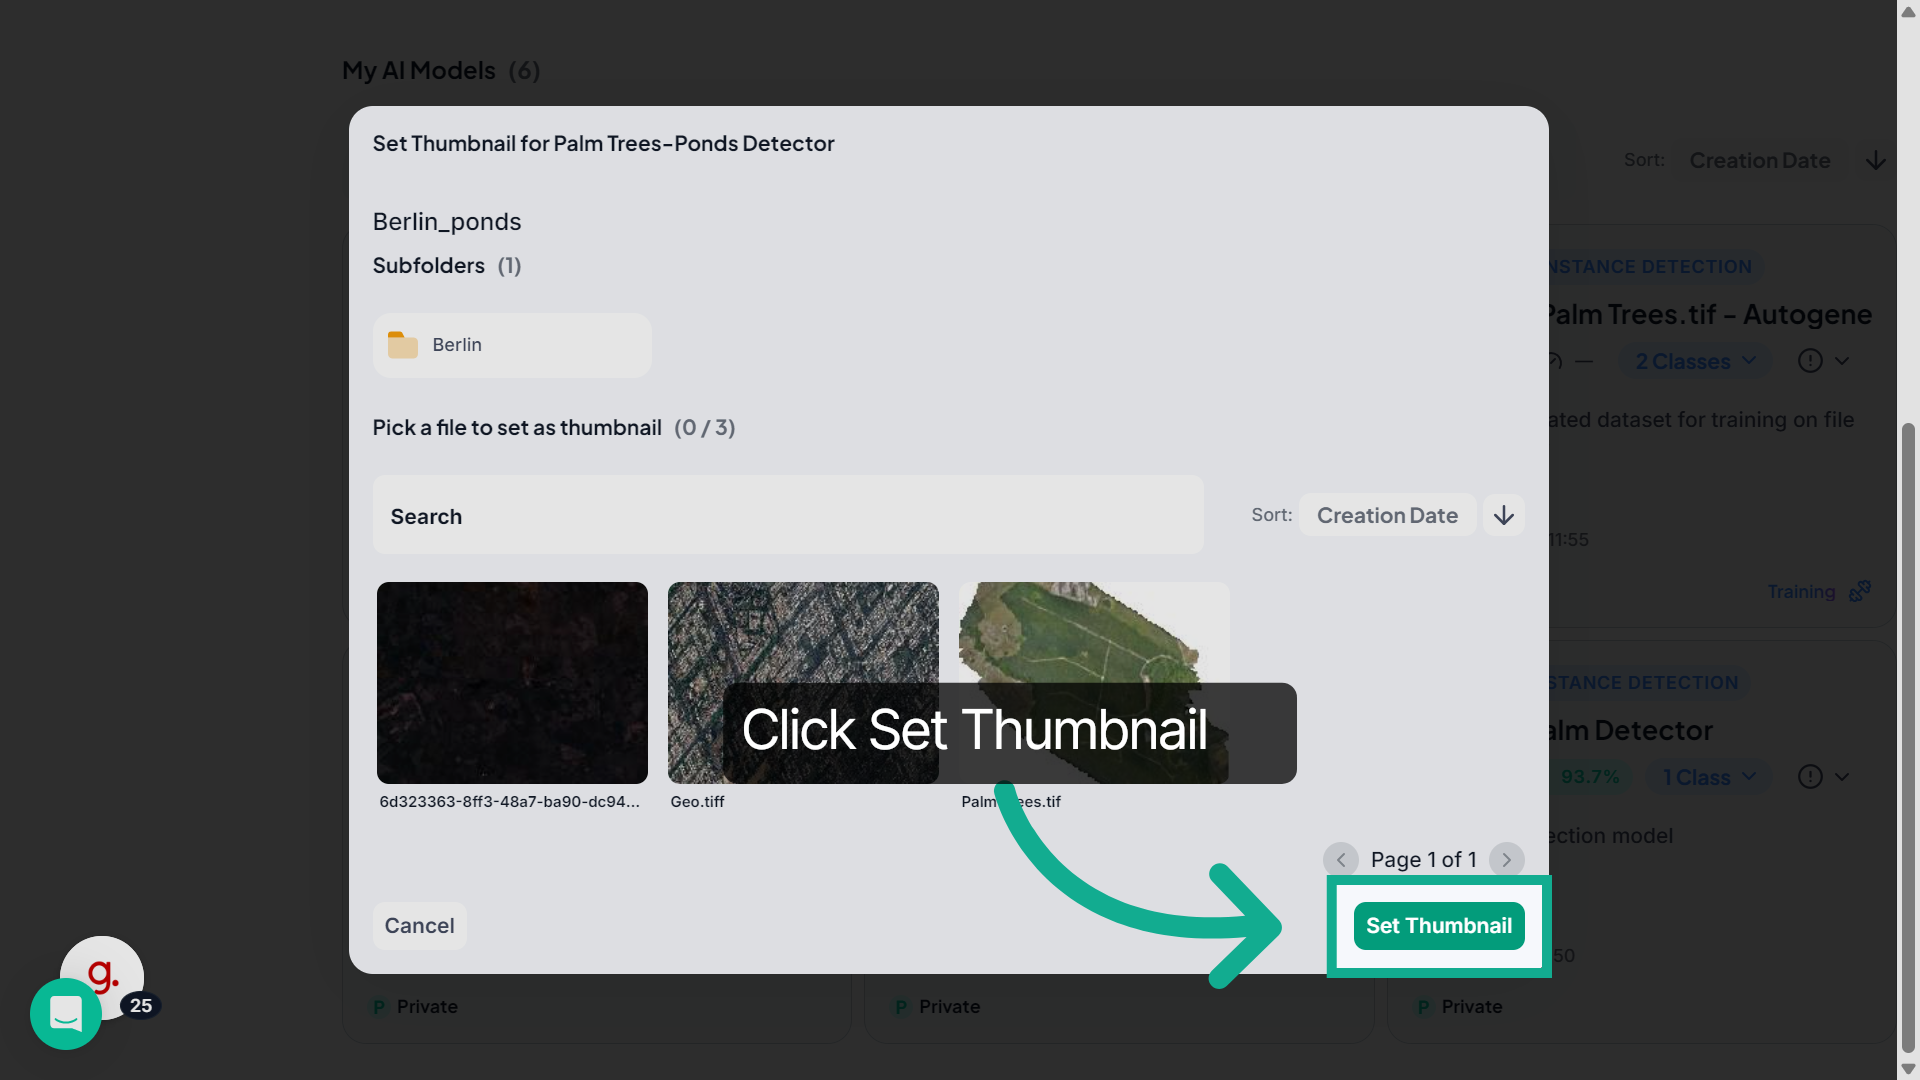
20. Change Model Thumbnail
Open the options menu again and select Change Thumbnail to update the model’s preview image.
21. Choose Thumbnail Image
Browse the available dataset files and select an image that will represent the model.
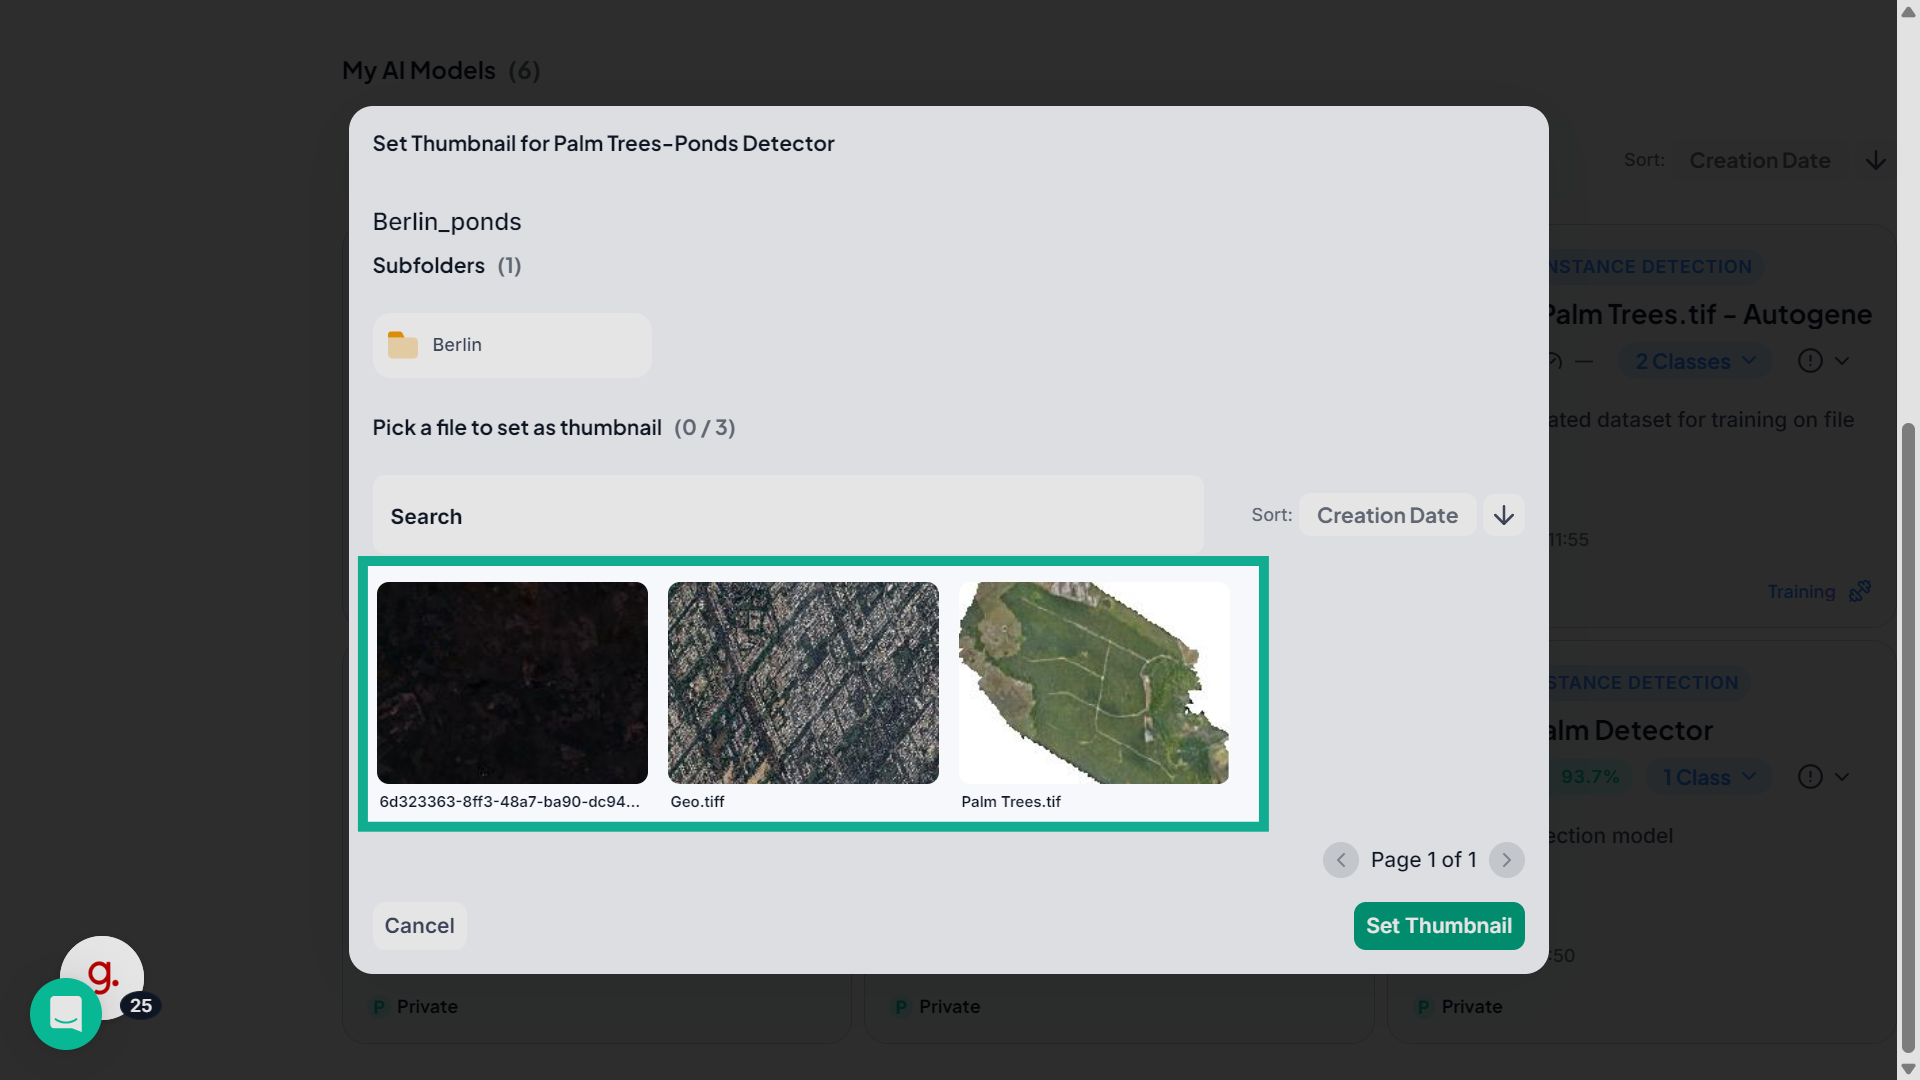
22. Set New Thumbnail
Once selected, click "Set Thumbnail" to set the image as the new thumbnail image for the model.
23. Delete a Model
If you want to remove the model, open the options menu and select Delete.
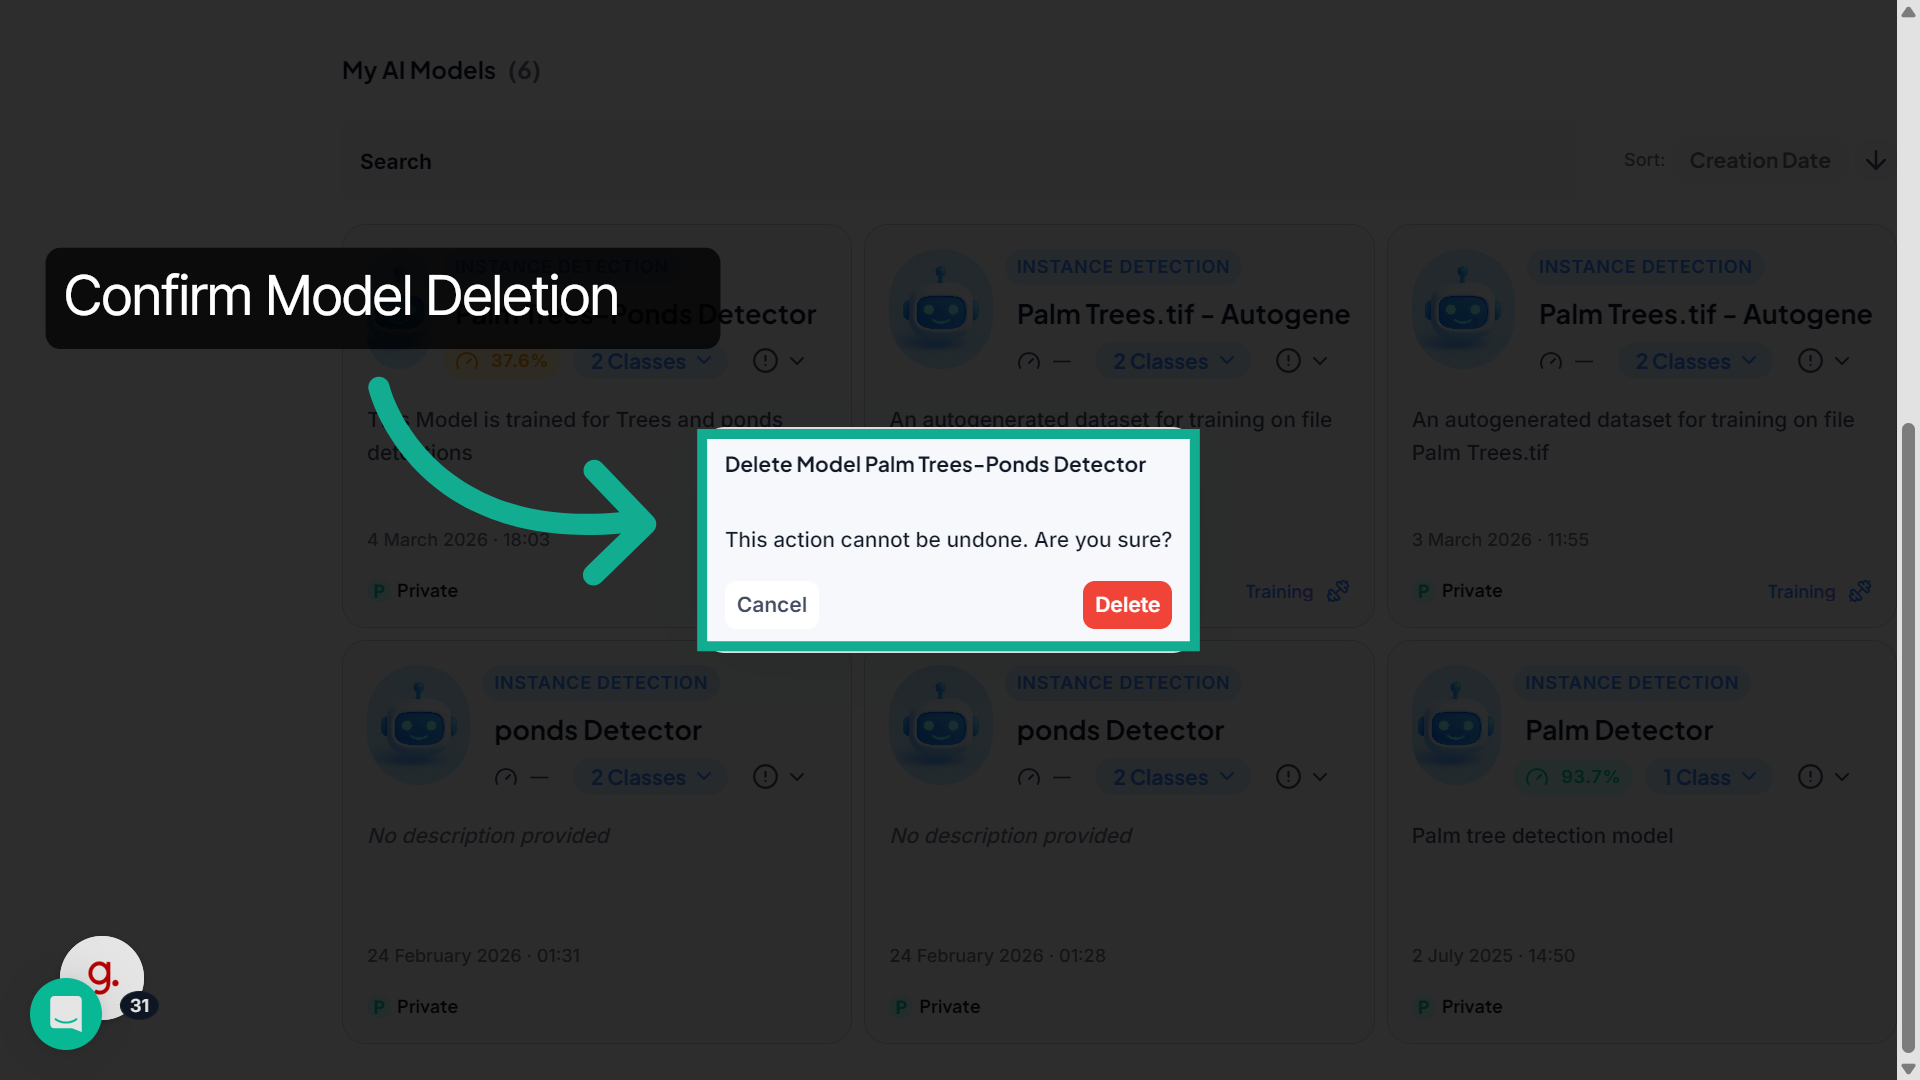
24. Confirm Deletion
A confirmation dialog will appear. Click Delete to permanently remove the model, or Cancel to keep it.
FlyPix AI makes it easy to explore community models, manage your trained models, update model information, and maintain an organized AI workspace.