Apply AI Model Workflow In FlyPix Workspace
This demo showcases how to apply an AI model within the FlyPix platform to analyze images effectively.
Go to app.flypix.ai
1. Introduction
In this walkthrough, you’ll learn how to select a trained model, choose processing scope, monitor credit usage, and review prediction results generated by the system.
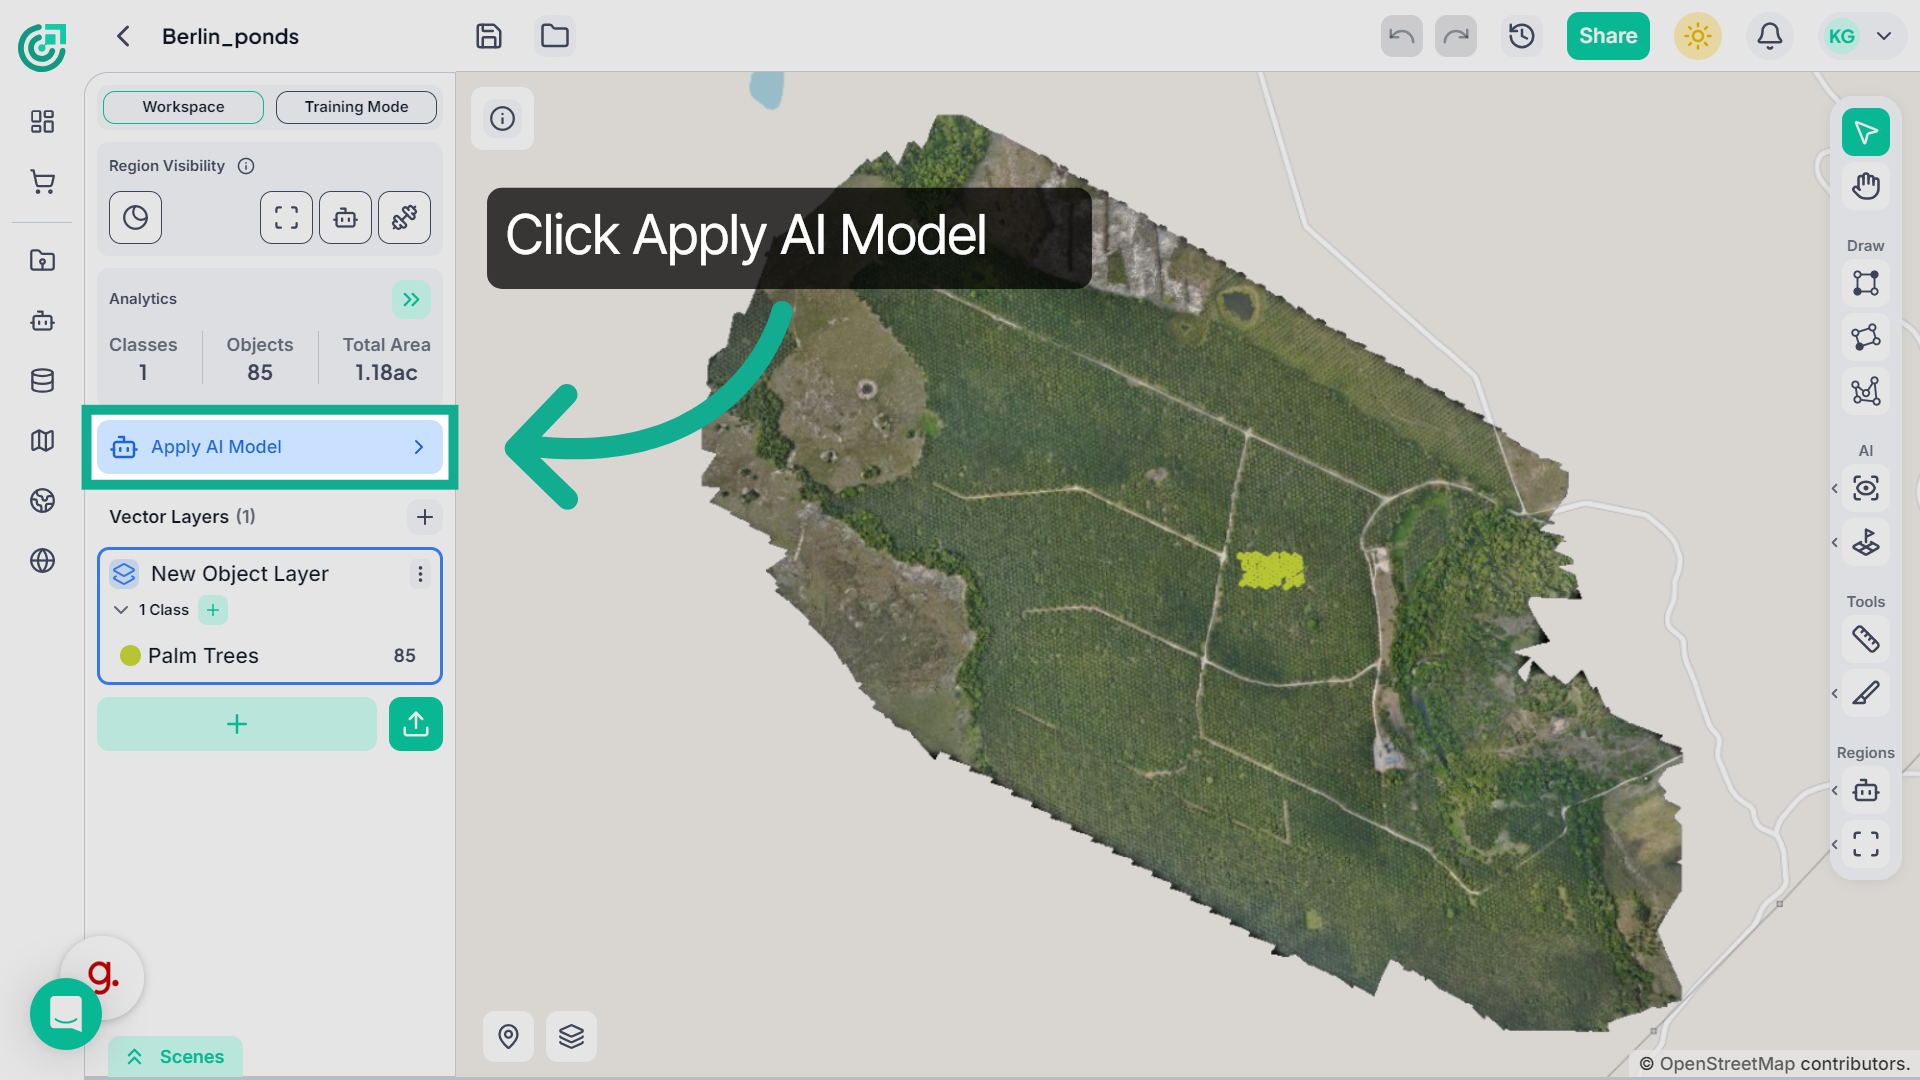
2. Initiate AI Model Application
To begin, go to the right panel and click Apply AI Model. This opens the model selection window.
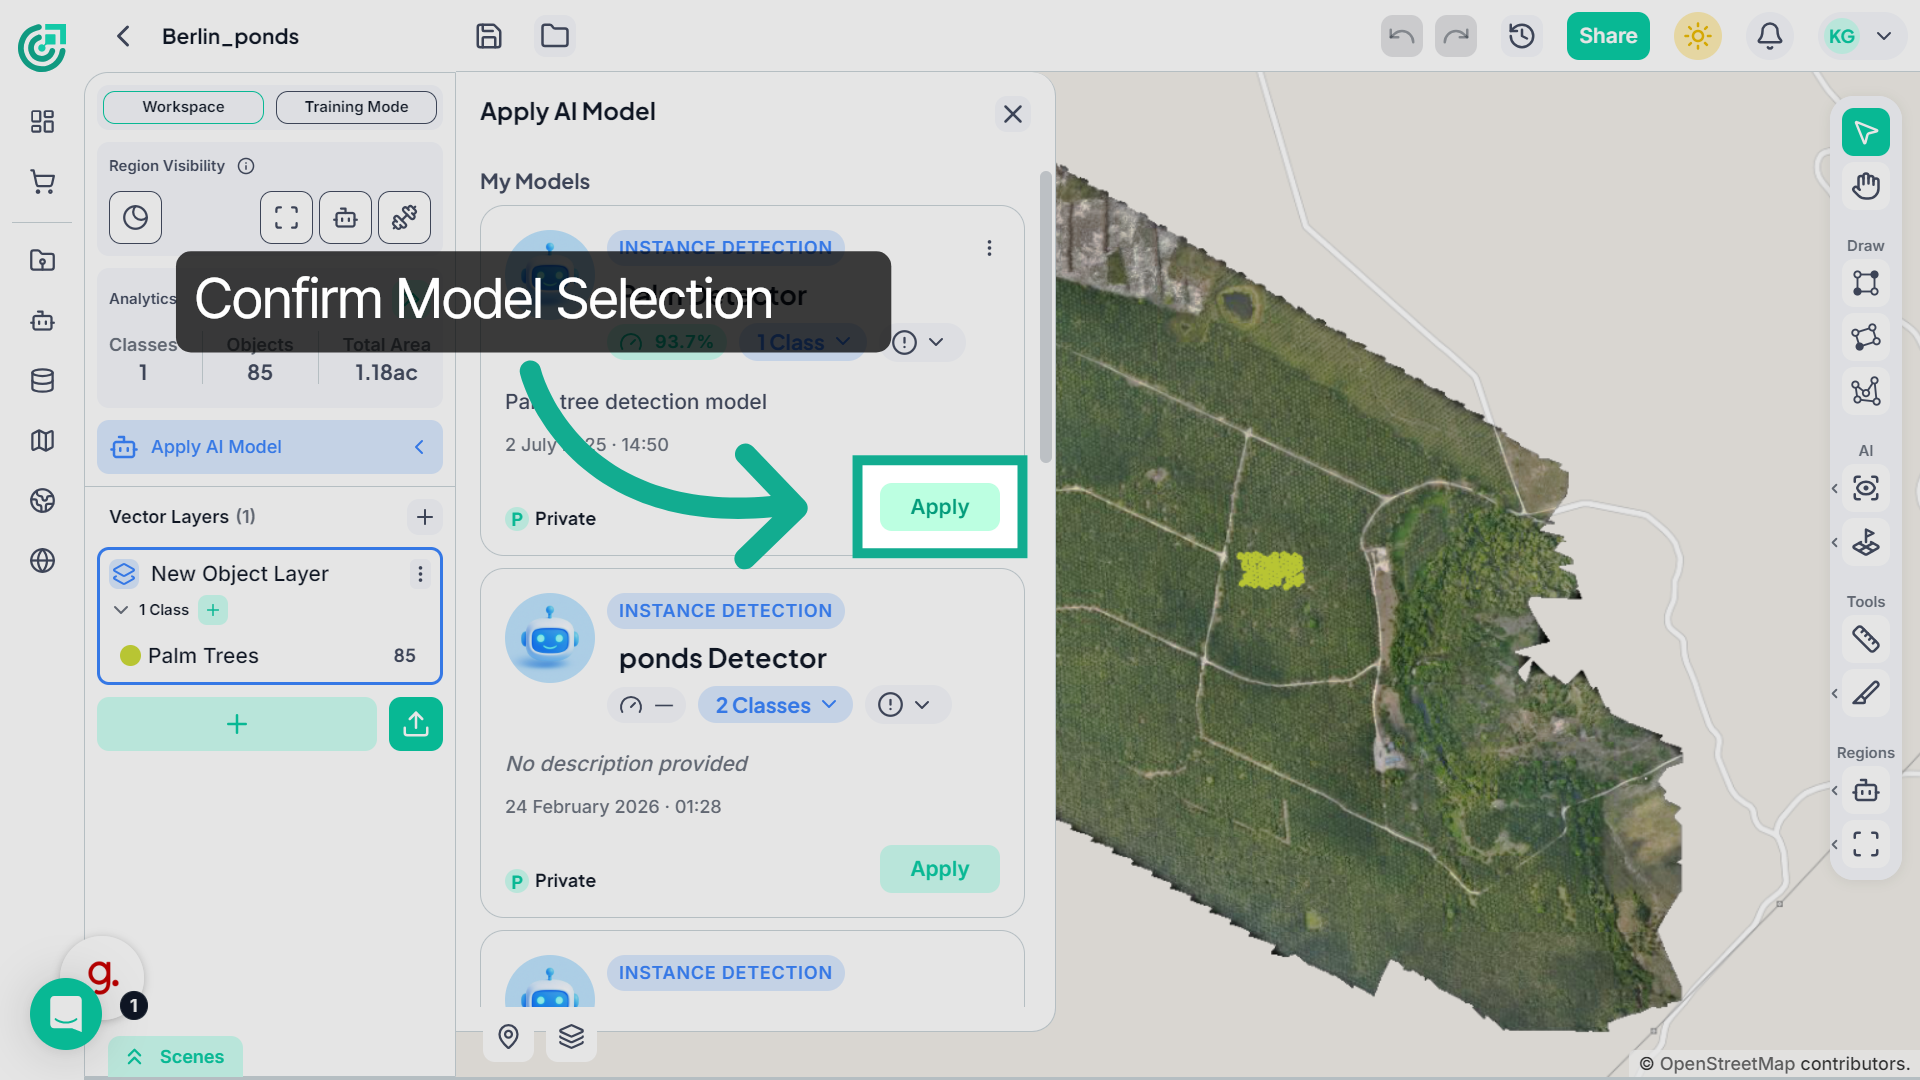
3. Confirm Model Application
Now choose the trained model you want to use. If you have multiple trained models, make sure you select the correct one based on the object or feature you want to detect.
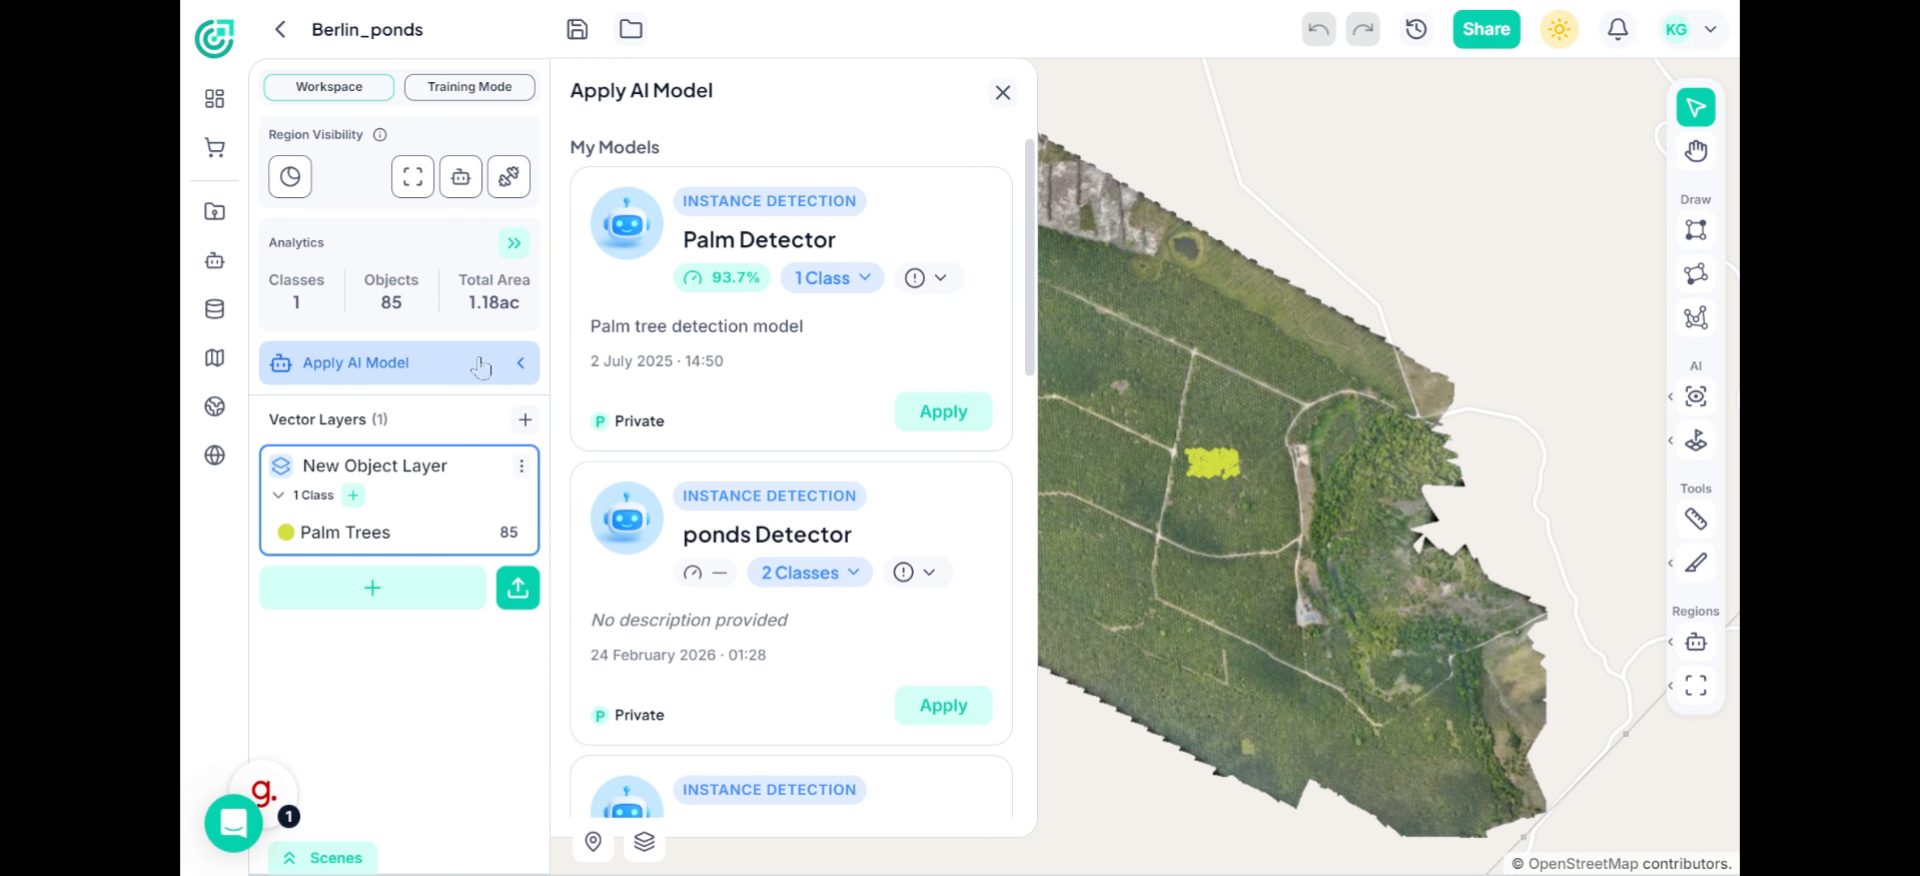
4. Select Model
Once you have selected the trained model, then click on the "Apply" button.
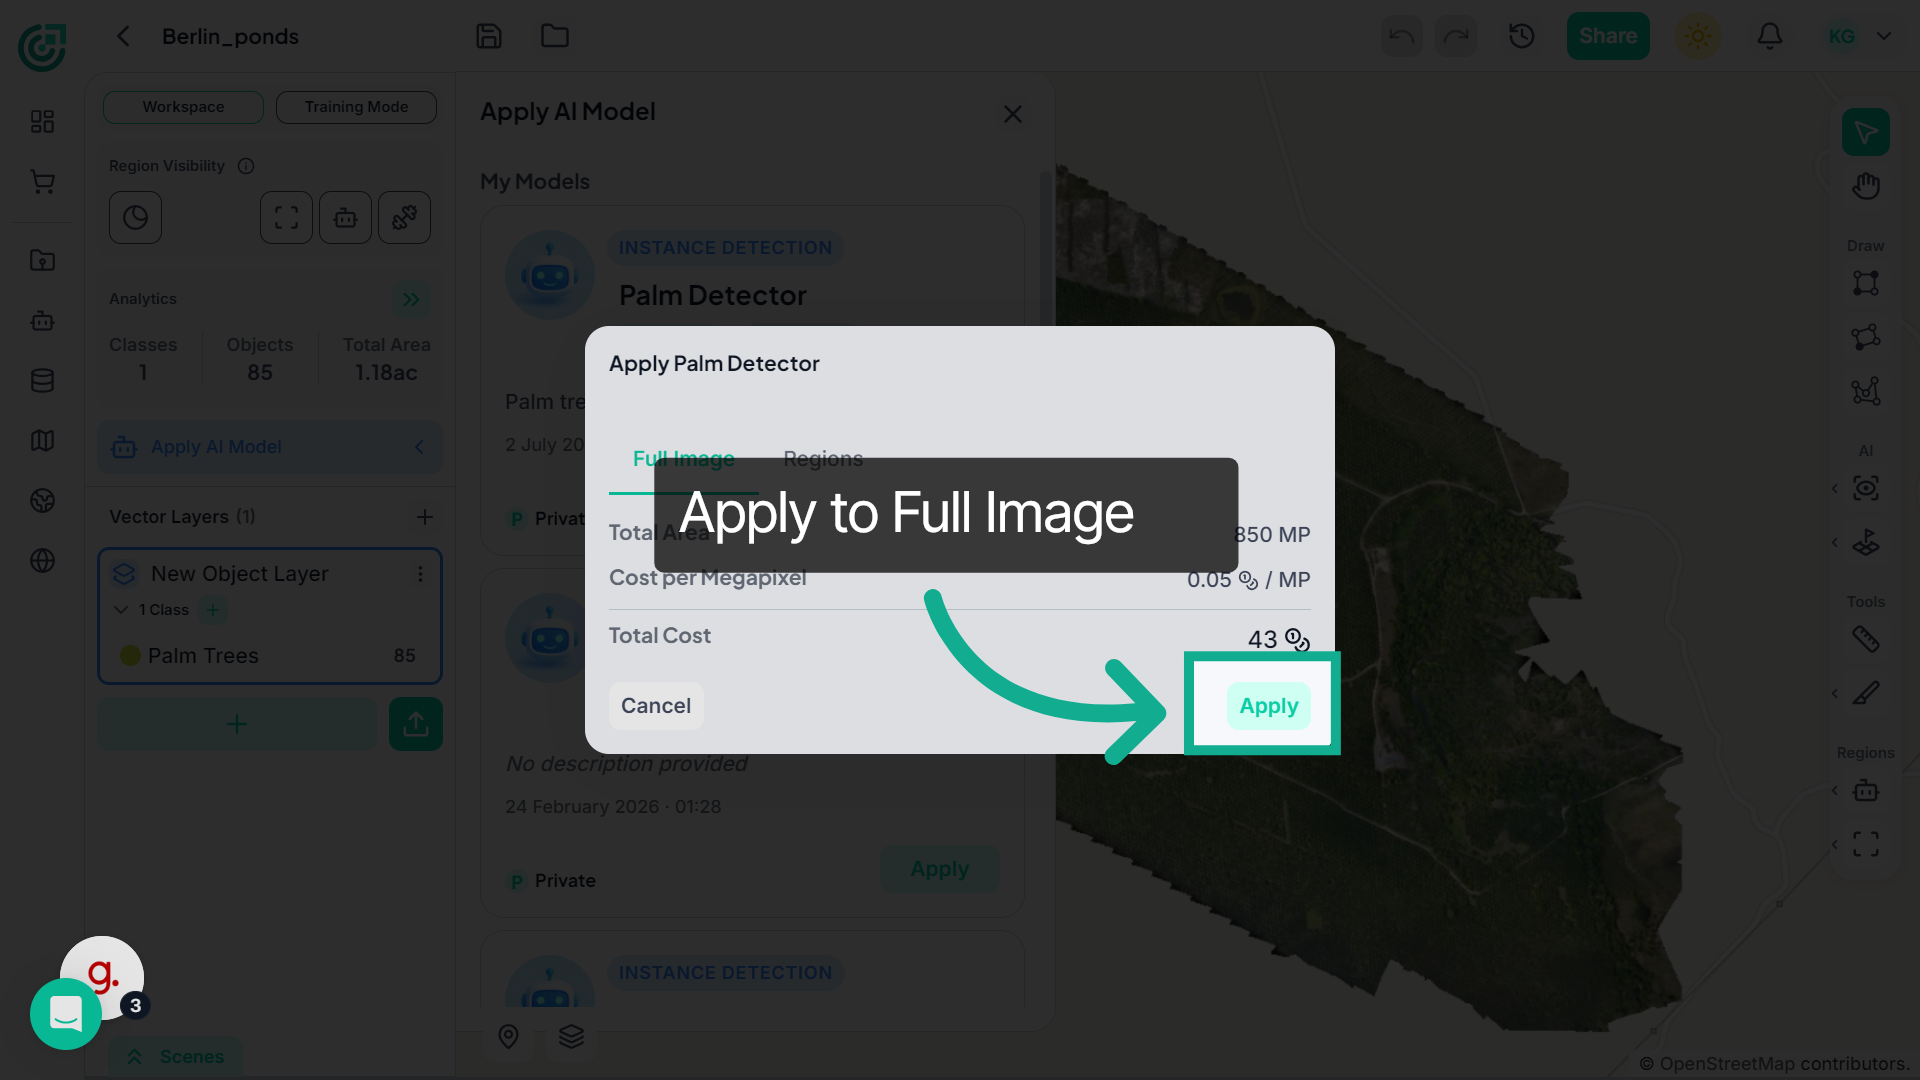
5. Full Image
If you want the model to analyze the entire image, select Full Image. Before proceeding, you’ll see an estimated credit cost. Since the model will process the entire dataset, this typically consumes more credits.
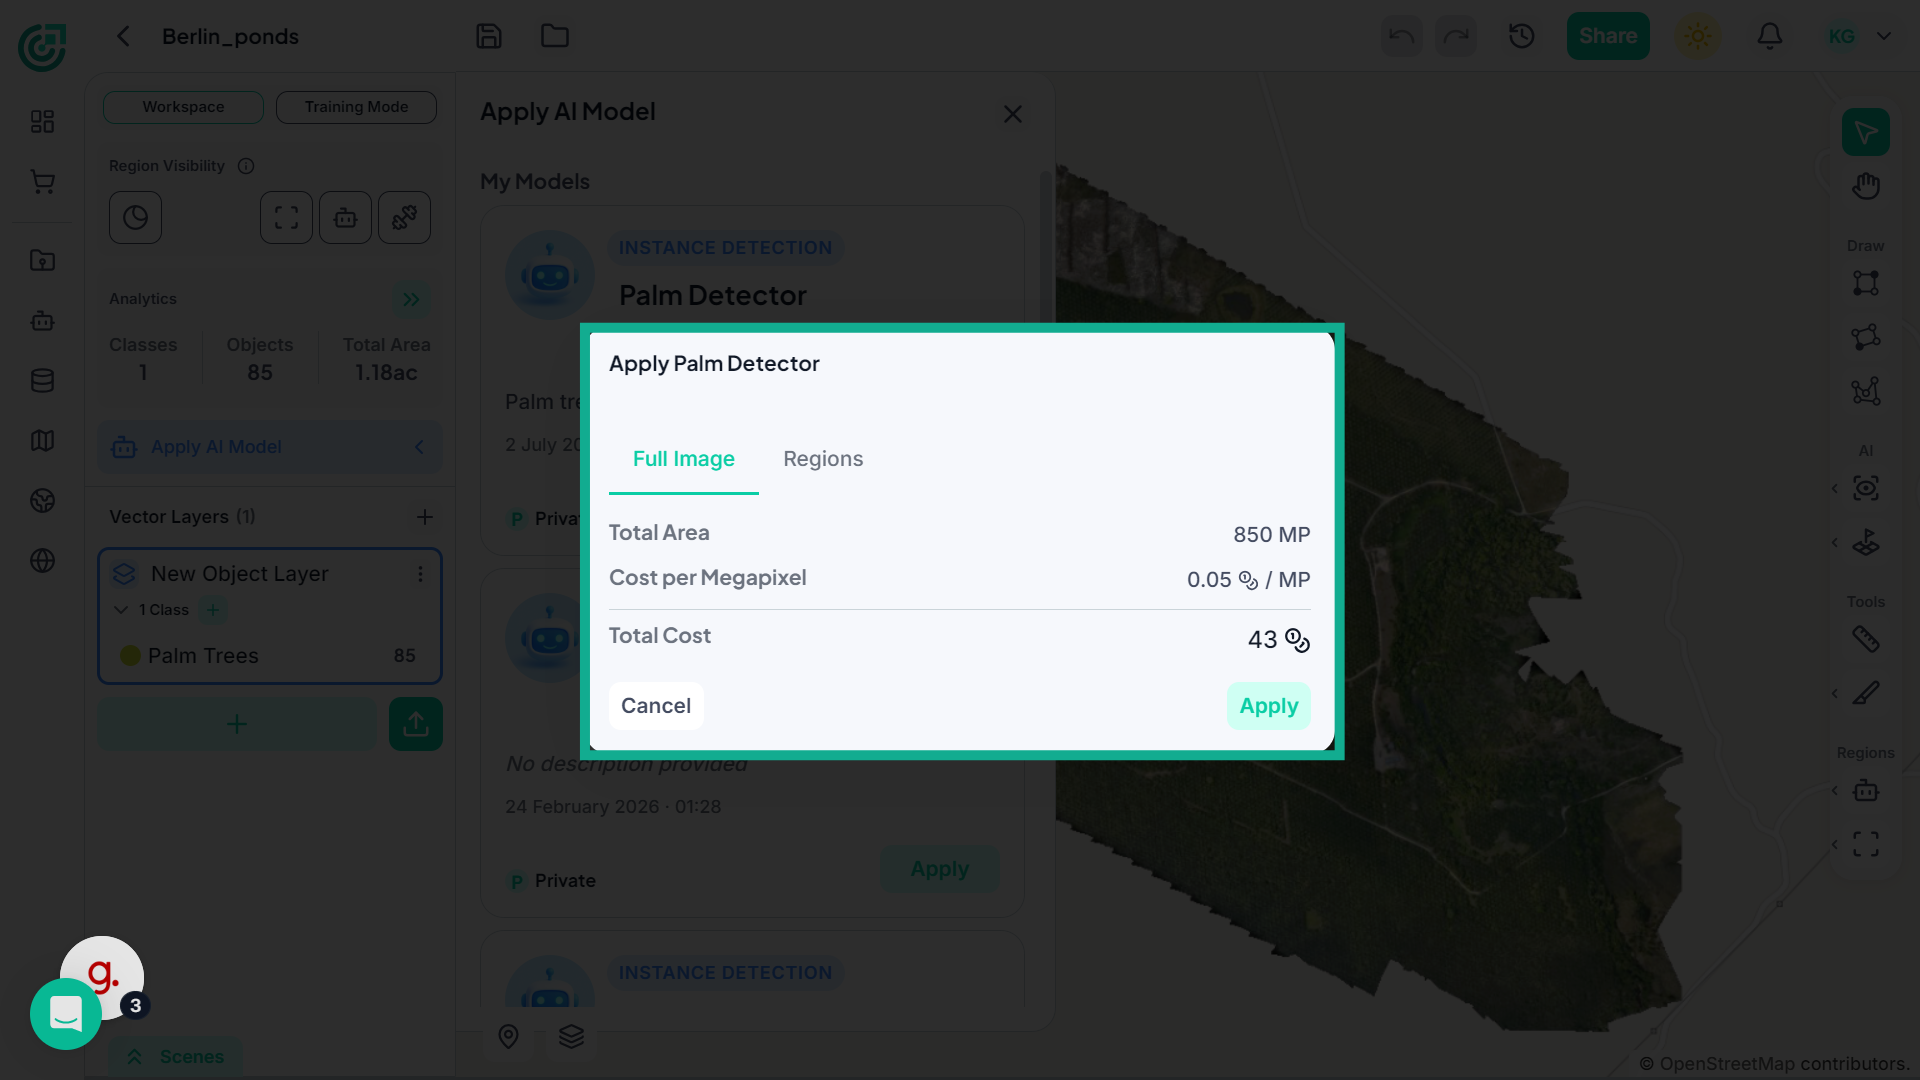
6. Apply to Full Image
If you're ready, click Apply to start the inference process.
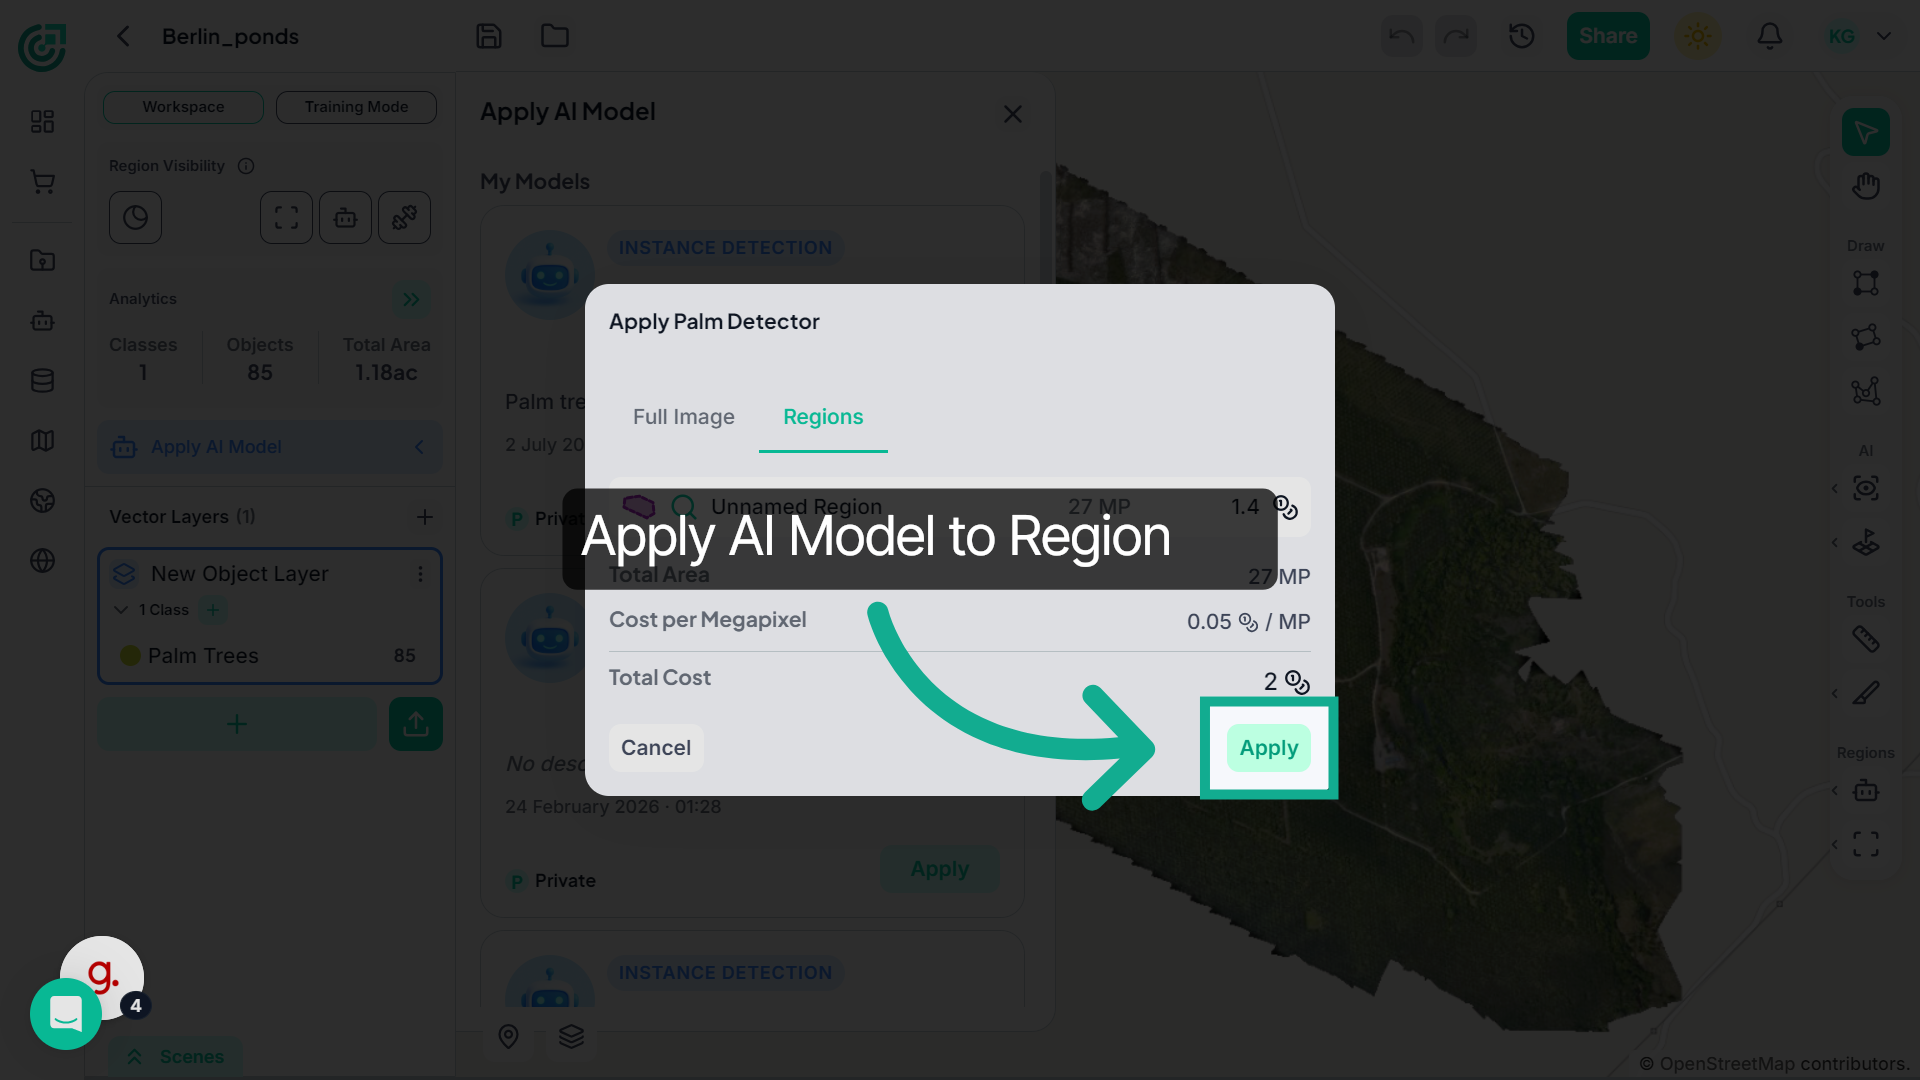
7. Region Specific
If you only want to analyze a specific area, select Regions instead. Then choose the region you previously created. This limits processing to that selected boundary, which helps reduce credit usage. If your goal is to optimize resources or focus on a particular area, this is the recommended approach.

8. Apply Model to Regions
Click "Apply" to execute the AI model on the chosen regions of the image.
9. Review Generated Results
Once the process begins, you can monitor the task status in the notifications or task panel.
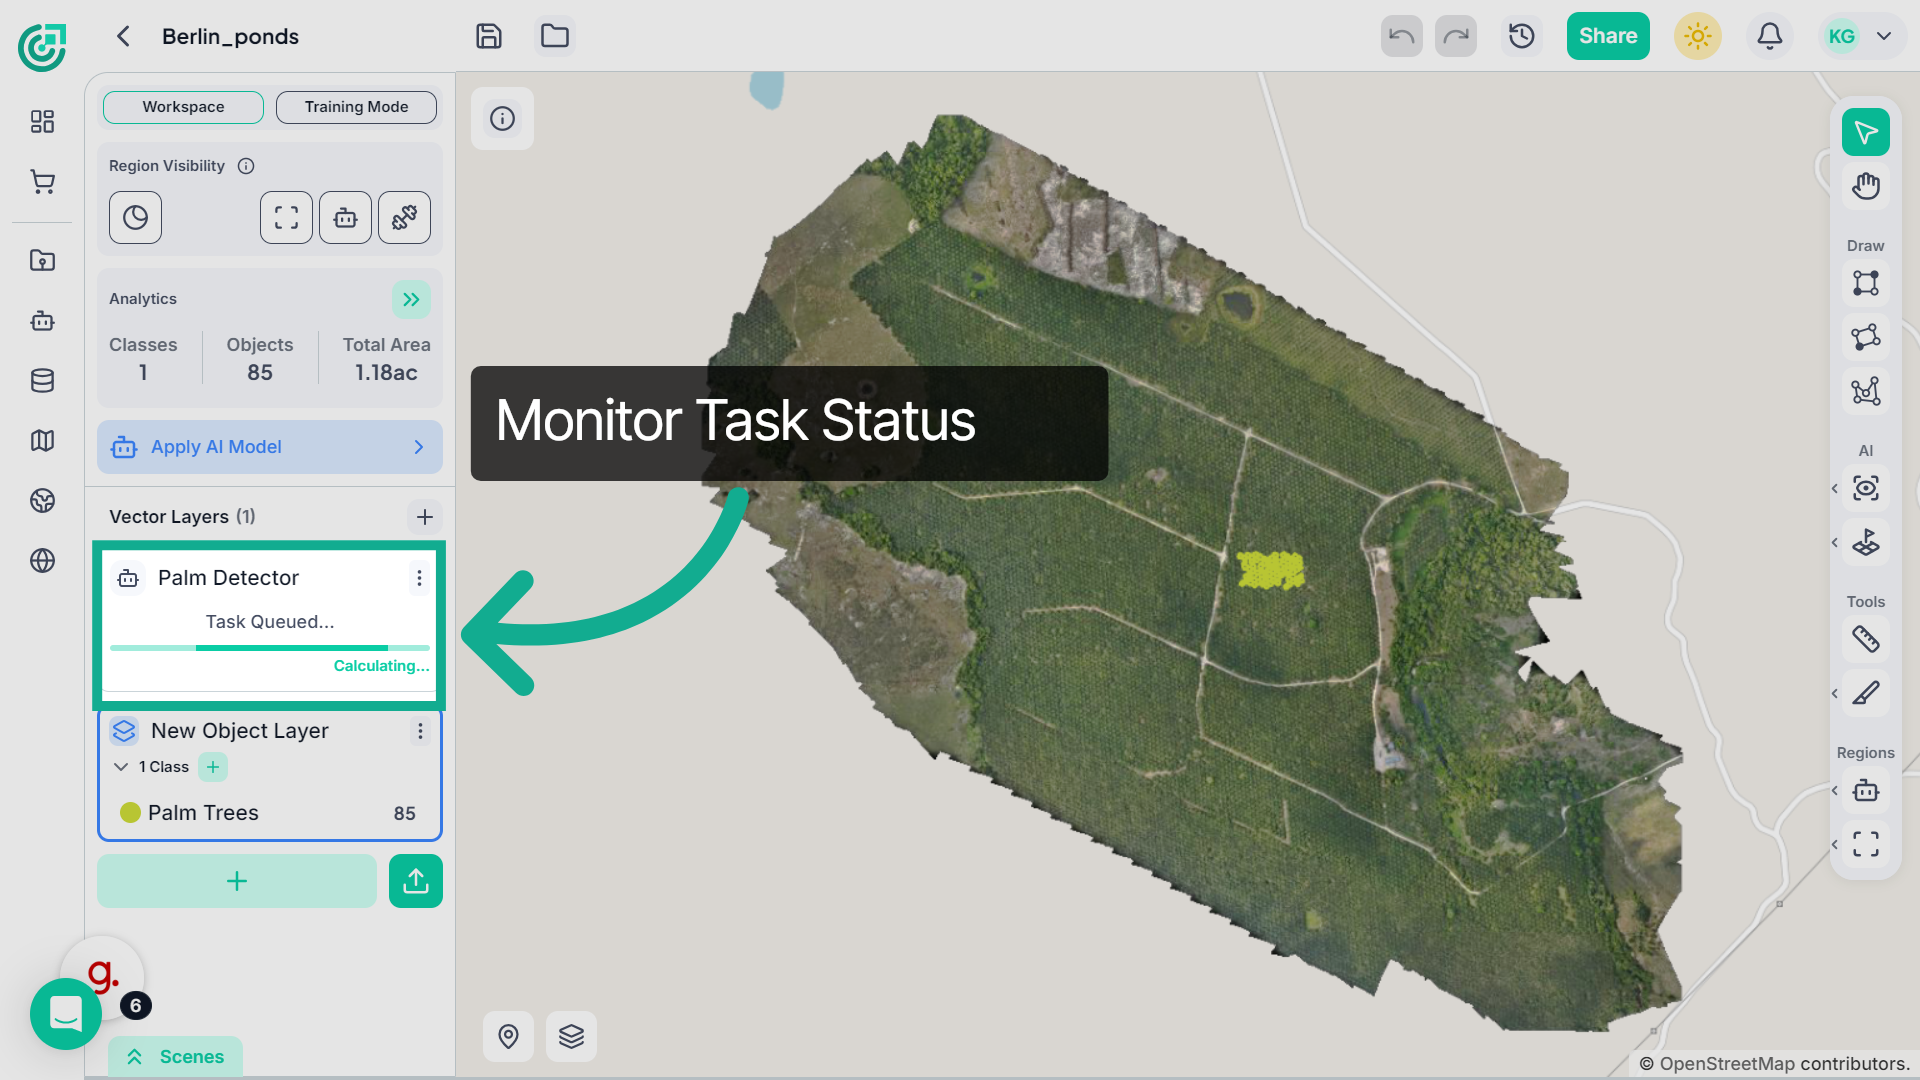
10. Final Review
Once the process is completed, the detected objects will appear directly on the imagery within a newly created inference layer.
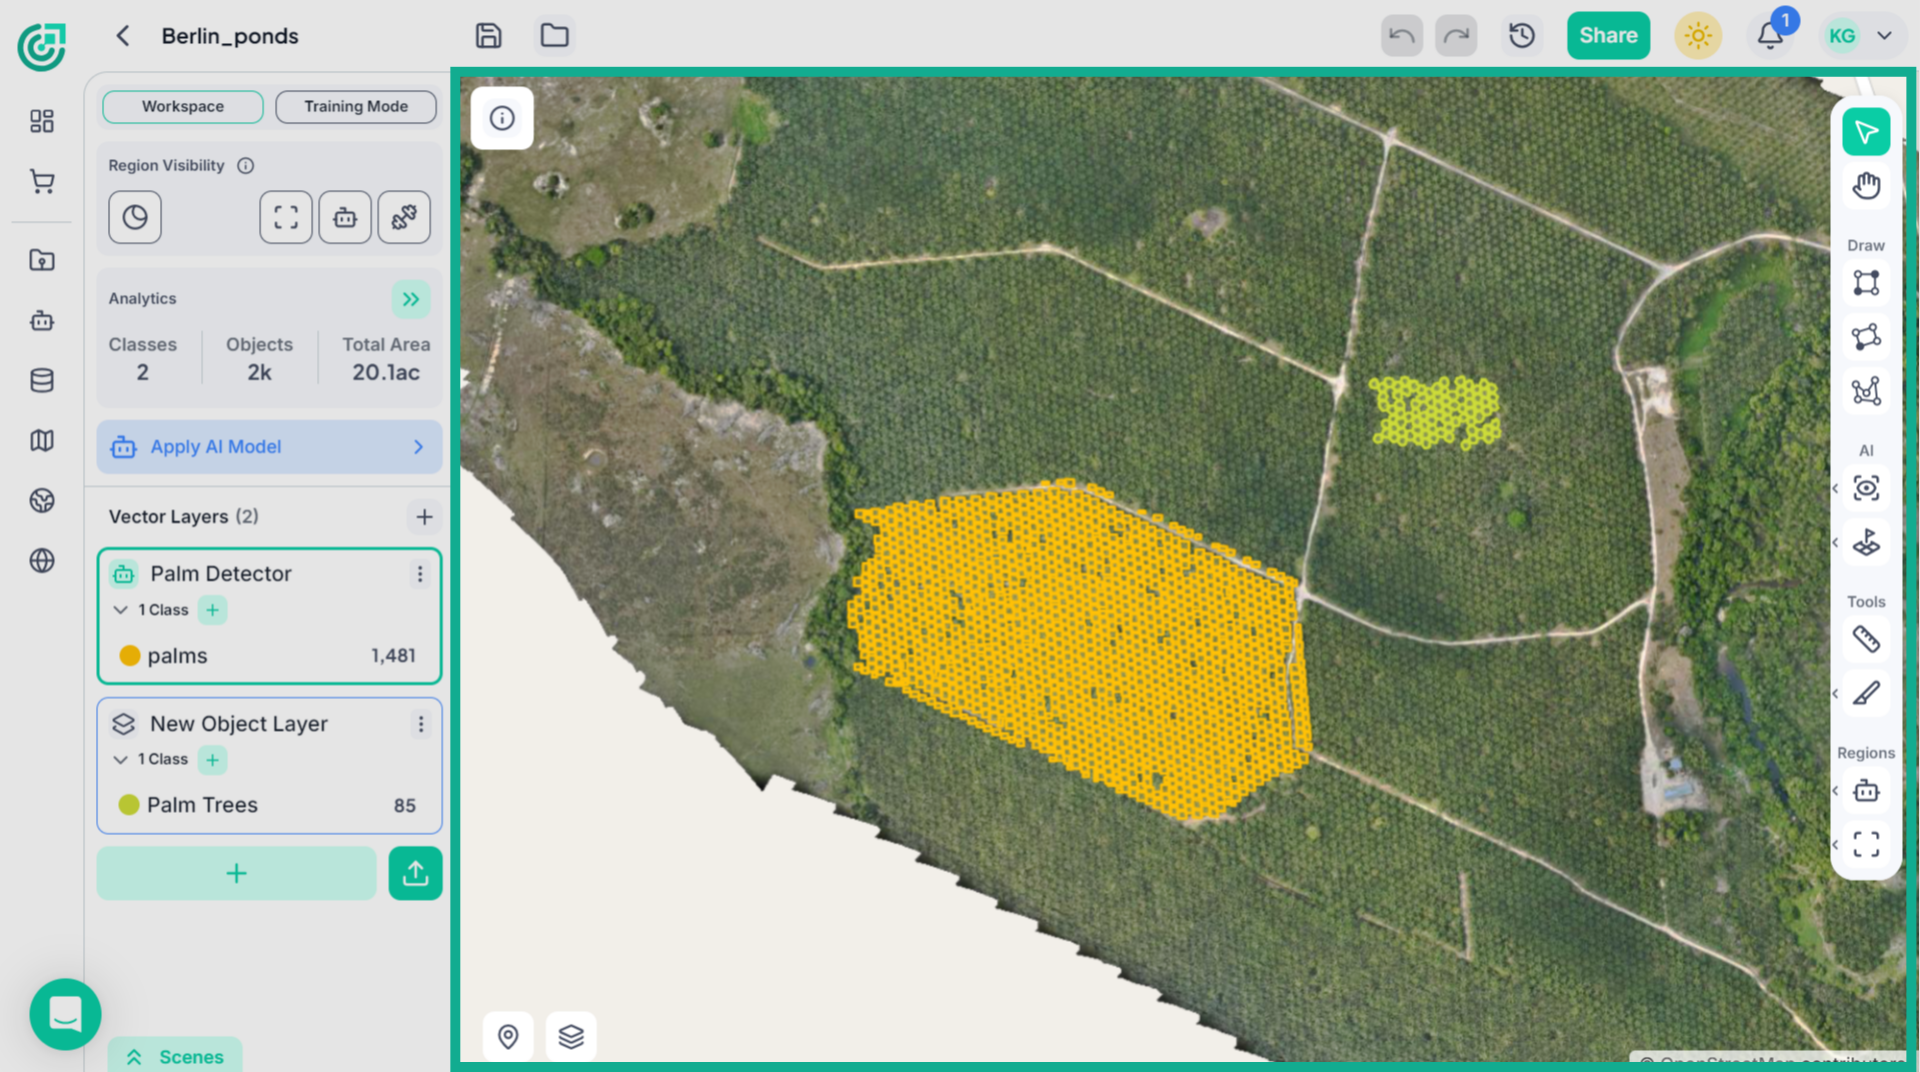
By applying a trained model to either the full image or selected regions, you gain flexible control over processing scope and credit usage while generating accurate AI-driven detections.