Create an Account
This guide walks you through creating your FlyPix AI account, completing your profile, and activating your subscription.
Go to flypix.ai
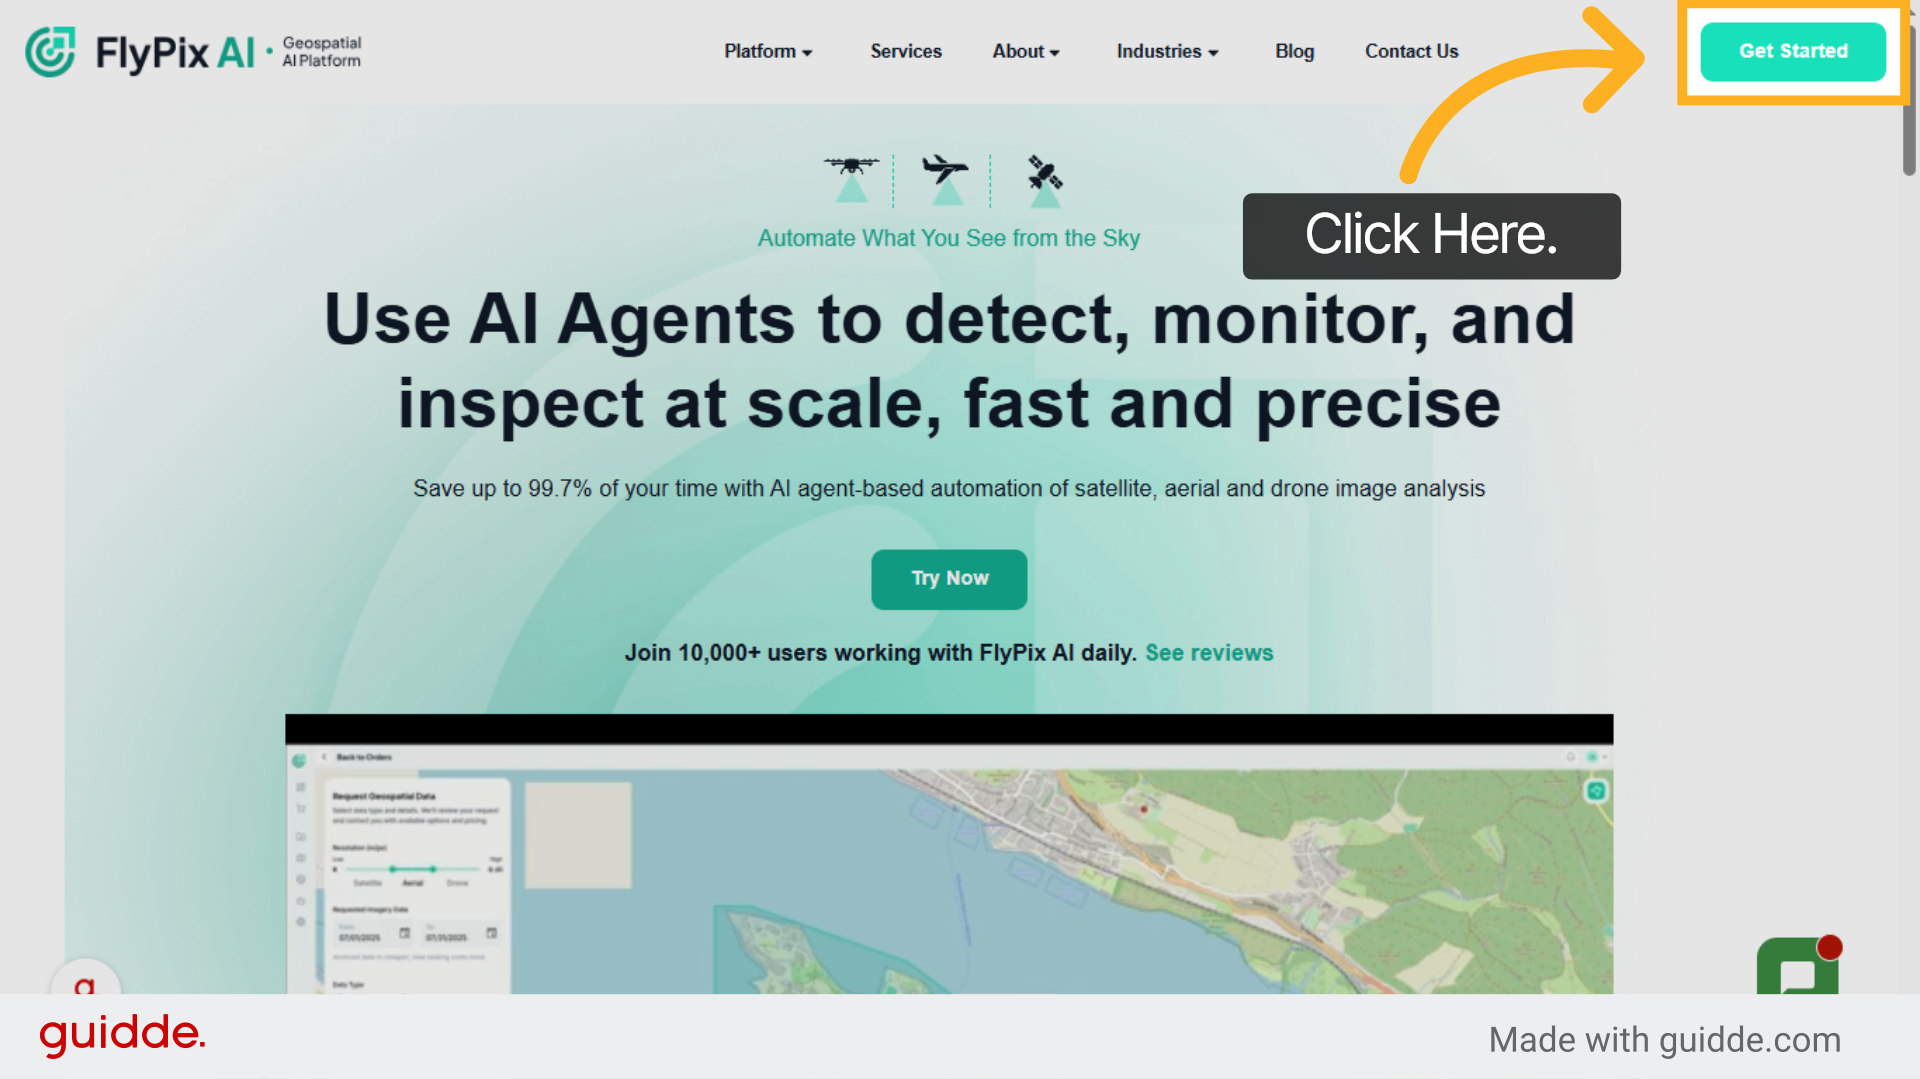
1. Start Sign Up Process
Click "Get Started" to begin the registration process for FlyPix AI.
2. Enter Email & Password
Enter your email address and create a secure password. Make sure to use a valid email, as it will be used for verification and account-related communication.

3. Review Password Requirements
Before proceeding, review the password requirements carefully. Ensure your password meets all the listed criteria to successfully complete the registration.

4. Sign up via Google/LinkedIn
Alternatively, click Continue with Google or Continue with LinkedIn to register using your existing account.

5. Click Continue Option
After entering your credentials, click Continue to proceed with registration.

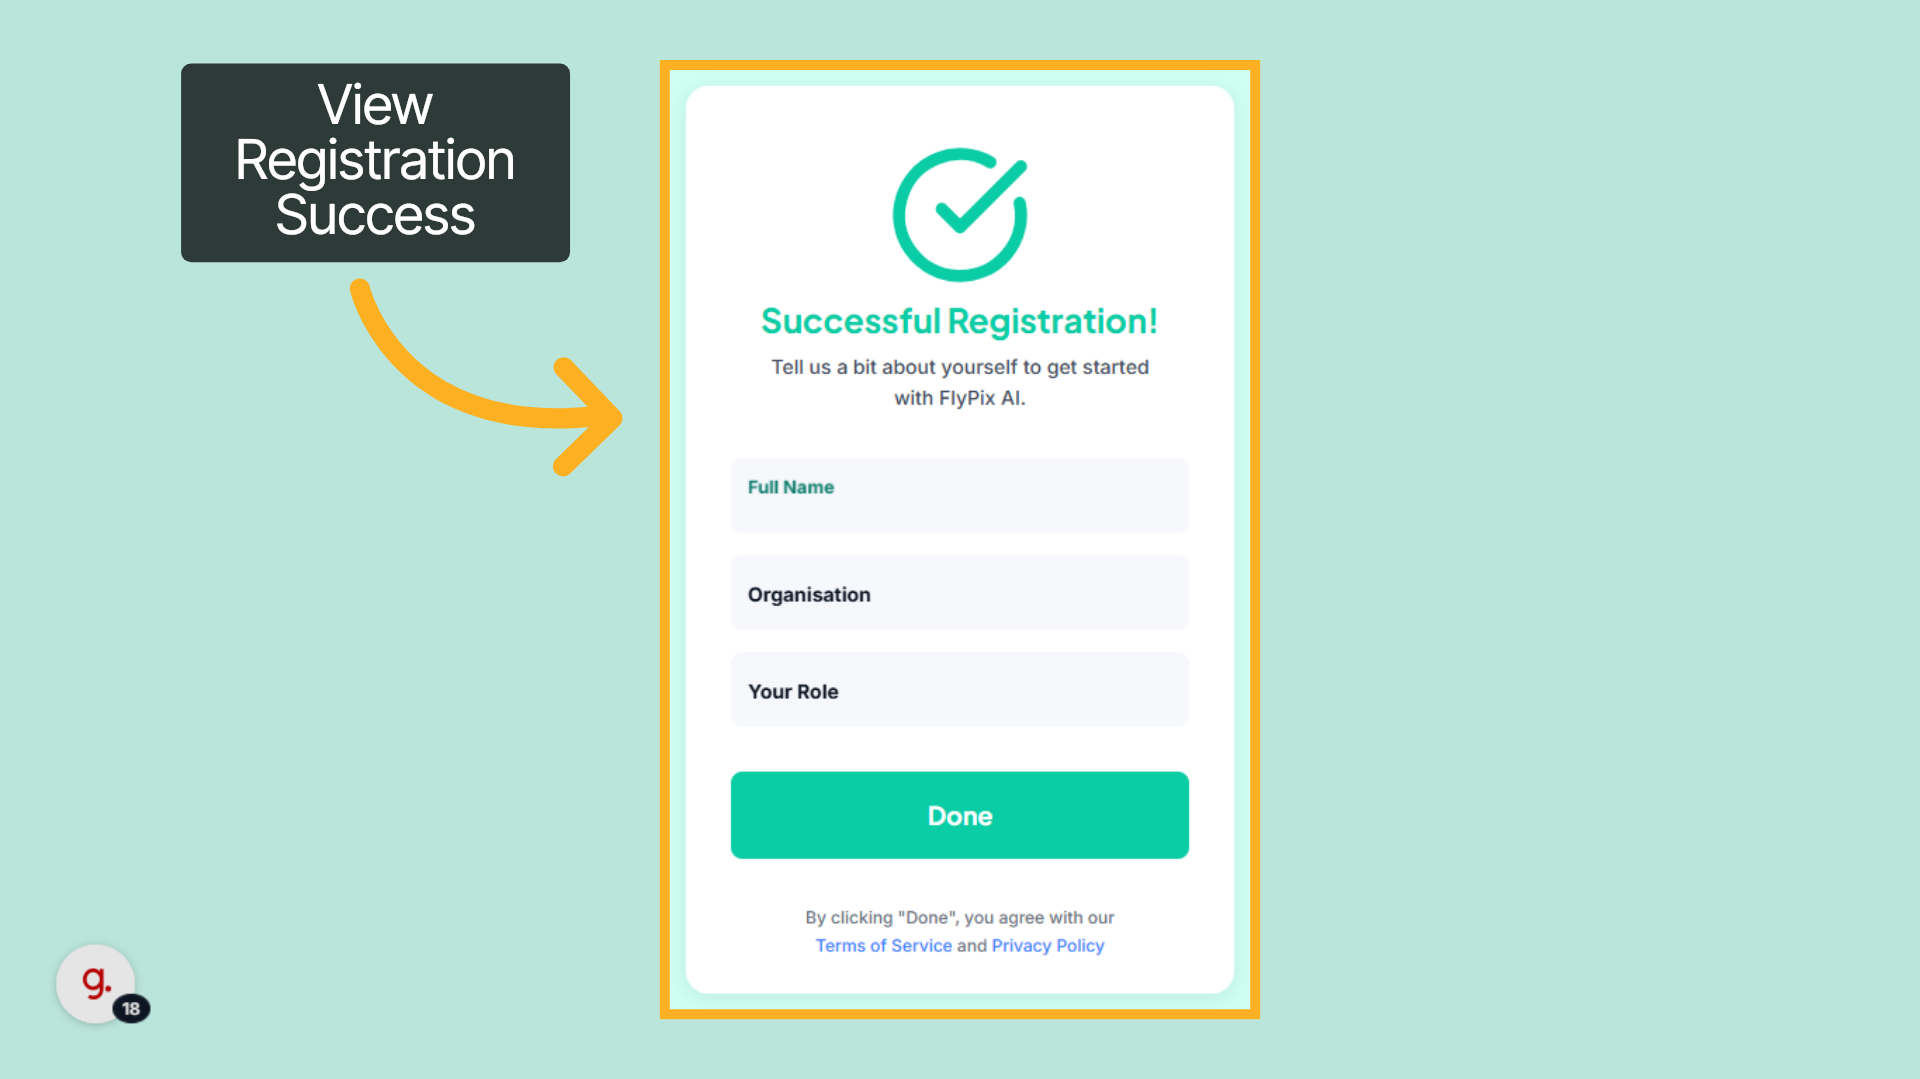
6. Registration Confirmation
Once your account is successfully created, you will be prompted to complete your profile details.
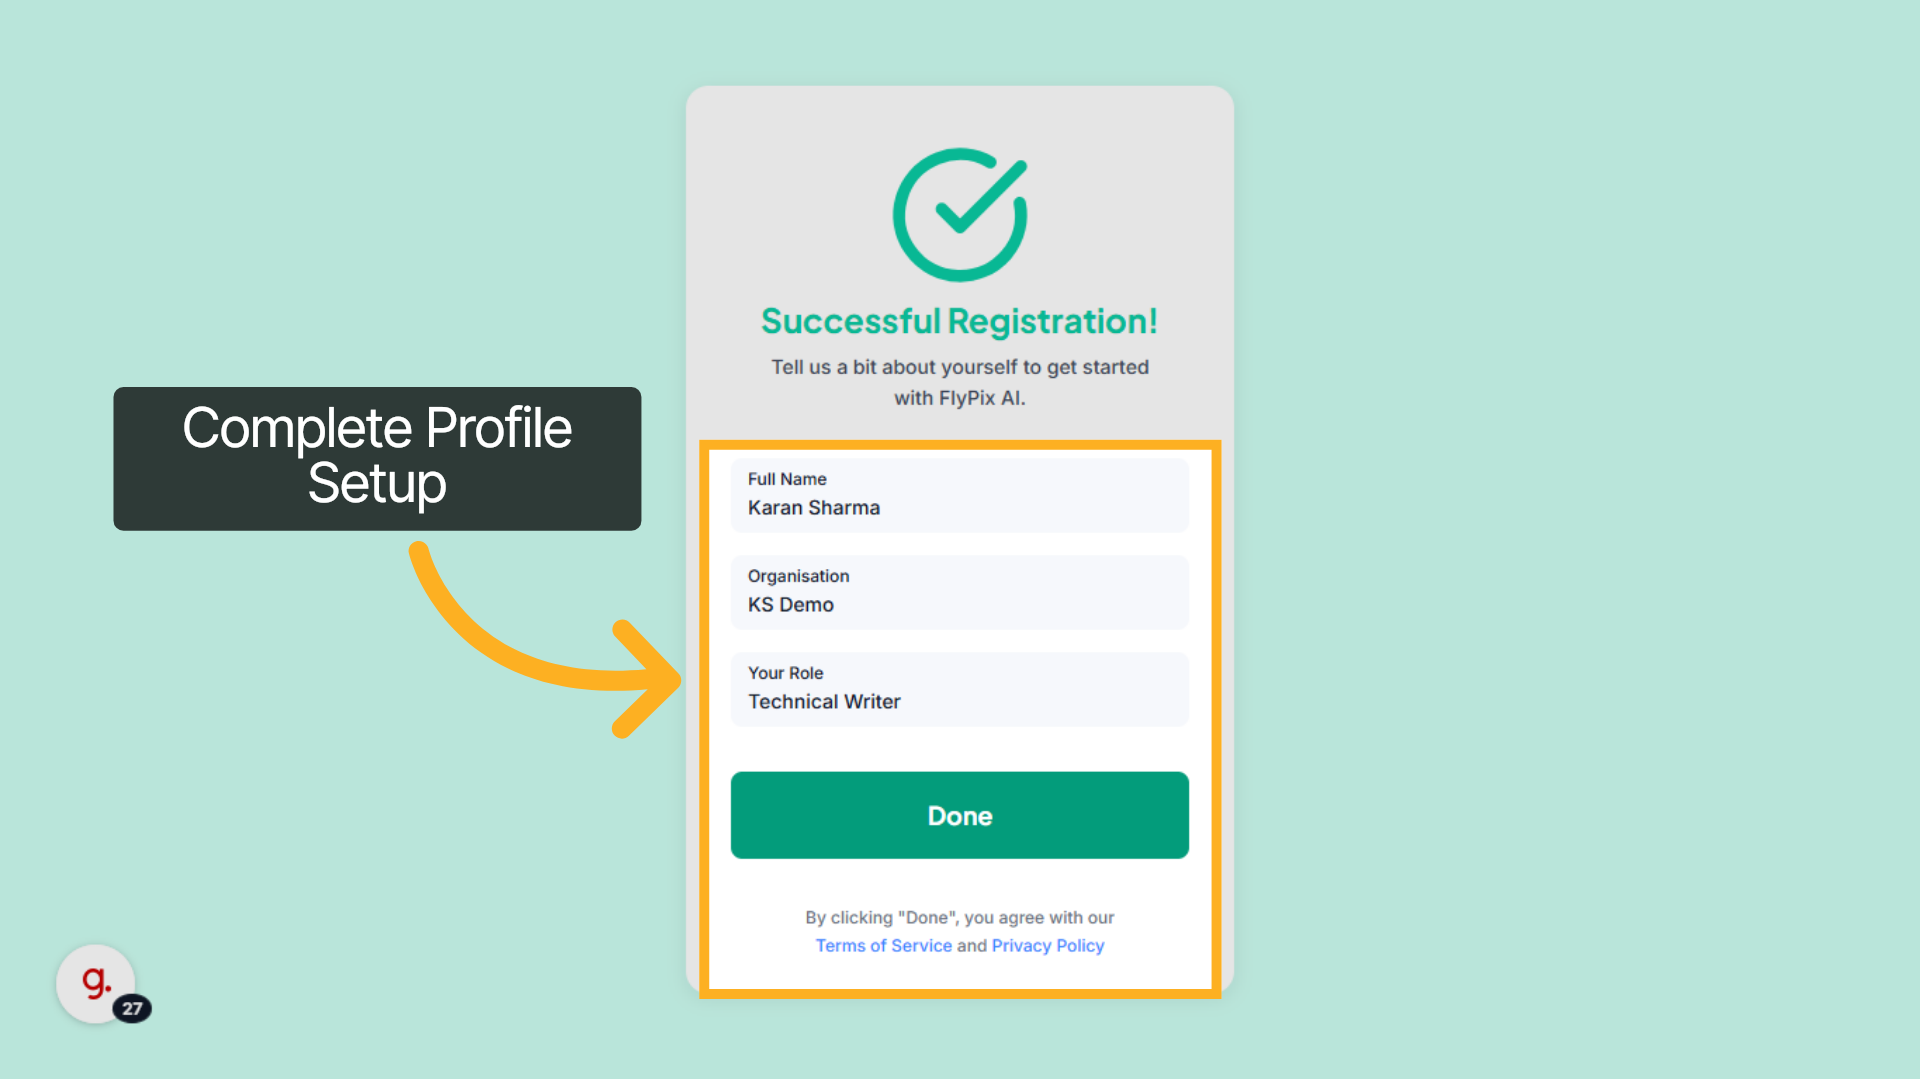
7. Complete Profile Setup
Enter your full name, organization name, and role, then click “Done” to finalize your account setup and agree to the Terms of Service and Privacy Policy.
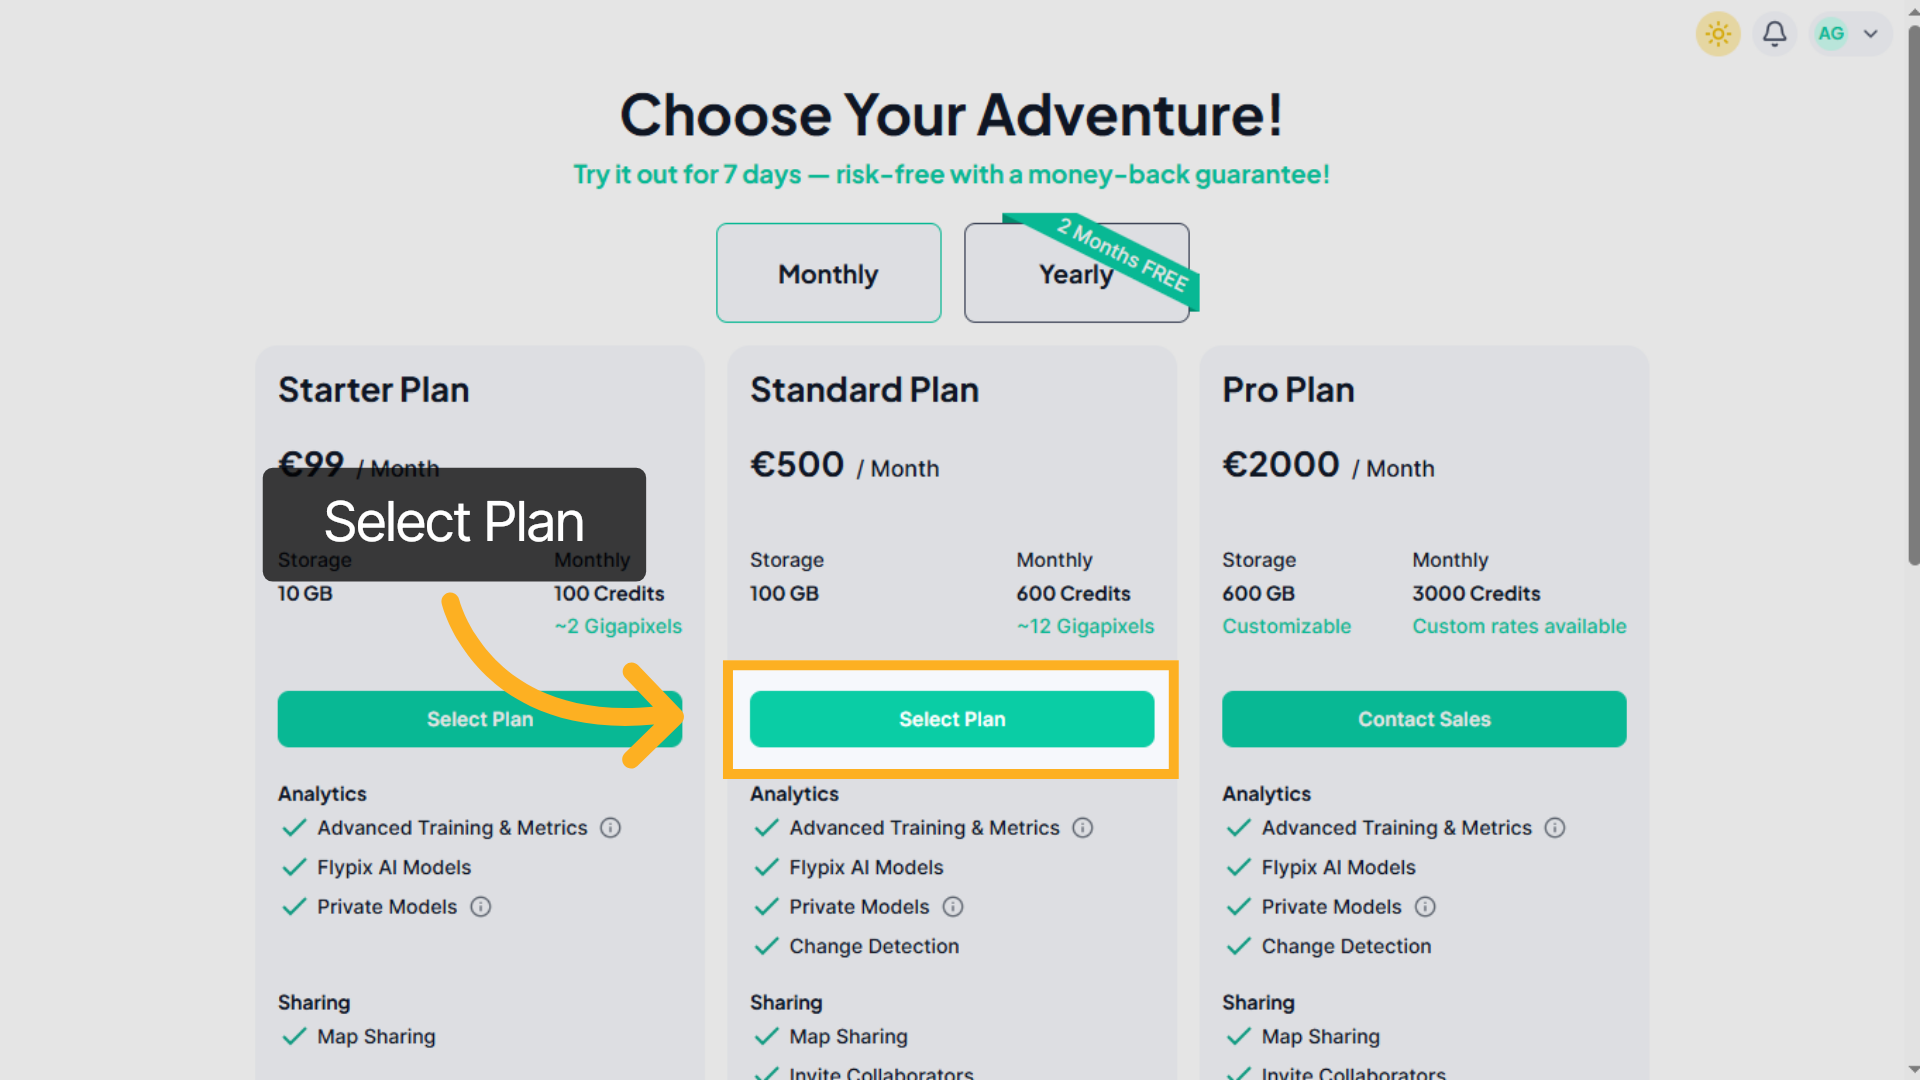
8. Choose a Plan
Select the subscription plan that best fits your requirements to proceed with the setup.
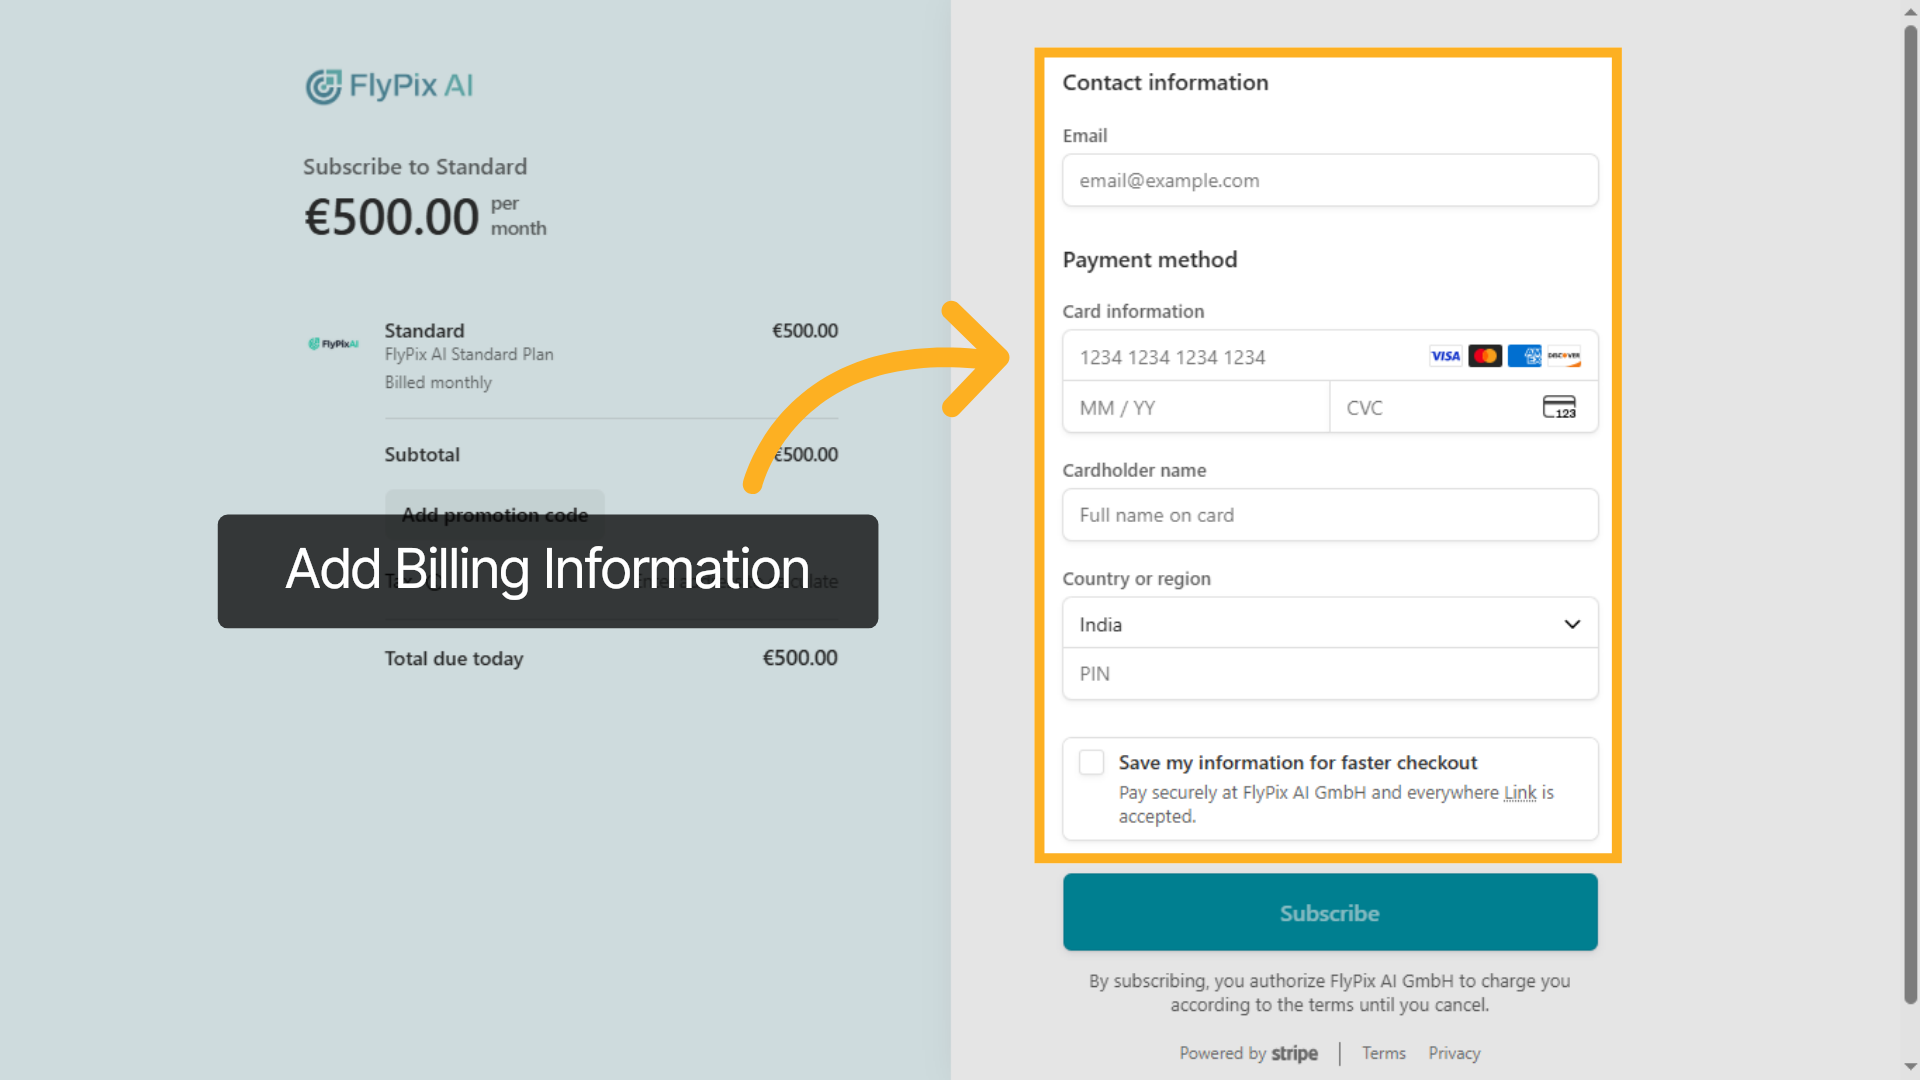
9. Add Billing Information
Enter your email address in the required fields to proceed with billing.
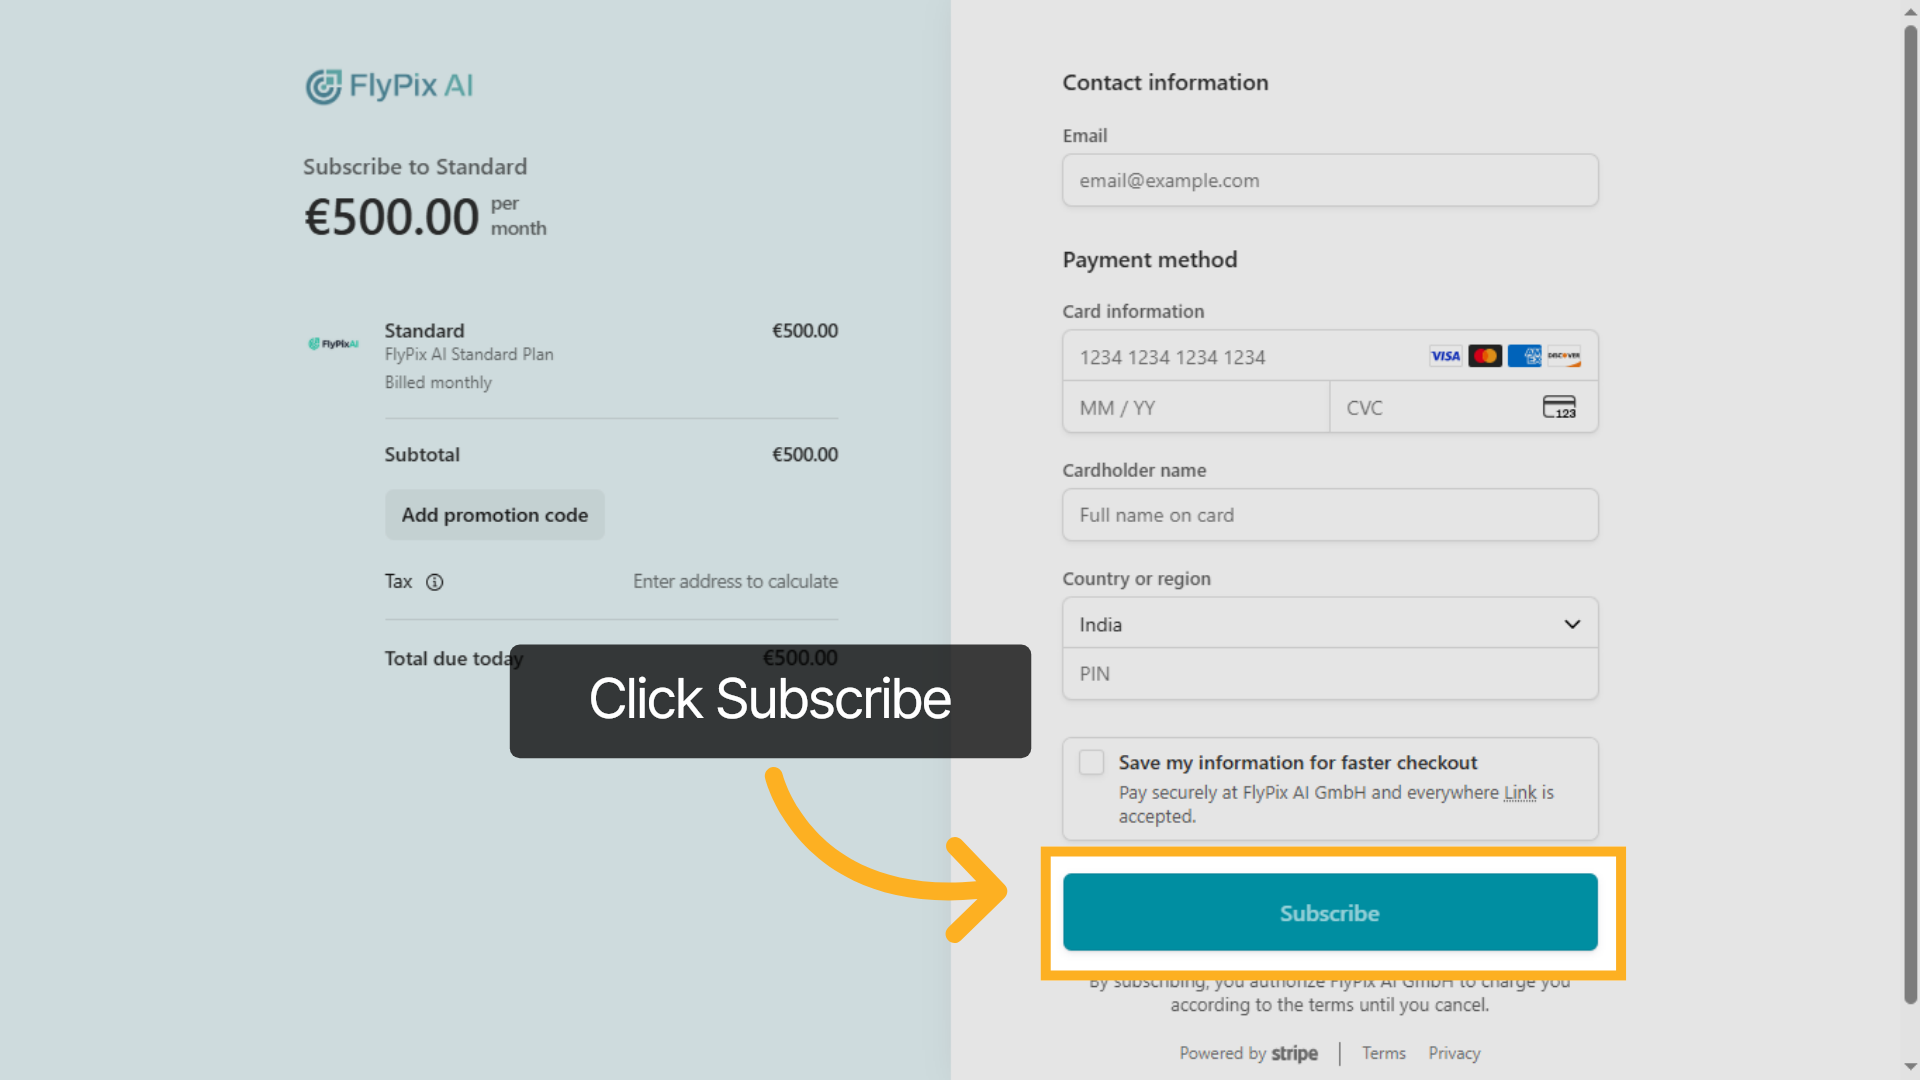
10. Confirm Subscription
Review your details and click the Subscribe button to complete your subscription and activate your plan.
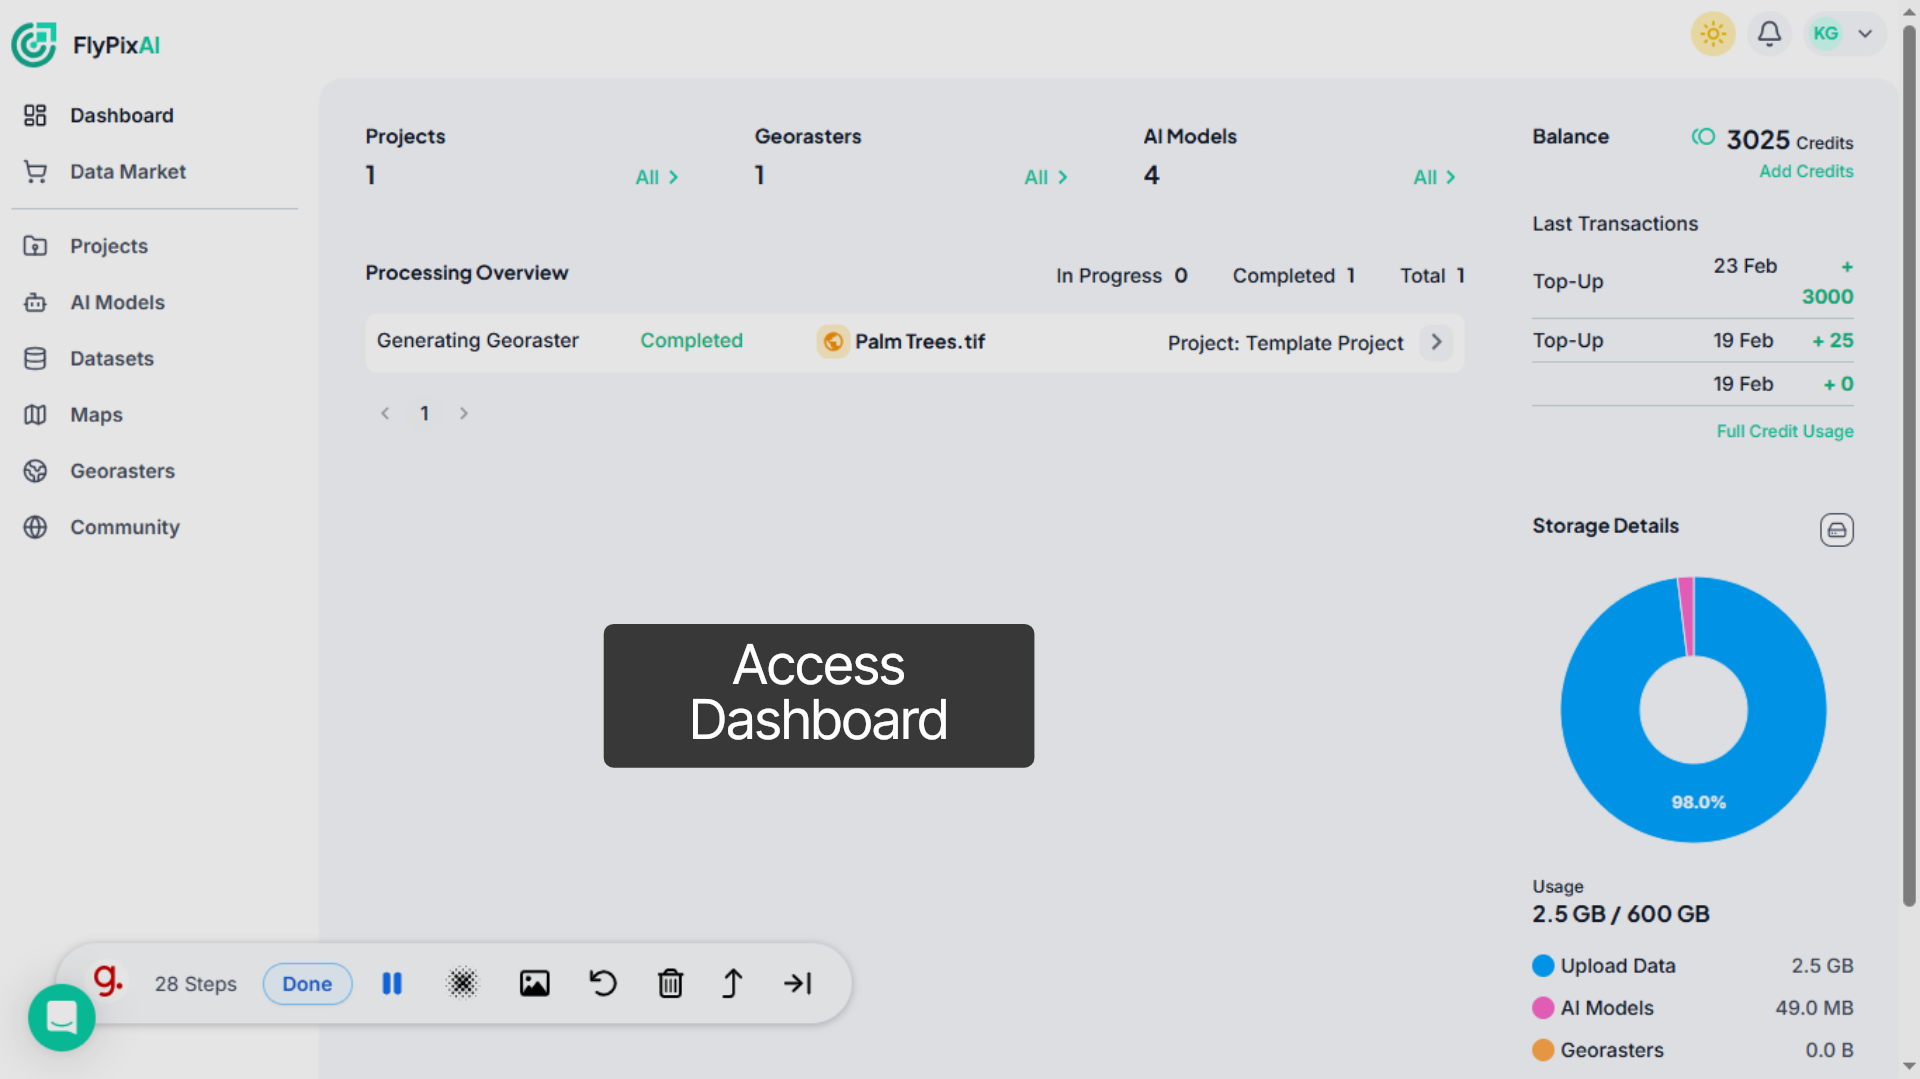
11. Access Dashboard
Onboarding completed. You can now access the dashboard and start building AI-powered geospatial solutions with FlyPix AI.